Week 9 | Reading Reflection

Physical Computing’s Greatest hits and misses

The first article “Physical Computing’s Greatest Hits (and misses)” provides a fascinating insight into the world of interactive design, showcasing recurring themes and popular ideas in the realm of physical computing. As I read through the diverse range of projects and ideas, I could reflect on the ingenuity and creativity that arises from the fusion of technology and human interaction.
Different types of projects, like making instruments that work like theremins or devices for sending remote hugs, show how flexible and adaptable physical computing can be. Each project has its own special appeal and room for creative ideas. It highlights how important it is to think about the person using the technology when designing interactive systems. Instead of just focusing on what the machine does, these projects make sure that technology improves and reacts to what people do, making the interaction more meaningful.
Additionally, I liked how the article mentioned projects that mix different ideas. It shows that new and creative things often come from combining unrelated concepts. For example, the flight simulator, which combines a tilty controller with a big glove, demonstrates how unexpected combinations can be both surprising and enjoyable.

Making Interactive Art: Set the Stage, Then Shut Up and Listen

In this article, the author advises artists creating interactive art not to interpret their own work explicitly. Instead of providing detailed explanations and pre-scripting the participant’s experience, the focus should be on designing an environment or device that initiates a conversation with the audience. I totally agree with the writer’s perspective on creating interactive art without explicit interpretation. The idea that artists should let their audience engage with the work independently resonates deeply with my own experiences as a user not a designer.
Reflecting on my visits to art museums, I can recall instances where the lack of clear interpretation hindered my appreciation of certain works. Some pieces seemed inaccessible, their beauty obscured by ambiguity. I often found myself yearning for a more interactive and participatory experience, one that allowed me to unravel the layers of meaning at my own pace.
Overall, the article confirmed my belief in the power of interactive art, where the beauty lies not only in the creation but also in the ongoing conversation it sparks between the artist and the audience.

Week 9: Reading Reflection

This might have been the first time I hear this opinion out loud, I always tried to create interactive art works independent and sufficient for the user to be immersed without any prior information or explanation. I totally agree on the idea that an artist need not explain their pov or their vision of the project as a primary part of the experience. “The thing you build, whether it’s a device or a whole environment, is just the beginning of a conversation with the people who experience your work.” Is a statement that caught my attention. In previous classes we discussed the definition of interaction and a definition that we came up with is “the exchanged interaction between two mediums” which is facilitated in conversations for example, hence it is well said that the interaction between the user and the project is like a conversation that one might say between the artist vision portrayed by the project and the user.

I agree with the second reading on “Physical Computing’s Greatest Hits and Misses.” The idea that the next big thing hasn’t come around yet is because people tend to give up on ideas they think have already been done and can’t be improved. The examples in the reading show that you can take something existing, use your creativity and imagination, and turn it into something new. It’s like how we use materials around us to create things – in the same way, we can use existing inventions as a starting point to build upon. The reading emphasizes the importance of not dismissing ideas too quickly and instead seeing them as opportunities to add something unique. By adopting this mindset, we can uncover new possibilities within familiar concepts, contributing to technological advancements and innovative solutions.

Reading Response Week 9 – AakifR

I think that the reading “Making Interactive Art: Set the Stage, Then Shut Up and Listen” captures what all art is about and how all art works regardless of whether it’s explicitly interactive or not. After the artist publishes their work for other people to see, a process of interaction between the artist’s thoughts and the thoughts of the audiences starts to happen. This is where the magic of meaning happens. Each viewer has their own perspective towards anything they encounter and with each interaction a new meaning is formed. Sometimes, the new meanings are quite vastly different than what the artists originally thought of when making the art. For example, the robotic arm that sweeps hydraulic fluid by Sun Yuan and Peng Yu called “Can’t Help Myself” was originally intended to be about migration and sovereignty but viewers largely interpreted it to be about being depressed and trying to hold oneself together.

I think for me personally, I learn a lot and connect a lot of dots while I’m having conversations with people rather than when I’m with myself. So this idea of putting an artwork out there and then let people interact with it and have conversation with it is something that makes a lot of sense to me.  As I think about capstone, I want to integrate more of this two way conversational aspect so that I learn more about myself and ideas and also how other people think about them.

Week 9 Assignment – AakifR

For this week I wanted to experiment with the Ultraviolet Distance Sensor that was provided in the Starter Kit. I hooked it up to the Arduino and then tried to create a sort of system that turns a red light on if the distance of the object becomes too little or too big from the sensor. Some of the applications could be, for example, to alert an automated robot vehicle if it’s getting too close to an obstacle and similarly if it’s moving too far apart.

Video Demonstration:

Code:

// defines pins numbers
const int trigPin = A0;
const int echoPin = A1;

const int pushButton = A2;

const int greenLEDPin = 13;
const int redLEDPin =  12;


// defines variables
long duration;
int distance;
void setup() {
  pinMode(trigPin, OUTPUT); // Sets the trigPin as an Output
  pinMode(echoPin, INPUT); // Sets the echoPin as an Input

  pinMode(greenLEDPin, OUTPUT);

  Serial.begin(9600); // Starts the serial communication
}
void loop() {


int buttonState = digitalRead(pushButton);

  if (buttonState == HIGH) {
   
    digitalWrite(greenLEDPin, HIGH);
  }
  else{
    digitalWrite(greenLEDPin, LOW);
  }

// print out the state of the button:
  Serial.println(buttonState);
  delay(1);  // delay in between reads for stability


  // Clears the trigPin
  digitalWrite(trigPin, LOW);
  delayMicroseconds(2);
  // Sets the trigPin on HIGH state for 10 micro seconds
  digitalWrite(trigPin, HIGH);
  delayMicroseconds(10);
  digitalWrite(trigPin, LOW);
  // Reads the echoPin, returns the sound wave travel time in microseconds
  duration = pulseIn(echoPin, HIGH);
  // Calculating the distance
  distance = duration * 0.034 / 2;
  // Prints the distance on the Serial Monitor
  Serial.print("Distance: ");
  Serial.println(distance);

  if (distance >= 10 && distance <=  20){
    digitalWrite(redLEDPin, HIGH);
  }
  else{
    digitalWrite(redLEDPin, LOW);
  }

}


Week 9 – Reading Reflection

I would like to start with “Making Interactive Art: Set the Stage, Then Shut Up and Listen” because it points out an idea I was not very comfortable with. Yesterday we had a presentation of our sound project for another IM class. Before giving the presentation, I raised the question of what would be better: first, give a chance for an audience to listen to the song and then give a presentation of what the project is actually about, or, vice versa. One of the senior IM students in my group said that it is much better to give them the freedom to interpret, and have their idea of the project rather than forcing our interpretation to them. The idea was the same as it was conveyed in the text because the interactive media project is not a research work with a clear thesis and arguments, it is a more exploratory object that needs to be interacted with. I liked the idea that the project created is “just the beginning of a conversation with the people who experience your work”. We have our idea about the project and we can make a short remark about what the project is about but nothing more because the audience should explore and understand its meaning themselves. Coming back to our sound project, I was worried that the audience wouldn’t understand the point of the project and what exactly we wanted to convey with that. This happened. Some of the audience didn’t get the point of our sound project, but because of the text, I understood that it is fine because not all conversations make sense either. 

“Physical Computing’s Greatest Hits” felt like a selective collection of the simple, yet interesting physical computing project ideas. Starting from the musical instruments, and ending up with the interaction with the body, the article provides many ideas to get inspired from. Particularly, I loved the idea of floor pads as a space for dancing. As a child, I loved that kind of game in the gaming rooms of huge malls. It would be very interesting and exciting to create that by myself and give my little sisters to play with. I am not sure whether they would be as excited as I was with so much technological development nowadays. Although the article gives the basic idea about how each project is created, there are still many grey areas. It would be better if the author provided more technical elaboration on that.

week9.reading – Physical Computing’s Greatest Hits (and misses) & Making Interactive Art

Physical Computing’s Greatest Hits (and misses)

In this article by Tigoe, a variety of different examples of ‘physical computing’ projects are discussed and lightly analyzed. I believe that this article is particularly useful for us Intro To IM students in order to start thinking about various ideas we might have for our final projects and how we could implement our ideas into action. It is also highly helpful that in the article, Tigoe also provides a simple explanation of how each of the provided examples most likely works.

Additionally, I think the first statement of the article is crucial for individuals to not easily give up on their project when they are just getting started. Tigoe writes, “Sometimes when people learning about physical computing hear that a particular idea has been done before, they give up on it, because they think it’s not original. What’s great about the themes that follow here is that they allow a lot of room for originality.” This statement precisely encourages everyone who is interested in physical computing not to get discouraged just because something has been done before but rather explore the possible options to make it original. As for myself, I have not yet decided on what type of final project I might be making but I will surely use this article as a resource for more ideas and brainstorming.

Making Interactive Art: Set the Stage, Then Shut Up and Listen

In this different article from Tigoe, the presentation of an interactive artwork is discussed. The article is well structured and explains at first the common misconceptions newcomers to the field might face because of what we were taught about art in school. Then the article goes on to discuss a perspective on how an interactive artwork or environment must function. Even though this is subjective to each individual, I believe the provided formula is a great framework for how these types of projects must be structured. This article is highly complementary to the article discussed above, and I believe it gives us a thorough perspective on how we should approach our future projects in interactive media.

What I found interesting, though, is that there are multiple factors that might not have been mentioned. Ultimately, is it accurate to assume that the majority of people will have mixed reaction. As noted in the article, I believe that the context and the environment in which the media is presented is a high contributing factor to the overall experience of the audience. I think that cultural context can have a significant effect on how the installations might be interpreted. This is most likely not the case for us university students as we are highly integrated with our current environment, but for bigger projects, the artists might want to consider how the geographical location might affect the experience they are trying to provide. Nevertheless, I believe that overall this article is highly beneficial for us to understand how we should structure and organized a interactive media project or experience.

Hot or Cold?

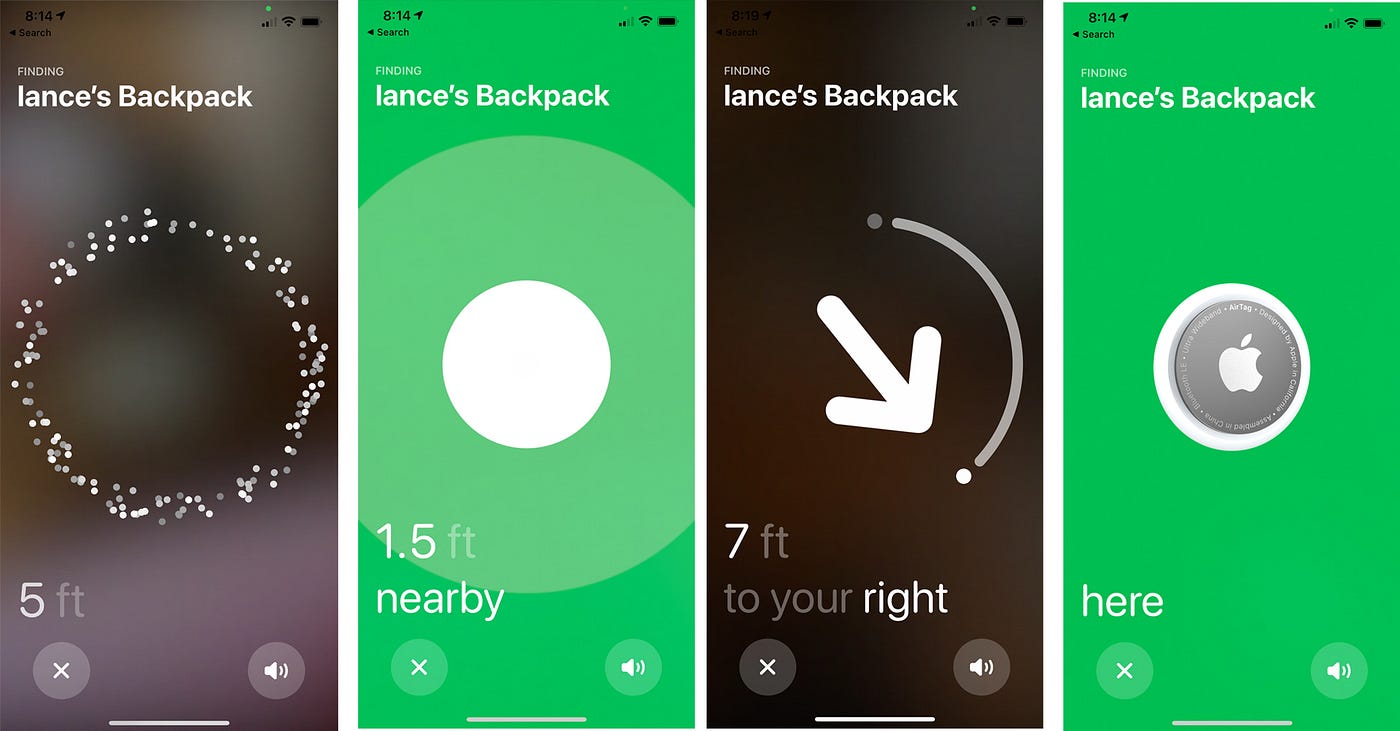
Who doesn’t love a classic game of hot or cold? Simple yet so fun and played for generations. Which is exactly why I felt like it was time for an update. Inspired by the apple AirTag and its precision proximity, I created my own little simpler version of it.

Inspiration:

Apple AirTags: What You Need to Know | by Lance Ulanoff | Debugger


My version:

In Action:

IMG_9190


Process:

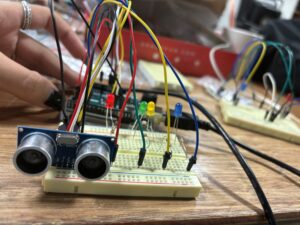
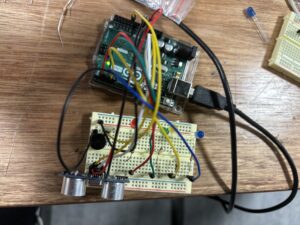
Before settling down with this idea as my final one I went through a period of many trial and error as I played around with other sensors and other ideas that unfortunately all failed me somehow but in the end I went back to what I was familiar with and created something that I really love and is fun to play and test its limits with an UltraSonic Sensor.

To make this I first added the different level of closeness LED to resemble the app’s screen and lighting up levels of LED to show how hot or cold you are from the object and then I added the ultrasonic sensor to be able to detect the closeness of the object, following that I added a piezo buzzer to make it give audio feedback as to how close “hot” you are to the object. For the code I just wrote several if else statements that change the LED based on it’s distance and plays a tone on the buzzer and builds up on each other depending on the amount of LED you have on which makes them sound louder.

Code:
// Define the connection pins for the ultrasonic sensor
const int trig = 11;
const int echo = 12;

// Define the pins for the LED indicators
const int LED1 = 5;
const int LED2 = 4;
const int LED3 = 3;
const int LED4 = 2;

// Define the pin for the piezo buzzer
const int piezoPin = A0;

// Variables to store the duration of the echo pulse and the calculated distance
int duration = 0;
int distance = 0;

void setup()
{
  // Set the ultrasonic sensor pins
  pinMode(trig , OUTPUT); // Trigger pin will send the pulse
  pinMode(echo , INPUT);  // Echo pin will receive the pulse

  // Set the LED pins as outputs
  pinMode(LED1 , OUTPUT);
  pinMode(LED2 , OUTPUT);
  pinMode(LED3 , OUTPUT);
  pinMode(LED4 , OUTPUT);

  // Set the piezo buzzer pin as an output
  pinMode(piezoPin, OUTPUT);

  // Start serial communication at 9600 baud rate
  Serial.begin(9600);
}

void loop()
{
  // Trigger the ultrasonic sensor to send a pulse
  digitalWrite(trig , HIGH);
  delayMicroseconds(10); // Ultrasonic pulse is 10 microseconds long
  digitalWrite(trig , LOW);

  // Measure the duration of the incoming echo pulse
  duration = pulseIn(echo , HIGH);
  
  // Calculate the distance based on the duration of the echo pulse
  distance = (duration/2) / 28.5;
  
  // Print the distance to the Serial Monitor
  Serial.println(distance);

  // Light up LED1 and sound buzzer if distance is 10 cm or less
  if (distance <= 10)
  {
    digitalWrite(LED1, HIGH);
    tone(piezoPin, 1000); // Emit a 1000Hz tone
  }
  else
  {
    digitalWrite(LED1, LOW);
    noTone(piezoPin); // Stop the buzzer if condition is not met
  }

  // Light up LED2 and sound buzzer if distance is 30 cm or less
  if (distance <= 30)
  {
    digitalWrite(LED2, HIGH);
    tone(piezoPin, 1000); // Emit a 1000Hz tone
  }
  else
  {
    digitalWrite(LED2, LOW);
    noTone(piezoPin); // Stop the buzzer if condition is not met
  }

  // Light up LED3 and sound buzzer if distance is 50 cm or less
  if (distance <= 50)
  {
    digitalWrite(LED3, HIGH);
    tone(piezoPin, 1000); // Emit a 1000Hz tone
  }
  else
  {
    digitalWrite(LED3, LOW);
    noTone(piezoPin); // Stop the buzzer if condition is not met
  }

  // Light up LED4 and sound buzzer if distance is 60 cm or less
  if (distance <= 60)
  {
    digitalWrite(LED4, HIGH);
    tone(piezoPin, 1000); // Emit a 1000Hz tone
  }
  else
  {
    digitalWrite(LED4, LOW);
    noTone(piezoPin); // Stop the buzzer if condition is not met
  }
}
Future Changes and reflection:

In the future I would love to make it more aesthetic and maybe even be able to have a way to make it detect only something specific by adding a magnet to it and making it only sensitive to that magnet for example but i’m not really sure how feasible that is. I’d also love to add an LCD screen that says how close you are to the object. But overall as a first time working with sensors and Arduino I do think that this is an amazing start and I can’t help but be proud of myself for it especially with the amount of times my circuits failed or the idea just wasn’t it when I was trying out with the other sensors and how frustrating that was to deal with.


Week 9: PAY HERE!

CONCEPT:

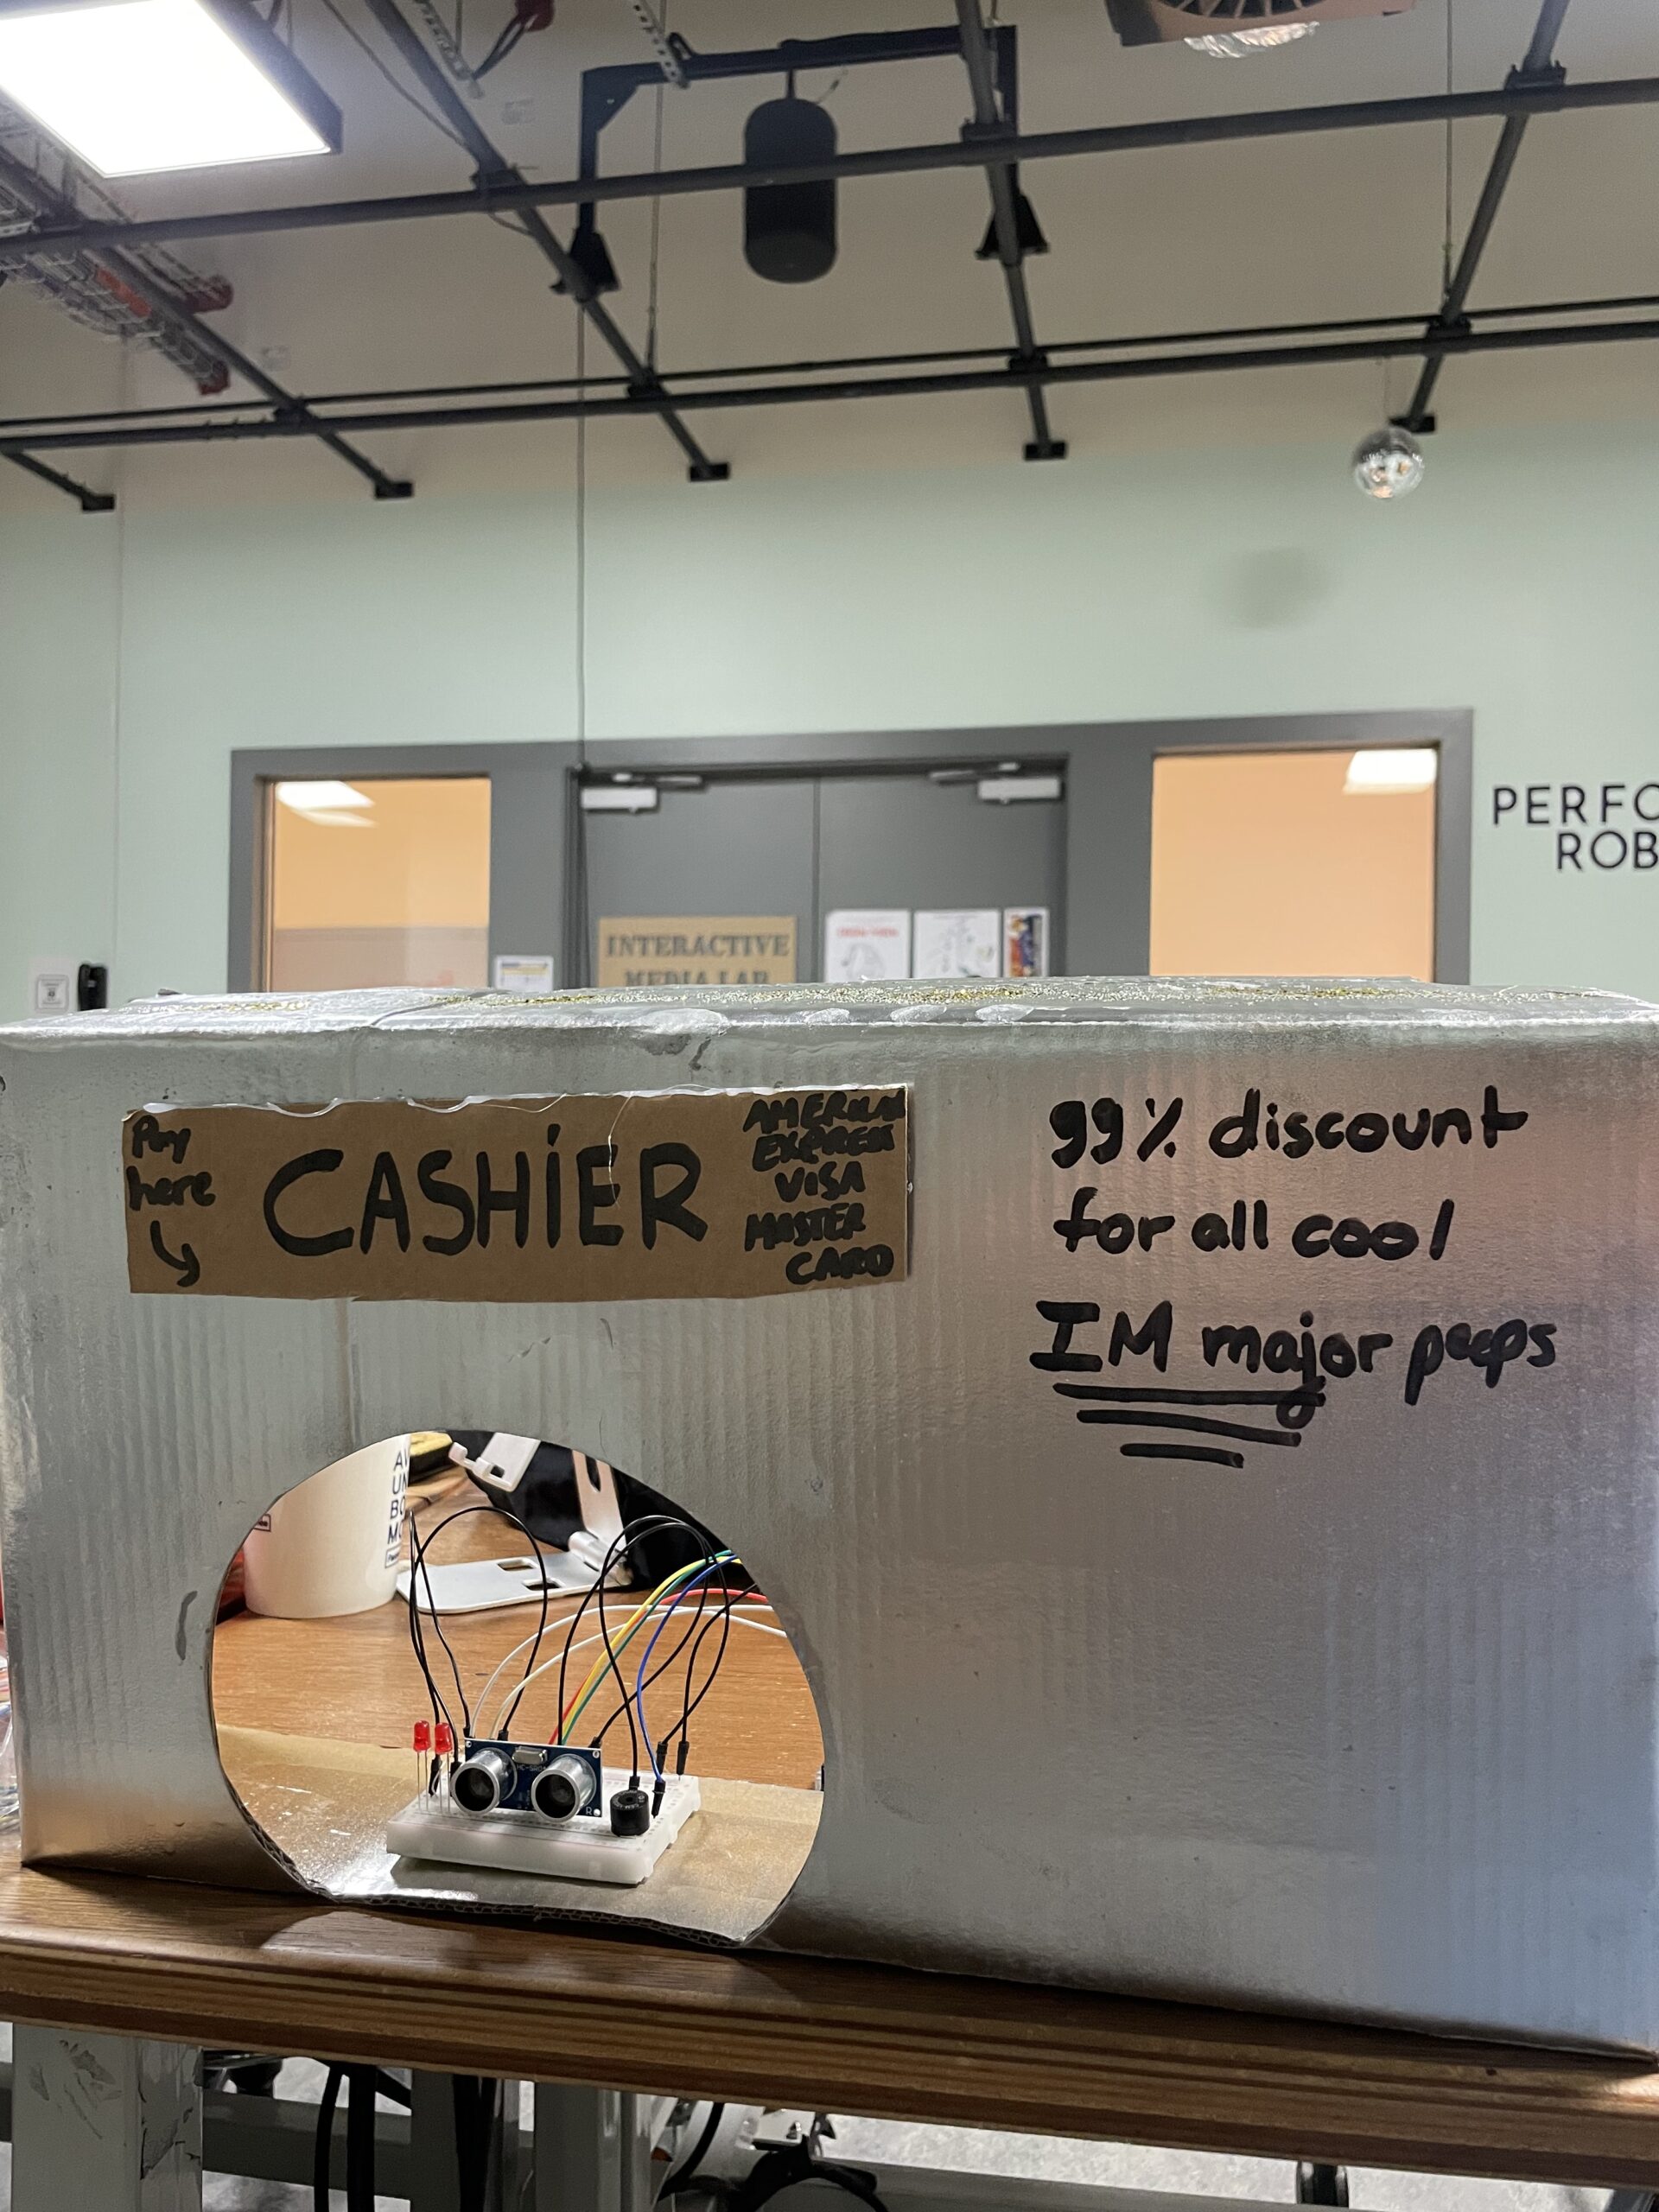
This week, I chose to work with an ultrasonic distance sensor to create a quirky barcode scanner. Since we still did not cover the sensor in class, I referred to SparkFun reference list and this video to know more about the sensor.

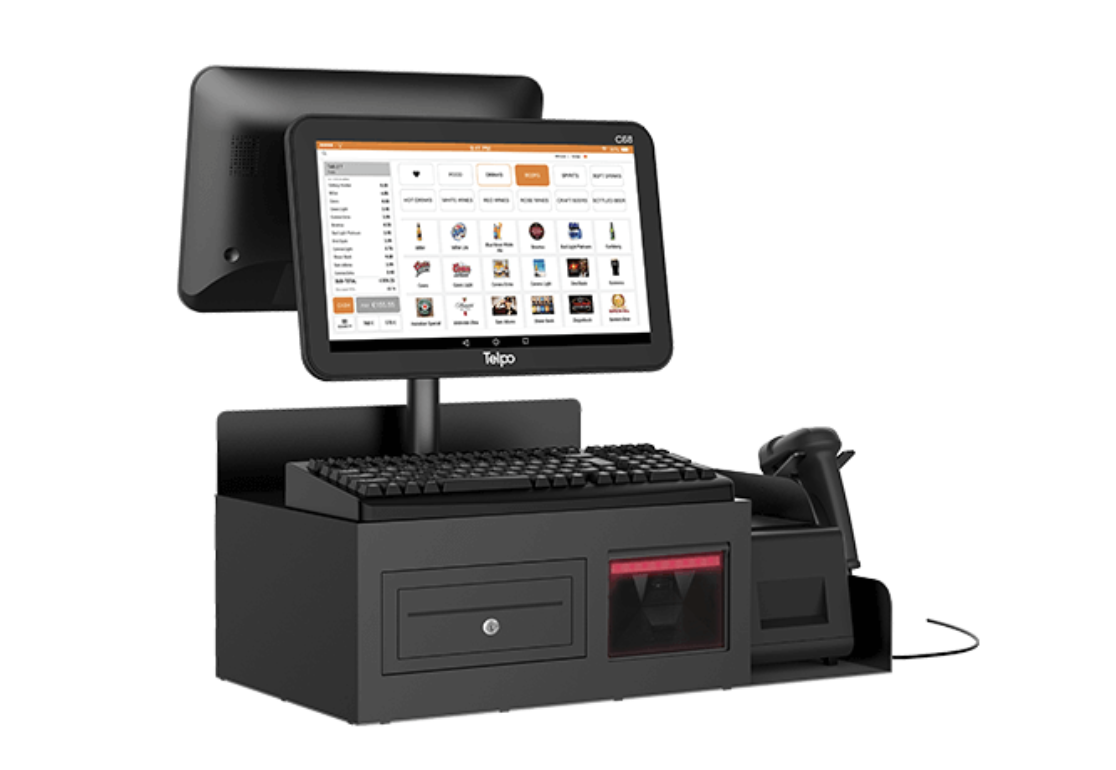
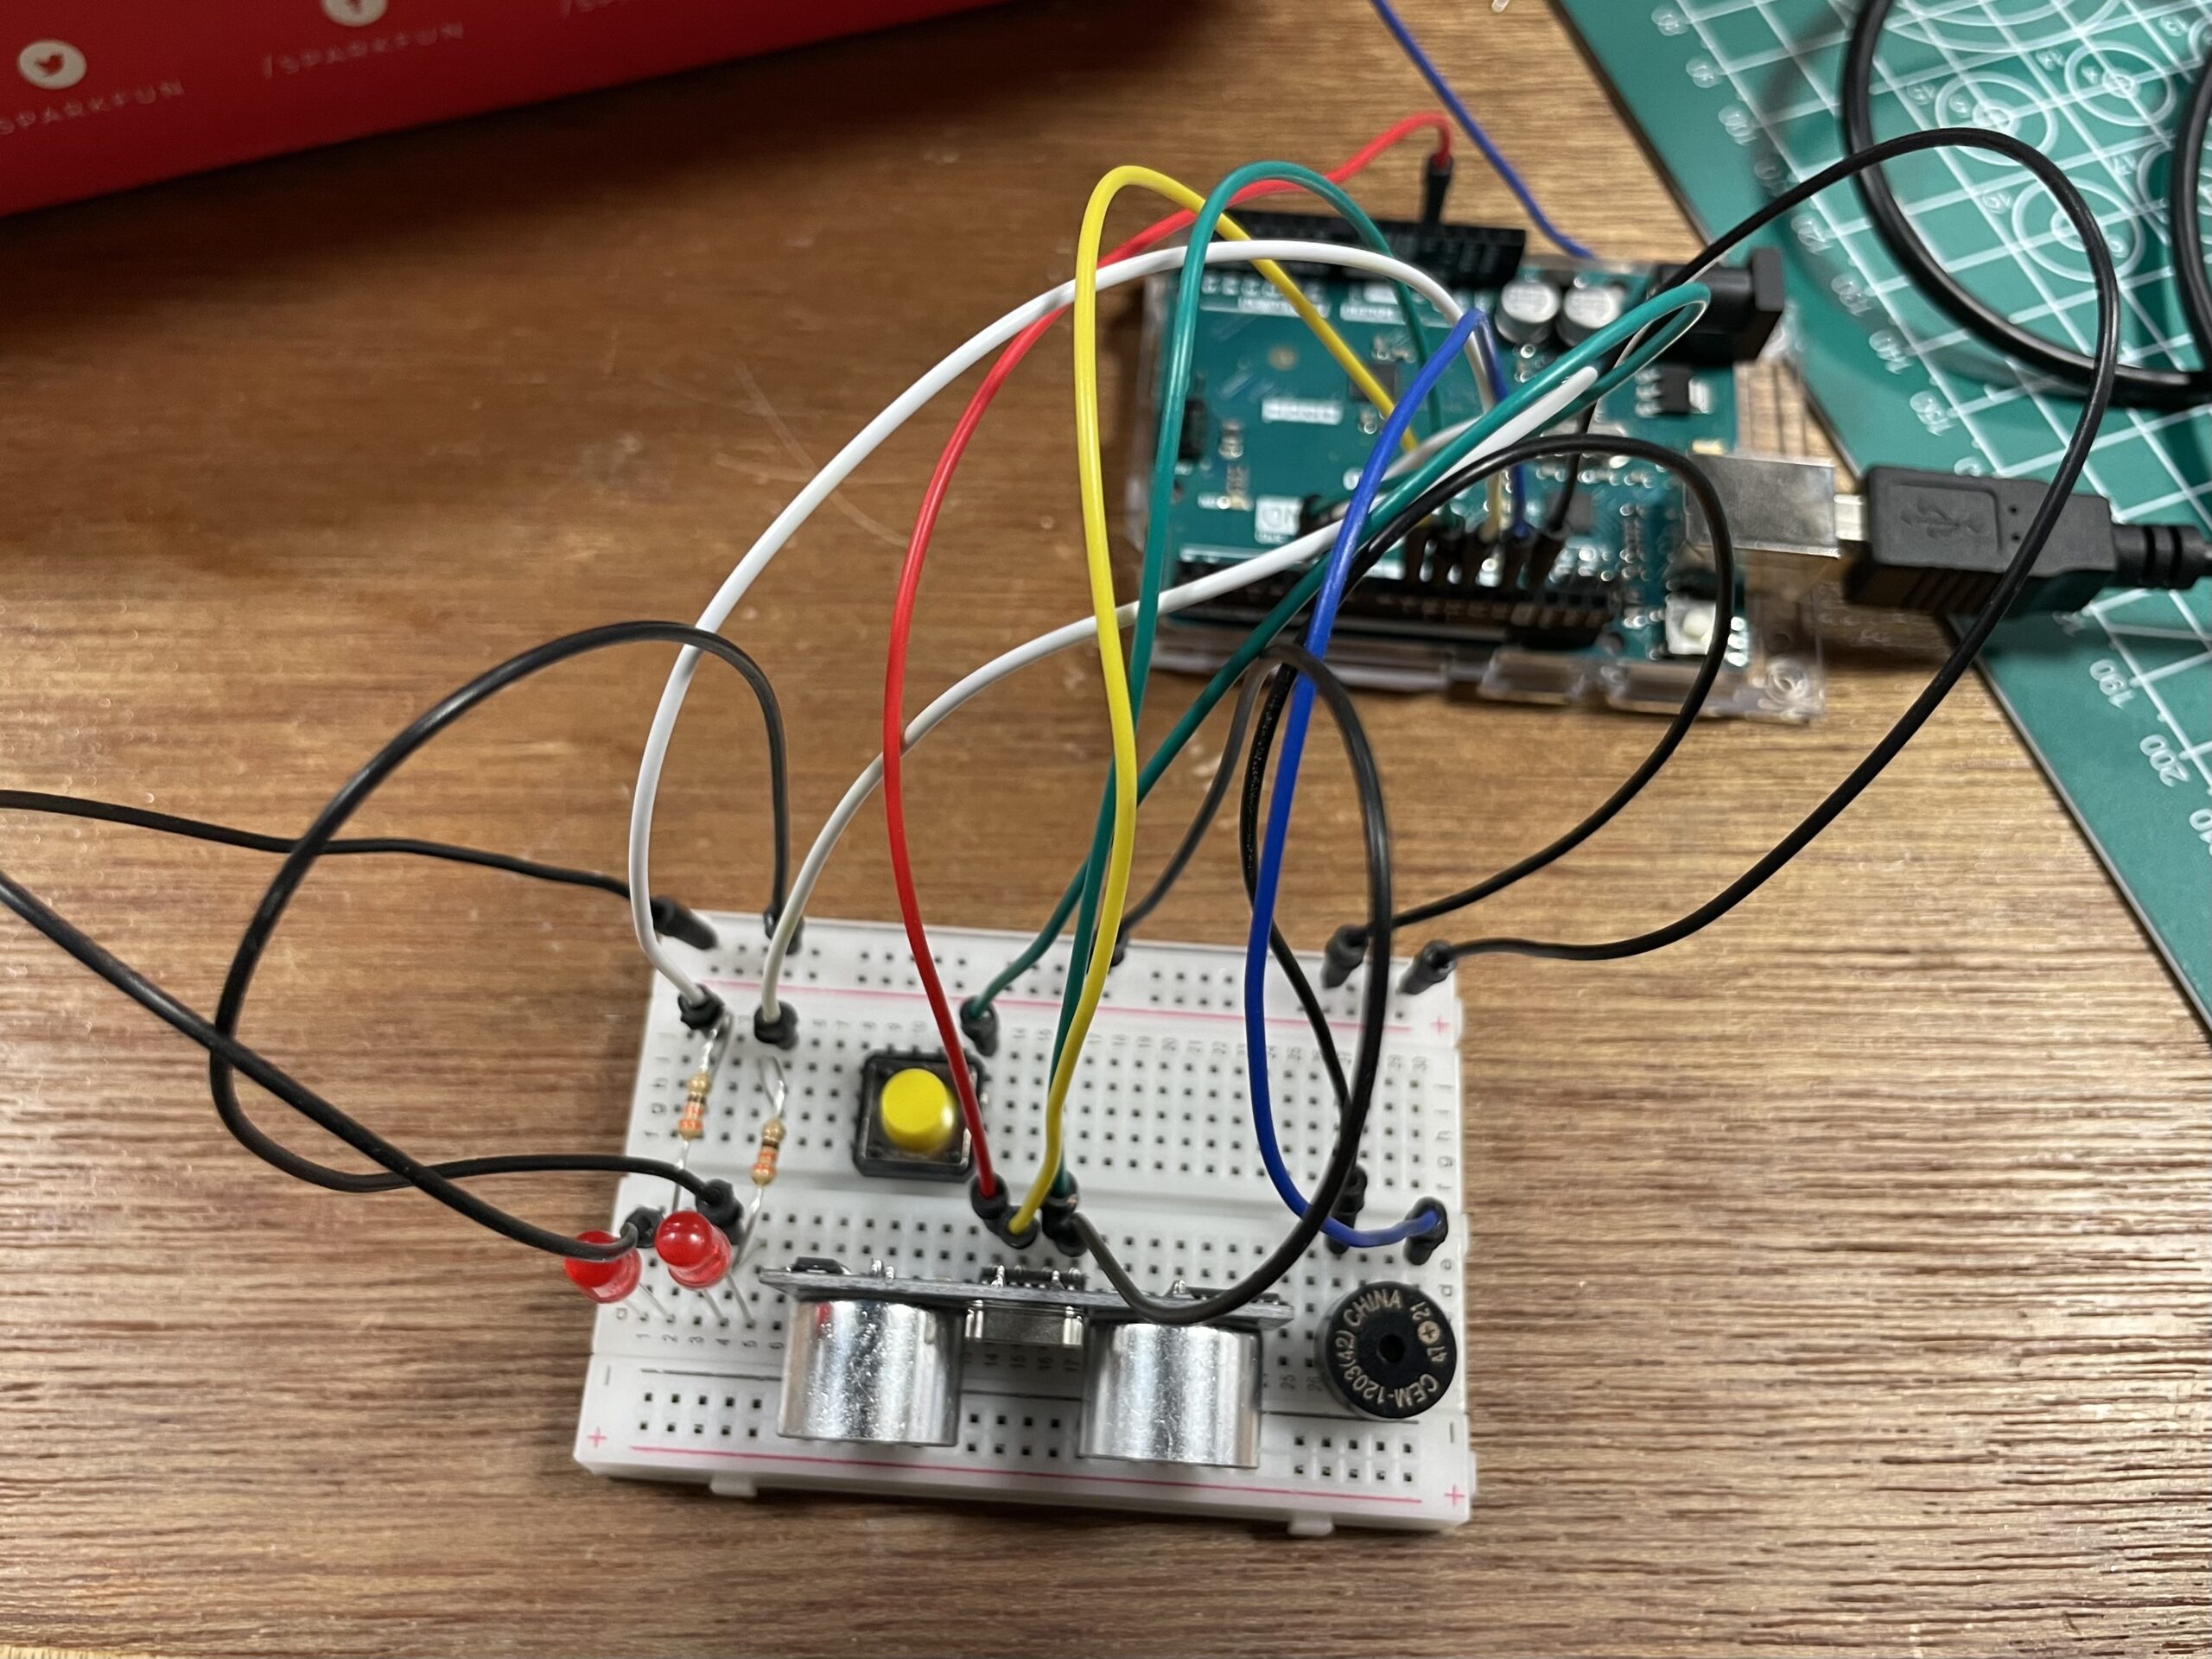
The LED lights light up and the piezo beeps once anything close (within a specific distance) is detected so that it mimicks the scanning of products’ barcodes. A switch button is also there in case the LEDs need to be switched manually (also to meet the requirements).  I handmade a funny setup of a cash register that you can check below.

COMPONENTS:

I used the following elements: BreadBoard/LEDs/Ultrasonic Sensor/Piezo Buzzer/Switch Button/Resistors/Wires/Arduino Uno, to make the following circuit:

The result was this funny looking cash register:

VIDEO:

Here is a video of how it works: cashier

CODE:
//pins numbers
const int trigPin = 9;
const int echoPin = 10;
const int ledPin1 = 11;
const int buzzer = 3;
const int ledPin2 = 6;

//variables
long duration;
int distance;
bool buzzerOn = false;  

void setup() {
  pinMode(trigPin, OUTPUT);
  pinMode(echoPin, INPUT);
  pinMode(buzzer, OUTPUT);
  pinMode(ledPin1, OUTPUT);
  pinMode(ledPin2, OUTPUT);
  Serial.begin(9600);
}

void loop() {
  //to clear trigpin
  digitalWrite(trigPin, LOW);
  delayMicroseconds(2);


  //set trigPin on HIGH state for 10 micro seconds
  digitalWrite(trigPin, HIGH);
  delayMicroseconds(10);
  digitalWrite(trigPin, LOW);

  //read echoPin & return the sound wave 
  duration = pulseIn(echoPin, HIGH);

  //calculating the distance
  distance = duration * 0.034 / 2;

  if (distance <= 50) {
    tone(buzzer, 2000); //frequency to make buzzer louder
    digitalWrite(ledPin1, HIGH);
    digitalWrite(ledPin2, HIGH);
    buzzerOn = true;  //buzzer is on
  } else {
    if (buzzerOn) {
      noTone(buzzer); 
      buzzerOn = false;  //buzzer off
    }
    digitalWrite(ledPin1, LOW);
    digitalWrite(ledPin2, LOW);
//Prints the distance on the Serial Monitor
//Serial.print("Distance: ");
//Serial.println(distance);
  }
 
}

Basically, what’s happening here is that the code uses an ultrasonic sensor to measure distances based on the time it takes for a sound wave to bounce off an object and return. The trigger (trigPin) sends out a short ultrasonic pulse, and the echo (echoPin) detects the reflected pulse. The duration of the pulse’s travel time is then measured, and the distance is calculated based on the speed of sound. If the calculated distance is less than or equal to 50, the code activates the piezo buzzer at a frequency of 2000 and turns on two LEDs to indicate that an object is detected. The `buzzerOn` flag is used to prevent the buzzer from continuously sounding when an object remains within the detection range. When the distance exceeds 50 units, the code turns off the buzzer and the LEDs.

REFLECTION:

The code was the most challenging part in this assignment. I watched few tutorials (including the one referenced) to figure out how to work with the HC-SR04 and how to code the piezo buzzer part so that it is responsive to the distance. Also, I juggled many hardware issues including a short circuit costing me a sensor and almost my laptop plus a lot of damaged wires. Looking at the result now, I think it was worth taking the risk and working with something I never used before.

REFERENCES:

Sparkfun Kit: https://learn.sparkfun.com/resources?page=all

UltraSonic Sensor: https://youtu.be/ZejQOX69K5M?si=t1Vb3VMzbjPW2PnG


Week 9 – Reading Reflection

Making Interactive Art: Set the Stage, Then Shut Up and Listen

While reading the article, I resonated a lot with the author. I do believe that artists should create a space where the mind of a person experiencing the artwork can feel free to explore. By doing so, the artist can not only analyze how interactive and understandable the artwork is, but also take a look at their own work from different perspectives.

The other great point was about not making people adopt the author’s interpretation of the work. I do believe that every artwork should find its own unique place in a person’s mind. And that’s why the idea of artwork having only one interpretation doesn’t make any sense to me.

On the other hand, I do believe that for complex projects, guidance for the user is necessary, even though it can be interpreted as “giving a user a way of doing things”. But otherwise, the initial idea of creating a free space doesn’t see the light because the user may not be able to enter that space.

Physical Computing’s Greatest Hits (and misses)

I really enjoyed the idea described in the first paragraph that it’s worth doing something that has already been done because there’s always room for originality. But I also believe that humans should be inventors, and before pursuing any type of work, think if there’s something more that can be done.

The article gave me ideas that can be used in the projects. I saw most of the ideas mentioned in the article being implemented in real life. Particularly, I see a lot of room for originality in the project involving gloves.

Digital & Analog Sensors

Concept

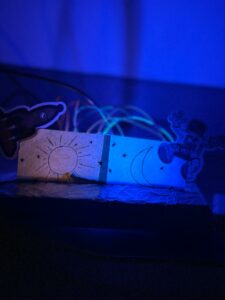
For this assignment, I thought of making a multipurpose sensor but I decided to create a rough design of a night lamp that has a space touch to it. I used two LEDs, a blue and a yellow one, where the blue was used for the moon and the yellow was used for the sun. For the digital aspect of this assignment, I used a button that turns on the blue light, and when clicked for the second time, the blue light starts to blink as well as the yellow light if it’s on, and when clicked for the third time, the blue light turns off. For the analog aspect, I used the sensor to detect light, so when it’s dark enough or the brightness is below 500, the yellow light turns on, and it can be in blinking mode along with the blue light if the button is clicked. 

Code 

if (isButtonPressed) {
    buttonMode = (buttonMode + 1) % 3;
    isButtonPressed = false;

    switch (buttonMode) {
      case 0: // Off
        analogWrite(BUTTON_LED_PIN, 0);
        break;

      case 1: // On
        analogWrite(BUTTON_LED_PIN, 255);
        break;

      case 2: // Fading
        break;
    }
  }

The overall code was not very challenging, but it’s definitely new to me and  it took me a while to make sure I have my code right so that I could focus on the hardware. I liked this piece of code because I’m using the switch function which really helped me organize what I had in mind. Also, I initially wanted the lights to fade but I need to work on it to figure out why its blinking.

Reflection 

This assignment challenged me to learn more about the bread board and the arduino and how to separate different functions from each other. I started this assignment by experimenting with what I already learned in class and making a few adjustments, and thought of just leaving it as a multipurpose sensor that can be used in a bedroom setting, a museum, or anywhere else, but I wanted it to have some creative aspect to it, and hence, I used whatever tools I had with me to create a rough design of a night lamp.

Video : https://intro.nyuadim.com/wp-content/uploads/2023/11/lampsensors.mp4