Just Work

Concept

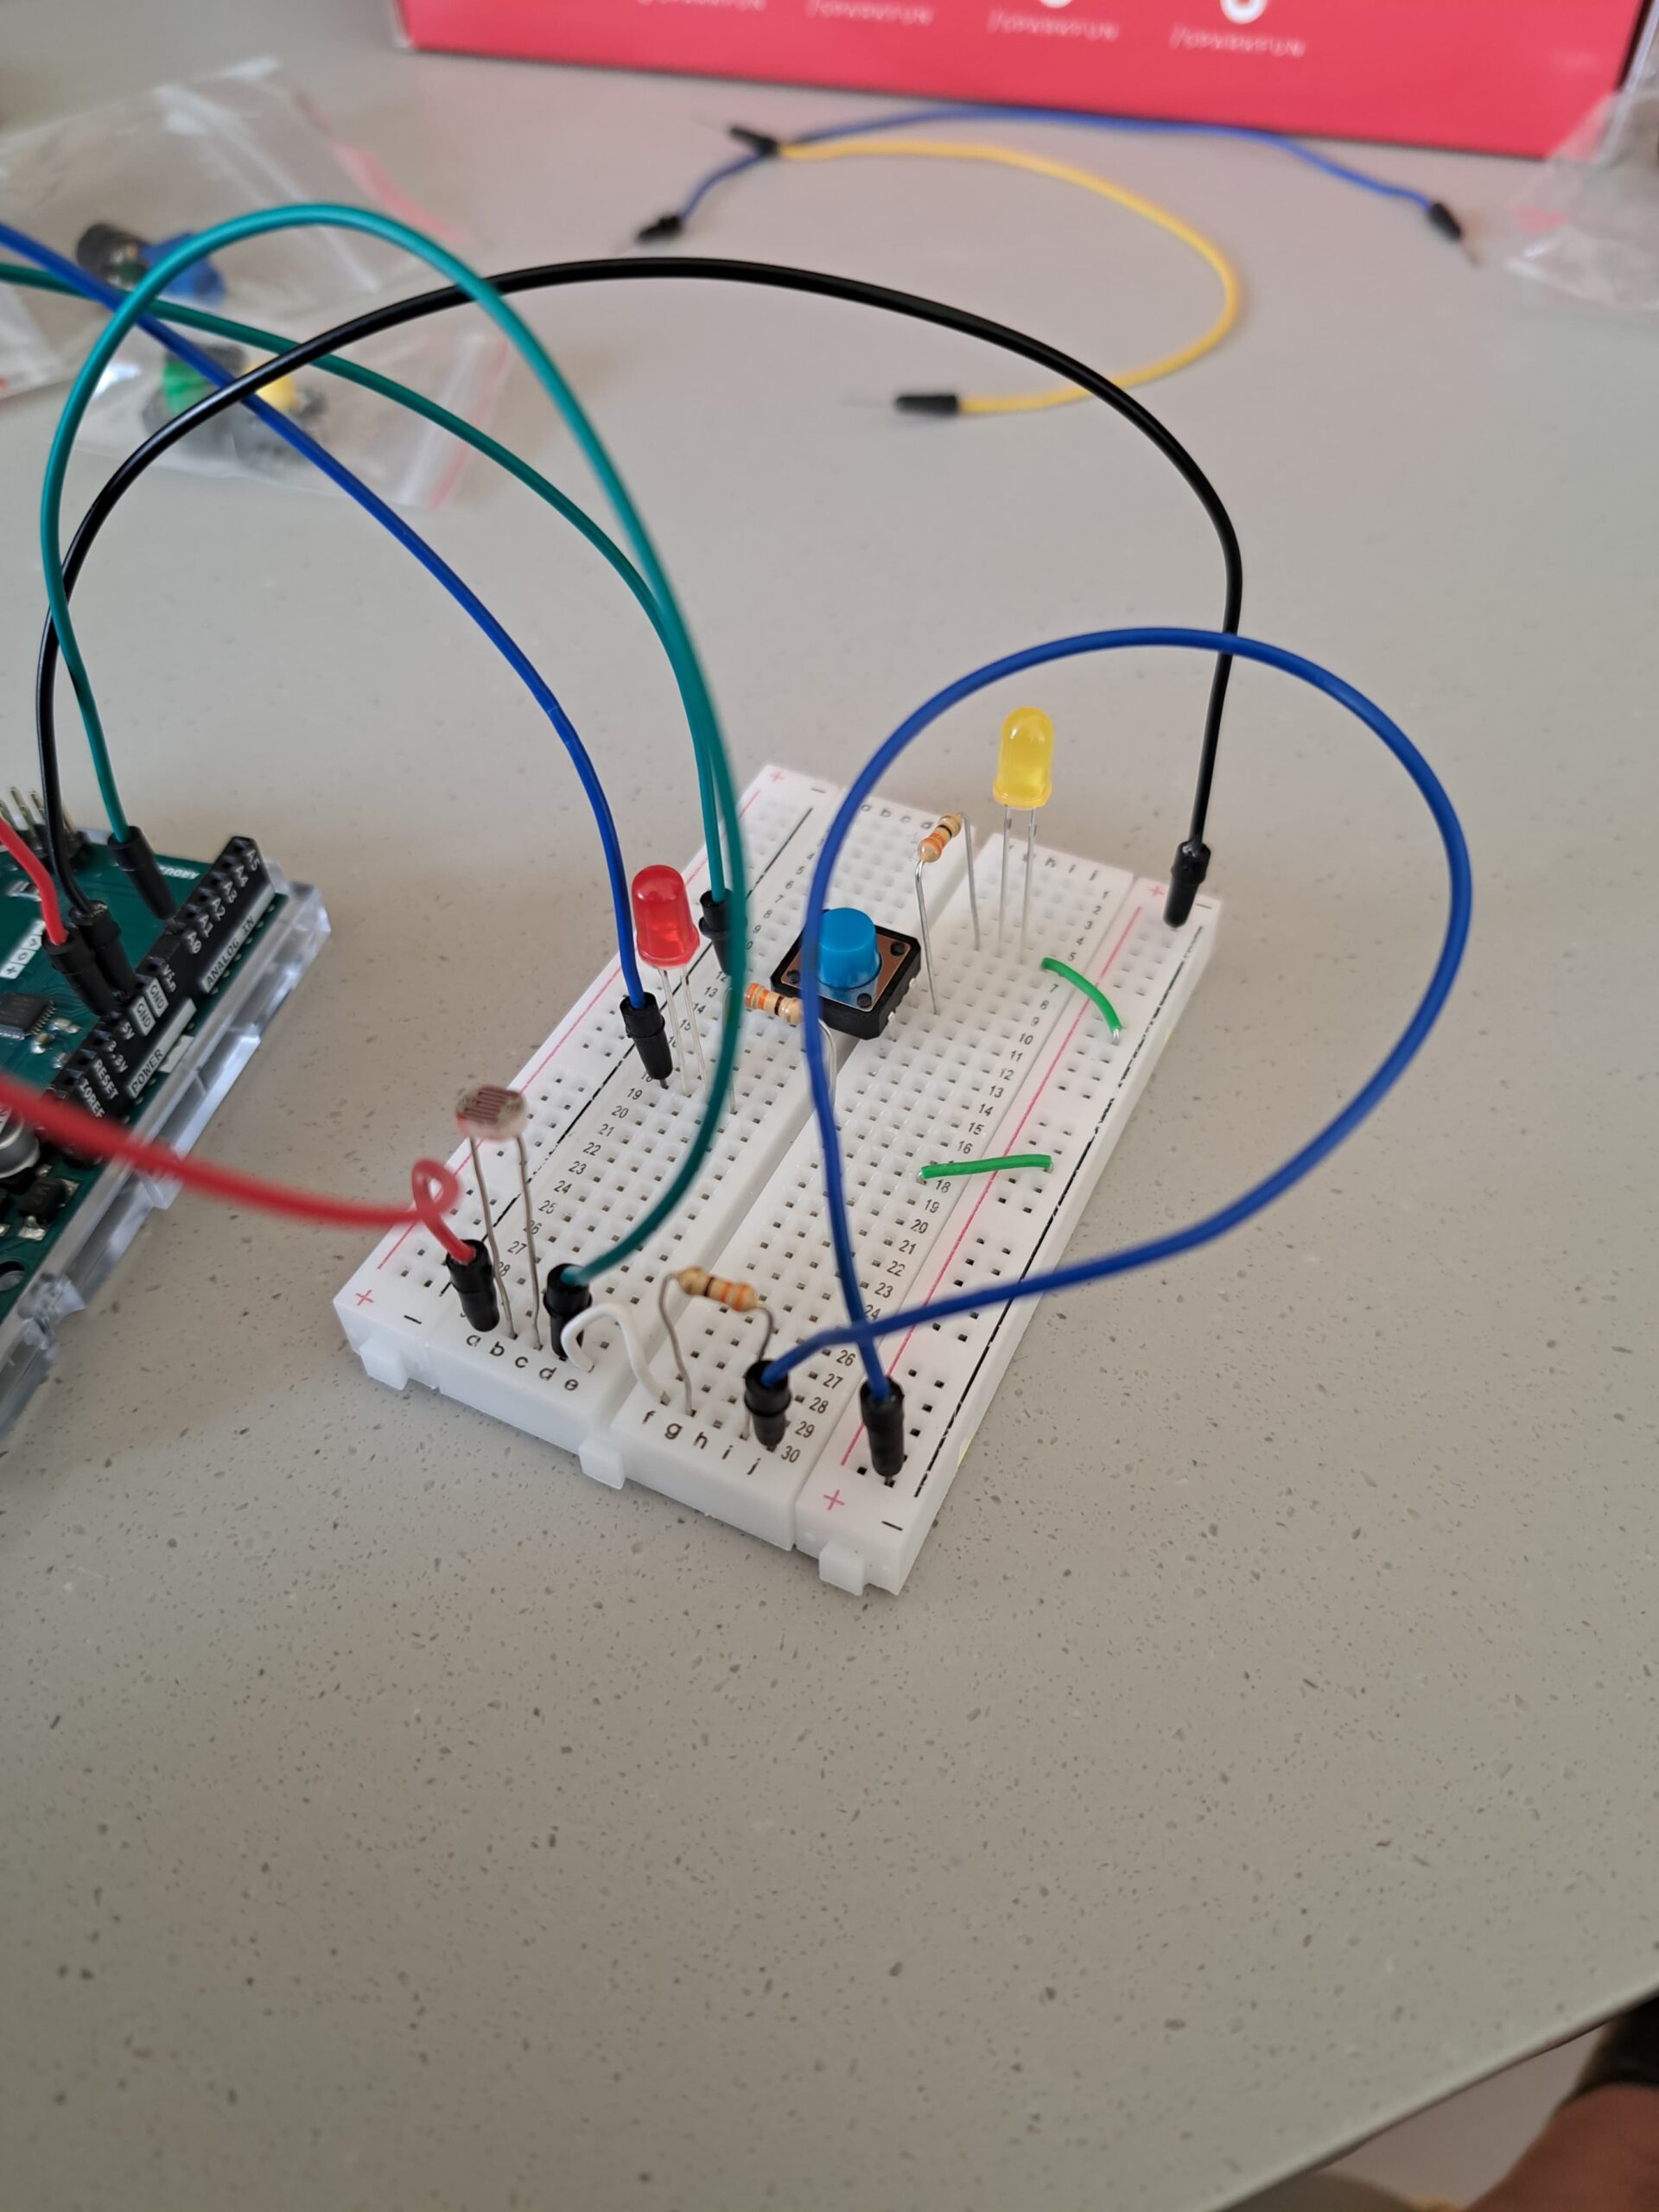
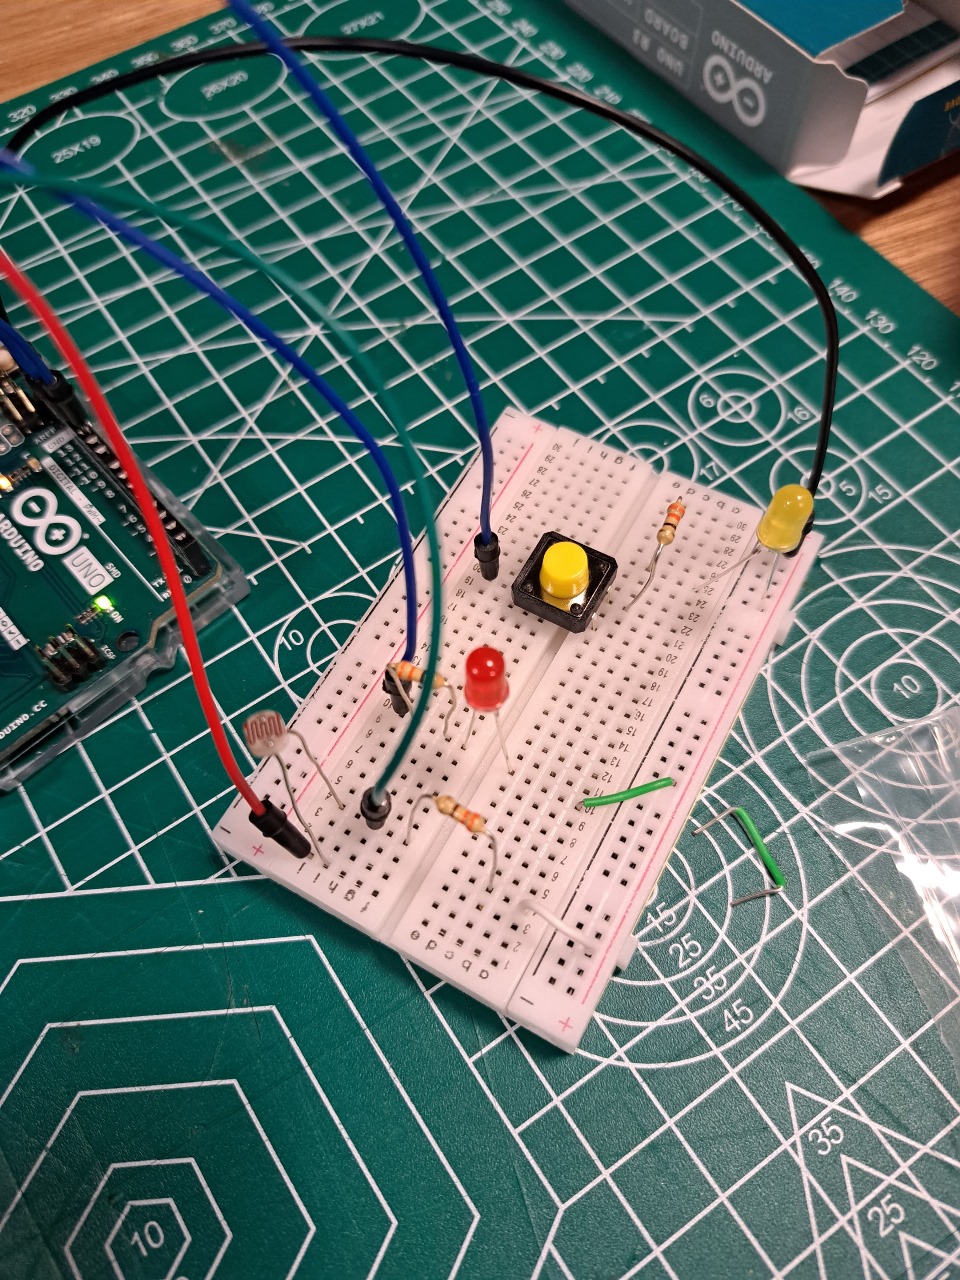
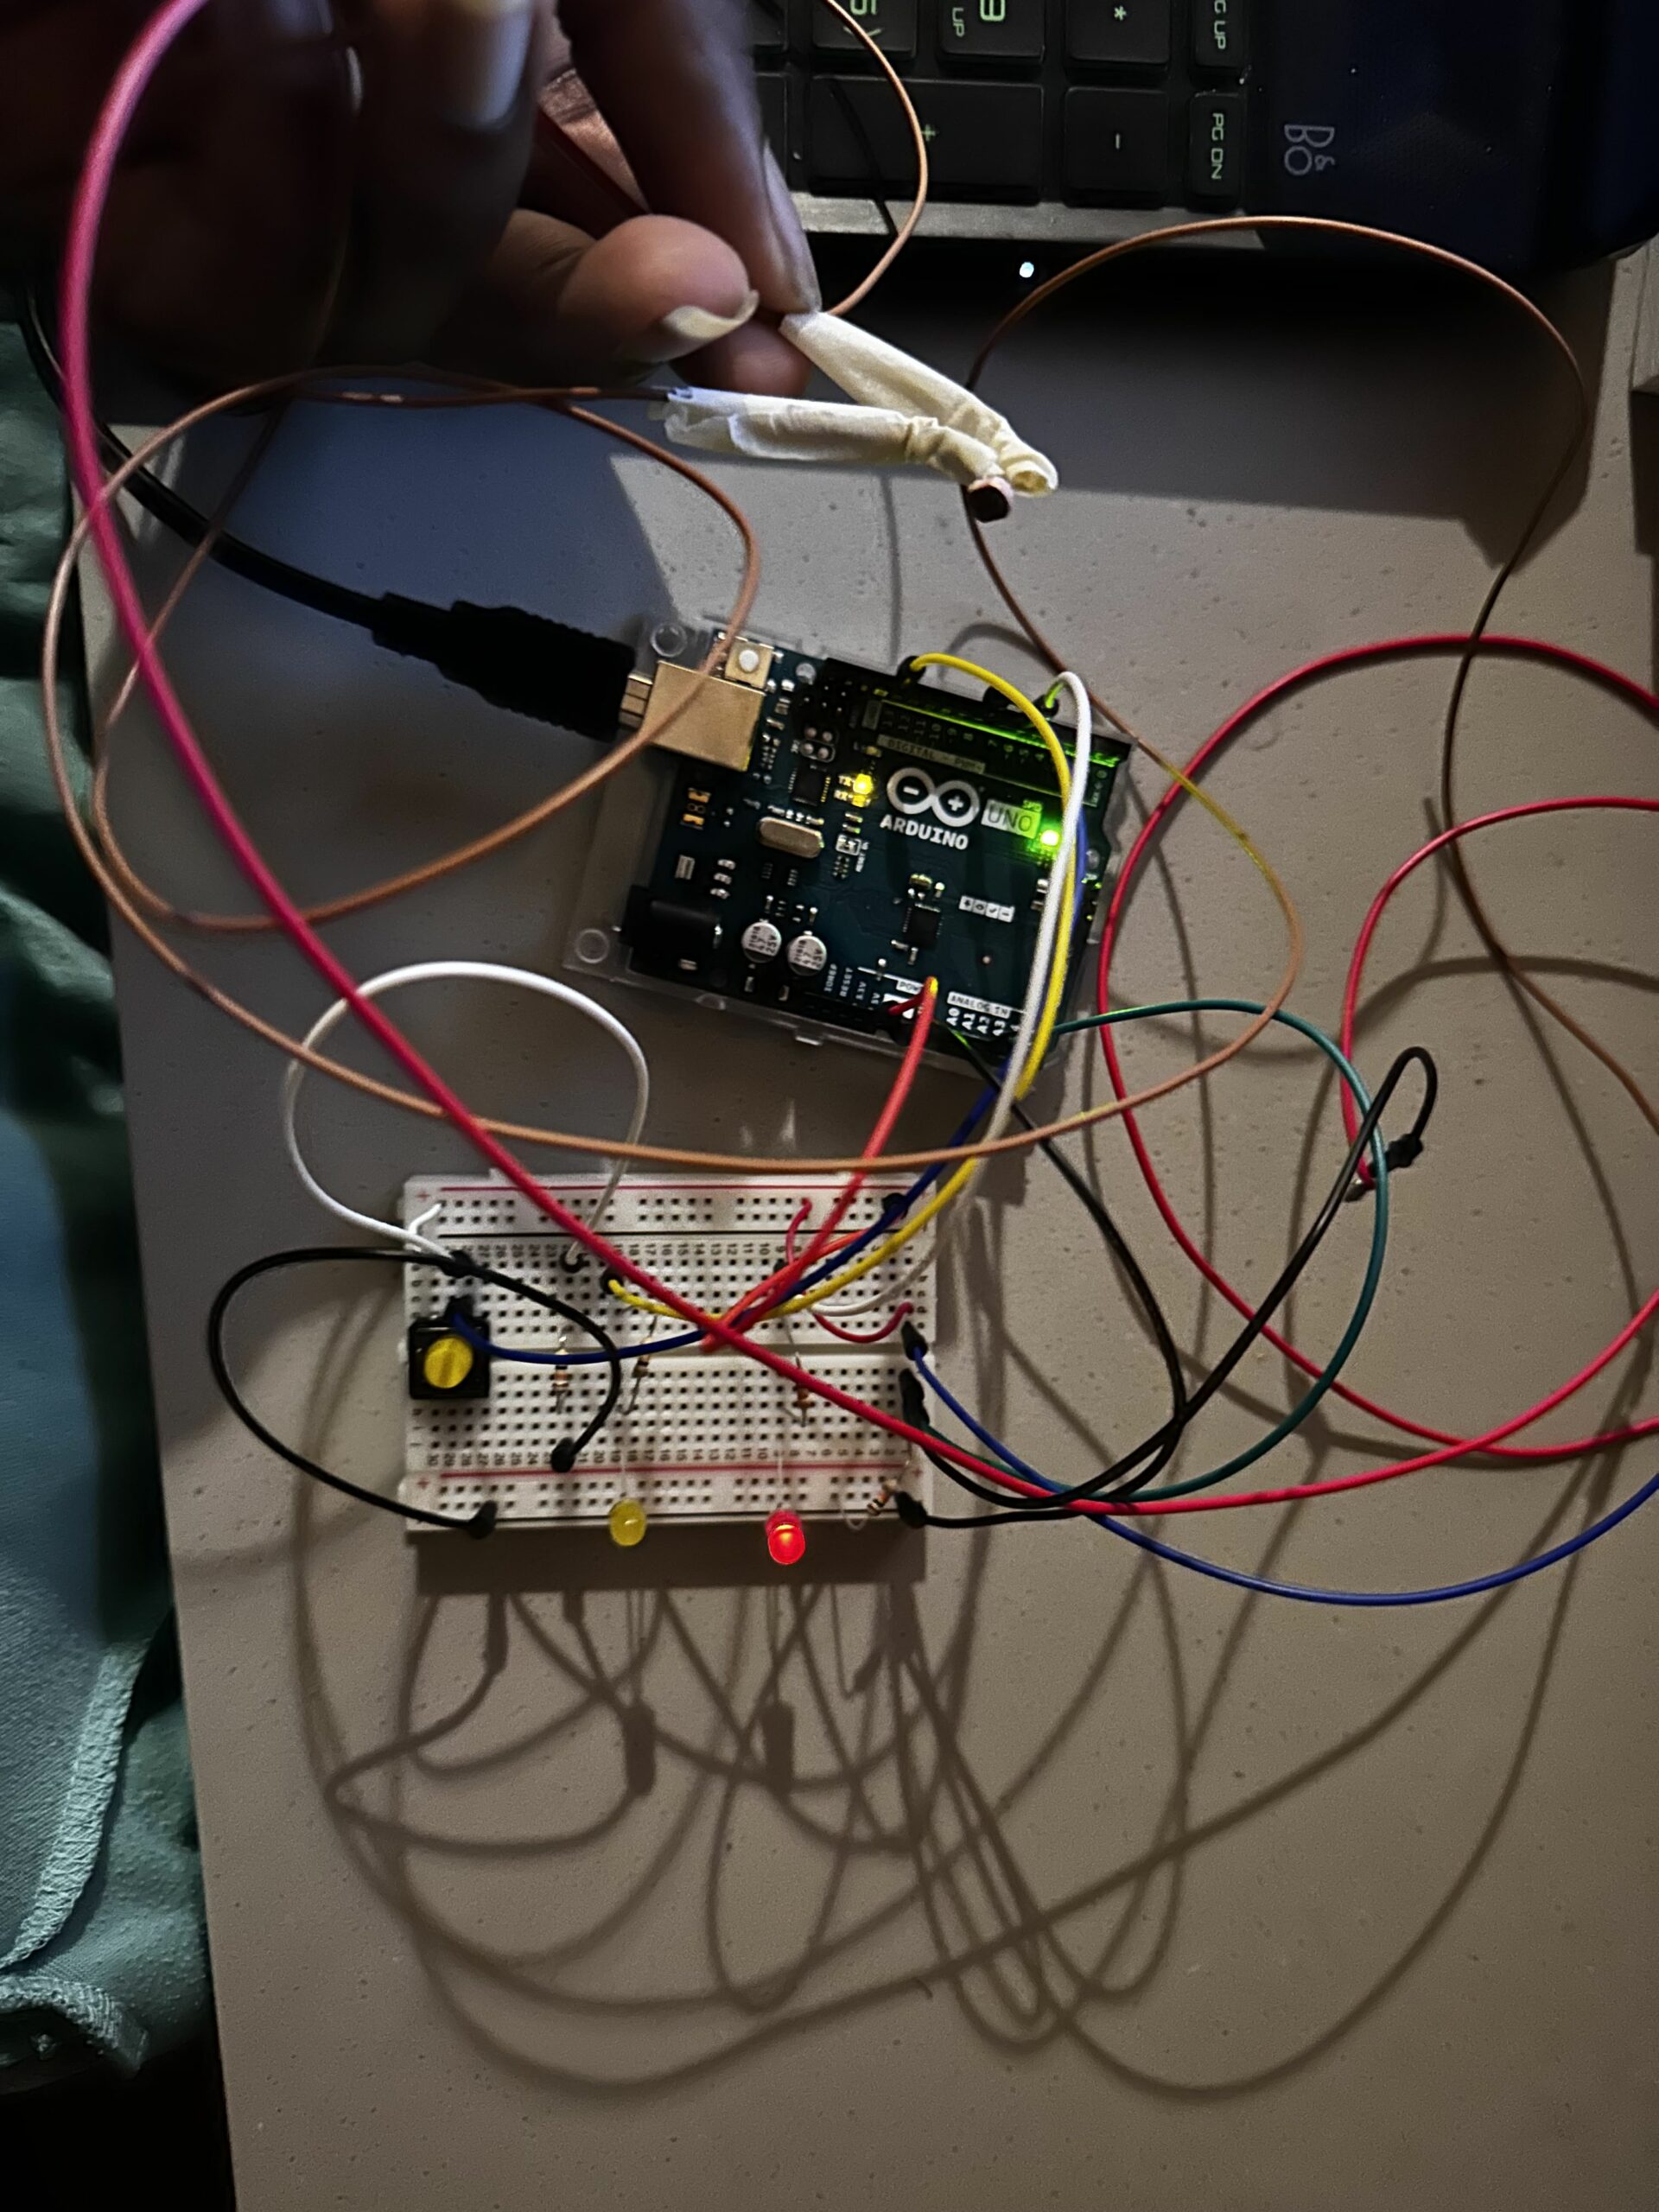
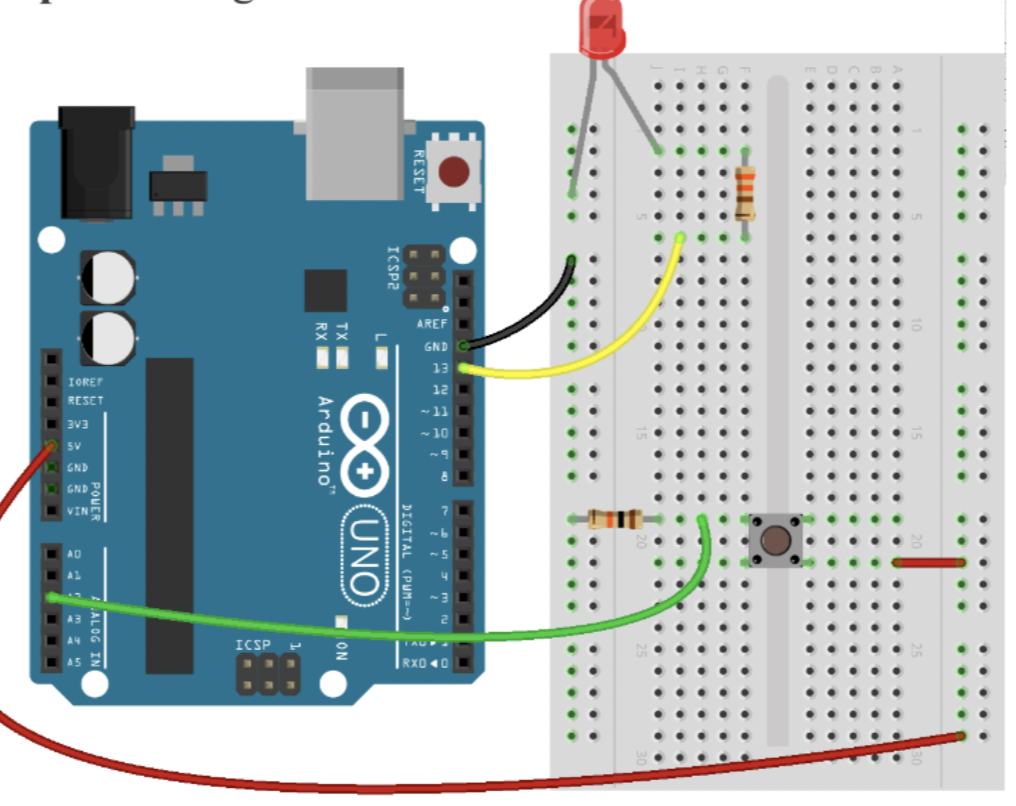
For this particular assignment, I didn’t particularly aim for anything. I have been having issues with connecting some of the components of the arduino kit and getting them to work so I decided to strictly get stuff to work. I utilized three buttons, jumper wires, three LEDs, a potentiometer, and the arduino UNO board. Using the value read from the potentiometer as a delay time, the LEDs are blinked using different buttons. That’s basically what the setup does.

I’ve included the sketch below.

//set the pins for the button and leds
int firstKeyPin = 2;
int secondKeyPin = 3;
int thirdKeyPin = 4;

int led1 = 9;
int led2 = 10;
int led3 = 11;

void setup() {
  //set the button pins as inputs
  pinMode(firstKeyPin, INPUT_PULLUP);
  pinMode(secondKeyPin, INPUT_PULLUP);
  pinMode(thirdKeyPin, INPUT_PULLUP);

  // set leds for output
  pinMode(led1, OUTPUT);
  pinMode(led2, OUTPUT);
  pinMode(led3, OUTPUT);

}

void loop() {
  // read voltage from potentiometer
  int delay_time = analogRead(A0);

  if(digitalRead(firstKeyPin) == LOW){        //if the first key is pressed
    // turns on led1
    digitalWrite(led1, HIGH);
    // delays for the value read from the potentiometer
    delay(delay_time);
    // turns off led1
    digitalWrite(led1, LOW);
    // delays for the value read from the potentiometer
    delay(delay_time);
  }
  else if(digitalRead(secondKeyPin) == LOW){  //if the second key is pressed
    // turns on led2
    digitalWrite(led2, HIGH);
    // delays for the value read from the potentiometer
    delay(delay_time);
    // turns off led2
    digitalWrite(led2, LOW);
    // delays for the value read from the potentiometer
    delay(delay_time);
  }
  else if(digitalRead(thirdKeyPin) == LOW){   //if the third key is pressed
    // turns on led3
    digitalWrite(led3, HIGH);
    // delays for the value read from the potentiometer
    delay(delay_time);
    // turns off led3
    digitalWrite(led3, LOW);
    // delays for the value read from the potentiometer
    delay(delay_time);
  }
  else{
    // turns off all leds
    digitalWrite(led1, LOW);
    digitalWrite(led2, LOW);
    digitalWrite(led3, LOW);
  }
}

Ideas for Future Improvements

For future improvements, I hope it doesn’t take me as much time as it took me this time to get everything working properly.

I used the tinker kit circuit guide as a reference when I got stuck.

Reading Reflection – Week 9

In my initial perspective, I approached the interaction in physical computing from a strictly practical standpoint. However, the revelation brought about by the mechanical pixels and the surrounding fields of grass has broadened my understanding, highlighting the potential for creativity and aesthetics in these interactions. Previously, I considered the user’s input as the primary influence, shaping the device’s responses accordingly. Yet, the mechanical pixels and the grassy environment exhibit a distinct “will of technology.” Despite their simplicity, they engage with their surroundings not merely to fulfill a predetermined purpose dictated by humans, but to actively create an interaction with people. An illustrative example is the subtle quivering of the mechanical pixel “leaves” in an attempt to attract attention when no one is nearby. As individuals pass by, they collectively form a wave, accompanied by a tinkling sound, showcasing a dynamic and engaging interaction that transcends the conventional user-device relationship.

After delving into Tigoe’s “Making Interactive Art,” my perspective on interaction and interactivity has evolved. Initially, I conceived these concepts as a straightforward exchange where two entities respond to each other through inputs and outputs. However, Tigoe’s insights have led me to perceive interactivity as a more nuanced and profound experience. The excerpt from “Making Interactive Art” that resonated with me emphasizes the importance of letting the audience absorb the work through their senses, encouraging them to contemplate the meaning of each part, identify elements open to contact or control, and ultimately empowering them to interpret and respond in their own unique ways.

This perspective reframes interactivity as a process that places emphasis on the receiving end, highlighting the significance of allowing individuals to engage with artistic or interactive creations on a personal and subjective level. Rather than a uniform response to inputs, true interactivity, as suggested by Tigoe, enables a diverse range of interpretations and responses. In this light, I now see interaction not only as a means of communication but also as a pathway for individuals to feel a sense of uniqueness, care, and individuality within the realm of human experience.

Financial Management

So uhhh… I bought… A desk lamp… For a hundred dirhams. A hundred. A hundred as in 1-0-0.

Impulsive purchases got the best of me again.

Anyways, I decided I would use this lamp for something other than playing around with its colors. So I made this kind of proximity/light sensor thing. Basically when I hold the lamp close to the the circuit, the red LED turns off and as I back up the lamp, the red LED blinks slower and slower until it stops blinking. As long as the red LED blinks/is on, the green LED can be turned on using a digital switch. Initially while making this circuit, I ran into some very silly difficulties – I attached the components on a single row which meant the circuit was never complete and I couldn’t figure out the problem the entire night for the life of me. Here is the bad circuit:

But one debugging session later here is my creation, the good circuit:

It works in a very fun way and the lamp works in an even fun-er way. Check out the video I’ve attached of the LEDs in action:

https://drive.google.com/drive/folders/1uOQwTJqiPt6b5cQ-L8GTVn3CXHp50x17?usp=sharing

Here is the code:

int green = 10;
int red = 11;
// the setup routine runs once when you press reset:
void setup() {
  // initialize serial communication at 9600 bits per second:
  Serial.begin(9600);
  pinMode(green, OUTPUT);
  pinMode(red, OUTPUT);
}

// the loop routine runs over and over again forever:
void loop() {
  // read the input on analog pin 0:
  int sensorValue = analogRead(A0);
  // print out the value you read:
  Serial.println(sensorValue);
  delay(1);  // delay in between reads for stability

if (sensorValue > 40) { // when far, turn on but don't blink
  digitalWrite(green, LOW);
  digitalWrite(red, LOW);
}
if (sensorValue > 15 && sensorValue <= 40) { // when slightly close, blink slow
  digitalWrite(green, HIGH);
  digitalWrite(red, HIGH);
  delay(100);
  digitalWrite(red, LOW);
  delay(100);
}
if (sensorValue <= 15 && sensorValue > 10) { // when closer, blink fast
  digitalWrite(green, HIGH);
  digitalWrite(red, HIGH);
  delay(250);
  digitalWrite(red, LOW);
  delay(250);
} 
if (sensorValue <= 10) { // when very close, turn off
  digitalWrite(green, HIGH);
  digitalWrite(red, HIGH);
}  

}


Week 9: Eye Protection

Concept:

I often use my phone late in the night with my light out and this has been messing up my eyesight for this Project I decided to create a form of eye protection warning system that alerts the user with the use of an LED when the light from their phone screen or laptop is too bright.

So when the screen brightness is low the LED remains off and as the user increases the brightness the LED gets brighter. When the screen brightness reaches a level where the user’s eye is at harm the LED starts to blink and when the brightness gets too high the LED blinks faster.

Code:

int warning=0;//variable to store the warning value used to control blinking and led brightness

void setup() {
  // put your setup code here, to run once:
  pinMode(13,OUTPUT);//set the 13 pin to output type
  pinMode(8,INPUT);//set pin 8 to input type
  pinMode(6,OUTPUT);//set pin 6 to output type
  Serial.begin(9600);//set serial screen for viewing values
}

void loop() {
  // put your main code here, to run repeatedly:
  int anasens=analogRead(A2);//read info from light sensor and store in anasens
  
  int digsens=digitalRead(8);//read info from switch sensor and store digsens
  Serial.println(anasens);//print anasens on serial board
  anasens=constrain(anasens,100,680);//keep the values between 100 and 680 at all times
  warning=map(anasens,100,680,0,255);//rescale the values from 100 and 680 to 0 and 255
  
  if(digsens==1){//if the switch is pressed 
    digitalWrite(13,1);//turn on yellow LED
  }
  else{//if the switch is not pressed
    digitalWrite(13,0);//turn off LED
  }
  if(warning>200){//if the warning is greater than 200
    analogWrite(6,warning);//turn on red LED based on warning value
    delay(100);//wait for 100 milliseconds
    analogWrite(6,0);//turn off red LED
    delay(100);//wait for 100 milliseconds
  }
  if(warning>100&&warning<200){//the value is between 100 and 200
    analogWrite(6,warning);//turn on red LED based on warning value
    delay(500);//wait for 500 milliseconds
    analogWrite(6,0);//turn off red LED
    delay(500);//wait for 500 milliseconds
  }
  analogWrite(6,warning);//turn on red LED based on warning value
}

Highlight:

This was an interesting assignment. I am happy I was able to do it. What i look forward to is making this a wireless connection as connecting the wires was stressful

Circuit Diagram:

Set-Up Picture:

Video:

https://drive.google.com/drive/folders/17efBVjbUX72MkYQmuw92EqgqJVYxm1Oi?usp=sharing


Thank You!.

Week 10 – Response

The Future of Interaction Design  and Responses: A Brief Rant on the Future of Interaction Design:

The rant is about a problem in interaction designs now. They are not tangible interfaces, dynamic materials, and/or haptic. Human Capabilities were the main concern of the author. I think humans’ capabilities are daffier. As much as it was an interesting read as much as it is not inclusive. There are a lot of responsibilities and an interactive designer needs to keep in mind in terms of inclusivity. I think accessibility is a big concern. I agree that capabilities like our hands and fingers can do a lot of things and influence our futures and how they are incredible but this also made me think of those who do not have them. What should an interaction designer do? How can we help? How should we compensate?  I do not know the answer, but I hope one day I will.

I like the part when he/she started to talk about choices, and we chose what to do and how to interact. I agree and I think as interactive designers we should choose to have a responsibility to make our designs inclusive as much as we can.

I think there is a lot to be done in research regarding tangible interfaces, dynamic materials, and haptic because they are somehow inadequate. Thus, I wonder what would be a dynamic medium for keyboards.

Even though he is trying to challenge us to create designs that take advantage of our capabilities I think there should be a balance between that and the idea that capabilities might not always be equal.


Week9: Mini DJ Player

My Arduino code simulates a mini DJ player by incorporating a potentiometer and a switch. The potentiometer, connected to analog input pin A1, emulates a DJ slider or knob, allowing you to control the brightness of an LED connected to PWM pin 11. This provides a visual representation of adjustments such as volume or fading effects.

Meanwhile, the switch, connected to digital input pin A2, mimics a button on the DJ player. When the button is pressed, a yellow light connected to pin 13 is activated briefly, creating a visual cue for a button press or an effect. The code establishes a loop that continuously reads the analog sensor value, and button state, and adjusts LED brightness accordingly, producing a dynamic and interactive simulation of a basic DJ player interface.

It does not look like DJ player in the bright light, and it was hard for me to take a video with one hand and simultaneously press the button with another hand.

int led = 11; //the PMW pin the LED is attached to

void setup(){
  Serial.begin(9600);
  //declare pin 11 to be output:
  pinMode(led,OUTPUT);
  pinMode(13, OUTPUT); //yellow light
  pinMode(A2, INPUT); //button
}
  // put your setup code here, to run once:


void loop() {
  // put your main code here, to run repeatedly:
  int sensorValue = analogRead(A1);
  //Serial.println(sensorValue);

  int buttonState = digitalRead(A2); //button

  Serial.println(buttonState);
  if (buttonState == 1) {
    digitalWrite(13, HIGH);
    delay(100);

  } else {
    digitalWrite(13, LOW);
    //delay(300);
  }


  //set the brightness of pin 11 according to the sensor value/4)
  analogWrite(led, sensorValue/4);

  //wait for 30 milliseconds to see the diming effect
  delay(30);
}

One particularly interesting aspect of the code is the use of the analog input from a potentiometer to control the brightness of an LED. The line int sensorValue = analogRead(A1); reads the analog input from pin A1, representing a DJ slider or knob. The subsequent analogWrite(led, sensorValue/4); adjusts the brightness of an LED on pin 11 based on this input, creating a dynamic and interactive simulation of volume or fade control. This part of the code adds a tangible and intuitive user interface element to the mini DJ player simulation.

(I also refer to the slides from Professor!)

Week 9 – Reading Response

Greatest Hits (and Misses)
The reading went over how different materials were used in different projects. I think there is 2 ways of approaching a project: come up with the idea first and look at available technologies or methods, or look at available technologies or methods and think about what you can do with it.

I wouldn’t say any of them is superior than the other. However, I do want to say that it does mean knowing what’s available will be helpful in terms of thinking outside the box, doing remix, and creating your project.  In this sense, it was interesting to see how different technologies were used. Some were crazier than others, but regardless, they still make it to my reference list.

Making Interactive Art
I think the reading very well points out how certain performers or artists tend to directly guide the audience to think a specific way or come to a specific conclusion. I think it’s easier to fall into this pitfall as an interactive media creator, as there’s a limitation to different types or cases of interactions we can think of as creators, which will make us limit the conclusion and the emotions we create with our project.

I think this can both work against you or work in your favour. It is true we, as creators, should try not to have a set conclusion and just ‘educate’ our audience of it. However, at the same time, interactive media holds the power to guide people to experience certain things and, in return, think a certain thing. I think this is a strength not many forms of media has. For instance, a painting may go through so many interpretations of different individuals. While I agree the charm lies within this characteristic, it is also very true that the painter may fail in delivering the message with the correct context and depth.

Week 9- Reading Response

In his blog posts, Tom Igoe analyzes the importance of innovative thinking for those who work on physical computing projects and considers the performative dimension of digital products and creative artworks. What strikes me about his approach is that Igoe encourages students to stop thinking of specific ideas as not original and consider how to create variations of them instead. While dance floor pads, electronic instruments controlled by players’ gestures, and touch kiosks may seem overused, such projects bring about a wealth of learning opportunities. Interactive art projects enable creators to engage their audience and discover new interpretations.

Instead of scripting users’ actions, creators should prioritize giving them the freedom to express themselves through works of art. I find this strategy especially useful for product developers, artists, and creative professionals looking for ways to grab the interest of their audience. As it is impossible to predict how a target user may react to an end product without conducting thorough research, we can test out physical computing and creative art projects in real time to get feedback. I think that by analyzing users’ and viewers’ reactions, web developers and artists can increase the value of their projects.

Week 9 – Production

Concept)

When I thought about what I could do with 2 LEDs, I again thought about the colours. Looking at buttons and red and blue LED lights, I thought of an old-style game that used to be played on primary school sports day: “Blue Flag, Red Flag.”

How you play the game:
There’s one referee who gives orders like…
– Hold up red flag
– Don’t hold up red flag and hold up blue flag
– etc..
It makes much more sense and has more thrill in Korean grammar.. The grammatical order of English kind of giving everything away.

Anyways, I wanted to create a game control for this game.

Materials I Used:
– Arduino Uno
– 2 LEDs (red & blue)
– 4  resistors (330 ohm)
– 2 push button switches
– breadboard
– jumper wires

Video: (just realized the top part is a little cut off, but the subtitles on top of the video or examples of the orders)

Code:

const int redButton = 3;
const int blueButton = A1;
const int redLight = 6;
const int blueLight = 5;

void setup() {
  Serial.begin(9600);
  pinMode(redLight, OUTPUT);
  pinMode(blueLight, OUTPUT);
  pinMode(redButton, INPUT);
}

void loop() {

  int redState;
  int blueState;

  redState = digitalRead(redButton);
  blueState = analogRead(blueButton);

  //Serial.print("restate: ");
  //Serial.println(redState);
  //Serial.print("bluestate: ");
  //Serial.println(blueState);
  if (redState != 0)
  {
    Serial.println("red high");
    digitalWrite(redLight, HIGH);
    delay(100);
    digitalWrite(redLight, LOW);
  }
  if (blueState > 500)
  {
    Serial.println("blue high");
    digitalWrite(blueLight, HIGH);
   delay(100);
    digitalWrite(blueLight, LOW);
  }
}


The code is very simple as it’s just recognizing the buttons and turning on the LED lights. It is notable that the push of the buttons are recognized differently (analog and digital input) and therefore the if statement is a little different.