This post is a mirror to the following post: Link
Concept:
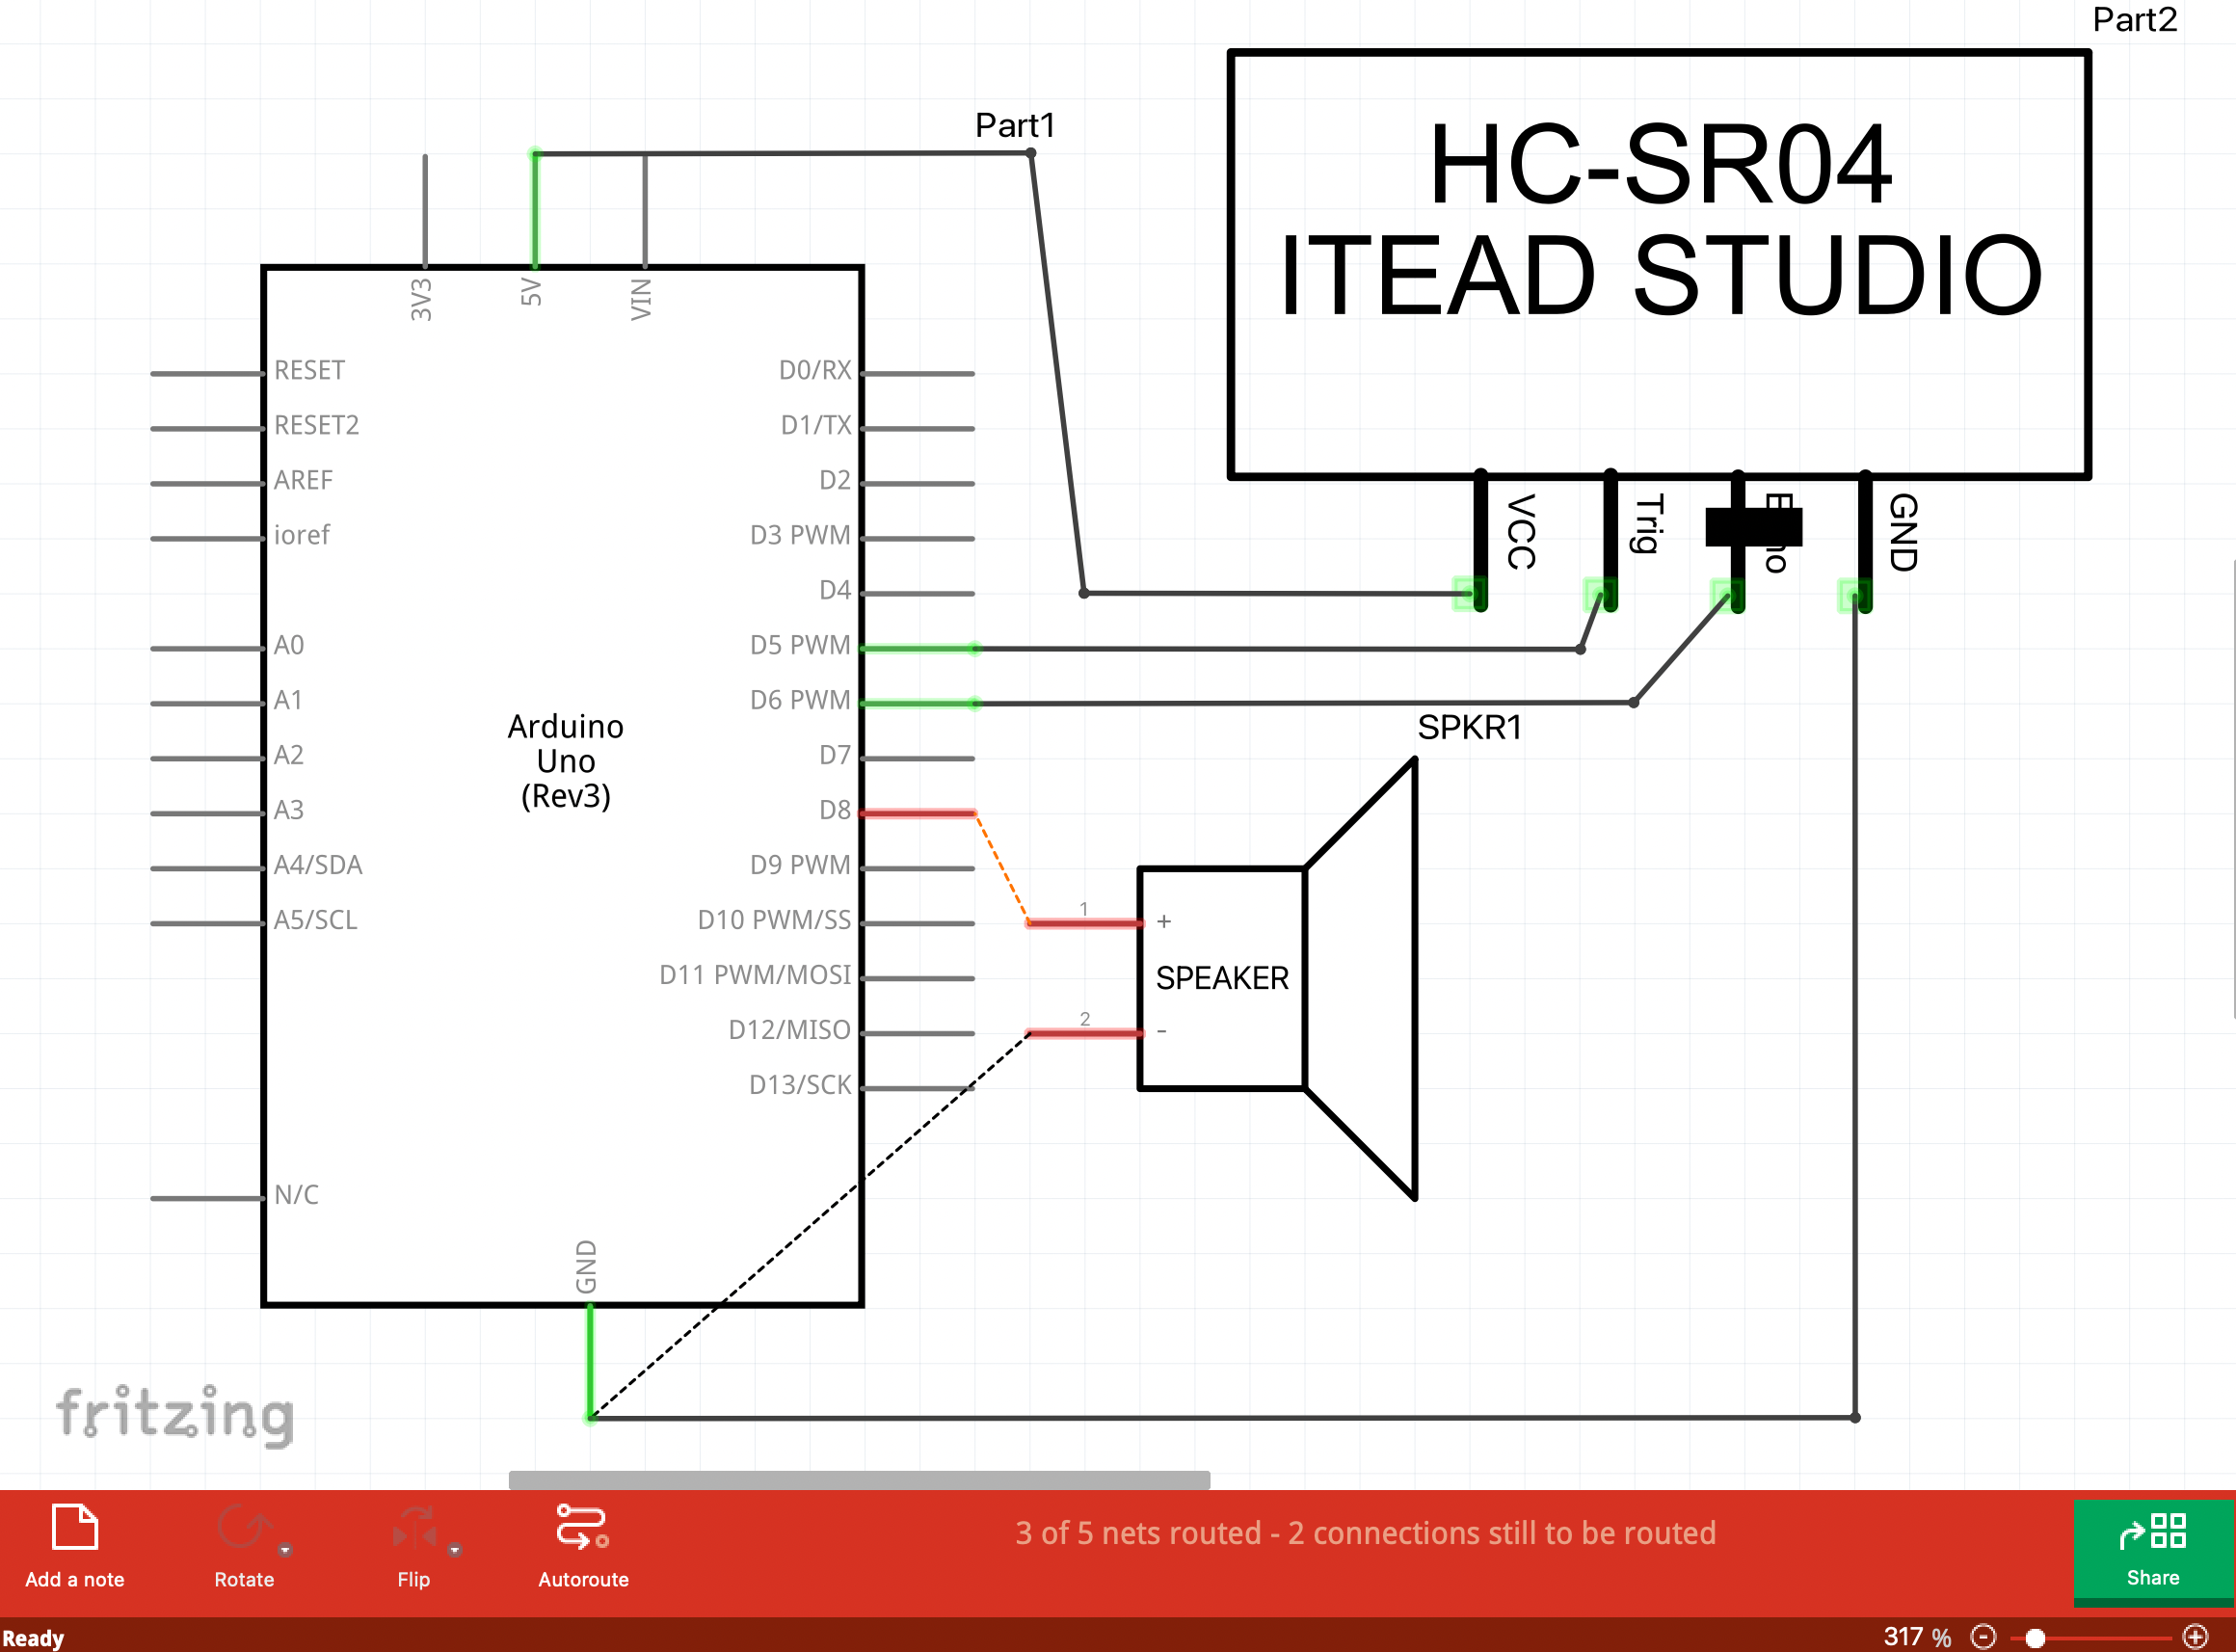
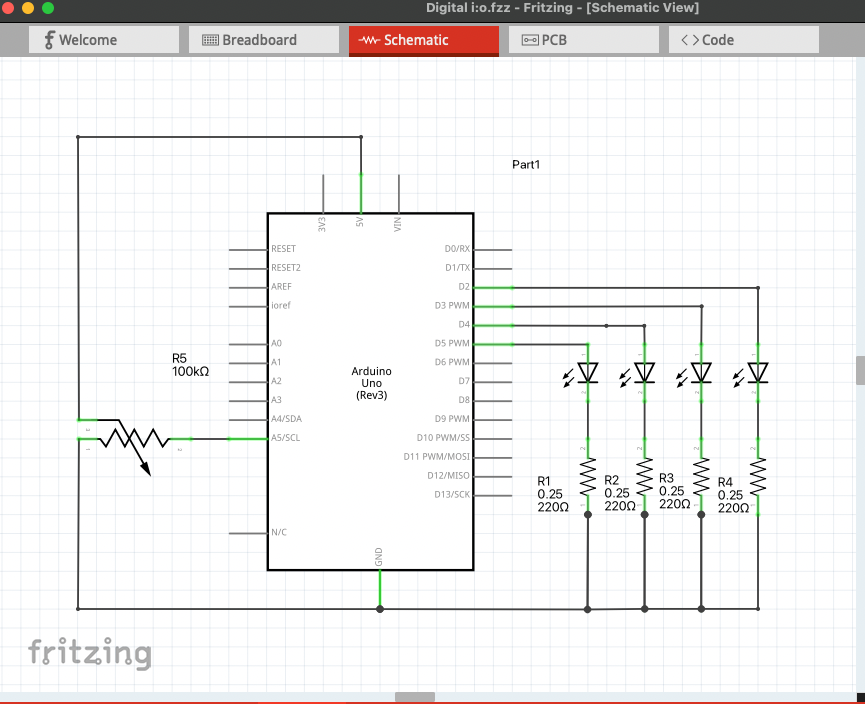
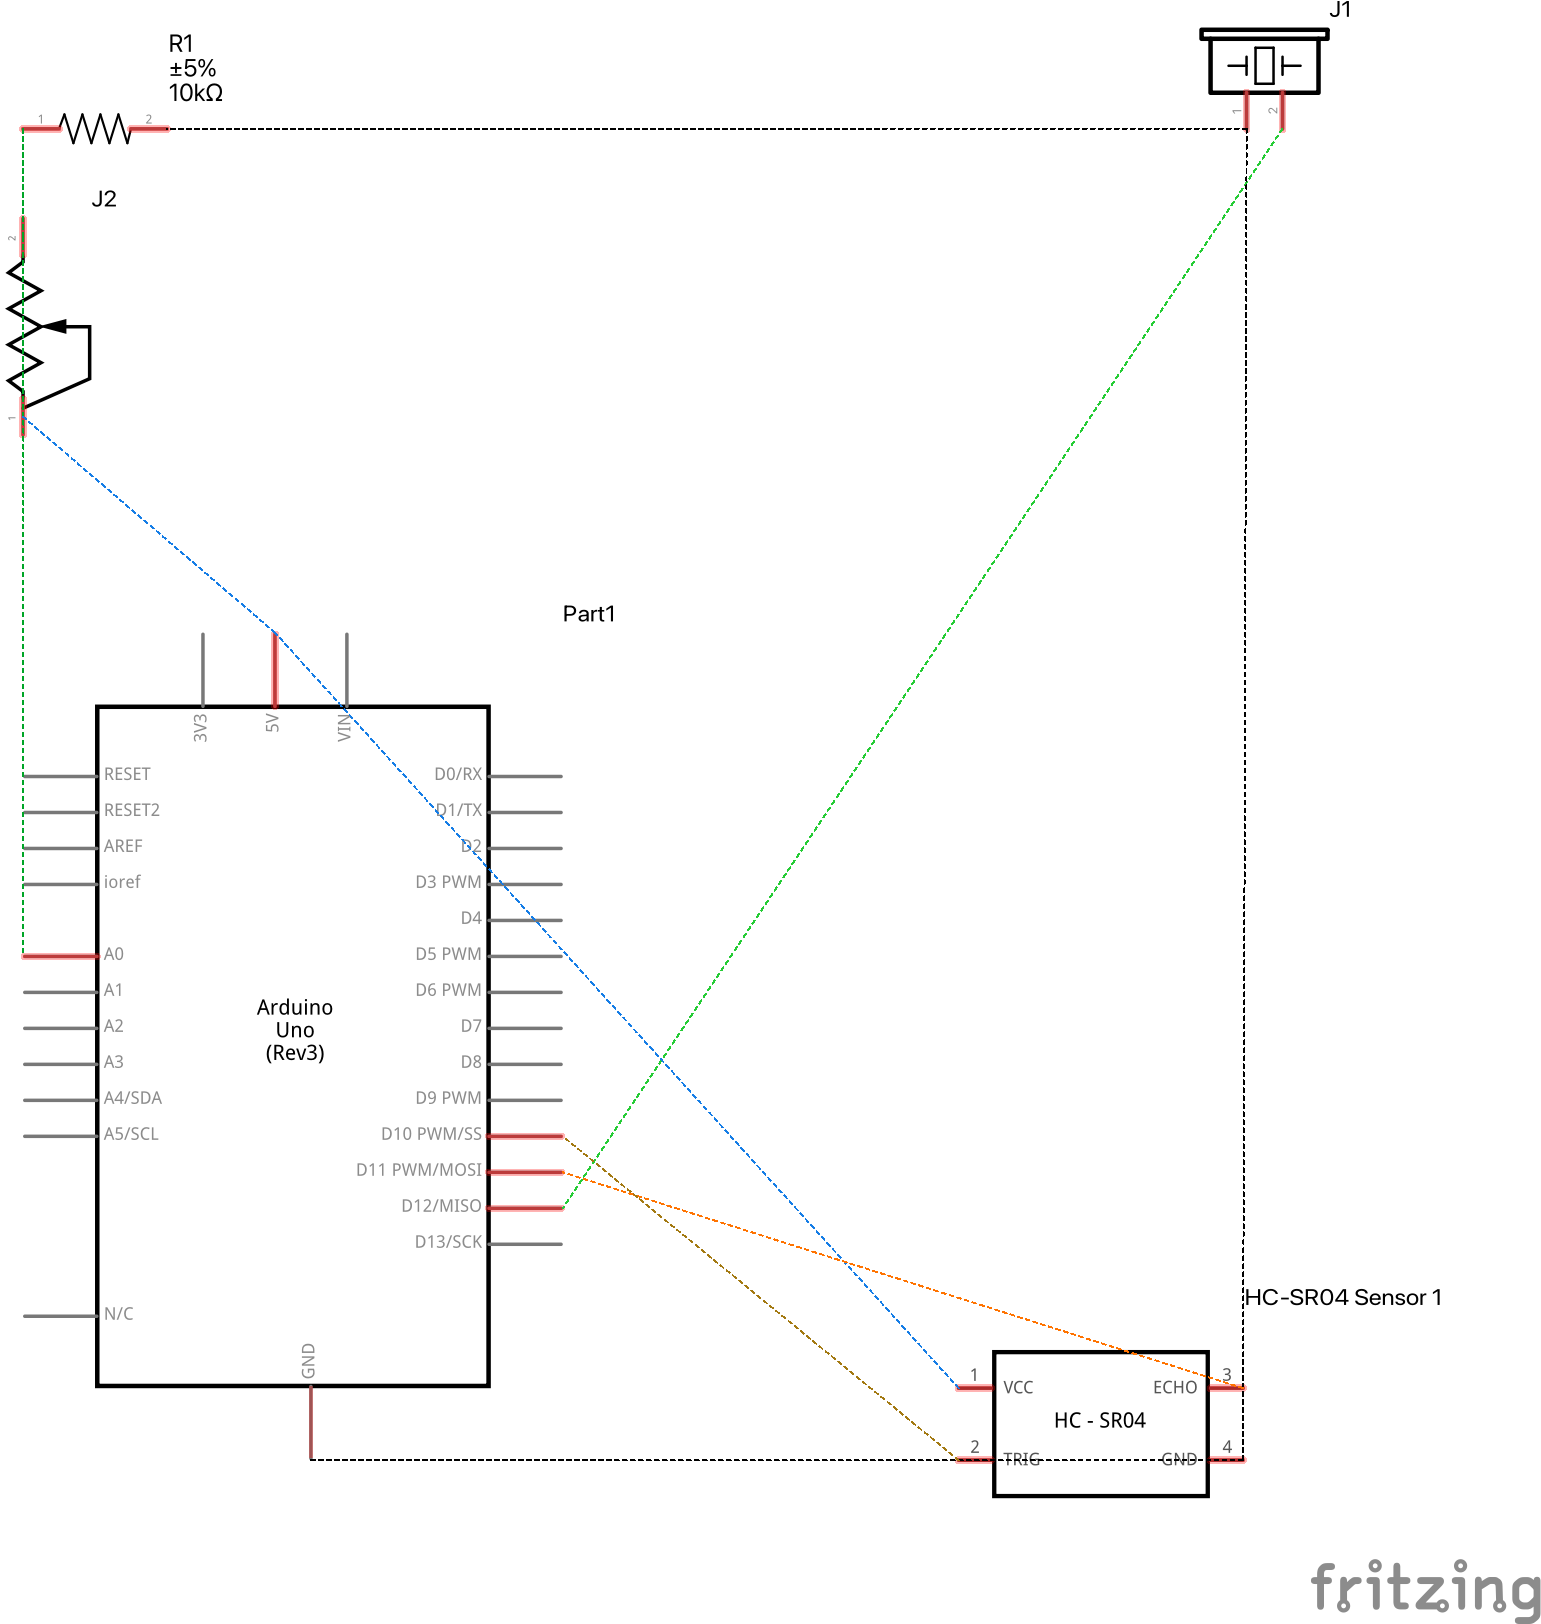
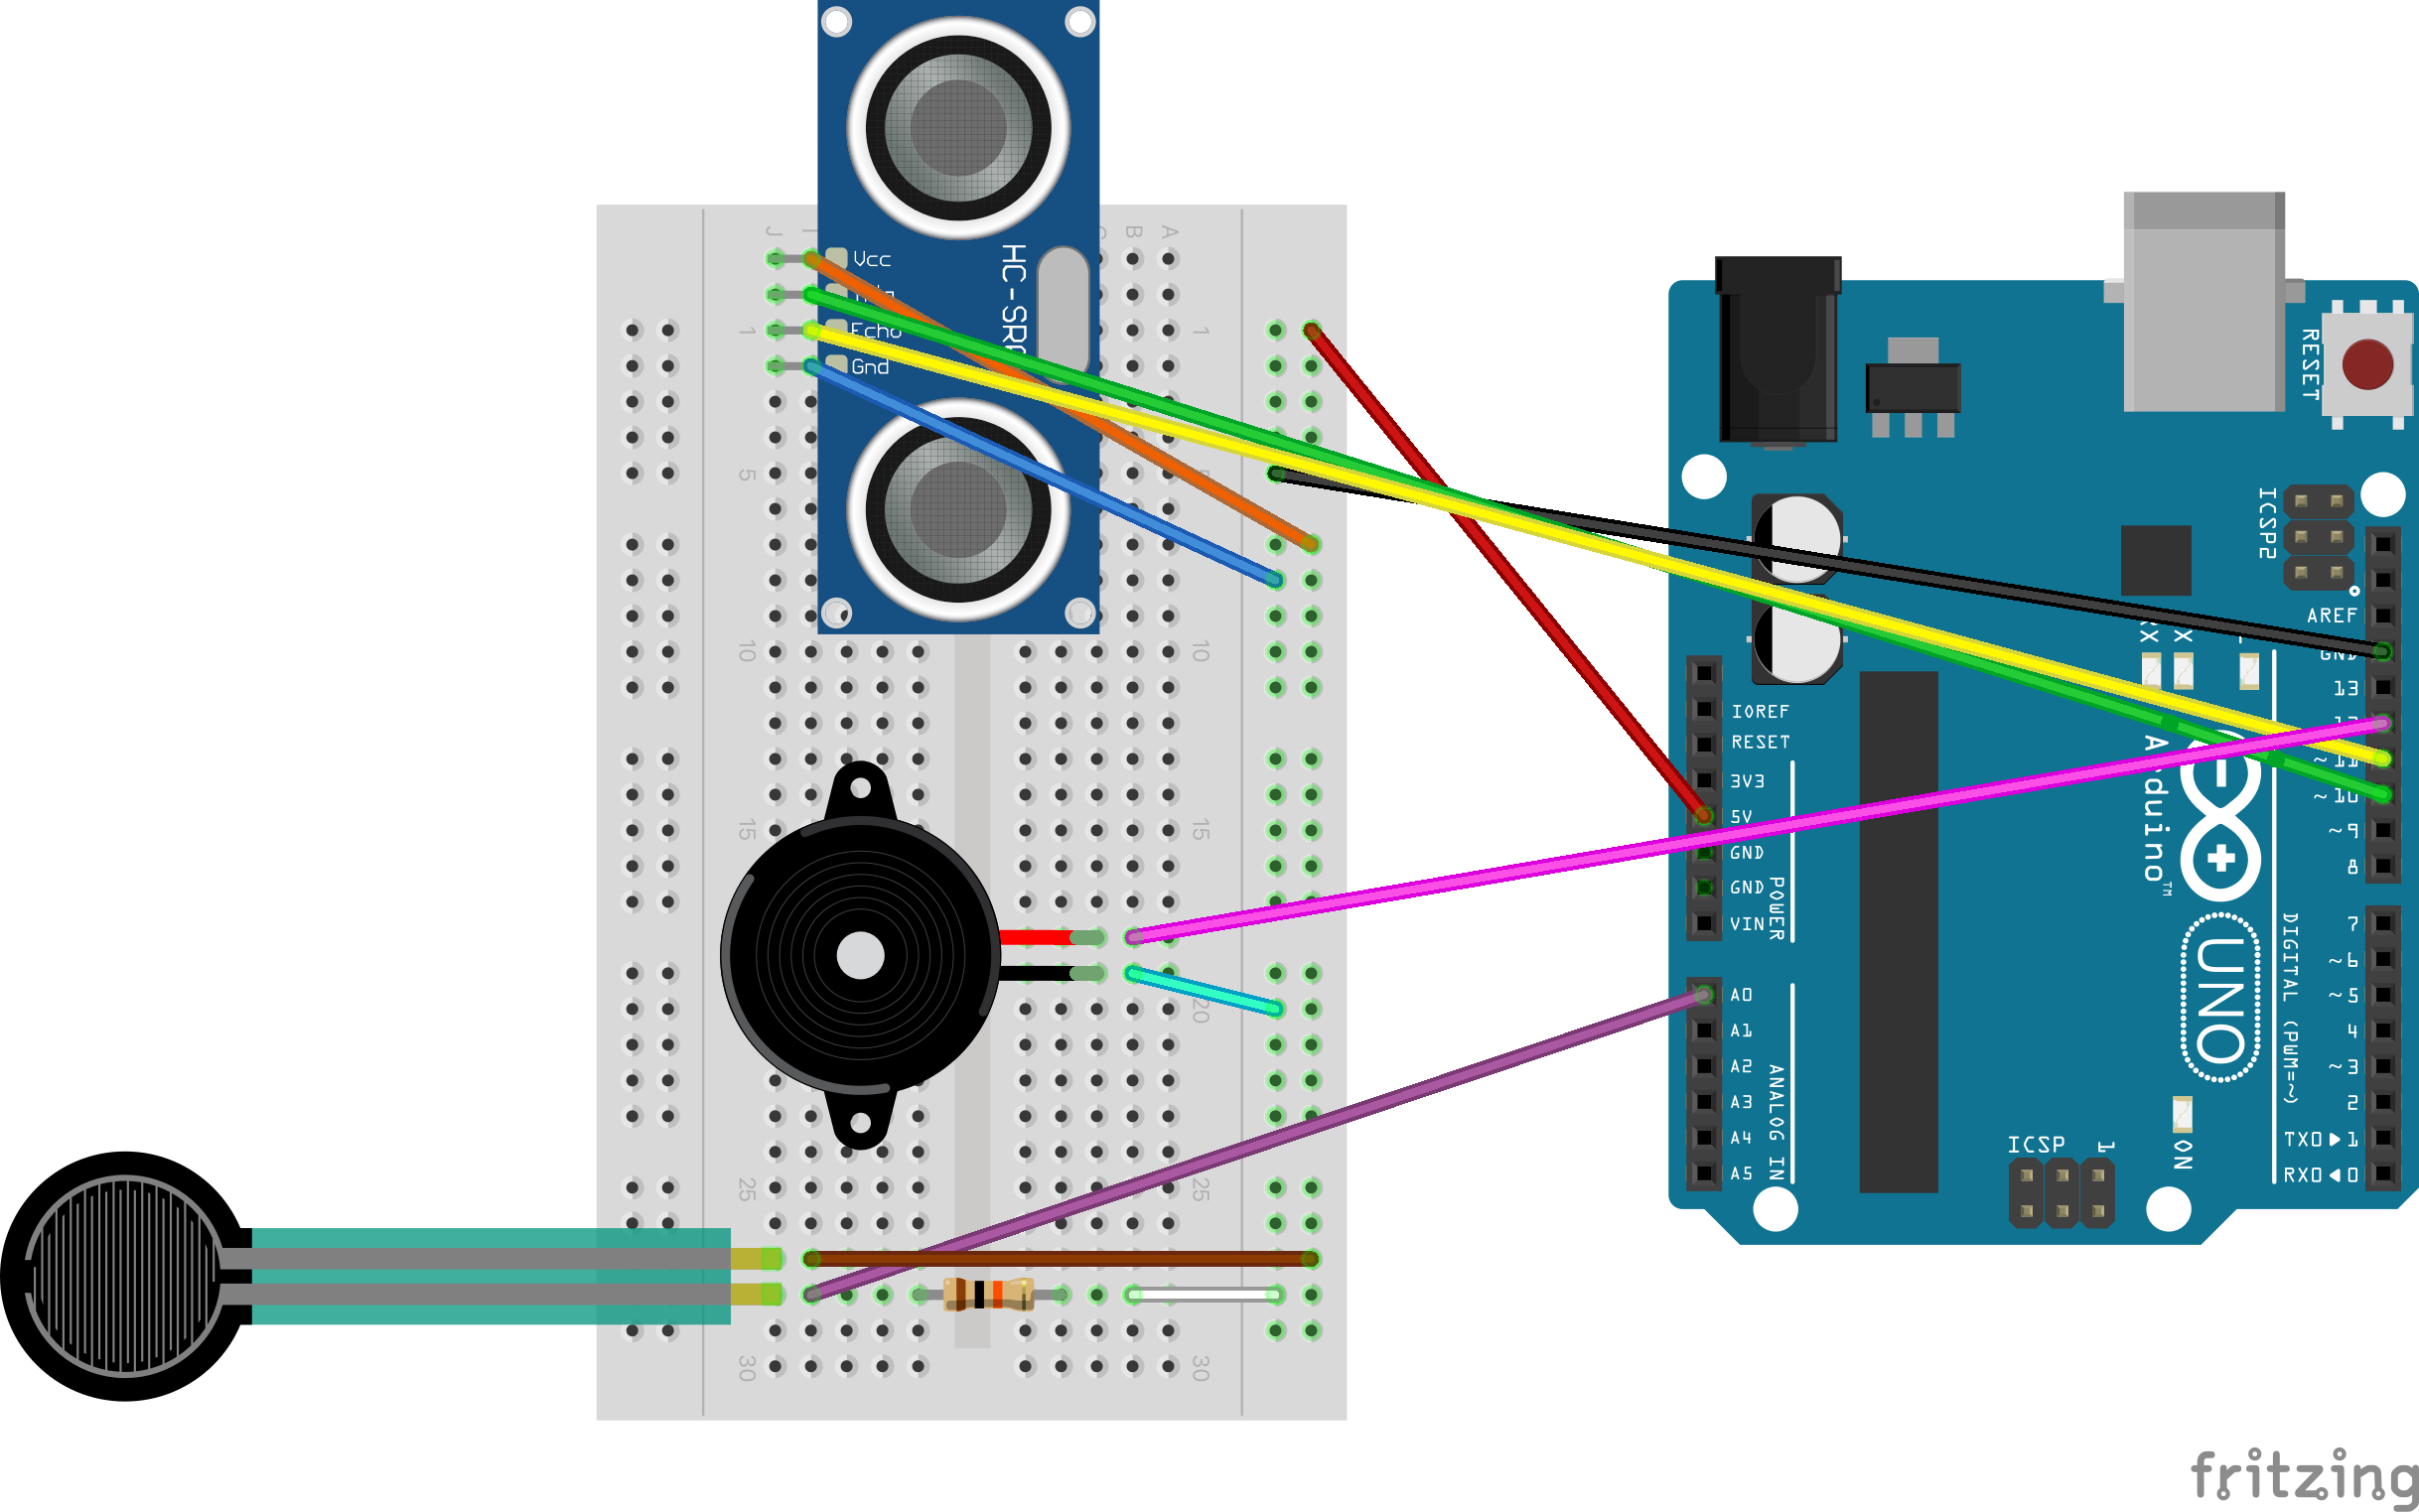
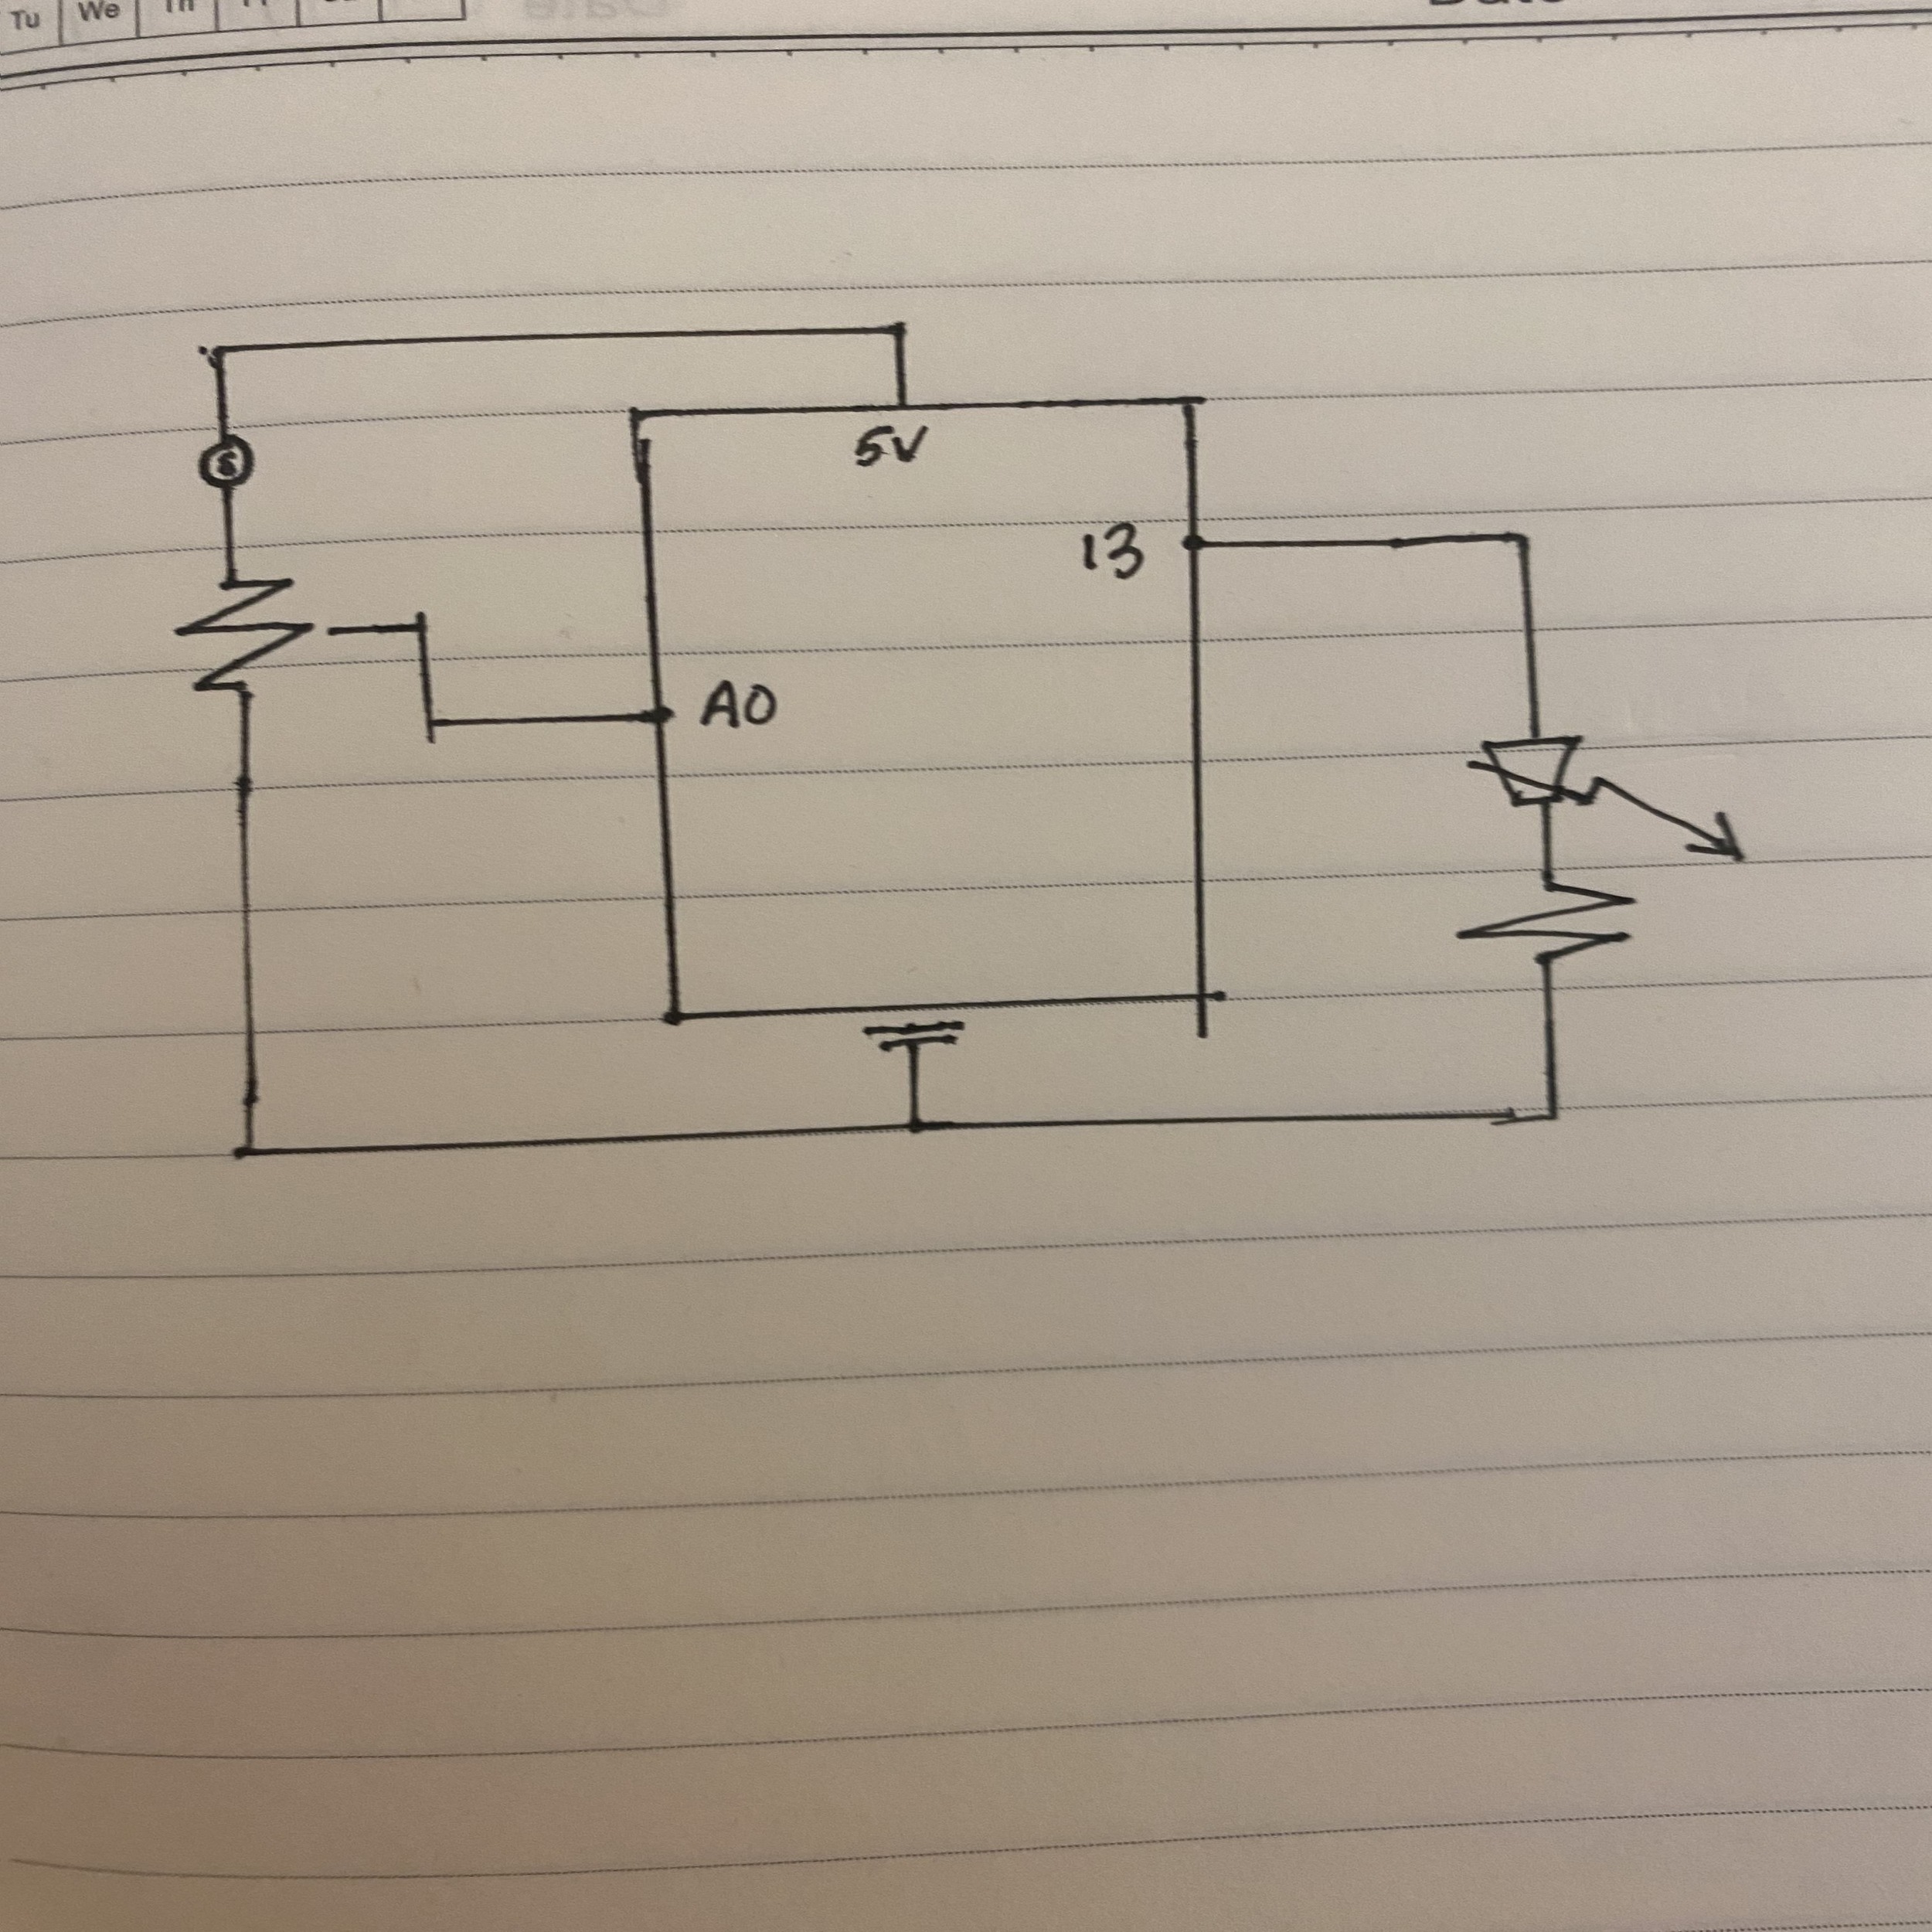
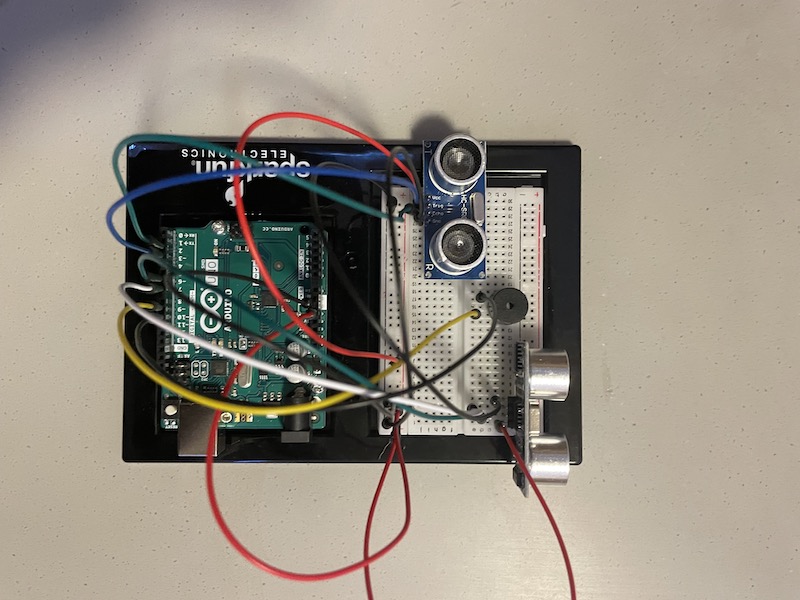
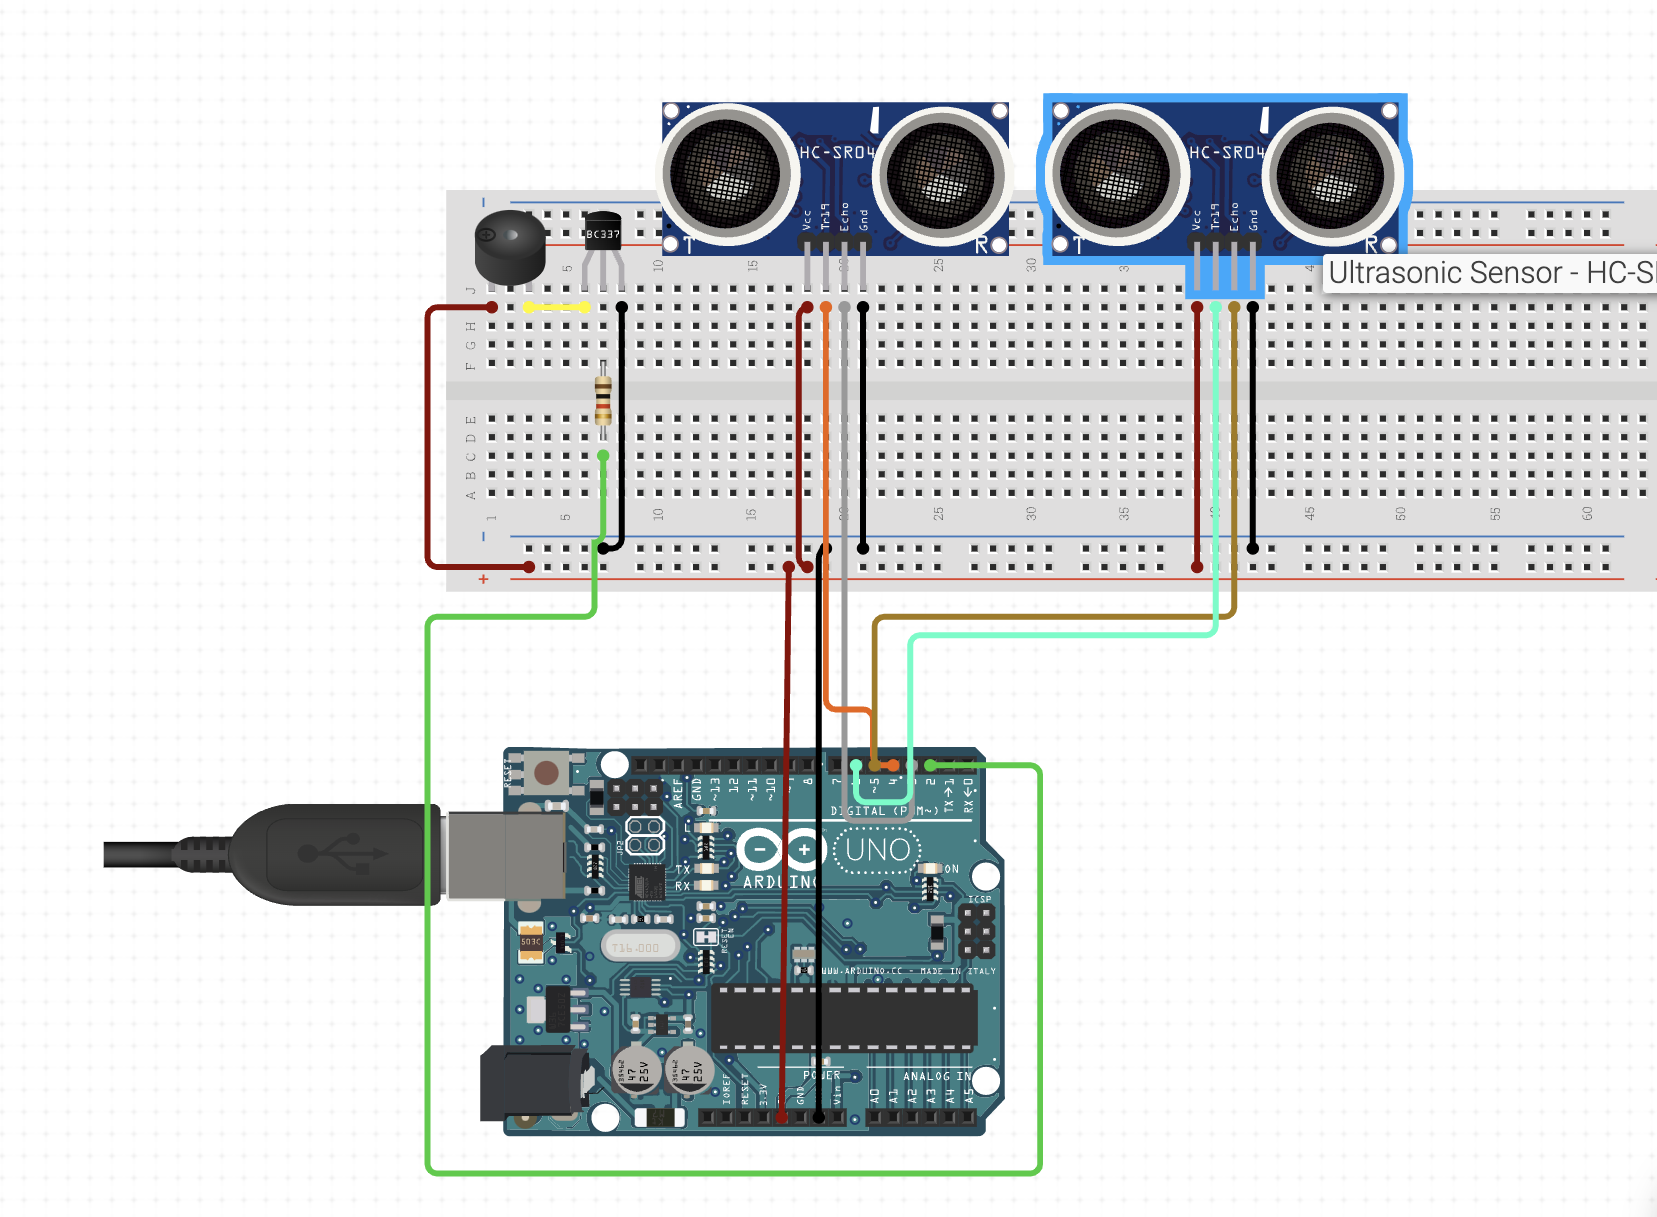
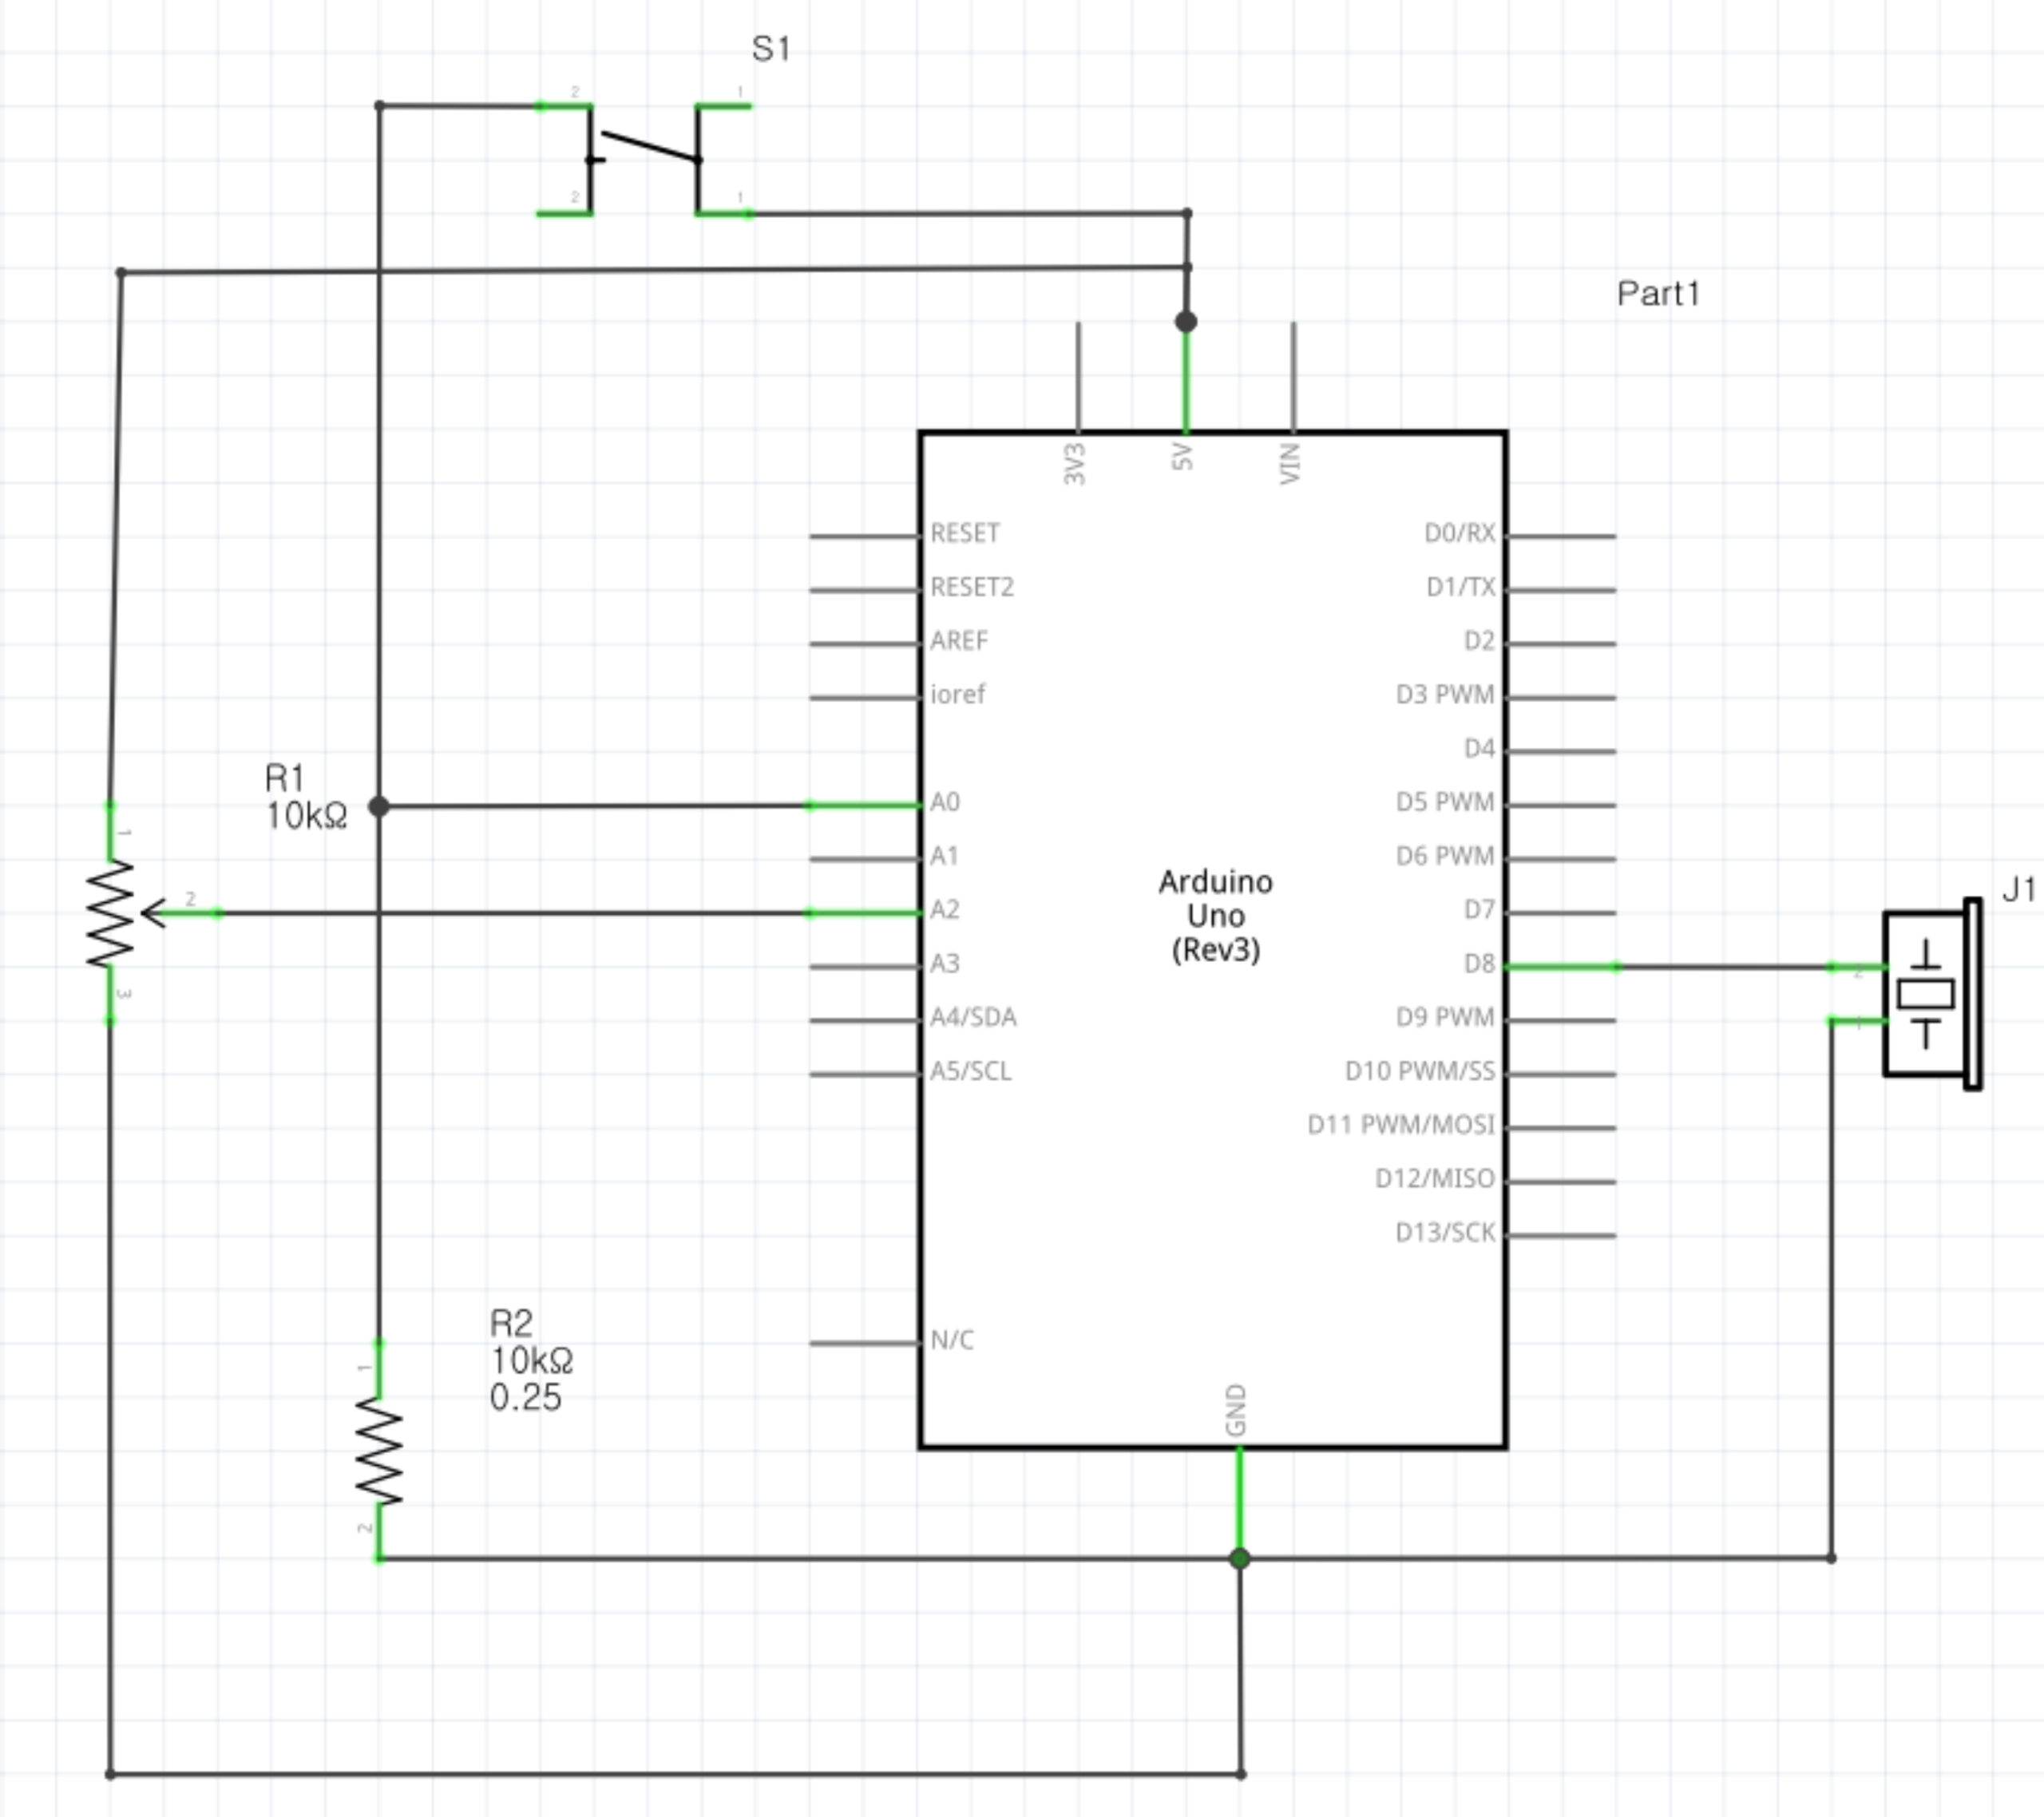
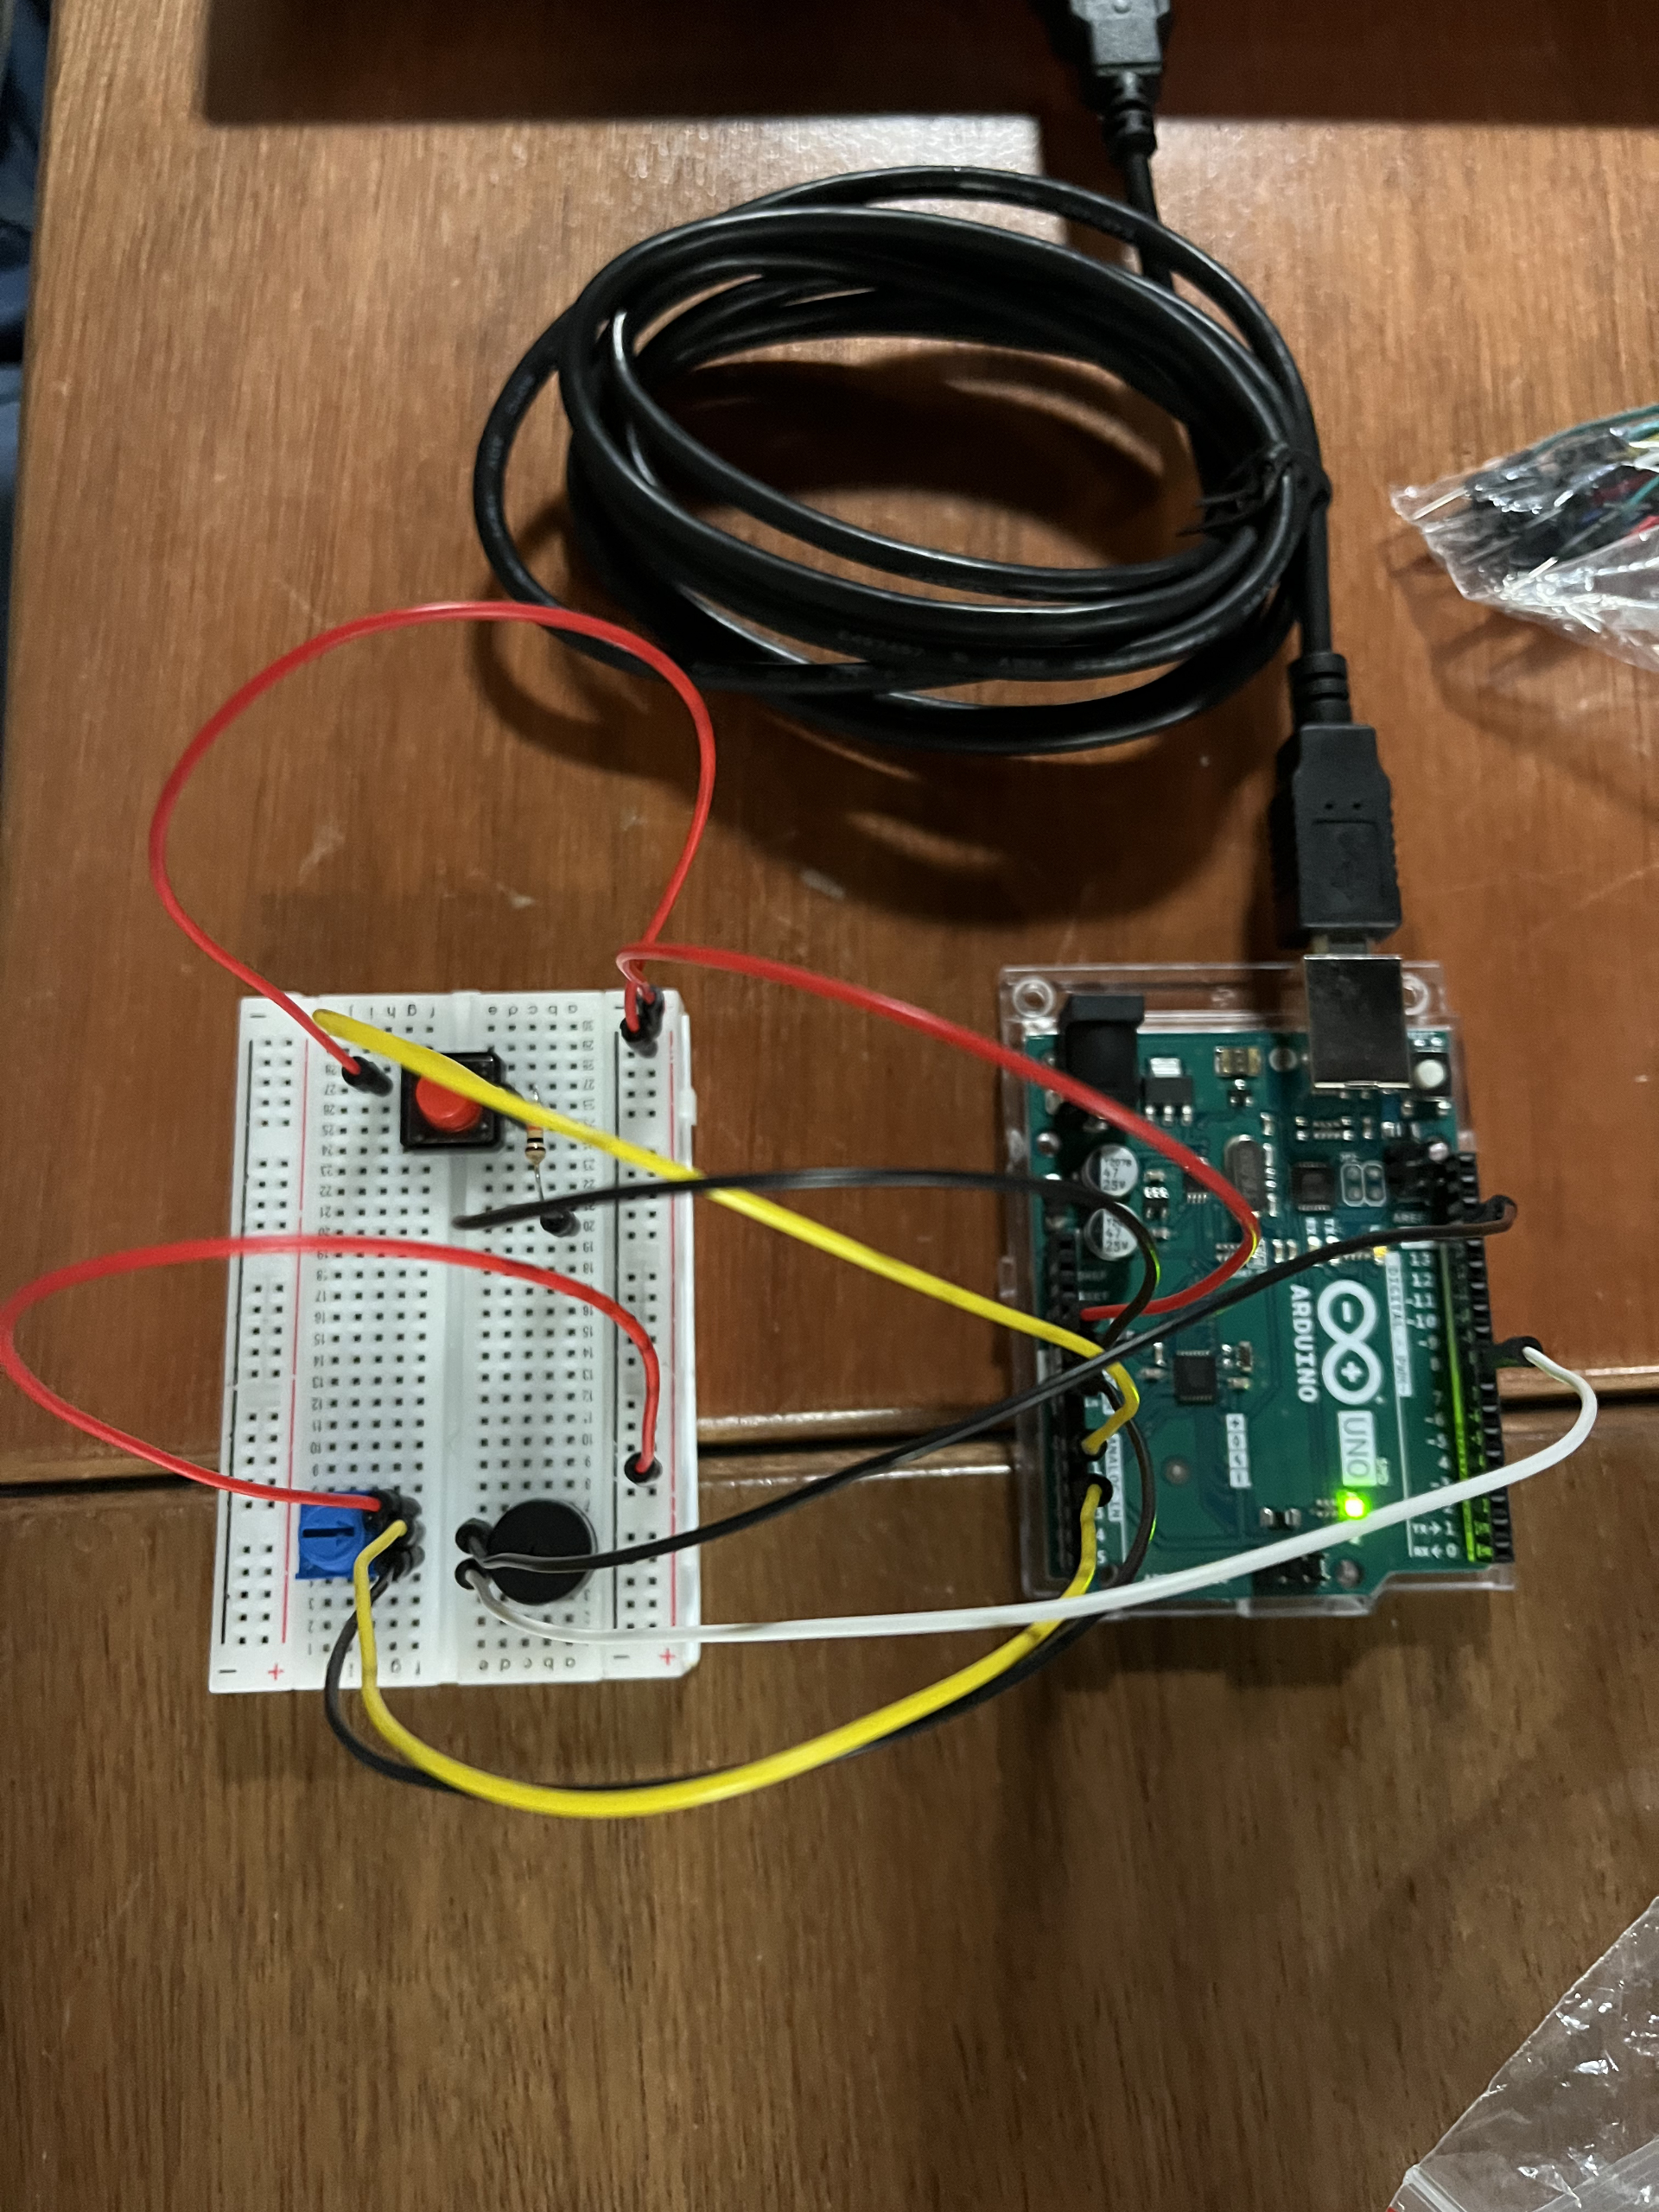
To be frank, we both didn’t really have a mind-blowing, creative inspiration when we got started on this project, which is why we decided to create something that’s simple but also making sure that it will leave enough room for user to be creative with it on our behalf. The idea that we had was to create an instrument that is able to be controlled by the user, such as its beats, pitch, etc., and it consisted of one digital sensor (switch), one analog sensor (potentiometer), and a Piezo speaker, along with the according wires that were needed. Here’s the picture of our initial state that we began with, along with the schematic:

Process/Coding:
While building the circuit itself was fairly easy and efficient since it was just a matter of connecting the wires into the respective places, the coding process was a little bit more complicated as we ran into a few obstacles:
- Initially, the turn-off function of the switch wasn’t working — this was because of the delay time, so we realized that we had to press on the switch for a while instead of just pressing lightly.
- We also had to adjust the tone range of our “instrument” — initially it was around 5000, but we later made it to 2000 so that it doesn’t hurt our ears as much even when we turn it up to the maximum tone.
- Sometimes, the instrument won’t turn off at all even when we pressed down on the switch with enough strength and time; this was due to a small error in the code.
But after a few trials and errors, we were able to fulfill our initial vision for our instrument by controlling both the beat and the pitch either simultaneously or separately.
There was one aspect of the code that was still slightly flawed when we went back to review it, but the final product seemed to work fine despite it so we kept it, which is shown here:
To see the entire code, click here.
Final Product:
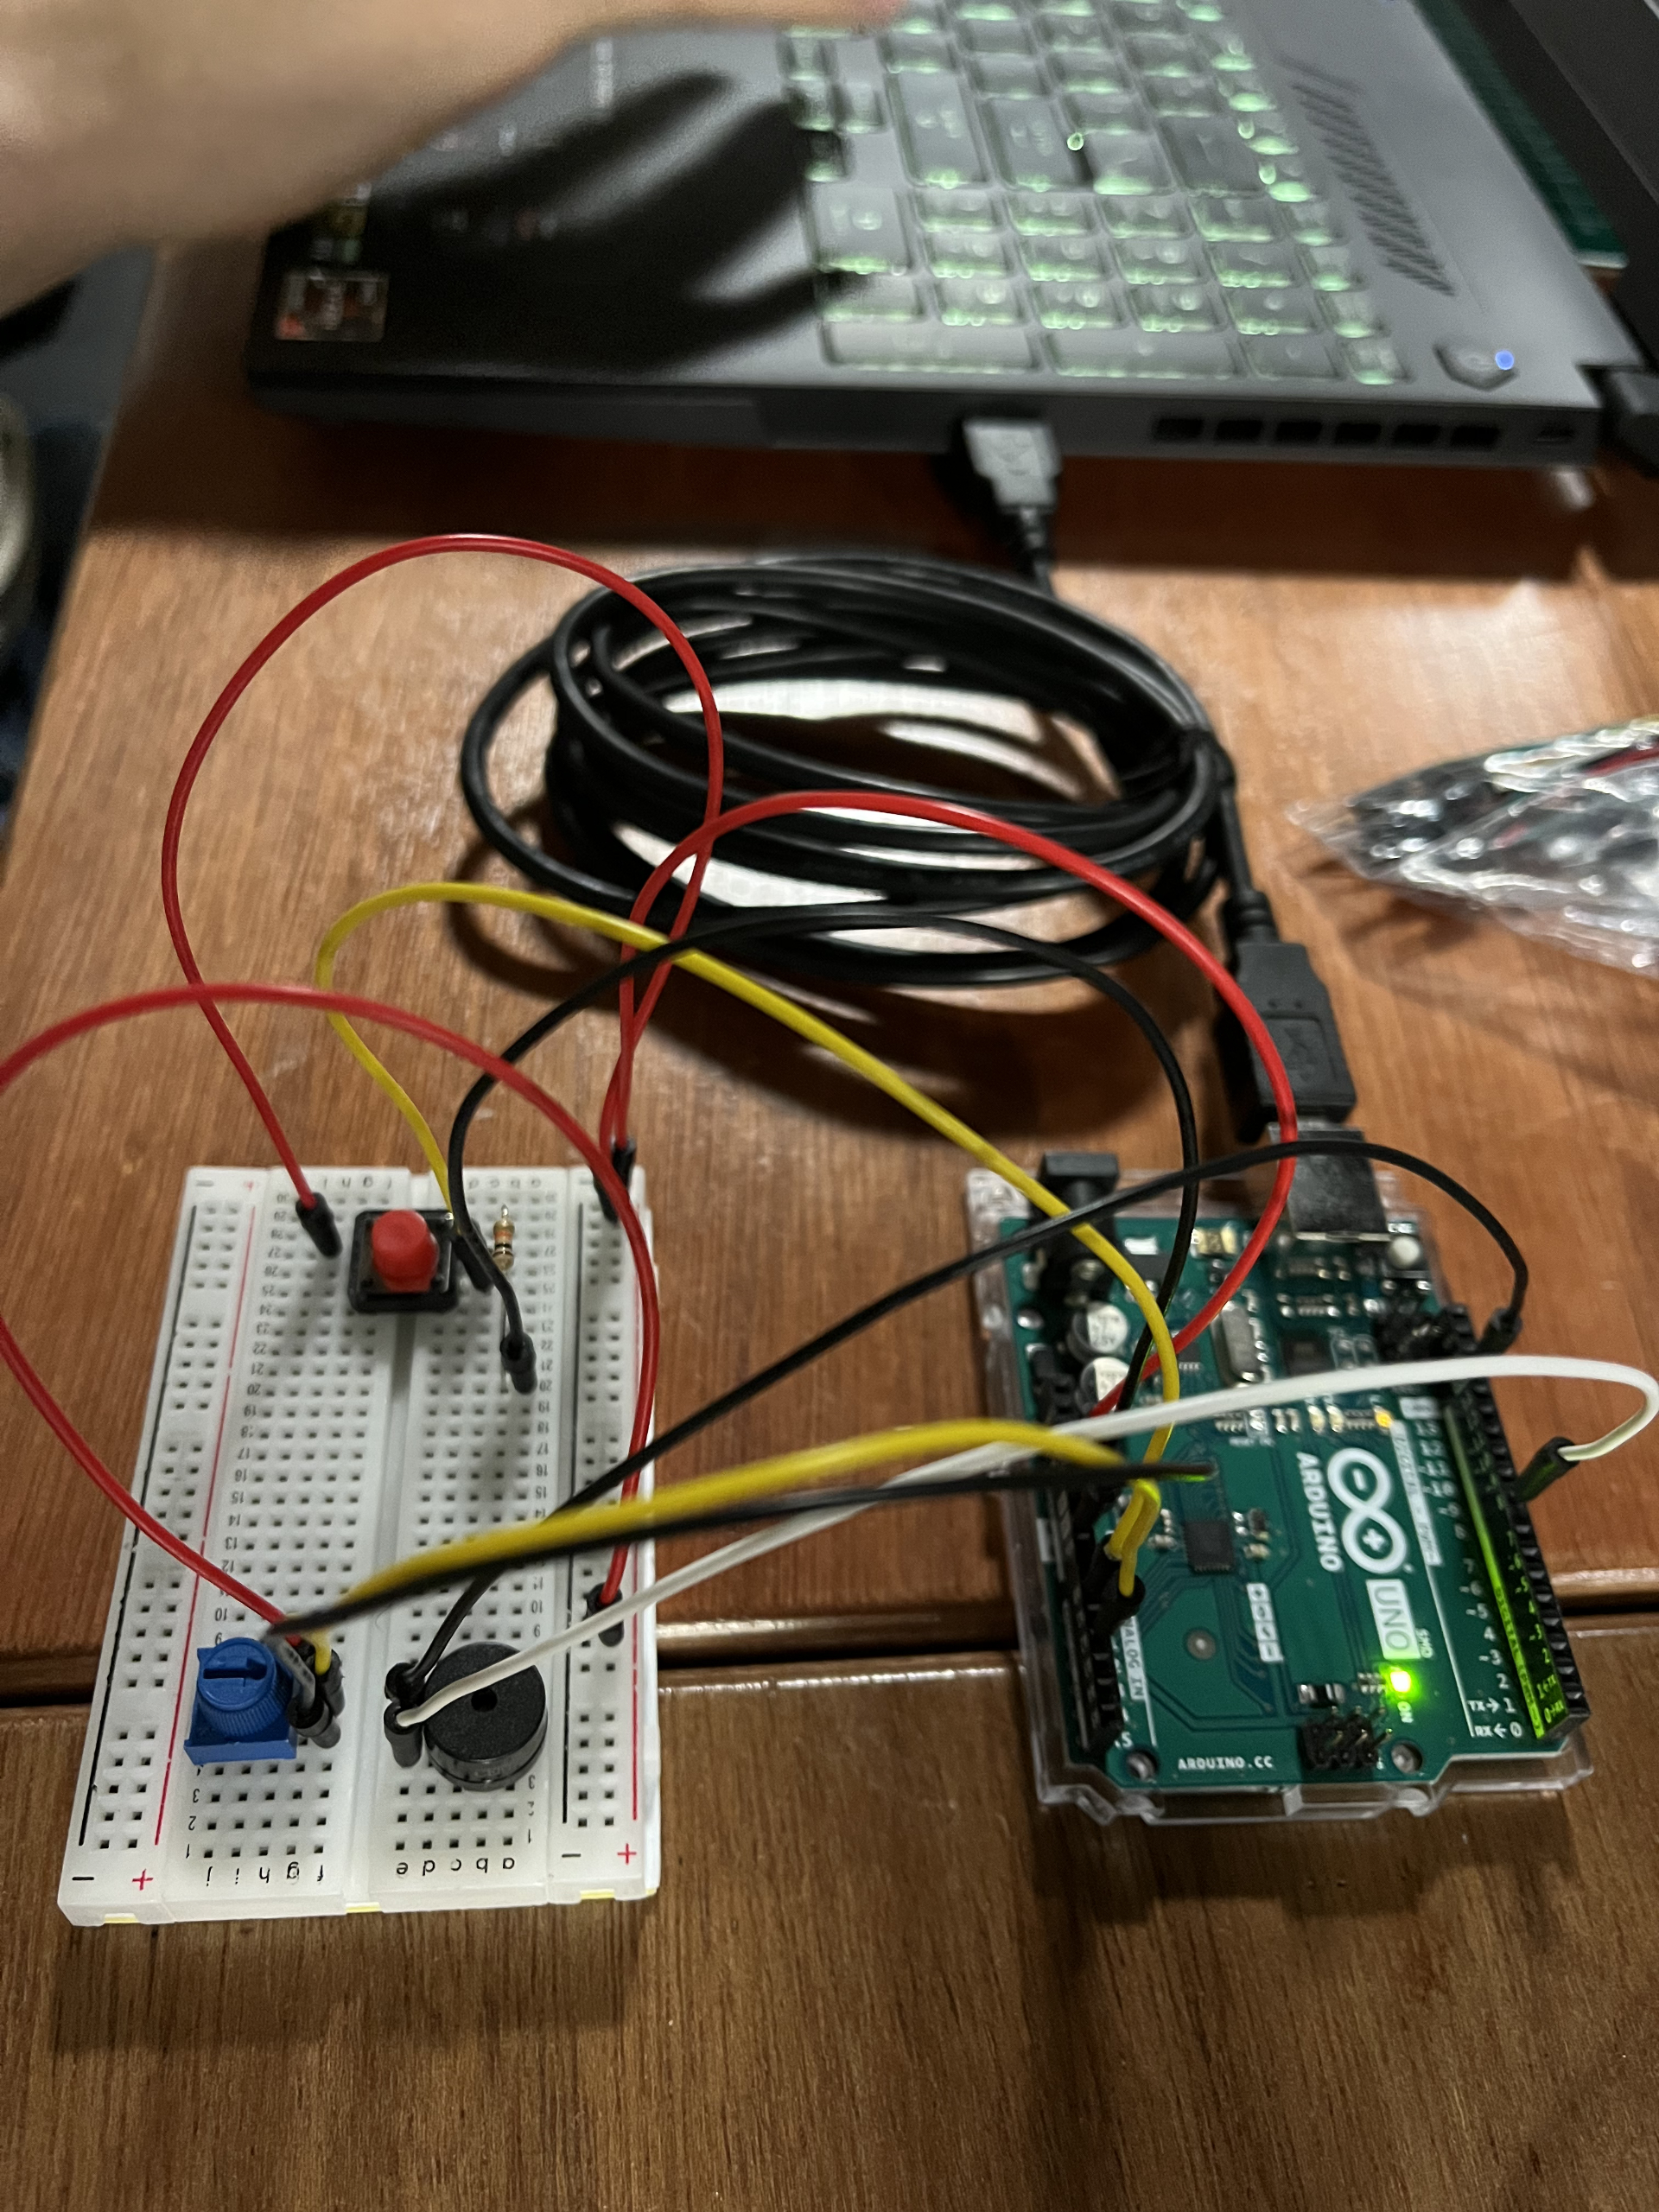
Here’s what the final product looked like:
Here’s a brief instruction on how to use the instrument:
- When you press on the switch button, the Piezo buzzer will start making sounds.
- You can use the potentiometer to control the pitch/tone of the sound and you can use the switch button to control the beat length of each sound. Mind the fact that each time you press on the switch button, the beats will get faster and faster. There will be 5 different beat speed offered.
- By pressing the switch button for the 6th time, you will be able to turn off the instrument completely.
…and here’s the video of it running:
Reflection:
Despite some minor hiccups that we’ve faced during the making process, this project was actually pretty manageable and simpler than we thought it’d be! It was exciting to hear how the sound changed as we adjusted the potentiometer/pressed the switch button to create a melody. Potentially creating a song or playing an already existing one by using this instrument that we made will be really fun, and we’re proud of the final product that we ended up with!