
Concept:
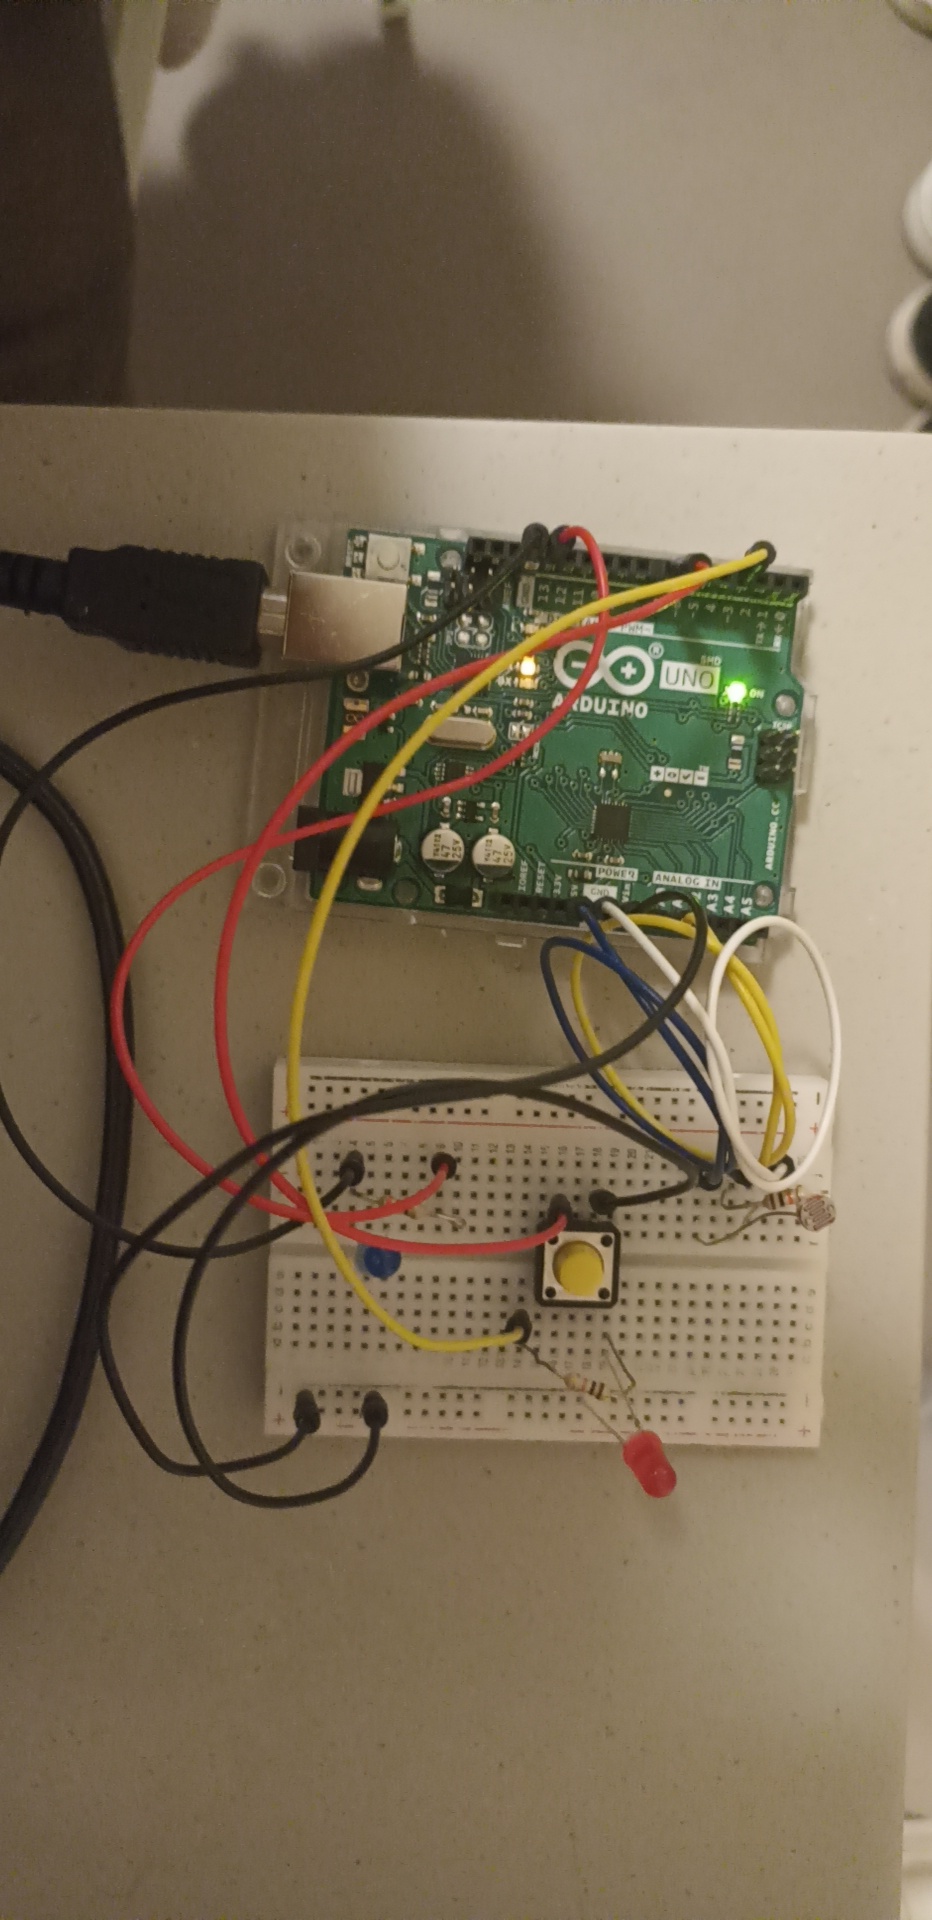
For this assignment, I carried forward my concept from the last project. I wanted to make a circuit that included the use of a photoresistor, primarily because it could help me imitate a street lamp. As a child, I was always fascinated by street lamps and their magical tendency to somehow detect when it was dark and turn on.
The photoresistor could pick up environmental light levels and control one of the LEDs. However, I also wanted to enact the mental image of someone using a physical switch to control the lamps so that was also a conceptual integration
Implementation:
For the circuit for the light-dependant LED, I started put by connecting the LED in a pattern where the LDR would control the amount of voltage provided. My line of thinking was that I could in turn create a code that would give me light-level readings from the LDR and allow me to control the LED in real-time. However, I could not figure out how to make it work so I decided to take inspiration from some sources;
LED Control with LDR (Photoresistor) and Arduino
Turn On & Off of LED with Photoresistor
After implementing the circuit, I was able to calibrate the code and modify it to fit the ambient light levels of my room. It allowed me to create a loop that runs constantly to detect the light and as soon as it drops below a certain level, it allows the LED to receive a charge and emit light.
The following code checks for the light levels and loops constantly and detect any changes in the light levels:
int ResistorStatus = analogRead(LDRPinNum);   //read the status of the LDR value

//check if the LDR status is more than/ equal to 500
//if it is, the LED is HIGH

 if (ResistorStatus <=500) {

  digitalWrite(LEDPinNum, HIGH);               //turns LED on
  Serial.println("It is  dark now, time for light");

 }
else {

  digitalWrite(LEDPinNum, LOW);          //turn LED off
  Serial.println(".............");
}
After this, I wanted to create a circuit and code that would control the button and the attached LED when the LDR circuit wasn’t working appropriately. For that, I used a code that would basically detect the state of the button and control the LED depending on that. if the button was pressed it would turn on and then a reversal statement would reverse the state of the button on the next press and turn the LED off.
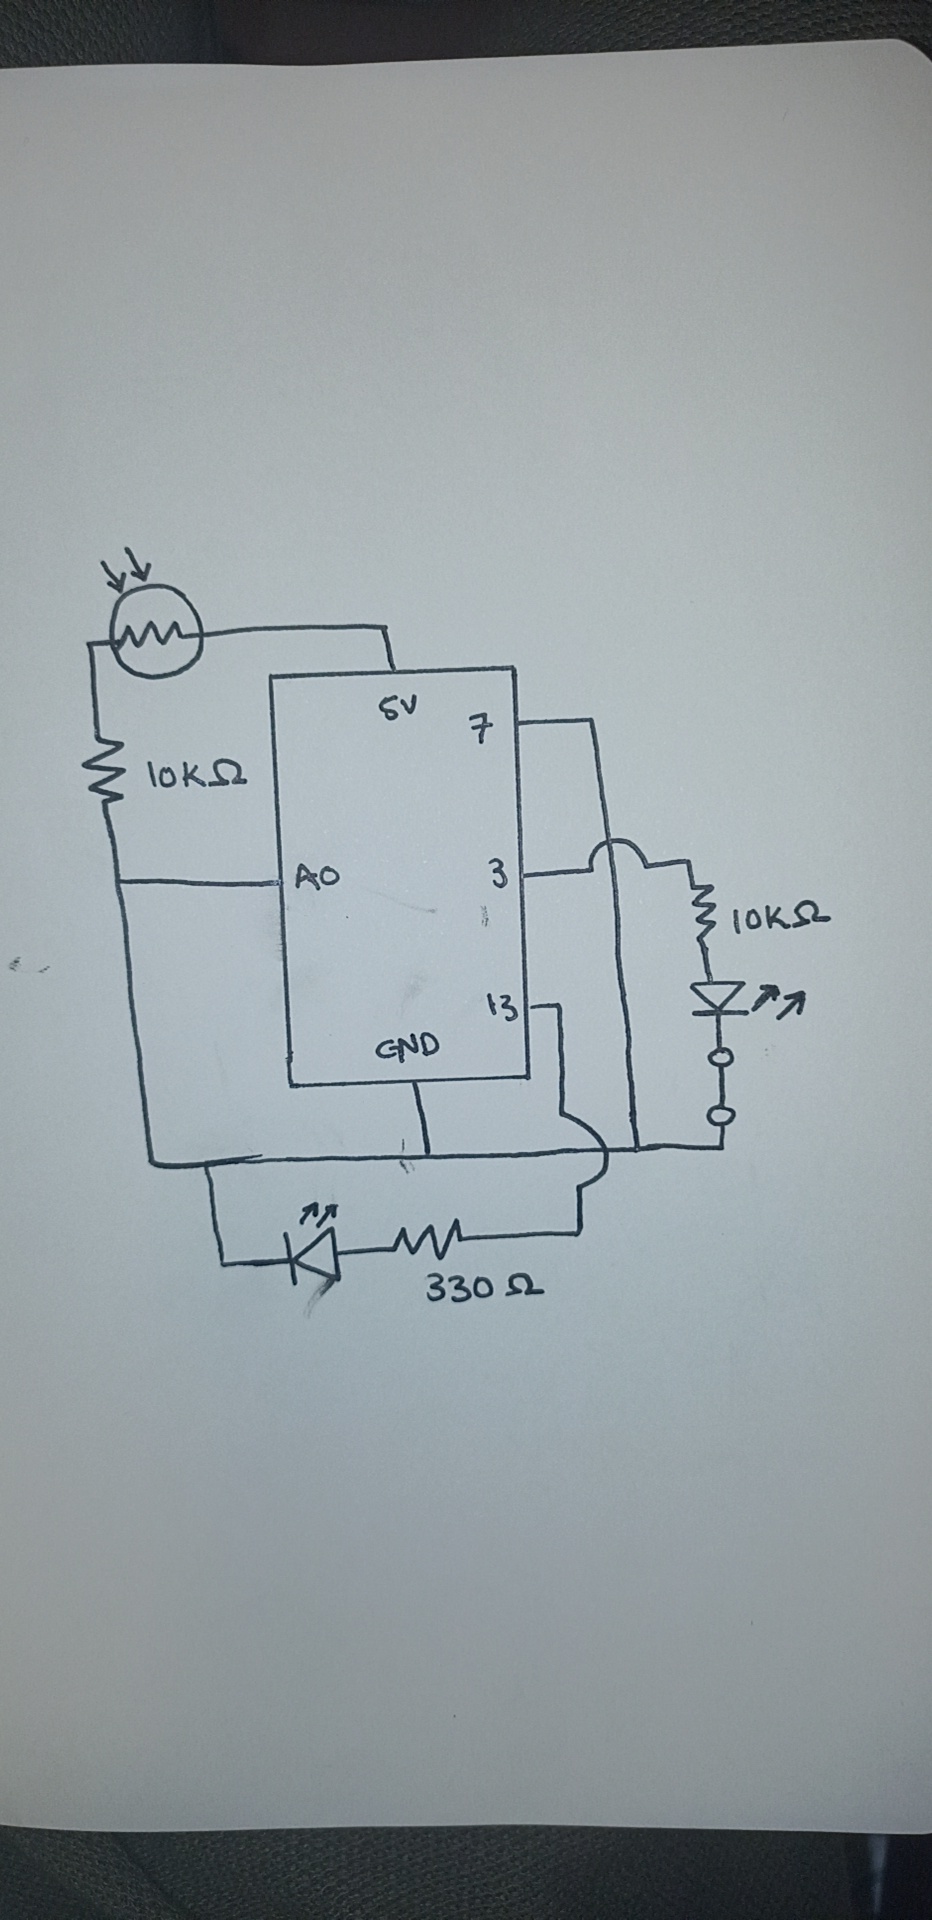
The Diagram for the Circuit:
Video of the Project running:
Light-Sensitive Street Lamp Project Video Link
Reflection:
For this project, the main challenge was learning a seamless way to create unique code in C+. So far I have only dabbled in JS so this is a new experience for me but thankfully there are seemingly infinite resources online available for free for this. Additionally, I was also challenged by the hand-drawn diagram for my circuit. I think it took me way longer than it should have because I was scared of making mistakes but it seemed easier once I actually started making it. also, I’m glad I learned to draw circuits this way because it’s much more intuitive and takes less time than rendering it out on an editor.
also, one of the best things I learned during this exercise was that you can actually do cable management on Arduino! All you have to do is twist them into small loops. et voila! but i still have a ways to go lol