Computer Vision for Artists and Designers: Pedagogic Tools and Techniques for Novice Programmers (Response)

I definitely enjoyed this week’s reading since it brought up numerous critical points and inspiring thoughts from me.

To begin with, I was inspired by the fact that computer vision has detached from an esoteric, high-privileged scheme into something that everyday artists and users can utilize to add to their performances. For instance, I was amazed by “Cheese”, the installation by Christian Moller because it has a very intriguing objective and the process of using computer vision to achieve that is interesting as well. Basically, from what I understood, there is a level-meter that is able to detect the actress’s smile and analyze how happy she seems. Unfortunately, I wish there was a more technical explanation for that since I was very curious on how it exactly worked rather than just what it was.

Other than that, I admired the way that the author attempted to introduce the mechanisms for how each installation worked, along with the fundamentals of computer vision techniques and algorithms at the latter part of the article. Since Paulin and I are also using computer vision in our final project, this article has been so helpful in the sense of what to use, when to use, and how to use. Now that I’ve read the article, maybe we can switch up for our project and even try out Infrared Illumination in a dark panel for our Iron Man glove. It is definitely an option, and we will have to discuss more to find the optimal solution.

Response: “Computer Vision for Artists and Designers”

I thought it was really interesting how  Myron Krueger–who developed Videoplace, one of the first interactive works of art using computer vision– did so because he believed that “the entire human body ought to have a role in our interactions with computers”. There is something very profound about how we’ve come to find both practical and artistic uses for our bodies and their movement in relation to computers. What’s even more fascinating is that Krueger’s work preceded computer mice!

This reading was very helpful, especially as I read it while I was beginning to work on my final project where I’m using computer vision with Processing for the first time. It really helped me narrow down what I wanted my code to do, and since computer vision has many uses and capabilities, I had to think about what would work best with my project’s aim. Since I want to separate the foreground from the background to sense whether the person in the camera’s view is in front of the display or simply walking in the background, brightness thresholding seemed to be the best option. Aaron and I discussed Daniel Shiffman’s OpenKinect library for Processing yesterday, and we looked through the examples to see how I could set a brightness or depth threshold.

We’re done and it’s only Friday???`

Whaddup it’s ya boyz tori and kyle.

We did a few things this weekend.

Code: 

Tori made some words in a document and made them randomize on screen. She also figured out how to call specific characters which will be useful for later. Also, we got a dope hangman sketch. Here’s the code and a video:

Text text = new Text();

PImage hangman;
boolean one = false;
boolean two = false;
boolean three = false;
boolean four = false;


void setup() {
  fullScreen();
}


void draw() {
  background(255);
  hangman = loadImage("hangman.gif");
  image(hangman, 100, 100, 1000, 1000);
  noFill();
  strokeWeight(5);


  if (one == true) {
    ellipse(785, 355, 150, 150);
  }
  if (two == true) {
    line(785, 430, 785, 720);
  }
  if (three == true) {
    line(785, 720, 755, 780);
    line(785, 720, 815, 780);
  }
  if (four == true) {
    line(785, 480, 755, 580);
    line(785, 480, 815, 580);
    
    text("GAME OVER", width/2, height/2);
  }
  
  
    text.run();
  }

  void keyPressed() {


    if (key == '1') {
      one = true;
    }
    if (key == '2') {
      two = true;
    }
    if (key == '3') {
      three = true;
    }
    if (key == '4') {
      four = true;
    }
  }


class Text {

  float data[];
  int number = int(random(0, 6));
  int size = 60;

  Text() {
  }

  void run() {
 
    String[] message = loadStrings("words.txt");
 
 
    data = float(split(message[number], ","));
    fill(0);
    textSize(size);
    text(message[number], width/2 + 400, 700);
    text(message[number].charAt(3), width/2, height/2);    //now how do I get that to respond to an input...I don't think I can rn without connecting it to an input 
    if (keyPressed && (key == ' ')){
      number = int(random(0, 6));
    }
  }
}

I’m controlling the word randomization using the space bar. The hangman appears using the number keys 1-4 (based on # of errors in the future)

Physical Stuff: 

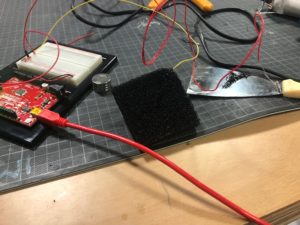
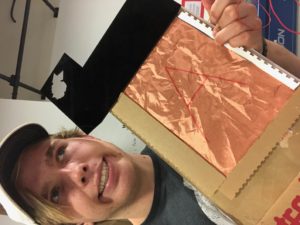
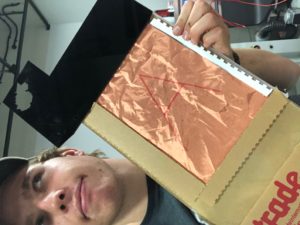
Kyle focused more on the physical stuff this weekend. He prototyped a panel using conductive copper fabric that we got from the Engineering Design Studio and some felt in between the two layers. He then got some poky pins and made a circuit using his arduino. He ran a bunch of trials to make sure that he could complete the circuit multiple times (upwards of 50-100) without the cicuit breaking or wearing down. We expect to complete more of these tests in the future, especially when we recieve the darts, which we ordered today and should be arriving on Monday or Tuesday.

Here is a picture of the failed attempt with conductive foam. We realized that this was not conductive enough to complete the circuit. 

Here’s a video and some pictures of the final prototype panel!

Response

Computer Vision for Artists and Designers: Pedagogic Tools and Techniques for Novice Programmers

This week’s reading introduced us to “computer vision” which is a method that allows computers to make use of digital input e.g. videos and images and make inferences. Since the new wave of digital art has come forth, this method of work allows a lot of room for creativity for artists to work with. The 4 ways mentioned in the article about how computer vision can work is: 1). Detecting motion: movements of people  within the video frame can be detected and quantified using frame differencing. 2). Detecting presence: background subtraction. 3). Detection through brightness thresholding: objects of interest can be distinguished based on their brightness in a threshold value. 4). Simple object tracking: finds the location of the single brightest pixel in every fresh frame of video.

For my final project, this text really encouraged me to not forget about the physical components of my work as I may get too involved in software and forget about the other constraints. The physical aspects of the project are just as important as the software; therefore, it reminded me to work out which software techniques are going to be best compatible with the available physical conditions. As I am hoping to use IR camera and simple object tracking, I learned that “using IR significantly improves the signal-to-noise ratio of video captured in low-light circumstances”, since light is critical, I need to make sure I test my project out beforehand in the location of the exhibition.

Kyle plays with 3D pixels and may or may not have created an image of God

I worked with a friend to learn how to take an image that I had grabbed color values from and pixelated, and make each of the pixels into a 3-dimensional box. we used “brightness” to sense how bright each square was and then correlated that to the magnitude of the pixel’s height.

I also correlated the zoom and overall pixel height to mouse X and mouse Y via a map.

PImage img;
float increment = 5;
float increment2 = 150;

void setup() {
  size(700, 700, P3D);
  imageMode(CENTER);
  img = loadImage("god.jpg");
  rectMode(CENTER);
}

void draw() {
  noStroke();
  background(0);
  translate(50, 50);
  rotateY(0);
  
 // pushStyle();
 // imageMode(CENTER);
 // PImage section= img.get (mouseX,mouseY,50,50);
 // image(section, mouseX,mouseY, 200, 200);
 // //translate(50,50);
  
 //popStyle();

  for (int y = 0; y<img.height; y+= increment) {           
    for (int x = 0; x <img.width; x+= increment) { 
      img.loadPixels();
int index = (x + y * img.width);
      color pix = img.pixels[index];
      fill(pix); 
      float diam = map(brightness(pix), 0, 255, 2, increment2/2);
      pushMatrix();
      translate(x, y, diam);
     float a = map (mouseX, 0,700, 0, 20);
     float b = map (mouseY, 0,700, 0, 20);
      box(increment, increment, map(a, 0, b, 0, increment2));
       
      popMatrix();
    
    }
  }
  
  
 img.updatePixels();
 
}


Class Exercise: Pixels

Using code and some of the new/old functions we learned on Processing, I fiddled around with the values to change the pixels and their movement in a certain image.

PImage img;
int cellSize=2;
int columns, rows;
void setup() {
  size(512, 512, P3D);
  img = loadImage("Elizabeth Taylor.jpeg");
  img.resize(width,height);
  noStroke();
  columns=width/cellSize;
  rows=height/cellSize;
}

void draw() {
  background(255);
  img.loadPixels();
  for (int i=0; i<columns; i++) {
    for (int j=0; j<rows; j++) {
      int x= i*cellSize+cellSize/4;
      int y= j*cellSize+cellSize/2;
      int loc = x+(y*height);
      color pix=img.pixels[loc];
      float z=map(brightness(pix), 10, 255, 0, mouseX);
      float t=map(brightness(pix),255,0,255,mouseY);
      pushMatrix();
      translate(x,y,z);
      fill(pix);
      rectMode(CENTER);
      ellipse(10,0,cellSize,cellSize);
      popMatrix();
    }
  }
  img.updatePixels();
}


Exercise

  • Make it interactive with the mouse, the further you move the mouse in one direction the more it explodes, or goes back to it’s original position
  • Take an image and draw it with rectangles or circles with the proper colors

Hope you all get the reference (watch video with sound) Here is what I got using this code:

PImage dog;
float increment =4;
float incrementZ = 500;

void setup(){
  size(700, 500, P3D);
  dog = loadImage("C:/Users/mab1312/desktop/dog.jpg");
  rectMode(CENTER);
}
void draw(){
  noStroke();
  background(0);
  rotateY(.2);
  for (int y = 0; y<dog.height; y+= increment){
    for (int x = 0; x<dog.width; x+= increment){
      dog.loadPixels();
      int i = (x+y*dog.width);
      color pix = dog.pixels[i];
      fill(pix);
      float d = map(brightness(pix),0,255,2,incrementZ/2);
      pushMatrix();
      translate(x,y,d);
      box(increment, increment, map(mouseX, 0, width, 0, incrementZ));
      popMatrix();
    }
  }
  dog.updatePixels();
  increment = map(mouseY,0,width,4,30);
}

In Class

In class, I played around with the 3D effect on processing. I also worked on a sketch that changed the brightness of the image as it zoomed into the pixels; however, I didn’t save it correctly so can’t find the record :(.

In-Class Exercise on Pixels

<Artistic Collage>

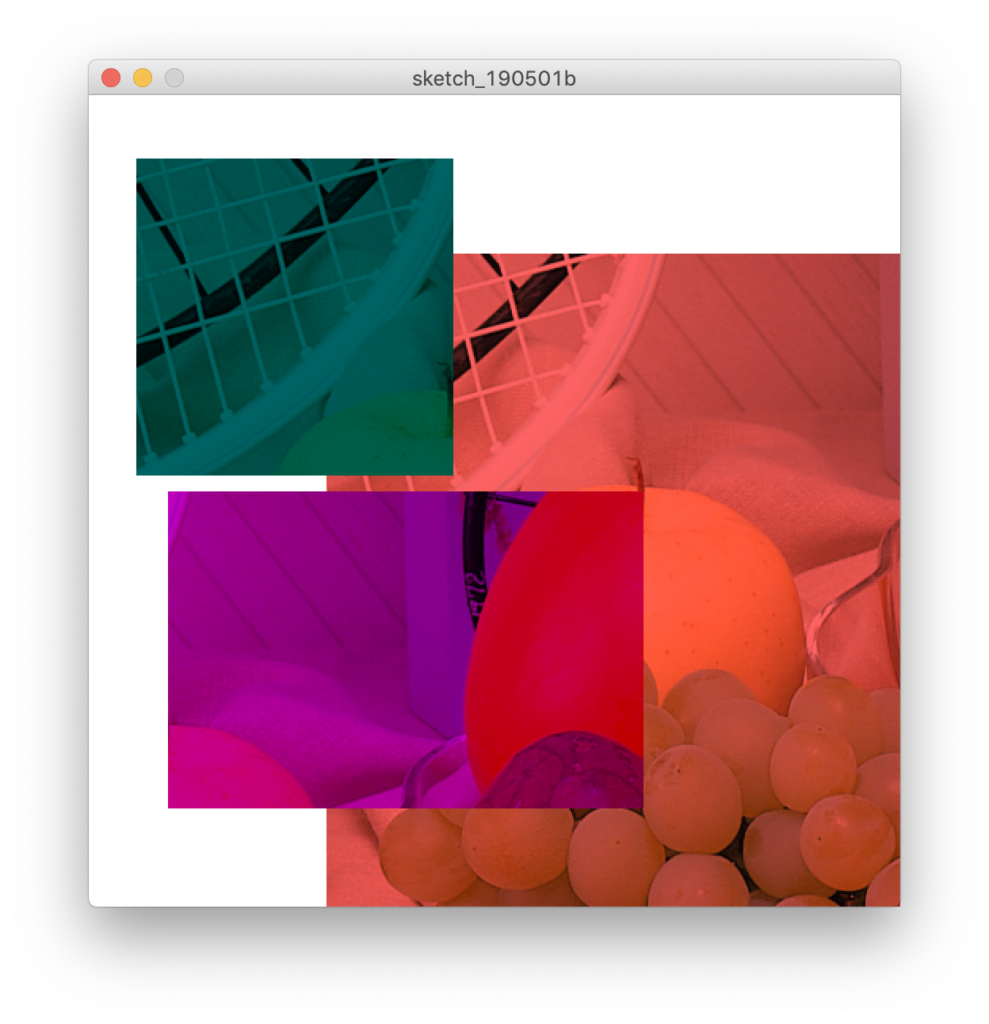
An artistic collage intake on the fruits image using the get() function with different tint appliance at different positions.

Source Code

PImage fruits;

void setup() {
  size(512, 512);
  fruits = loadImage("fruits.png");
}

void draw() {
  noStroke();
  background(255);
  pushStyle();
   tint(255, 100, 100);
   image(fruits, 150, 100);
  popStyle();
  PImage sectionOne = fruits.get(0, 0, 200, 200);
  PImage sectionTwo = fruits.get(200, 0, 300, 200);
  tint(0, 100, 100);
  image(sectionOne, 30, 40);
  tint(200, 0, 200);
  image(sectionTwo, 50, 250);
}


<Playing With Pixels With Two Images>

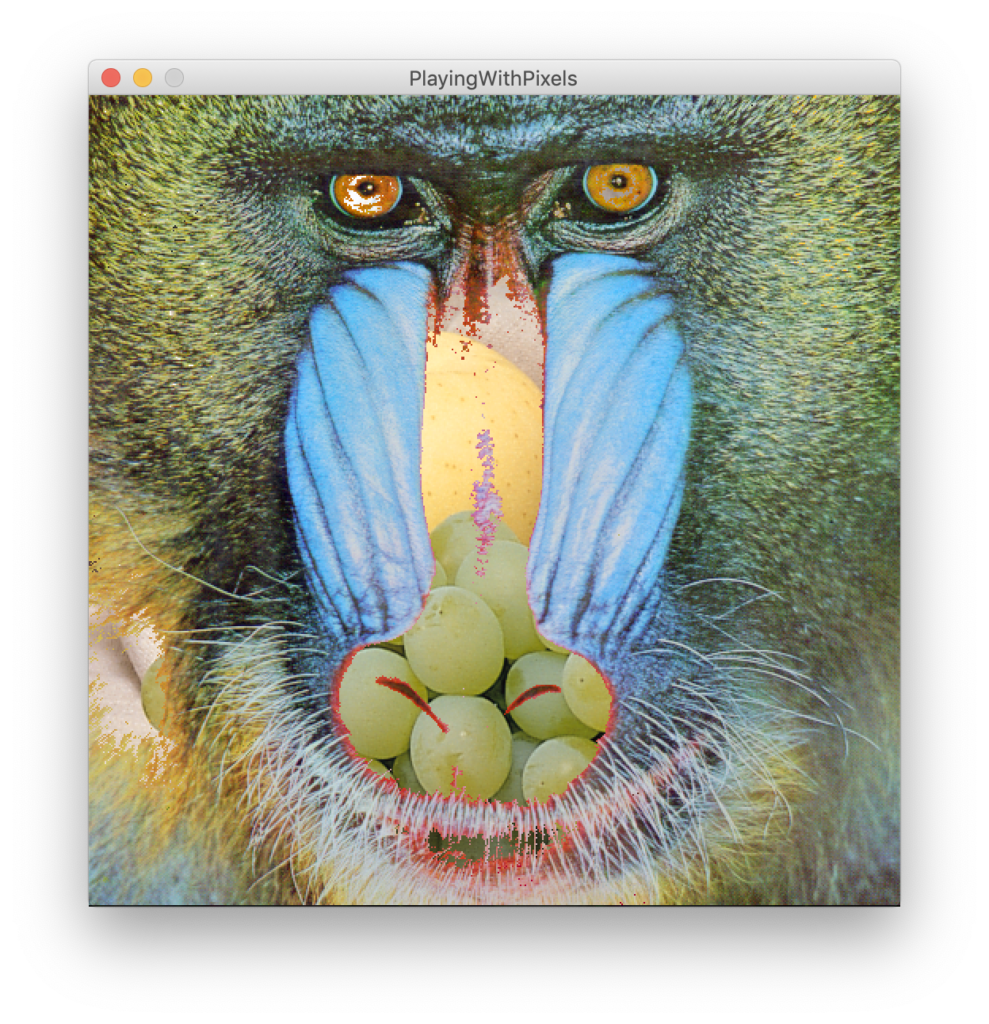
A merge of pixels from the fruits image on to the baboon (or mandril), fixed on the pixels with R-value above 210 – mainly targeting the nose color!

Source Code

PImage baboon;
PImage fruits;

void setup() {
  size(512, 512);
  baboon = loadImage("baboon.png");
  fruits = loadImage("fruits.png");
}

void draw() {
  background(255);
  baboon.loadPixels();
  fruits.loadPixels();
  
  for (int y=0; y<height; y++) {
    for (int x=0; x<width; x++) {
      int index = x + y * width;
      float r = red(baboon.pixels[index]);
      if ( r >= 210 ) {
        baboon.pixels[index] = fruits.pixels[index];
      }
    }
  }
  
   baboon.updatePixels();
   image(baboon, 0, 0);
}


<Exploding Pixels>

Trying to imitate an exploding facebook logo!

Source Code

PImage facebook;
int increment = 20;

void setup() {
  size(512, 512, P3D);
  facebook = loadImage("facebook.png");
}

void draw() {
  noStroke();
  background(0);
  facebook.resize(0, 512);
  facebook.loadPixels();
  
  for (int y=0; y<facebook.height; y+= increment) {
    for (int x=0; x<facebook.width; x+= increment) {
      int index = x + y * facebook.width;
      color pix = facebook.pixels[index];
      fill(pix);
      float z = map(brightness(pix), 0, 255, 0, mouseX);
      pushMatrix();
        translate(x,y,z);
        fill(pix);
        rectMode(CENTER);
        rect(0,0,increment,increment);
      popMatrix();
    }
  }
}