High five machine

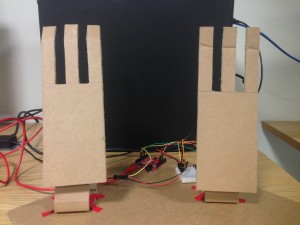
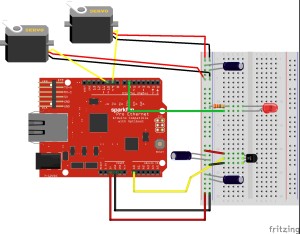
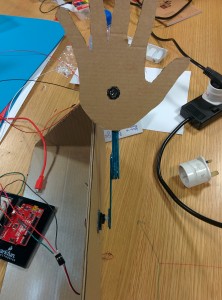
First off, I haven’t been able to get my project to work. The sonar distance sensor isn’t working as I expected, and the servomotor I’m using isn’t powerful enough to reliably throw around some popsicle sticks and cardboard. Regardless, my project was to work as follows. A user is presented with a cardboard cutout of a hand. If she were to pass her hand in front of it, the cardboard hand would rotate forward to give her a high five. Ultimately, this is pretty simple; just a servomotor and a sonar distance sensor. The way I have this setup is such that the sonar sensor is embedded in the cardboard hand. I think (and I could be wrong) that the sonar sensor readings are getting thrown off by the jittering of the servomotor. Even when it’s not being activated, the servo buzzes at a high frequency, which I think messes up the readings from the sonar sensor. Perhaps this was a good opportunity to use an infrared sensor. The end of my post has a few pictures of current (failed) setup.

I think I could make this work by taking some of the following steps. Instead of using a servo motor, I could get my act together and use a step motor with an external power supply. I think that this would prove to be the most difficult solution from a hardware and software perspective, but I think that it would probably result in the best end product. Alternatively, I could slap in a bigger servomotor such that the machine would reliable rotate the hand forward.

IMG_20151013_221532IMG_20151013_221544


Annoying wood/can/glasspeckers

For this assignment I decided to try out the solenoids to produce linear motion. Inspired by woodpeckers (thanks, Shunya), I set out to create a device that would produce ringing noises by hitting objects with the solenoids.

First I had to get acquainted with the solenoids. To use them, I had to hook them up to a transistor in order to not fry my RedBoard. Transistors are annoyingly not labled and their wiring changes between models, so I had to look that up. The TIP120 transistors we have in the lab have, seen from the front and from left to right, the base (signal in), the collector (voltage in) and then the emitter (to ground). That way, I could use the RedBoard’s output to control the transistors, which in turn control the solenoids.

Continue reading “Annoying wood/can/glasspeckers”

Motors and transistors

Turning a transistor on and off is just a matter of applying voltage.

Use the Blink example code to turn the motor on and off every second, or try the Fade example to vary its speed.

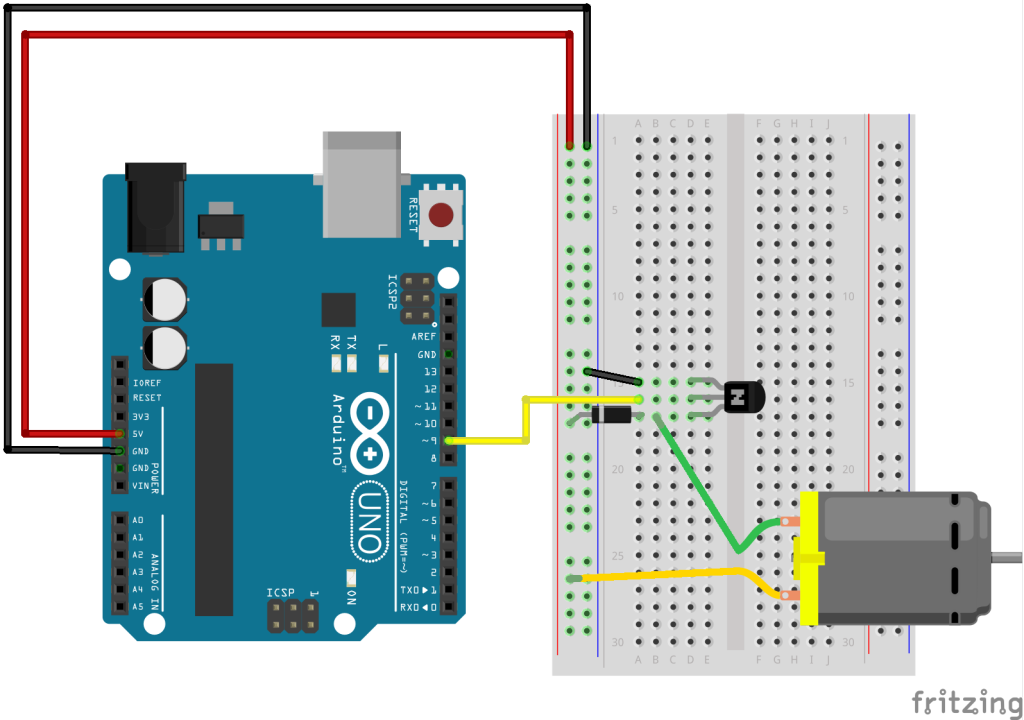
Here’s the wiring for a p2n2222 transistor (the kind you have in your kit) :

p2n2222a_TransistorMotor_bb

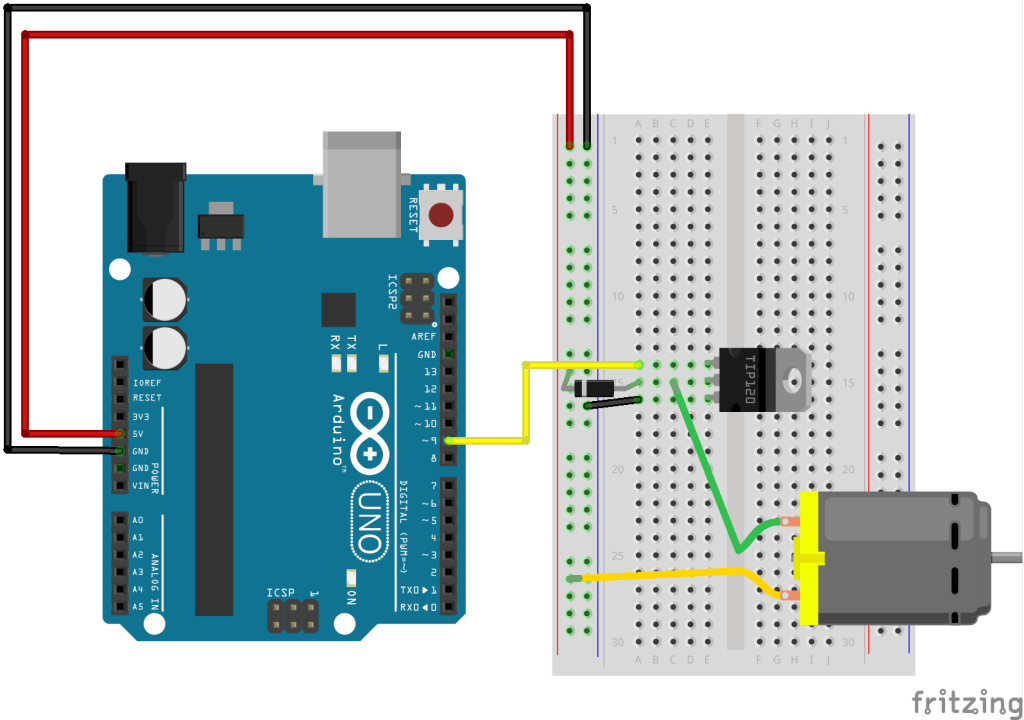
Below is the schematic for a  TIP120 transistor (the kind we have in the lab) :

TIP120_TransistorMotor_bb


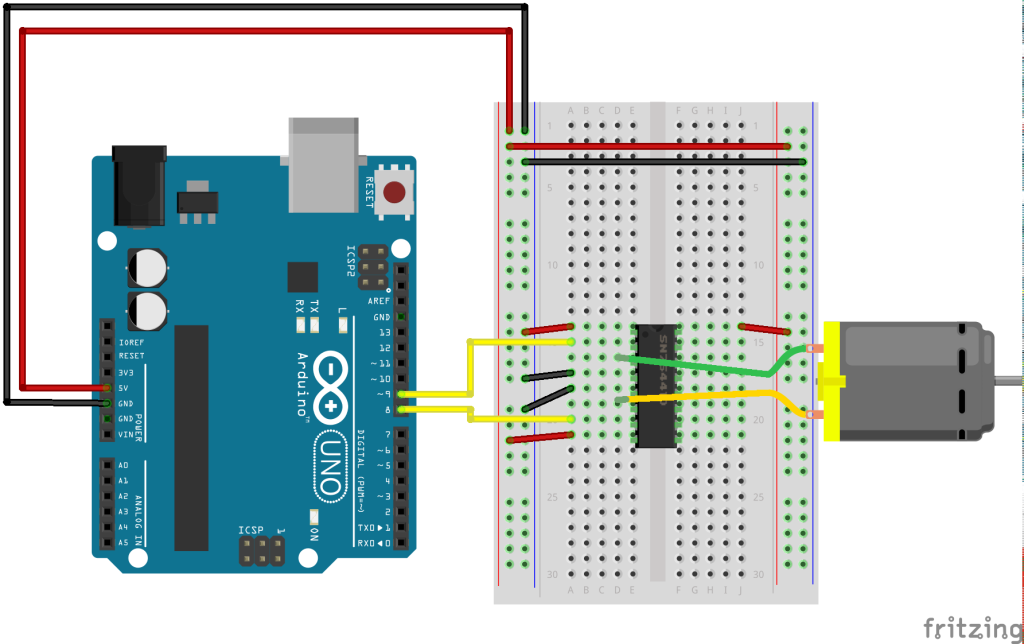
A H-bridge (fund in the lab, not in your kit) allows you to turn the motor in either direction. Use the code below with this schematic :

HBridge_motor_bb

const int motor1Pin = 9;    // H-bridge leg 1 (pin 2, 1A)
const int motor2Pin = 8;    // H-bridge leg 2 (pin 7, 2A)

void setup() {
    // set pins you're using as outputs:
    pinMode(motor1Pin, OUTPUT);
    pinMode(motor2Pin, OUTPUT);
  }

void loop() {
      // turn the motor in one direction:
      digitalWrite(motor1Pin, LOW);   // set leg 1 of the H-bridge low
      digitalWrite(motor2Pin, HIGH);  // set leg 2 of the H-bridge high
      delay(1000); // wait for a second
   
      // stop the motor spinning :
      digitalWrite(motor1Pin, LOW);   // set leg 1 of the H-bridge low
      digitalWrite(motor2Pin, LOW);  // set leg 2 of the H-bridge high
      delay(1000); // wait for a second
 
      // turn the motor in the other direction :
      digitalWrite(motor1Pin, HIGH);   // set leg 1 of the H-bridge low
      digitalWrite(motor2Pin, LOW);  // set leg 2 of the H-bridge high
      delay(1000); // wait for a second

      // stop the motor spinning :
      digitalWrite(motor1Pin, LOW);   // set leg 1 of the H-bridge low
      digitalWrite(motor2Pin, LOW);  // set leg 2 of the H-bridge high
      delay(1000); // wait for a second
  }

For inspiration of different gears and things, look at http://robives.com/mechs and http://robives.com/techniques

The Panda That Wanted To Be A Polar Bear

Allen has a polar and he loves it. He’s been sleeping with the polar bear since forever and his obsession with it is becoming unhealthy. For my stupid pet trick I wanted to find a way for Allen to move on from the polar bear but I couldn’t. I didn’t have the courage to steal the polar bear and transform it into a horrific thing and then give it back to Allen. I just couldn’t do that him. The last time he cried he was three months old and didn’t want to break his little heart.

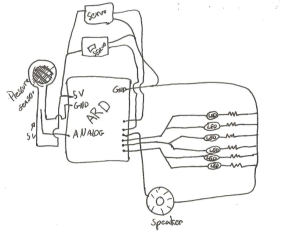
So I stole a panda bear from one of my friends, opened its back, and inserted an Arduino, LEDs, two servos, a speaker, and a pressure sensor.   The idea was to make a panda bear that would always make noise. The user, thinking that it would quiet down by hugging it would hug the bear making its eyes move, turn red, and making the noise even more annoying. With the amount of movement, sound, and light depending on the pressure of the hug.

Screen Shot 2015-10-12 at 2.17.39 PM

Continue reading “The Panda That Wanted To Be A Polar Bear”

heat machine or love-o-meter

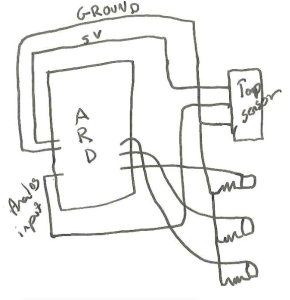
So we had to make a love machine or something similar. I decided to take the traditional path and work on a love-o-meter using a temperature sensor. The sensor, connected to an analog input, gave me numbers that I couldn’t read, so I used arbitrary numbers after playing around and exposing it to several temperatures. Depending on the values received a different number of LEDs would turn on. The hotter the more LEDs turned on.

Here’s how it looked:

Screen Shot 2015-10-12 at 1.48.16 PM


Continue reading “heat machine or love-o-meter”

Spaceship Water Dispenser

I always carry my water bottle around and filling it up with water is super boring, so I decided to add some LEDs to the water dispenser in the IM Lab. Everything is still there, except for the Arduino, so if you want to see it working or make it stay there forever download the code below to an Arduino and fill up your bottle.


The idea:

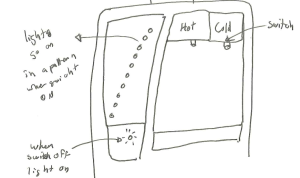
I wanted to have a line of LEDs replicate the idea of water flowing by creating a pattern of LEDs turning on and off. Then I thought of having and LED that would be on whenever the switch was opened.


Screen Shot 2015-10-12 at 1.29.16 PM

Continue reading “Spaceship Water Dispenser”

PEEEWWWWWWW –> The Illusion of Interactivity

I’m really bad at keeping up with my journal but today I got a super friendly reminder from Scott and I decided to add all the posts I was missing 🙂 YAAAYYYY! Thanks Scott!

Screen Shot 2015-10-12 at 1.16.10 PM

So here we go:

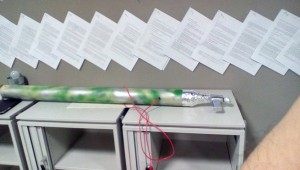
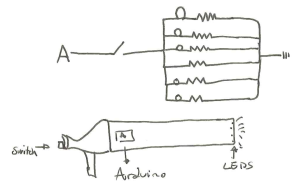
Earlier on the semester I took an invention from the junk shelf, a cardboard tube attached to a horn, and added some LEDs that would only turn on when the user blew the horn. The aim of the exercise was to create a switch that could turn on LEDs without being pressed by the user’s fingers. In my case, I took a normal switch and attached it to the horn so that the user would press it with his/her lips.

thumb

Here’s what the circuit looked like:

Screen Shot 2015-10-12 at 1.24.22 PM

The interesting part about the user experience was the illusion that what turned on the LEDs was the air blowing through the horn and not the lips pressing a switch. This is important in thinking not only how systems work but also how the user perceives they work to focus not only on creating an objects that work in a certain way but experiences that are imagined in a certain way.