
“Design of Everyday Things” presents a compelling exploration of the interdisciplinary nature of design and the challenges involved in creating successful products. For me, it emphasized the importance of considering various perspectives, goals, and priorities from different disciplines, such as marketing, engineering, manufacturing, and customer support. In the modern age, where industries increasingly rely on cross-functional collaboration to innovate and deliver products that meet diverse consumer needs, the point that the text makes shine. In today’s fast-paced market, where competition is fierce, understanding and integrating these varied viewpoints is crucial for achieving market success.
Don Norman highlights the significance of user experience and the formation of conceptual models in product design. He underscores the gap that often exists between the designer’s vision and the user’s perception, emphasizing the critical role of the system image in bridging this divide. In our modern digital landscape, where user-centered design principles are paramount, this notion holds particular relevance.
Norman stated many things which I found relevant to myself. One such idea was that designers will often take shortcuts when something is too complex. This reminded me of myself: I am lazy, and if there is a way to do something quicker without too much of a quality sacrifice, I will do it. Interestingly, I also remembered Japanese web design, and how it differs from Western websites. While her in the West, sites are usually as streamlined as possible, Eastern sites often feel cluttered to me, and present a lot of information all at once.
Category: Spring 2024 – Aya (Section 002)
Assignment 4 (production 4) Word Search
The concept of this assignment is a word search. I was inspired to do this because of how much I help my younger brother with his word search activities at home. So I immediately started working on the idea.
I started y creating a grid and then have randomized letters in the grid. There are three specific words that you need to find: “WOW” “FUN” “CAT”. Obviously there are more extra and bonus words that you will find in the grid. The process was long but this is what I ended up with. Please mouse click on the letter that you want to highlight:
A big part of the code that I am proud, which was the most challenging part is the WordGrid Class that I created to have many different functions.
class WordGrid {


    // Constructor
    constructor(gridSize, cellSize) {
      // Number of cells along one edge of grid
        this.gridSize = gridSize;
      // Size of each cell in pixels
        this.cellSize = cellSize;
        this.words = ['FUN', 'WOW', 'CAT'];
      // Initialize grid layout
        this.grid = this.initGrid();
      // Place words in the grid
        this.placeWords();
      // Fill empty spaces in grid
        this.fillGrid();
    }


    // Initializes grid with empty values.
    initGrid() {
      // Array to hold grid data
        let grid = [];
      // Iterate over each row
        for (let i = 0; i < this.gridSize; i++) {
          // Initialize an empty row
            grid[i] = [];
          // Iterate over each column in row
            for (let j = 0; j < this.gridSize; j++) {
      // Set each cell to default state with no letter and not colored
                grid[i][j] = { letter: '-', colored: false };
            }
        }
        return grid;
    }


    // Places words from 'words' array into grid
    placeWords() {
        // Iterate over each word and its index in the array
        this.words.forEach((word, index) => {
    // Calculate row number based on word's index to space out words
            let row = index * 2;
            // Place each letter of the word into grid.
            for (let i = 0; i < word.length; i++) {
       // Set cell at calculated row and current column to letter of word
                this.grid[row][i] = { letter: word[i], colored: false };
            }
        });
    }


    // Fills empty cells of grid with random letters
    fillGrid() {
        // Iterate over each cell in grid
        for (let i = 0; i < this.gridSize; i++) {
            for (let j = 0; j < this.gridSize; j++) {
                // Check if cell is empty (marked by '-')
                if (this.grid[i][j].letter === '-') {
                    // Set the cell to random letter
                    this.grid[i][j].letter = this.getRandomLetter();
                }
            }
        }
    }


    // Returns random letter from the alphabet
    getRandomLetter() {
      // String containing all letters
        const alphabet = "ABCDEFGHIJKLMNOPQRSTUVWXYZ";
        // Return random letter from alphabet string
        return alphabet[Math.floor(Math.random() * alphabet.length)];
    }

    // Toggles color state of specific cell
    toggleCell(row, col) {
        // Check if cell contains a valid letter (not '-')
        if (this.grid[row][col].letter !== '-') {
            // Toggle 'colored' state of cell
            this.grid[row][col].colored = !this.grid[row][col].colored;
        }
    }


    // Draws grid on screen
    draw() {
        // Iterate over each cell in grid
        for (let i = 0; i < this.gridSize; i++) {
            for (let j = 0; j < this.gridSize; j++) {
              // Set fill color based on cell's 'colored' state
                fill(this.grid[i][j].colored ? 'red' : 255);
                // Draw border around cell
                stroke(0);
                // Draw cell as rectangle
                rect(j * this.cellSize, i * this.cellSize, this.cellSize, this.cellSize);
                // Set fill color for text (letter) to black
                fill(0);
              // Align text to center of cell and draw letter
                textAlign(CENTER, CENTER);
                text(this.grid[i][j].letter, j * this.cellSize + this.cellSize / 2, i * this.cellSize + this.cellSize / 2);
            }
        }
    }
}
initGrid(): This function creates a two-dimensional array with objects that correspond to each cell in order to set up the grid’s basic structure. At first, I had trouble seeing the grid as an arrangement of objects instead than just letters or empty spaces. But structuring every cell as an object with letter and color characteristics made managing the state of the grid more adaptable.
placeWords(): It was difficult to arrange the words on the grid, especially to make sure they matched and did not overlap. Every word in this condensed form is arranged horizontally and separated by rows. This function established the foundation for comprehending how words interact with the grid, even though the true problem lay in creating more sophisticated placement algorithms.
fillGrid(): To finish the setup of a standard word search puzzle, random letters had to be placed into the remaining vacant cells of the grid. This method iterates across the grid, substituting random letters for unassigned cells. It filled all the cells that had “-” instead of letters of the words that we placed in the grid.
getRandomLetter(): This function selects a letter at random from the alphabet. It fills in the blank cells in the grid, completing the word search problem and enabling gameplay. It’s a little but essential component of the code. It works directly with the function before it.
toggleCell(row, col): The requirement for grid interaction made this function difficult to implement. Users can choose which cells to change color by clicking them. The gameplay revolves around this interaction, which lets players highlight words they come across.
draw(): Lastly, the draw method gives the word grid a visual representation of each cell’s condition, bringing it to life. For the game to be visually appealing and functional, it was essential that every cell’s content—a letter—and state—colored or not—be shown clearly.
There are a couple of limitations for my assignment though. First of all the function that places the words in the grid is placing them all horizontally and under each other which makes the word search game less interesting. Moreover, I only chose three words all with three letters only which again makes this game easy and will end fast. From the technical side, you are required to press on every letter of the grid when you find a word which makes it harder and less appealing to play the game. Making it more realistic like striking through the letters when the correct word is found will make the game more realistic and more appealing to the player. However, overall, I think I did a good job with the representation of the grid and creating a separate file for the WordGrid class to make the code more organized.
Week 4 Reading Response: The Psychopathology of Everyday Things
This was a really interesting reading on the principles of good design. A lot of considerations mentioned by Don Norman seem obvious from the user standpoint but are often forgotten by product designers. Norman goes in depth regarding the principles he sees as crucial for designing good products, especially products with increasing functional complexity.
This reading is archaic. After all, the latest technologies mentioned here include new types of landline telephones. But everything mentioned here is relevant in the Web age. Even now, we still see complicated products in the market that need you to search for an instruction manual on Google. And UI/UX is a very important consideration on websites and applications. Yet many websites fail at one or more of Norman’s principles of good design: providing good conceptual models, making things visible, mapping, or feedback. A common example is the fact that a lot of websites that are mapped well on desktops completely lose all sense of mapping on mobile, even when (and sometimes especially when) using the mobile version of the website. An example from the application side of things might be Slack, whose problems range from the fact that separate channels usually do not display notifications if not actively logged into them (at least in my experience), the interface that seems hostile to new users with its multiple menus of options (some of which don’t visibly change anything), and notification “quiet hours” being turned on by default. Many of these problems have slowly been fixed by updates, yet Discord, or even WhatsApp, feels like a better alternative to Slack as a group messaging service. Which is not to say that the other two apps don’t have their own UX problems either.
To close off, the final line about the paradox of technology struck a chord with me. “Added complexity and difficulty cannot be avoided when functions are added, but with clever design, they can be minimized.” This, after all, is the very principle of UX design.
Assignment #4 – Diamond Machine
For this week’s assignment, I decided to stay away from displaying only basic shapes (not really) and instead do something different, as in having no inspiration from other sources. This code could arguably not be considered art in the sense that it does not portray an intriguing, thoughtful work; instead, it is more of an interactive piece of media that showcases data in an interactive way.
Since I also have a passion to try new and challenging ideas, I thought about implementing “gravity” and collisions in a database, and I decided to use the following CSV: Diamond Prices 2022. From this data, I removed some information that was not useful for this canvas. So, once I finish implementing my idea, we have the following canvas that displays falling diamonds, each one with a different price and size:
Even though it appears simple at first hindsight, it was difficult for me to properly implement the collisions without creating a code that could be considered spaghetti. I easily spent around 4–5 hours to make it work properly without the use of external tools for guidance; I generally tried to stay away from them since the idea of having a challenge is compelling for me. Furthermore, since I was also thinking about the user, I tried to implement as much information as possible to help the user understand what was going on “behind the cameras”.
As mentioned, the implementation of the collision was challenging, although I could find a way to implement it with the following code:
//Check for collision.
 for (let i = 0; i < diamonds.length; i++) {
   diamonds[i].display(img);

   if (i > 0) {
     for (let c = diamonds.length - 2; c >= 0; c--) {
       if (
         diamonds[i].x <= diamonds[c].x + diamonds[c].w &&
         diamonds[i].x + diamonds[i].w >= diamonds[c].x
       ) {
         if (diamonds[c].y < diamonds[i].tempy && diamonds[c].landed == 1) {
           diamonds[i].tempy = diamonds[c].y;
         }
       }
     }
     if (diamonds[i].y + diamonds[i].h < diamonds[i].tempy) {
       diamonds[i].applygravity();
     } else {
       diamonds[i].landed = 1;
     }
   } else if (diamonds[i].y + diamonds[i].h < height / 1.005) {
     diamonds[i].applygravity();
   } else {
     diamonds[i].landed = 1;
   }

   //Check if it is safe to release another diamond given the Y and X coordinates.
   if (diamonds[i].y > machine.y + 140) {
     machine.safetorelease = 1;
   } else if (
     machine.x + machine.w - 15 > diamonds[i].x &&
     machine.x + machine.w - 15 < diamonds[i].x + diamonds[i].w &&
     diamonds[i].landed == 1
   ) {
     machine.safetorelease = 0;
   } else {
     machine.safetorelease = 1;
   }
 }

 //Helps to erase the last displayed diamond to avoid overlapping.
 if (machine.safetorelease == 0) {
   diamonds.pop(diamonds.length - 2);
   machine.safetorelease = 1;
 }
This code also helps to avoid overlapping between diamonds, since the machine will not stop releasing diamonds.
In conclusion, I learned a lot with this assignment, and while I wish I could find ways to implement sin()and cos(), this time at least I could do something different and challenging.
Reading Reflection – Week #4
The assigned reading was interesting. It provided information on how design, readability and usability can coexist with each other. This is something that I have been looking into lately, as when you have a mind as a designer, you not only care about how things look, but rather, how can you communicate to the user everything they should know about how to operate a device without the need to go through a manual? In my life, I have been confused over several devices since they operate in strange manners. Take, for example, a modern iPad. Their power button can seem very hidden if the tablet is using a fall protector, and it is frequent that I do not find an obvious quick way to turn it on since I am not familiar with the device, so I just ask the owner to turn it on for me.
The same connection regarding design can be applied to operating systems, for example. If one person uses Windows and makes the switch to Mac, it is very likely that common features will stand out between them, but since both operating systems excel at the act of “show, don’t tell,” their UIs will often communicate to the user what a certain thing will do to avoid confusions in this shift. The same scenario cannot be applied to someone who is new to computers, as it will require more time to get used to them.
Assignment 4 – reading reflection
Diving into “The Design of Everyday Things,” particularly the chapter about the everyday challenges we face with seemingly simple objects, was like turning on a light in a room I didn’t realize was dimly lit. It struck me how something as mundane as a door could become a puzzle. Don Norman eloquently sheds light on this, making me nod in agreement and chuckle at the universal struggle against “Norman doors” – those doors we push when we need to pull and vice versa, named humorously after Norman himself for highlighting these design missteps.
In interactive media, users should grasp not only what they can do within an interactive piece but also have some insight into the cause and effect of their interactions. An interactive narrative created in p5.js, for example, should provide clear feedback in response to user inputs, making the narrative’s branching paths understandable and meaningful. Because a lot of the time when we create an “interactive art”, the interactivity is there and looks amazing, but sometimes confusing or unclear to explore.
Assignment 4 – The Emotion Tree
To make this assignment, I browse the Kaggle for a while to find any suitable data table that can be used for my assignment. I came across a table about emotion of the twitter quotes. The table consists of 6 emotions: sadness, joy, love, angry, fear, surprise.
Since the data has different emotions, I am inspired by the movie Inside Out and assign each emotion with a color. In particular, sadness is blue, joy is yellow, love is pink, angry is red, fear is purple and surprise is green. These colors will be displayed as options for the users to choose what type of quotes they want to read.
Since the initial file consists of different mix of emotions, I organize the file and make it into 5 different files for different emotions. Then I load the emotion tables into the sketch file and continuously display a random text from the file after the MousePressed event. Below is the example code for the first 2 emotions:
function mousePressed() {
  //sadness
  if (dist(mouseX, mouseY, 30, 30) < 50) {
    let stringList = sadness.getColumn('text');
    string = stringList[int(random(stringList.length-1))];
    push();
    translate(width / 2, height);
    background('black');
    fill("white");
    branch(70, 0);
    pop();
  }
  //joy
  else if (dist(mouseX, mouseY, 30, 100) < 50) {
    let stringList = joy.getColumn('text');
    string = stringList[int(random(stringList.length-1))];
    push();
    translate(width / 2, height);
    background('black');
    fill("white");

    branch(70, 1);
    pop();
  }
Furthermore, the colors of the emotions will also be presented as the color of the leaves on the tree. I initially want the leaves on the tree to be responsive to display text after clicking on them. However, it is incredibly difficult because of recursively called translation function. As a result, I can not figure out the position of the leaves to add interactions. I believe that this is not the best way to do for this approach. However, I modify the idea so that the users can still choose the emotions using the circle at the top of the page.
Reflection:
As I said before, I want to add interaction to the leaves of the tree. I added the class for the leaves (Leaf class), but I was successfully implemented that. Furthermore, I wanted to add animation such as leaves falling and changing of night and day.
My sketch:
Reference:
Reading Reflection – Design is difficult
I feel that design is difficult, especially when we are designing for others. Since the product is designed for the users, we have to understand their behavior. Take the example of a door in the reading: The way a hurried person interacts with the door will much different from someone who takes their time to use the door. While the first one needs to prioritize the efficiency of how the door works, the latter can be focused on the creative aspects of it.
Furthermore, it sometimes difficult to be someone’s shoes. Assume that we are designing a product for the public customer. However, because we are the product owner, we understand the product much more than anyone else outside of the product scope. There will be a lot of things that are obvious under our eyes but it serves no meaning in the users’ eyes. That is why Human Centered Design is really important. However, the human here is our application users and not ourselves.
Assignment 4: Cards For Humanity
For this assignment, I wanted to create a generative text output. I was thinking of games that play with words and phrases and I immediately thought of Cards Against Humanity. So I wanted to create a PG version that just uses playful humor and thus called it “Cards For Humanity”:)
The way my game is played is that the user first clicks on the deck of black cards and reads the prompt. Then, they will click on the deck of white cards and read the comical response. They can then click the button below to try multiple rounds. It is based on the party game below: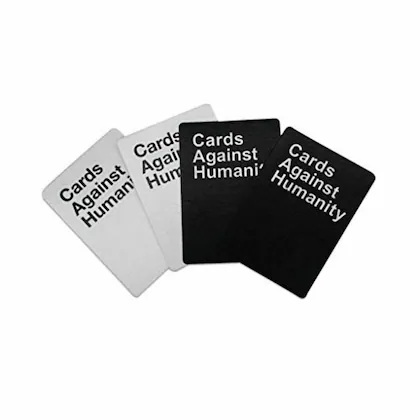
The part of my code that I want to highlight shows how I fit the varying text within the card. Since I didn’t want to limit the length of the text or the size of the font, I could only make the text fit by separating it into different lines. Words are added to the same line until it exceeds the max length.
function drawSelectedCard(x, y, cardText, isBlack) {
  fill(isBlack ? 0 : 255); //checks if card is from black deck and assigns color
  rect(x, y, cardWidth, cardHeight, 10);

  fill(isBlack ? 255 : 0); //text color opposite to card

  // Split the card text into lines to fit within the card
  let lines = splitLines(cardText, 70); //Maximum characters per line set to 70

  // Display each line of text within the card
  for (let i = 0; i < lines.length; i++) {
    text(lines[i], x + cardWidth / 2, y + cardHeight / 2 - (lines.length - 1) * 10 + i * 20); //vertical centering
  }
}

function splitLines(text, maxLength) {
  let words = text.split(' '); //split text into array of words
  let lines = [];
  let currentLine = '';

  for (let i = 0; i < words.length; i++) {
    if (textWidth(currentLine + words[i]) <= maxLength) { //checks if adding the current word to the current line exceeds the maximum length
      currentLine += words[i] + ' '; }
    else {
      //if the max length is exceeded, push the current line to the array and start a new line
      lines.push(currentLine);
      currentLine = words[i] + ' ';
    }
  }

  lines.push(currentLine); //push the last line to the array
  return lines;
}
Overall, I am happy with the output. I would like to work further on this by adding more amusing prompts and responses. I would also like to improve the game by letting the user choose the best response from their set of already-selected white cards, like the actual game. Lastly, I could organize my code better by using OOP and making the cards objects.
Assignment #4 – Code – ☆Meticulous Misleading☆
When we learned how to do data visualization, I immediately knew that this is what I wanted to do for this assignment. I find data very interesting, but probably not for the reasons you think. Ever since I am little, my dad tells me to think about and interpret data critically. In fact, data is very nuanced in the media. In many aspects of journalism, digital or not, the data may be honest. However, it is not about the data itself. It is about how it is presented.
I remember one instance two years ago: my dad showed me a two-sided graph comparing deaths due to two different factors over time (I can’t remember what the factors were, nor can I find the picture unfortunately). At first glance, the two graphs seemed pretty similar. But after looking closely, the x-axis for factor A went from 0 to 10, whereas the x-axis for factor B went from 0 to 100. Therefore, the visual representation was very misleading. So, data is in fact about how it is presented, and often, it will be presented in a way that favors the author’s argument despite it being deceitful – whether that be by withdrawing or skewing information
For this assignment, then, I wanted to visualize data in a way that would say ABSOLUTELY NOTHING to the reader. I just wanted to make a sort of artwork with it to prove my point. I searched for “art” on Kaggle, and found a sheet containing the artists whose works are featured in the MoMA collection. Here is the link to the file: https://www.kaggle.com/datasets/momanyc/museum-collection
And here is my sketch:
The data I first wanted to visualize was the gender of the artists, in order to create some sort of visual comparison between the number of male and female artists featured in the collection. For that, I mapped the birth and death years to the canvas, which I then used to represent circleX and circleY respectively (I ended up switching from circles to points, so I just used circleX and circleY as the coordinates for the latter). I then used an if else function to attribute the colors green to female artists and orange to male artists.
Then, I started working on turning the visualization into an inaccurate/incomplete one:
- I changed the mapping to include birth years only after 1850, although some were born between 1730 and then. Similarly, I only included the artists who died after 1900, though some died between 1795 and then.
- I added 50 to both the width and the height in the mapping in order to “enlarge” the position of the sketch.
- I added a random component to circleX and circleY, which slightly randomized the position of each point, making it dynamic.
- I used the sin function to randomize the size of each point. Some are therefore bigger, and some are smaller, creating some sort of “illusion” when it comes to the data.
- I animated the background to transition from orange to green to black continuously. This way, you sometimes see all the points, sometimes only the green ones, and sometimes only the orange ones. It all depends then on at which point of the sketch you look, and you will see different things.
- Finally, I set the alpha of the background to 70 in order to have a trail. This gives the impression of having more points than there actually are.
For parts 5 and 6, here is the code:
//   mapping the sin value to different colors
let sinValue = (sin(angle) + 1) / 2;

let r, g, b;

if (sinValue < 1 / 3) {
  // transitions from black to green
  r = map(sinValue, 0, 1 / 3, 0, 215);
  g = map(sinValue, 0, 1 / 3, 0, 234);
  b = map(sinValue, 0, 1 / 3, 0, 193);
} else if (sinValue < 2 / 3) {
  // transitions from green to orange
  r = map(sinValue, 1 / 3, 2 / 3, 215, 232);
  g = map(sinValue, 1 / 3, 2 / 3, 234, 103);
  b = map(sinValue, 1 / 3, 2 / 3, 193, 42);
} else {
  // transitions from orange back to black
  r = map(sinValue, 2 / 3, 1, 232, 0);
  g = map(sinValue, 2 / 3, 1, 103, 0);
  b = map(sinValue, 2 / 3, 1, 42, 0);
}

background(r, g, b, 70);
I feel like I’ve achieved what I wanted to, and as usual, it has been a learning process. I would say I didn’t really encounter any difficulties, I just had fun practicing data visualization especially in my own little way 🙂