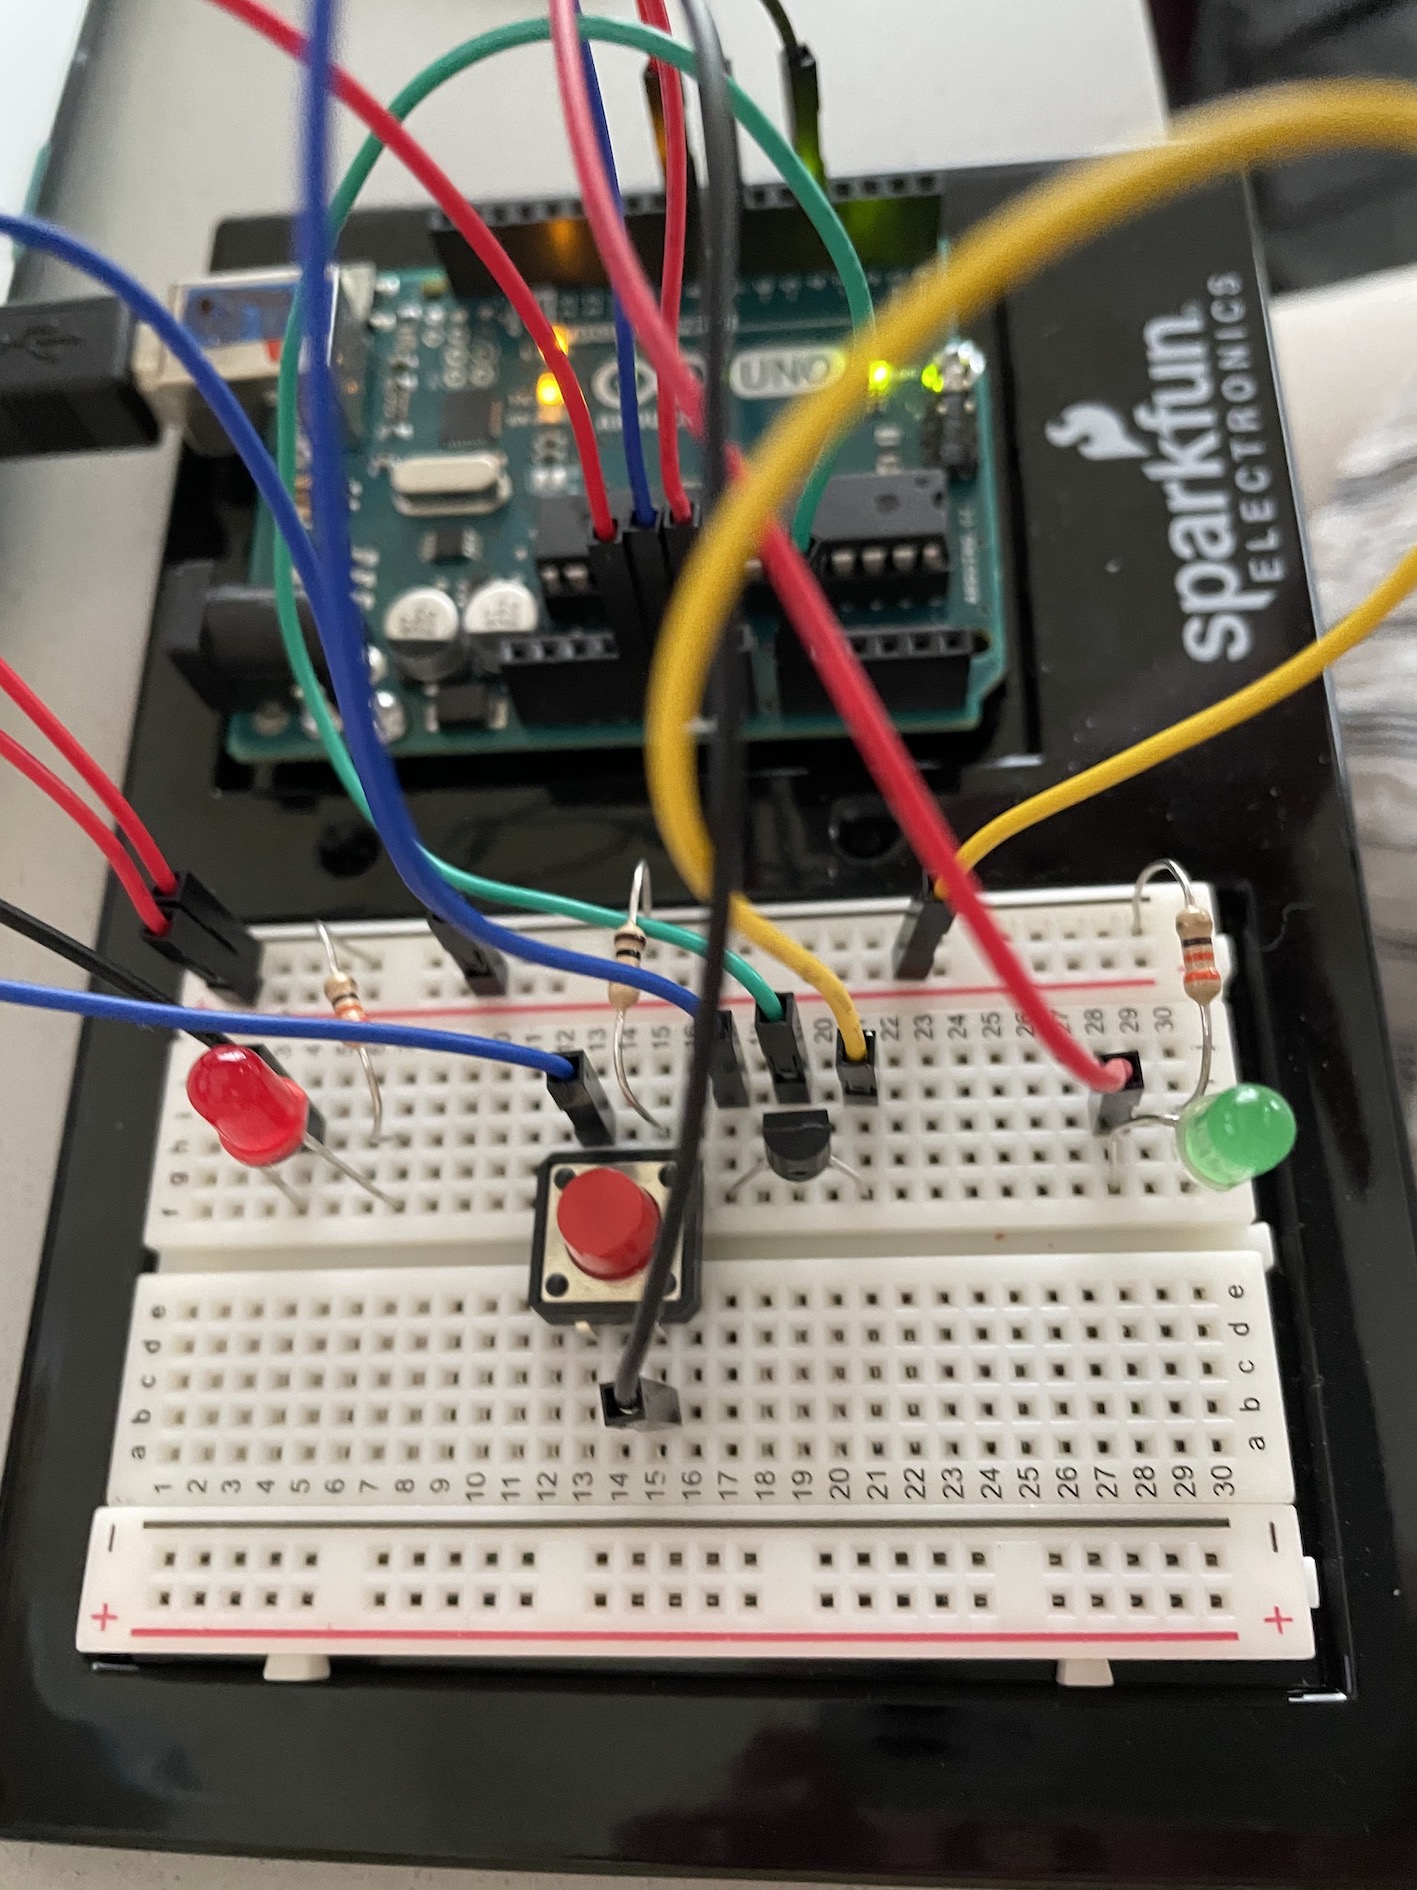
MY FINAL TWIST WAS ADDING A HOUSE, I KNOW THE HOUSE DOESNT LOOK GREAT. HOWEVER, I THOUGHT IT GAVE PURPOSE TO THE LED SWITCH. IMAGINE WALKING INTO A HOUSE , TURNING ON THE LIGHT AND HAVING A SWITCH THAT CAN ALTERNATE BETWEEN THE LIGHTS YOU NEED. THIS IS WHAT I TRY TO DISPLAY IN THIS WEEKS ASSIGNMENT.
I created a project where you can play with both analog input and digital input to activate different actions on the LED lights. To begin with, I have installed a photoresistor so that different number of lights can be turned on depending on the light intensity. With the least bright light switching on the red LED, it can go all the way up until the brightest light switching on the green LED. Another aspect I have added to this is the usage of a push button to initiate a collective blinking reaction. All four lights will blink four times and will not be interfered with the light during this process. The LEDs will go back to reacting to light after this. I initially wanted to use the potentiometer but I wanted to show something others have not already done so I chose to make use of the light sensor.
Here is my code:
int photoresistor = A0;
int yellow = 2;
int blue = 3;
int red = 4;
int green = 5;
int button = 6;


void setup() {
  pinMode(yellow, OUTPUT);
  pinMode(blue,OUTPUT);
  pinMode(red,OUTPUT);
  pinMode(green,OUTPUT);
  pinMode(button, INPUT);
}


void loop() {

  int button1 = digitalRead(button);
  if (button1 == HIGH) {
    digitalWrite(yellow, HIGH);
    digitalWrite(blue, HIGH);
    digitalWrite(red, HIGH);
    digitalWrite(green, HIGH);
    delay(2000);

    int count = 0;
    while (count < 5){
      digitalWrite(yellow, HIGH);
      digitalWrite(blue, HIGH);
      digitalWrite(red, HIGH);
      digitalWrite(green, HIGH);
      delay(20);
      digitalWrite(yellow, LOW);
      digitalWrite(blue, LOW);
      digitalWrite(red, LOW);
      digitalWrite(green, LOW);
      delay(1000);
      count += 1;
      }
  }

  else{

    int analogValue = analogRead(photoresistor);
    if(analogValue < 50){
      digitalWrite(red, HIGH);
    }
    else if(analogValue >= 50 && analogValue < 100){
      digitalWrite(blue, HIGH);
    }
    else if(analogValue >= 100 && analogValue <= 150){
      digitalWrite(yellow, HIGH);
    }
    else{
      digitalWrite(green, HIGH);
    }

    delay(100);

    digitalWrite(yellow, LOW);
    digitalWrite(blue, LOW);
    digitalWrite(red, LOW);
    digitalWrite(green, LOW);
  }
}
My idea for this week’s exercise is to create a ‘traffic light’ for learning progress where one can track how close one is to finishing an exercise. On turning the know, first a red, then a yellow, and then a green LED lights up. Then one can press the button to mark a task as completed and some ‘light confetti’ (blinking LEDs) show up to congratulate the learner.
In the end, this was not too difficult to create but it took me some time to understand the difference between analog and digital input but now it seems more clear after using analog input as well.
int greenledPin = 5;
int yellowledPin = 4;
int redledPin = 3;
int buttonPin = 2;

void setup() {
  // put your setup code here, to run once:
  pinMode(greenledPin, OUTPUT);
  pinMode(yellowledPin, OUTPUT);
  pinMode(redledPin, OUTPUT);
  pinMode(buttonPin, INPUT);
  Serial.begin(9600); //bit mode. 9600 commuting back and forth per minute
}

void loop() {
  // put your main code here, to run repeatedly:

  int knobValue = analogRead(A0);

  if (681 < knobValue) {
    digitalWrite(greenledPin, HIGH);
  } else {
    digitalWrite(greenledPin, LOW);
  }
  if (341 < knobValue) {
    digitalWrite(yellowledPin, HIGH);
  } else {
    digitalWrite(yellowledPin, LOW);
  }
  if (100 < knobValue) {
    digitalWrite(redledPin, HIGH);
  } else {
    digitalWrite(redledPin, LOW);
  }

  int buttonState = digitalRead(buttonPin);
  if (buttonState == HIGH) {
    digitalWrite(redledPin, HIGH);
    digitalWrite(yellowledPin, HIGH);
    digitalWrite(greenledPin, HIGH);
    delay(200);
    digitalWrite(redledPin, LOW);
    digitalWrite(yellowledPin, LOW);
    digitalWrite(greenledPin, LOW);
    delay(200);
    digitalWrite(redledPin, HIGH);
    digitalWrite(yellowledPin, HIGH);
    digitalWrite(greenledPin, HIGH);
    delay(200);
    digitalWrite(redledPin, LOW);
    digitalWrite(yellowledPin, LOW);
    digitalWrite(greenledPin, LOW);
    delay(200);
    digitalWrite(redledPin, HIGH);
    digitalWrite(yellowledPin, HIGH);
    digitalWrite(greenledPin, HIGH);
    delay(200);
    digitalWrite(redledPin, LOW);
    digitalWrite(yellowledPin, LOW);
    digitalWrite(greenledPin, LOW);
    delay(200);
    digitalWrite(redledPin, HIGH);
    digitalWrite(yellowledPin, HIGH);
    digitalWrite(greenledPin, HIGH);
    delay(200);
    digitalWrite(redledPin, LOW);
    digitalWrite(yellowledPin, LOW);
    digitalWrite(greenledPin, LOW);
  }

  Serial.println(buttonState);
}
My first thing to do this week was to brainstorm some ideas. My most prominent one was that I really wanted to play with many lights, almost like a carousel of lights. After noting down some random notes, I decided to aim for a code in which I could have a bunch of lights, and have my analogue reader blend through the lights. In this case I wanted to use the potentiometer, just because it seemed the most appropriate for me.
Setting up the circuit was much smoother than last week for me, I knew what I was doing way more. The first thing i needed to do was get the code to work where the lights would pass through. It came really easy for me, I just mapped the analogue reads from 0 – 800, just because that could make it easily divisible by 8 (my number of lights), without changing the values too much. Then I created a bunch of if-statements on when to light up. When I first did this, it made the leds light up and not shut off. Although this was also a cool effect, it wasnt what I wanted. I figured this out using ‘else statements.’
But that gave me the idea on what to use with a digital reading. I decided that once the button was clicked, the setting would change, and the led’s would turn on one after the other without turning each off as they go. After that, I realised I faced an issue where once they were all on, there would be no way (in that setting to turn them off). While washing my dishes, I kept thinking about how to code a way to fix that, and I found it. I measured the previous analogue reading, if it was higher than the current one that means the pattern was moving down, so I set the LED’s to turn off. If the previous reading was lower, the pattern was moving up, making the LED’s turn on. This meant switching the direction of the potentiometer would change whether you are turning the lights on or off.
Finally, I started adding some small features (such as all the lights turning on at the highest reading, and debugging). Here is the final project ! (I accidentally filmed vertically)
int button = 2;
int led1 = 3;
int led2 = 4;
int led3 = 5;
int led4 = 6;
int led5 = 7;
int led6 = 8;
int led7 = 9;
int led8 = 10;
bool buttonState = false;
bool prevState = false;
int knob = A0;
int prevLed = 0;


void setup() {
  // put your setup code here, to run once:
  pinMode(button,INPUT);
  pinMode(led1,OUTPUT);
  pinMode(led2,OUTPUT);
  pinMode(led3,OUTPUT);
  pinMode(led4,OUTPUT);
  pinMode(led5,OUTPUT);
  pinMode(led6,OUTPUT);
  pinMode(led7,OUTPUT);
  pinMode(led8,OUTPUT);
  Serial.begin(9600);

}

void loop() {
//   put your main code here, to run repeatedly:
  changeState();

int knobValue = analogRead(knob);
//mapping the potentiometer values from 0 - 800 for easy reference
int mappedValue =  map(knobValue, 0,1023, 0, 800);

//Button setting 1: where each light only appears individually
if (buttonState == false){
  if (mappedValue >= 0 && mappedValue <100){
    digitalWrite(led1, HIGH);
  }  else {
    digitalWrite(led1, 0);
  }
  if (mappedValue >= 100 && mappedValue <200){
    digitalWrite(led2, HIGH);
  } else {
    digitalWrite(led2, 0);
  }
  if (mappedValue >= 200 && mappedValue <300){
    digitalWrite(led3, mappedValue );
  } else {
    digitalWrite(led3, 0);
  }
  if (mappedValue >= 300 && mappedValue <400){
    digitalWrite(led4, mappedValue );
  }  else {
    digitalWrite(led4, 0);
  }
  if (mappedValue >= 400 && mappedValue <500){
    digitalWrite(led5, mappedValue );
  } else {
    digitalWrite(led5, 0);
  }
  if (mappedValue >= 500 && mappedValue <600){
    digitalWrite(led6, mappedValue );
  } else {
    digitalWrite(led6, 0);
  }
  if (mappedValue >= 600 && mappedValue <700){
    digitalWrite(led7, mappedValue );
  } else {
    digitalWrite(led7, 0);
  }
  if (mappedValue >= 700 && mappedValue <800){
    digitalWrite(led8, mappedValue );
  } else {
    digitalWrite(led8, 0);
  }
  //if the potentiometer is at its max, all lights turn on
    if (mappedValue ==800 ){
      digitalWrite(led1, mappedValue );
      digitalWrite(led2, mappedValue );
      digitalWrite(led3, mappedValue );
      digitalWrite(led4, mappedValue );
      digitalWrite(led5, mappedValue );
      digitalWrite(led6, mappedValue );
      digitalWrite(led7, mappedValue );
      digitalWrite(led8, mappedValue );
    }


}
//button state 2, where the lights turn on and off after one another
if (buttonState == true){
  //if analogue is increasing, they are turning on
  if (prevLed <= mappedValue){
    if (mappedValue >= 0 && mappedValue <100){
      digitalWrite(led1, HIGH);
      prevLed = mappedValue;
    }
    if (mappedValue >= 100 && mappedValue <200){
      digitalWrite(led2, HIGH);
      prevLed = mappedValue;
    }
    if (mappedValue >= 200 && mappedValue <300){
      digitalWrite(led3, mappedValue );
      prevLed = mappedValue;
    }
    if (mappedValue >= 300 && mappedValue <400){
      digitalWrite(led4, mappedValue );
      prevLed = mappedValue;
    }
    if (mappedValue >= 400 && mappedValue <500){
      digitalWrite(led5, mappedValue );
      prevLed = mappedValue;
    }
    if (mappedValue >= 500 && mappedValue <600){
      digitalWrite(led6, mappedValue );
      prevLed = mappedValue;
    }
    if (mappedValue >= 600 && mappedValue <700){
      digitalWrite(led7, mappedValue );
      prevLed = mappedValue;
    }
    if (mappedValue >= 700 && mappedValue <800){
      digitalWrite(led8, mappedValue );
      prevLed = mappedValue;
    }
    //if analogue is decreasing, they are turning off
  } else if (prevLed >= mappedValue){
    if (mappedValue >= 0 && mappedValue <100){
      digitalWrite(led1, 0);
      prevLed = mappedValue;
    }
    if (mappedValue >= 100 && mappedValue <200){
      digitalWrite(led2, 0);
      prevLed = mappedValue;
    }
    if (mappedValue >= 200 && mappedValue <300){
      digitalWrite(led3,0 );
      prevLed = mappedValue;
    }
    if (mappedValue >= 300 && mappedValue <400){
      digitalWrite(led4, 0);
      prevLed = mappedValue;
    }
    if (mappedValue >= 400 && mappedValue <500){
      digitalWrite(led5, 0 );
      prevLed = mappedValue;
    }
    if (mappedValue >= 500 && mappedValue <600){
      digitalWrite(led6, 0 );
      prevLed = mappedValue;
    }
    if (mappedValue >= 600 && mappedValue <700){
      digitalWrite(led7, 0);
      prevLed = mappedValue;
    }
    if (mappedValue >= 700 && mappedValue <800){
      digitalWrite(led8, 0 );
      prevLed = mappedValue;
    }
    }
  }

Serial.print(knobValue);
Serial.print(" ");
Serial.println(mappedValue);
}

//toggling the button state
void changeState() {
  if (digitalRead(button) == HIGH && prevState == LOW) {
    if (buttonState) {
      buttonState= false;
    } else if (!buttonState) {
      buttonState= true;
    }
  }
  prevState = digitalRead(button);
}
For this week, I had to visit a lot of external resources to finally grasp what is analog input/output and how is it different from digital input/output. Things finally started to click in my head after reading this definition on NYU ITP web page:
“While a digital input to a microcontroller can tell you about discrete changes in the physical world, such as whether the cat is on the mat, or the cat is off the mat, there are times when this is not enough. Sometimes you want to know how fat the cat on the mat is.”
Honestly, why all textbooks/videos/websites can’t explain concepts in this simple manner? 😄
I really like how all of the hardware stuff we are building has applications in real world that I can immediately think of: electricity switches, temperature sensors, etc. etc. Not to say that software isn’t applicable — it is just easier for me to remember engineering applications that we encounter in real life than, say, games.
Anyways, I am a bit digressing here, so let’s get into my homework circuit.
Complete Circuit
⚡️ idea
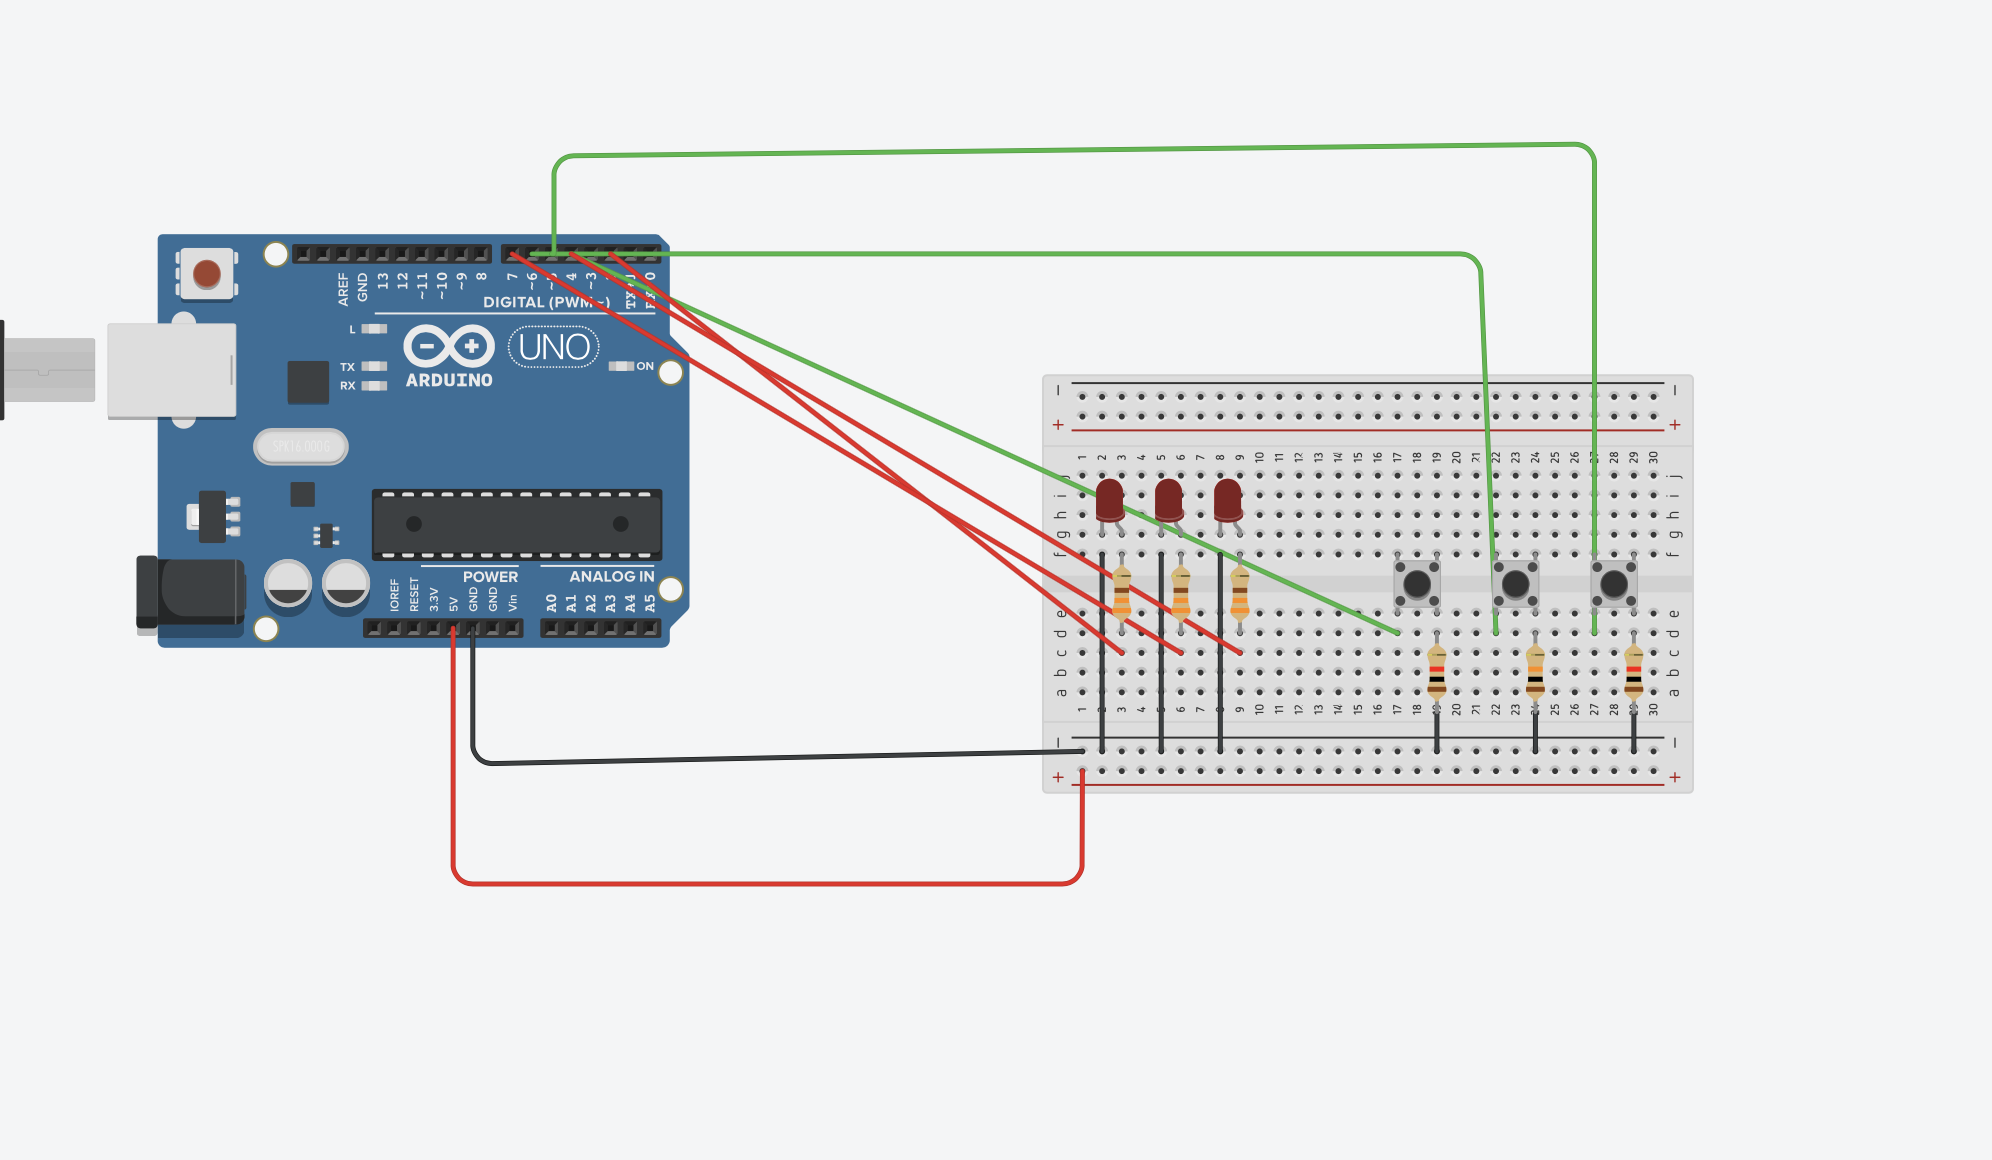
The idea behind was inspired by the air conditioning and heating system inside different cars. Usually, there is one LED light that turns on if the heater is on and another LED light turns on if the AC is on. So I have used a temperature sensor for the analog input/output communication, two LED bulbs + one button for digital input/output.
🛠 process
I have read quite a bit of documentation and watched some LinkedIn learning videos to finally understand how Arduino analog works.
First off, I almost burned my temperature sensor, xD. After I plugged everything in and ran my script for the first time, I started smelling something weird — and oh boy, it was a temperature sensor! Gladly I was quick to find out and immediately plugged everything out. Turns out I messed up the leg-connection to the 5V and the ground, which has caused this whole trouble.
After a bit of debugging, I was able to connect and read the temperature values. By the way, none of this would have been implemented had I not referred to this documentation on voltage and temperatures. It was super confusing, but apparently we have to manipulate voltage values in order to get the most precise measurements of temperature!
🎥 result
The most fun part was making it all work inside the script:
int analogPin = A0;
float voltageOut;
float temp;
int analog;
int LED1 = 7;
int LED2 = 8;
int button = 4;
int buttonState = 0;
boolean flag = 0;
boolean prevState = 0;

void setup() {
  // put your setup code here, to run once:
  pinMode(LED1, OUTPUT);
  pinMode(LED2, OUTPUT);
  pinMode(button, INPUT);
  Serial.begin(9600);
  analogReference(DEFAULT); // specify that I have 5 volts
}

void loop() {
  // calculating temp
  analog = analogRead(analogPin);
  buttonState = digitalRead(button);
  temp = (((double)analog/1024)*5-0.5)*100;

  // track the values on serial
  Serial.print("Current Temperature: ");
  Serial.println(temp);
  delay(500);

  // if button is pressed, run the program
  if (buttonState == 1 && prevState == LOW){
    flag = !flag;
  }

  // if button is pressed, turn on
  if (flag){

    // "heater" is on
    if (temp >= 26){
    digitalWrite(LED1, HIGH);
    digitalWrite(LED2, LOW);
    }

    // "AC" is on
    else {
      digitalWrite(LED1, LOW);
      digitalWrite(LED2, HIGH);
    }

  }
  // turn off
  else {
    digitalWrite(LED1, LOW);
    digitalWrite(LED2, LOW);
  }

  // track button state
  prevState = buttonState;
}
Some of the challenges I faced was making a code run only when a button is pressed and turn everything off when the button is pressed the second time. I have spent about an hour trying to debug when I realized that I was missing the “else”-snippet when the flag is off. But now it works! 🥳
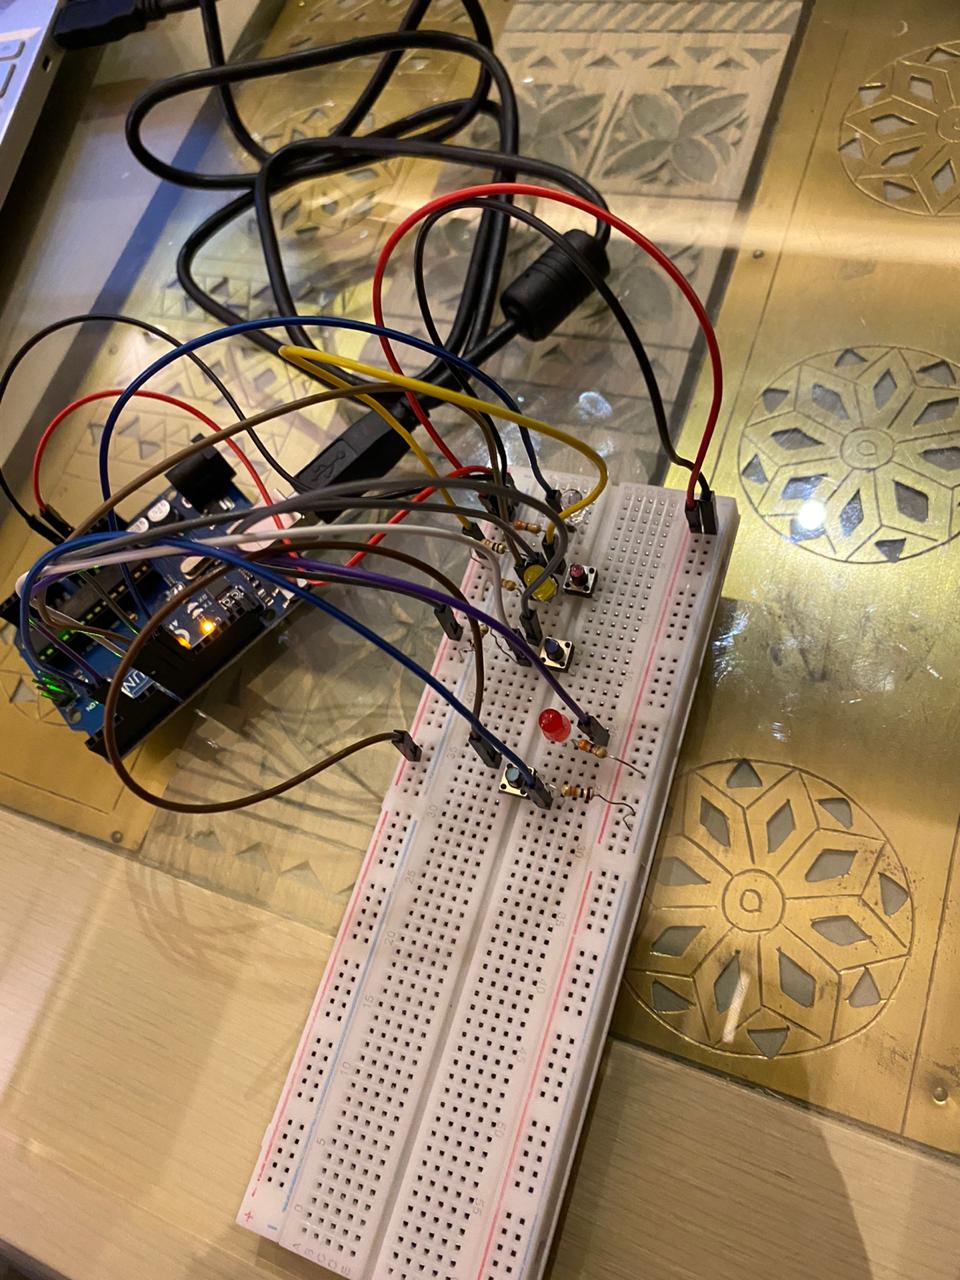
The idea of this puzzle was to find away to stop the lights from blinking with the right clicking combination.
I managed to configure the buttons and LEDs to separate digital pins and control them with code.However, I don’t know how to input the number of times the button was clicked in order to result in something.
In the end this became more of a learning experience, as it took me longer than expected to debug the mechanical components.
For this weeks assignment I wanted to really challenge myself. I feel really comfortable with coding so I decided not to code at all and depend only on the physical components of our Arduino sets!
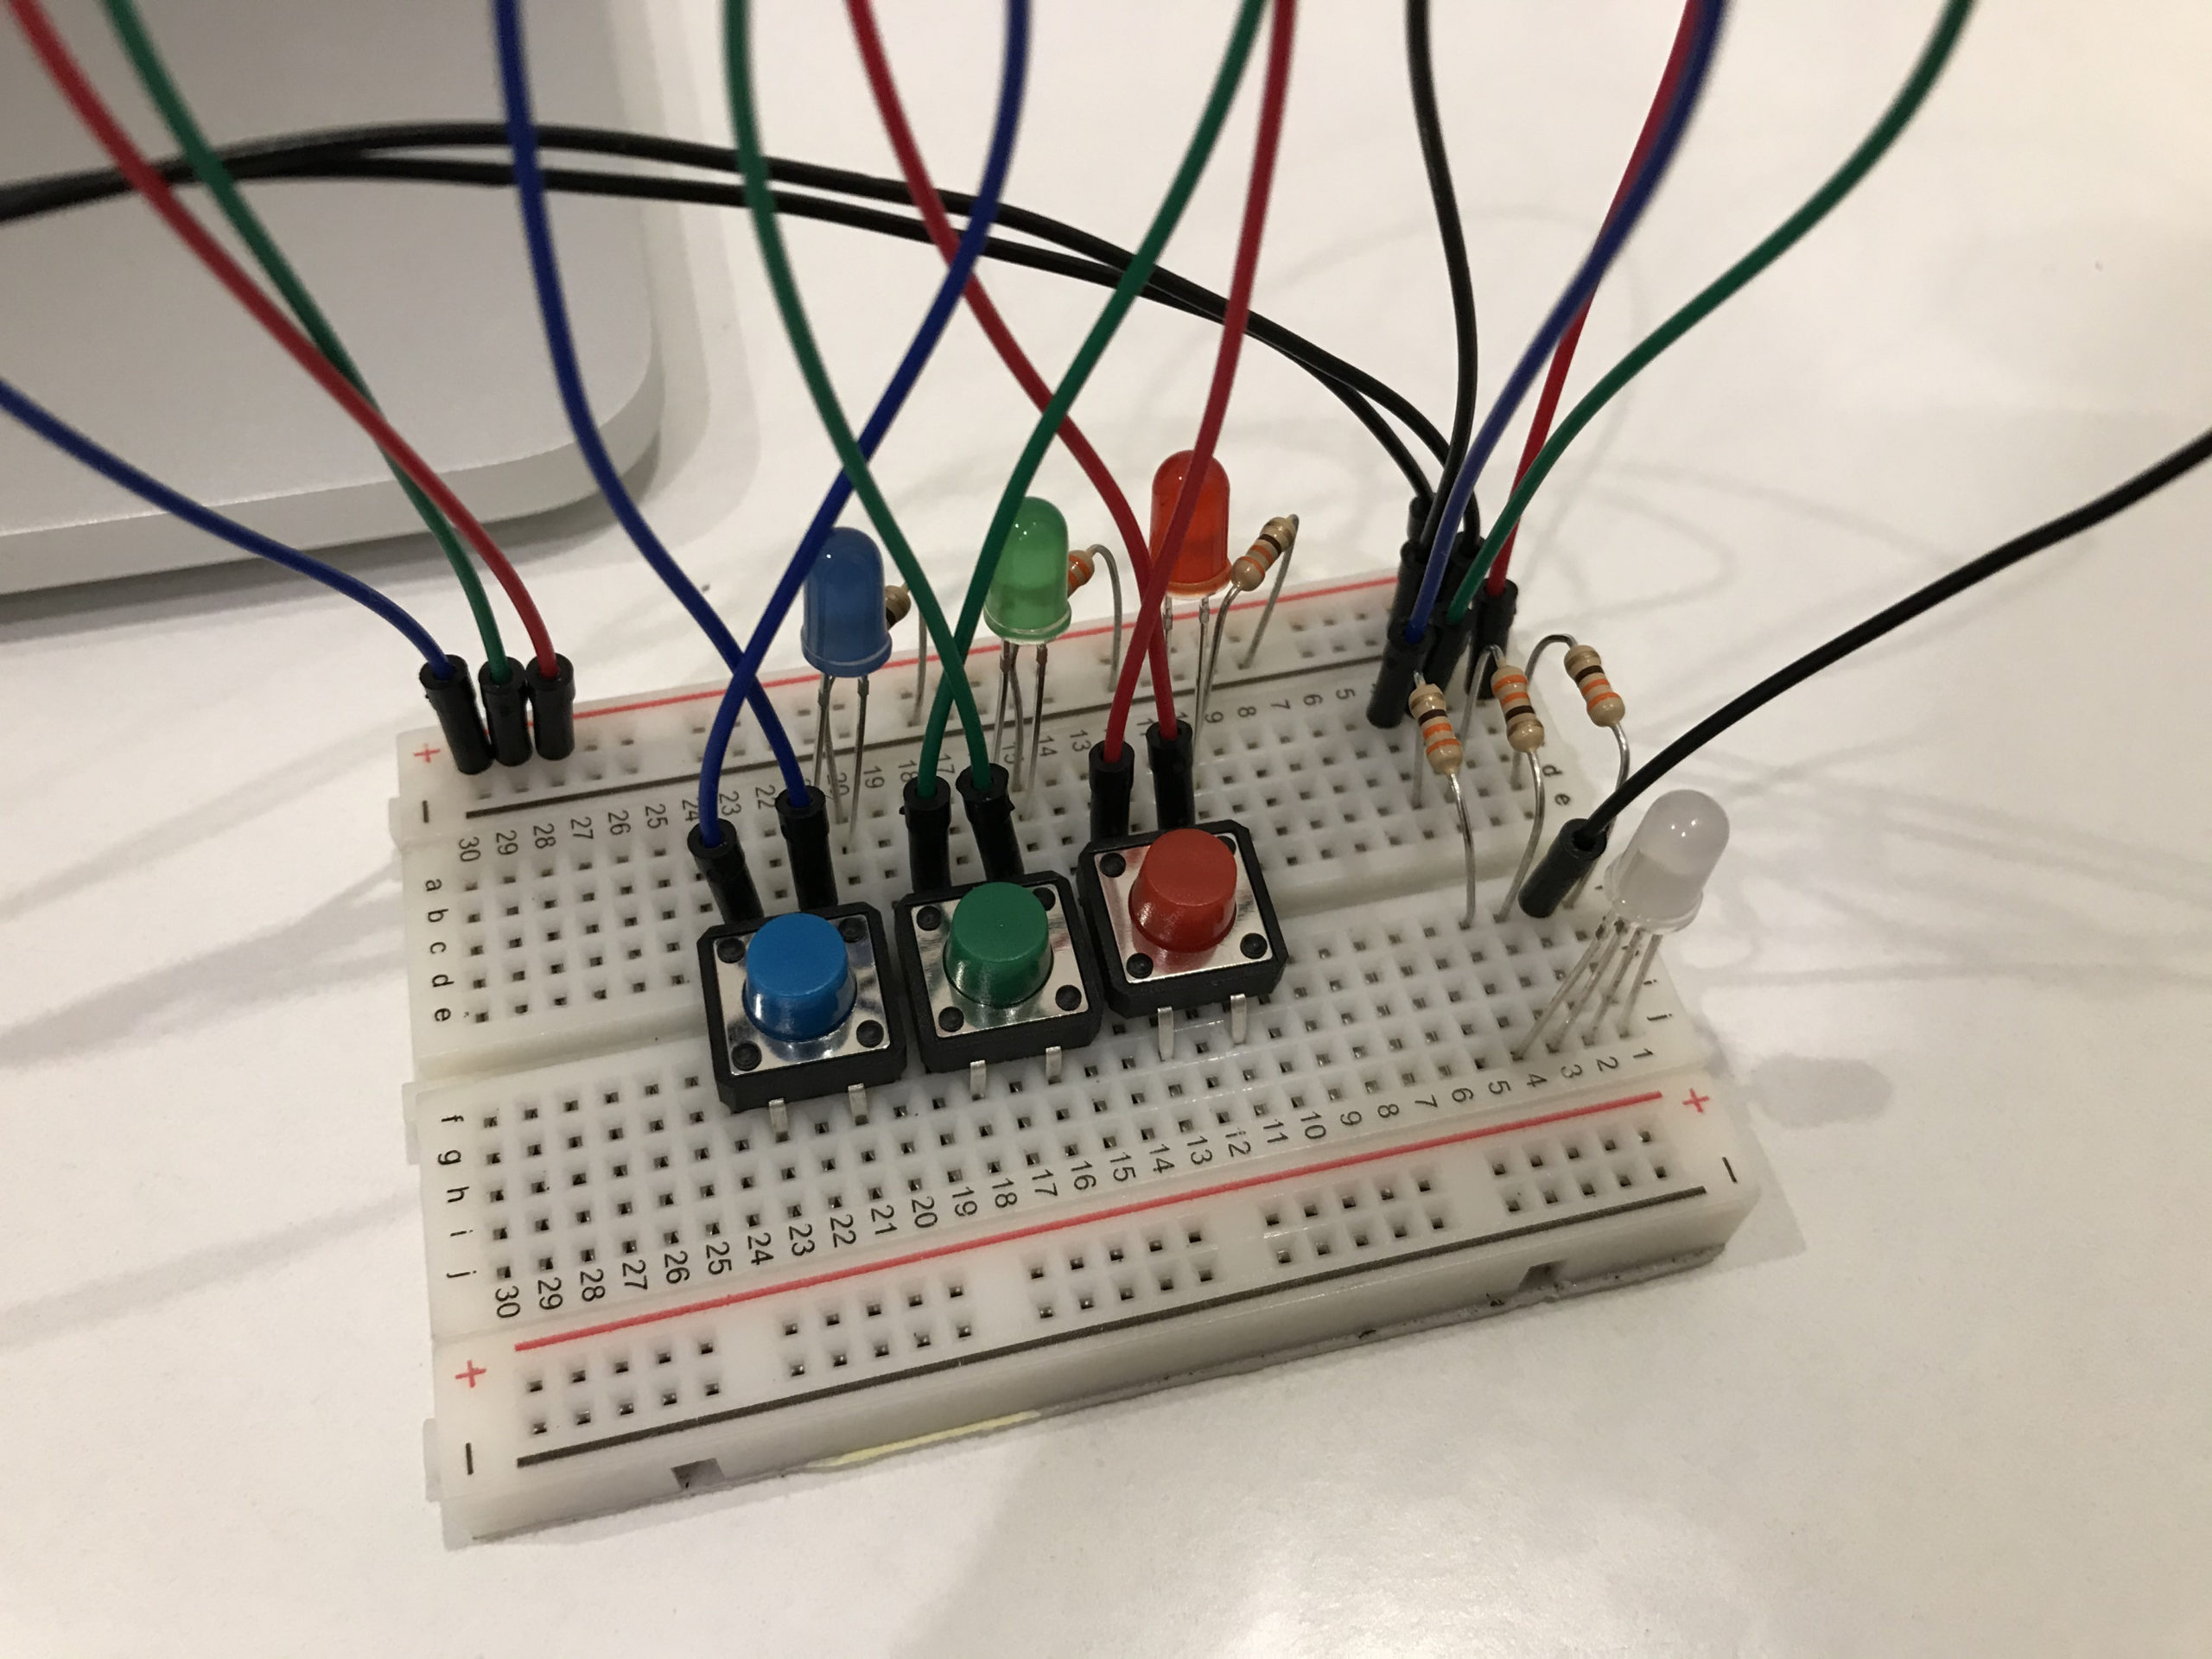
When I think about LEDs they always reminds of simple colors. And what could be simpler than a color in RGB representation. With that idea in mind I decided to create a form of button steered RGB representation.
I discovered that in our kits we have an actually RGB LED. Having read about it on the internet I plugged it accordingly. I wanted to have 3 separate buttons, which would control the amount of Red, Green and Blue in the final LED.
I plugged regular buttons in corresponding colors as well as check up LEDs next to them. Then I connected everything with the separate pins of the RGB LED.
I struggled to think of any creative ideas at first and just started working. After a while, my initial idea was to have 4 buttons and 4 bulbs, where clicking on a button triggers a temporary lighting of the bulbs in the order 1234, the second triggers them in the same order with the last bulb off (123), third lights 2 bulbs (12), and the fourth lights 1. If you click two times, the order changes to 4123, and the same logic applies to buttons, 2, 3, and 4. Then if three clicks it is 3412, and if 4 clicks it is 2341, basically shifting every number to fit in all four possible positions.
Major Struggles
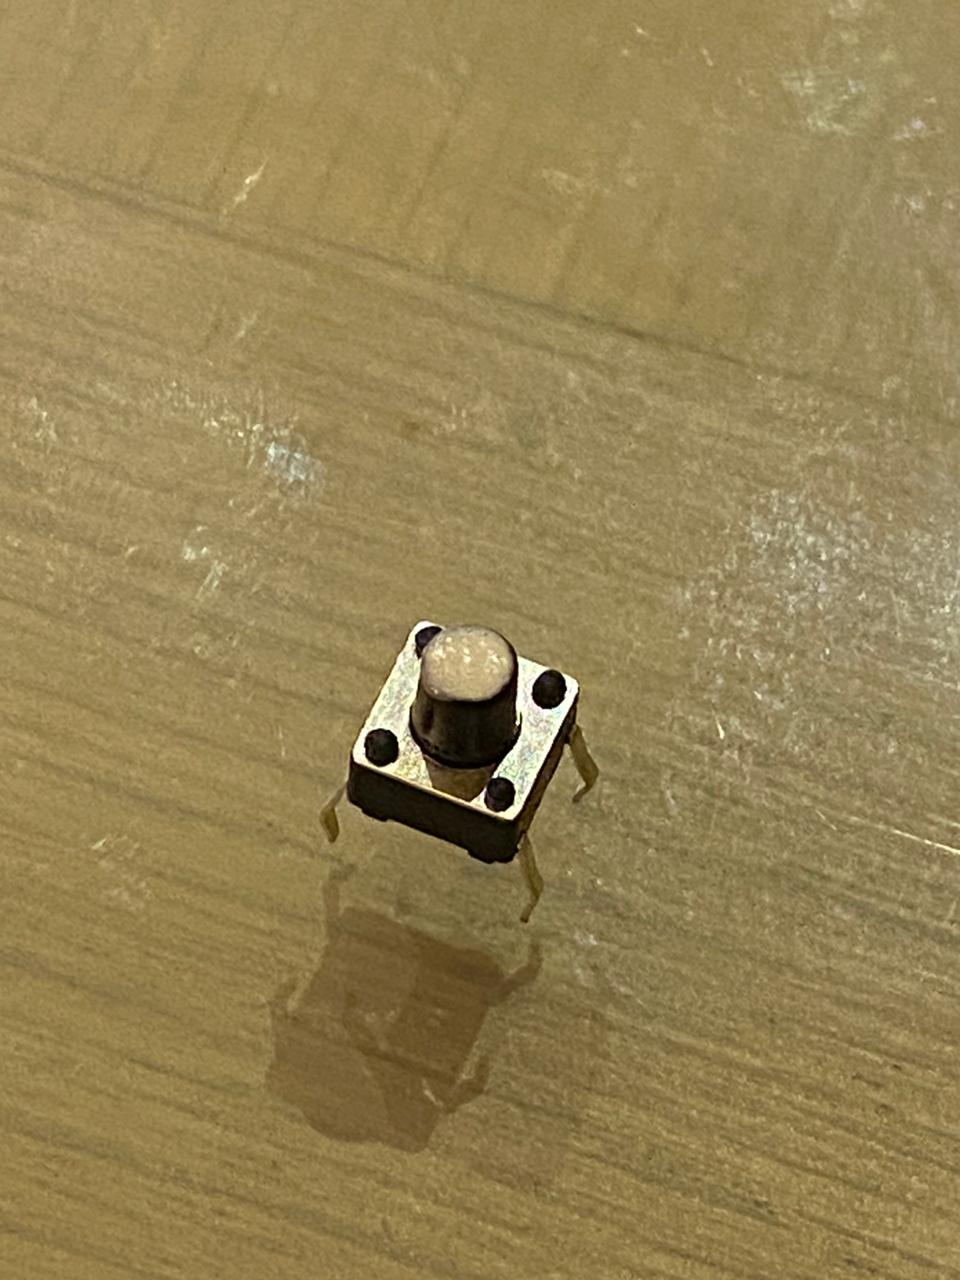
This assignment was actually very challenging for me for several reasons. Firstaly, I was not able to get buttons until Sunday night which made me very stressed while working during the tight time. I was not able to find big colorful buttons like the ones which my peers have in their kits; I found much smaller ones instead which are all just black. This in itself made it very hard to try them out properly and I would sometimes cause the buttons to fall off from the circuit if I simply press a bit hard. In order to resolve the color issue, I actually used nail polish to color the small surfaces of the buttons.
one of the buttons which I colored white
I kept working for hours and a recurring issue kept happening; anything I use in the lower half of the board simply did not work, even if I copy the literal code for it and corresponding electrical wiring from above. After hours of extreme frustration, I realized that half of my breadboard doesn’t work properly.
The lower half is untouched as it can be seen
In order to resolve the issue, I actually extended my power and ground wires to the right side too, and added a button and bulb on the right side. Even though I wanted to have more than three items at the start, that was not feasible at this point.
Idea and implementation
After getting acquainted with my board and with playing with electrical tools in general, I started to dive right into my idea. I realized that lighting the bulbs one after the other might be too much work that is not very necessary so I decided to just dismiss that idea. I decided pressing certain buttons would trigger certain bulbs and that pressing several buttons together would yield another result.
I was able to achieve this goal after several trials and errors where the following applies to my final project:
Pressing the blue button on the left turns the 3 bulbs on
Pressing it again right after turning them on turns them all off
Pressing the purple button in the middle turns the last 2 (yellow and white) bulbs on
Pressing it again right after turning them on turns them off
Pressing the dark red button on the left turns the 1st and 3rd (red and white) bulbs on
Pressing it again right after turning them on turns them off
Pressing/holding the first and second buttons together turns only the red (1st) one on
Pressing/holding the second and third buttons together turns only the yellow (2nd) one on
Pressing/holding the third and first buttons together turns only the white (3rd) one on
Pressing/holding the 3 buttons simply turns them all off
It should be noted that I made sure that if you already had some lights on and click a certain button, it adapts the bulbs to fit the appropriate output without having to turn off all of them and resetting then turning the appropriate ones on, which is so much aesthetically pleasing.
Below, I show how clicking on two buttons lights one bulb up (red in this case).
Below is the final assignment:
I learned so much from this assignment as the experience of coding and building such circuits is quite new me, and my pace is not as fast as with Processing which will require some extra effort from my end.
Here is the code I used for the circuit:
int ledRed = 5;               //pin of the red bulb
int ledYellow = 9;            //pin of yellow bulb
int ledWhite = 11;            //pin of white bulb

int prevButtonState1= LOW;    //previous state of blue button
int prevButtonState2= LOW;    //previous state of purple button
int prevButtonState3= LOW;    //previous state of red button

int ledState1;                //state of red bulb
int ledState2;                //state of yellow bulb
int ledState3;                //state of white bulb

int buttonBlue = 4;           //pin of blue button
int buttonPurple = 8;         //pin of purple button
int buttonRed = 10;           //pin of red button


void setup() {
  ledState1 = LOW;            //initializing blue button state to not clicked
  ledState2 = LOW;            //initializing purple button state to not clicked
  ledState3 = LOW;            //initializing red button state to not clicked

  pinMode(ledRed, OUTPUT);        //declaring red led as output variable
  pinMode(buttonBlue, INPUT);     //declaring blue button as intput variable
  pinMode(ledYellow, OUTPUT);     //declaring yellow led as output variable
  pinMode(buttonPurple, INPUT);   //declaring purple button as intput variable
  pinMode(ledWhite, OUTPUT);      //declaring white led as output variable
  pinMode(buttonRed, INPUT);      //declaring red button as intput variable

  Serial.begin(9600);
}
void loop() {
  int currentButtonState1 = digitalRead(buttonBlue);        //setting variable to digital reading of state of blue button
  int currentButtonState2 = digitalRead(buttonPurple);      //setting variable to digital reading of state of purple button
  int currentButtonState3 = digitalRead(buttonRed);         //setting variable to digital reading of state of red button
  if ((currentButtonState1 == HIGH) && (currentButtonState2 == HIGH) && (currentButtonState3 == HIGH)) {    //if all buttons are pressed, turn all bulbs off
    ledState1 = LOW;
    ledState2 = LOW;
    ledState3 = LOW;
  }
  else if ((currentButtonState1 == HIGH) && (currentButtonState2 == HIGH)) {       //if both the blue and purple buttons are pressed/held together
    if (ledState1 == HIGH) {                                                  //if red bulb was lighting turn it off
      ledState1 = LOW;
      }
    else if (ledState1 == LOW) {                                              //if red bulb was not on, turn it on
      ledState1 = HIGH;
      }

    ledState2 = LOW;                                                          //ensure the yellow bulb is off

    ledState3 = LOW;                                                          //ensure the white bulb is off


  }
  else if ((currentButtonState2 == HIGH) && (currentButtonState3 == HIGH)) {      //if both the purple and red buttons are pressed/held together
    if (ledState2 == HIGH) {                                                      //if yellow bulb was on, turn off
      ledState2 = LOW;
      }
    else if (ledState2 == LOW) {                                                  //if yellow bulb was off, turn on
      ledState2 = HIGH;
      }

    ledState1 = LOW;                                                              //ensure red bulb is off

    ledState3 = LOW;                                                              //ensure white bulb is off


  }
  else if ((currentButtonState1 == HIGH) && (currentButtonState3 == HIGH)) {            //if both the blue and red buttons are pressed/held together
    if (ledState3 == HIGH) {                                                            //if white bulb is on, turn off
      ledState3 = LOW;
      }
    else if (ledState3 == LOW) {                                                        //if white bulb is off, turn on
      ledState3 = HIGH;
      }

    ledState1 = LOW;                                                                    //ensure red bulb is off

    ledState2 = LOW;                                                                    //ensure yellow bulb is off


  }

  else if (currentButtonState1 == HIGH && prevButtonState1 == LOW) {                //if blue button is pressed
    if (ledState1 == HIGH && ledState2 == HIGH && ledState3 == HIGH) {              //if this was the last button previously pressed, turn off all bulbs
        ledState1 = LOW;
        ledState2 = LOW;
        ledState3 = LOW;
    }
    else {                                                                          //otherwise, turn them all on
      ledState1 = HIGH;

      ledState2 = HIGH;

      ledState3 = HIGH;
    }


  }


  else if (currentButtonState2 == HIGH && prevButtonState2 == LOW) {              //if the purple button is pressed
     if (ledState2 == HIGH && ledState3 == HIGH && ledState1 == LOW) {          //if this was the last pressed button, turn the lit ones off
        ledState2 = LOW;
        ledState3 = LOW;
    }

    else {                                                                    //otherwise, turn the yellow and white bulbs only on
      ledState2 = HIGH;
      ledState3 = HIGH;
      ledState1 = LOW;
    }


  }

  else if (currentButtonState3 == HIGH && prevButtonState3 == LOW) {              //if the red button is pressed
    if (ledState1 == HIGH && ledState3 == HIGH && ledState2 == LOW) {             //if it was teh last pressed button, turn lit ones off
        ledState1 = LOW;
        ledState3 = LOW;
    }

    else {                                                                        //otherwise, turn the red and white bulbs on
      ledState3 = HIGH;
      ledState1 = HIGH;
      ledState2 = LOW;
    }


    }

  digitalWrite(ledRed, ledState1);
  digitalWrite(ledYellow, ledState2);
  digitalWrite(ledWhite, ledState3);                                        //update the bulbs accordingly

  prevButtonState1 = currentButtonState1;
  prevButtonState2 = currentButtonState2;
  prevButtonState3 = currentButtonState3;                                   //update the current states of the buttons for evaluation in the next frame

}
This week, I decided to do an LED puzzle that is similar to Simon Says, where the instructions are given in the form of a melody. I didn’t want to use a song too long or else it’d be too hard, so I used the beginning of the sound of music theme song. The melody goes: 1 2 3 1 3 1 3 2 3 4 4 3 2 4.
There are four buttons on the breadboard, with four corresponding LEDs. They are Green(1), Yellow(2), Blue(3), and Red(4). When the program starts up, the lights will play (show) the melody in full. Then, it’s up to the player to recognize or memorize what the melody is. Then, the player has to press the four buttons in the order that the melody is. If they succeed in the end, all four lights will light up and flash.
In the process of doing this project, I encounter a lot of problems that were great learning experiences for Arduino. For one, when I put the condition where a button is pressed down, Arduino cycles through the execution many times, even though I just pressed it briefly. To solve this problem, I borrowed the method in class notes, where I made a “previous button” value that holds whether a button was just pressed.
There is one part of this project that I really wanted to improve on but couldn’t, which is making a database of melodies and giving them out randomly. There are a few problems that I’ll face if I want to do this. Currently, I have two arrays, one is the original melody array that is recorded when the lights are shown, and the other is the entry array of the player. I then go through a for loop the length of the original melody, and in each loop, I check whether that index is the same between the original and entry. If I wanted to do a database of melodies, I would have to find a way to make the length of the arrays dynamic and make the length of it a variable for the for-loop.
Another improvement I wanted to do was to make my code more optimized, specifically the part where the lights are showing the melody. Right now, I hardcoded the order and delay that each note should be played. What I want to do is to simply enter a dictionary of numbers, the first being the note and the second being the delay, and the code would automatically sort the dictionary into the flashing order for the lights. I ran out of time to do it this time, but I’m confident this is do-able. Getting the code to do this would also help the database idea by making it easier to code in a melody.
Here is my full code:
//buttons and lights initialization:
int greenB = 12;
int greenL = 13;
int yellowB = 9;
int yellowL = 10;
int blueB = 6;
int blueL = 7;
int redB = 3;
int redL = 4;
int prevB = LOW;
int prevYB = LOW;
int prevBB = LOW;
int prevRB = LOW;

boolean play = true;
boolean yay = false;

int song[14];
int entry[14];
int value;
int count = 0;

void setup() {
  // put your setup code here, to run once:
  pinMode(greenL, OUTPUT);
  pinMode(greenB, INPUT);
  pinMode(yellowL, OUTPUT);
  pinMode(yellowB, INPUT);
  pinMode(blueL, OUTPUT);
  pinMode(blueB, INPUT);
  pinMode(redL, OUTPUT);
  pinMode(redB, INPUT);

}

void loop() {
  // put your main code here, to run repeatedly:
  int Gstate = digitalRead(greenB);
  int Ystate = digitalRead(yellowB);
  int Bstate = digitalRead(blueB);
  int Rstate = digitalRead(redB);


//instructions

  if (play == true){
    digitalWrite(greenL, HIGH);
    delay(650);
    digitalWrite(greenL, LOW);
    song[0] = 1;
    digitalWrite(yellowL, HIGH);
    delay(250);
    digitalWrite(yellowL, LOW);
    song[1] = 2;
    digitalWrite(blueL, HIGH);
    delay(250);
    digitalWrite(blueL, LOW);
    song[2] = 3;
    delay(500);

    digitalWrite(greenL, HIGH);
    delay(400);
    digitalWrite(greenL, LOW);
    song[3] = 1;
    digitalWrite(blueL, HIGH);
    delay(400);
    digitalWrite(blueL, LOW);
    song[4] = 3;
    digitalWrite(greenL, HIGH);
    delay(400);
    digitalWrite(greenL, LOW);
    song[5] = 1;
    digitalWrite(blueL, HIGH);
    delay(400);
    digitalWrite(blueL, LOW);
    song[6] = 3;
    delay(500);

    digitalWrite(yellowL, HIGH);
    delay(600);
    digitalWrite(yellowL, LOW);
    song[7] = 2;
    digitalWrite(blueL, HIGH);
    delay(250);
    digitalWrite(blueL, LOW);
    song[8] = 3;
    digitalWrite(redL, HIGH);
    delay(200);
    digitalWrite(redL, LOW);
    delay(100);
    song[9] = 4;
    digitalWrite(redL, HIGH);
    delay(200);
    digitalWrite(redL, LOW);
    song[10] = 4;
    delay(100);
    digitalWrite(blueL, HIGH);
    delay(250);
    digitalWrite(blueL, LOW);
    song[11] = 3;
    digitalWrite(yellowL, HIGH);
    delay(250);
    digitalWrite(yellowL, LOW);
    song[12] = 2;
    digitalWrite(redL, LOW);
    song[13] = 4;
    digitalWrite(redL, HIGH);
    delay(650);


    play = false;
  }


//game

  if (play == false){
    //button lighting when pressed
    //green
      if (Gstate == HIGH) {
        digitalWrite(greenL, HIGH);
        if (prevB == LOW){
          value = 1;
          count = count + 1;
          entry[count - 1] = value;
          prevB = Gstate;
          }
      }
      if (Gstate == LOW) {
        digitalWrite(greenL, LOW);
        prevB = Gstate;
      }

      //yellow
      if (Ystate == HIGH) {
        digitalWrite(yellowL, HIGH);
        if (prevYB == LOW){
          value = 1;
          count = count + 1;
          entry[count - 1] = value;
          prevYB = Ystate;
          }
      }
      if (Ystate == LOW) {
        digitalWrite(yellowL, LOW);
        prevYB = Ystate;
      }

      //blue
      if (Bstate == HIGH) {
        digitalWrite(blueL, HIGH);
        if (prevBB == LOW){
          value = 1;
          count = count + 1;
          entry[count - 1] = value;
          prevBB = Bstate;
          }
      }
      if (Bstate == LOW) {
        digitalWrite(blueL, LOW);
        prevBB = Bstate;
      }

      //red
      if (Rstate == HIGH) {
        digitalWrite(redL, HIGH);
        if (prevRB == LOW){
          value = 1;
          count = count + 1;
          entry[count - 1] = value;
          prevRB = Rstate;
          }
      }
      if (Rstate == LOW) {
        digitalWrite(redL, LOW);
        prevRB = Rstate;
      }

      if (count >= 14){
        for (int i = 0; i <= 14; i++){
          if (song[i] == entry[i]){
            yay = true;
          }
        }
      }

    }


//win celebration:

  if (yay == true){
    for (int i = 1; i <= 5; i++){
      delay(500);
      digitalWrite(greenL, HIGH);
      digitalWrite(yellowL, HIGH);
      digitalWrite(blueL, HIGH);
      digitalWrite(redL, HIGH);
      delay(500);
      digitalWrite(greenL, LOW);
      digitalWrite(yellowL, LOW);
      digitalWrite(blueL, LOW);
      digitalWrite(redL, LOW);
      delay(500);
    }
    yay = false;

  }


}
The LED puzzle I am made is a sort of game where 3 different LED lights randomly turn on at different times and speed. There will come a point when all 3 lights are on at the same time, and this is when a player should press the button. If a player has pressed the button at this exact time of alignment, then all the lights will blink 7 times, signifying the win of the game.
I wanted to make this a game of speed and simplicity. I am personally very happy with what I have produced because it looks neat to me. One thing a player would have to be aware of is the pressing of the button because sometimes the button does not come in full contact with the board and so it leads to misses. Would love to learn to incorporate music to this game later in the future.
INITIAL CODE (didn’t work):
int ledPin = 2;

int ledPin2 = 4;
int buttonPin2 = 5;

int ledPin3 = 6;

int buttonState2 = 0;

void setup() {
  // put your setup code here, to run once:
  pinMode(ledPin, OUTPUT);

  pinMode(ledPin2, OUTPUT);
  pinMode(buttonPin2, INPUT);

  pinMode(ledPin3, OUTPUT);
}

void loop() {
  // put your main code here, to run repeatedly:
  int buttonState2 = digitalRead(buttonPin2);

  if (buttonState2 == HIGH) {
    Serial.println("button");
    digitalWrite(ledPin2, HIGH);
    digitalWrite(ledPin, HIGH);
    } else {
      // turn LED off:
      while (buttonState2 != HIGH){
        int n = 2*random(1,4);
        int m = 2*random(1,4);
        int p = 2*random(1,4);

        //Serial.begin(9600);
        //Serial.println(n);

        digitalWrite(n, HIGH);
        delay(random(1,500));
        digitalWrite(m, HIGH);
        delay(random(1,500));
        digitalWrite(p, HIGH);
        delay(random(1,500));

        digitalWrite(n, LOW);
        delay(random(1,500));
        digitalWrite(m, LOW);
        delay(random(1,500));
        digitalWrite(p, LOW);
        delay(random(1,500));

        if (buttonState2 == HIGH) {
          Serial.println("BUTTON");
          break;
          }
        }
      digitalWrite(ledPin2, LOW);
      digitalWrite(ledPin, LOW);
    }
    delay(100);
}
You can actually tell from the video below that the lights do turn on, but the buttons do not carry out any functionalities… Not good!
FINAL CODE:
I wanted to make my code as simple and straightforward as possible. Here is what it looks like.