Week 11 – AakifR

1. Moving Ellipse Using Sensor:

(Arduino Code Remains same as given in class)

/* Week 11.2 bidi serial example
 * Originally by Aaron Sherwood
 * Modified by Mangtronix
 *
 * Add this library to Sketch files
 *  https://github.com/mangtronix/IntroductionToInteractiveMedia/blob/master/code/p5.web-serial.js files
 *
 * You must include this line in your index.html (in Sketch Files) to load the
 * web-serial library
 *
 *     <script src="p5.web-serial.js"></script>
 *
 * Arduino code:
 * https://github.com/mangtronix/IntroductionToInteractiveMedia/blob/master/code/Week11Serial.ino
 */

let rVal = 0;
let alpha = 255;
let left = 0; // True (1) if mouse is being clicked on left side of screen
let right = 0; // True (1) if mouse is being clicked on right side of screen

function setup() {
  createCanvas(640, 480);
  textSize(18);
}

function draw() {
  // one value from Arduino controls the background's red color
  background(map(rVal, 0, 1023, 0, 255), 255, 255);
  
  ellipse(rVal +25,height/2, 50,55); // makes an ellipse that moves with resistor

  // the other value controls the text's transparency value
  fill(255, 0, 255, map(alpha, 0, 1023, 0, 255));

  if (!serialActive) {
    text("Press Space Bar to select Serial Port", 20, 30);
  } else {
    text("Connected", 20, 30);
    

    // Print the current values
    text('rVal = ' + str(rVal), 20, 50);
    text('alpha = ' + str(alpha), 20, 70);

  }


  // click on one side of the screen, one LED will light up
  // click on the other side, the other LED will light up
  if (mouseIsPressed) {
    if (mouseX <= width / 2) {
      left = 1;
    } else {
      right = 1;
    }
  } else {
    left = right = 0;
  }
}

function keyPressed() {
  if (key == " ") {
    // important to have in order to start the serial connection!!
    setUpSerial();
  }
}

// This function will be called by the web-serial library
// with each new *line* of data. The serial library reads
// the data until the newline and then gives it to us through
// this callback function
function readSerial(data) {
  ////////////////////////////////////
  //READ FROM ARDUINO HERE
  ////////////////////////////////////

  if (data != null) {
    // make sure there is actually a message
    // split the message
    let fromArduino = split(trim(data), ",");
    // if the right length, then proceed
    if (fromArduino.length == 2) {
      // only store values here
      // do everything with those values in the main draw loop
      
      // We take the string we get from Arduino and explicitly
      // convert it to a number by using int()
      // e.g. "103" becomes 103
      rVal = int(fromArduino[0]);
      alpha = int(fromArduino[1]);
    }

    //////////////////////////////////
    //SEND TO ARDUINO HERE (handshake)
    //////////////////////////////////
    let sendToArduino = left + "," + right + "\n";
    writeSerial(sendToArduino);
  }
}

//Arduino Code
/*
// Week 11.2 Example of bidirectional serial communication

// Inputs:
// - A0 - sensor connected as voltage divider (e.g. potentiometer or light sensor)
// - A1 - sensor connected as voltage divider 
//
// Outputs:
// - 2 - LED
// - 5 - LED

int leftLedPin = 2;
int rightLedPin = 5;

void setup() {
  // Start serial communication so we can send data
  // over the USB connection to our p5js sketch
  Serial.begin(9600);

  // We'll use the builtin LED as a status output.
  // We can't use the serial monitor since the serial connection is
  // used to communicate to p5js and only one application on the computer
  // can use a serial port at once.
  pinMode(LED_BUILTIN, OUTPUT);

  // Outputs on these pins
  pinMode(leftLedPin, OUTPUT);
  pinMode(rightLedPin, OUTPUT);

  // Blink them so we can check the wiring
  digitalWrite(leftLedPin, HIGH);
  digitalWrite(rightLedPin, HIGH);
  delay(200);
  digitalWrite(leftLedPin, LOW);
  digitalWrite(rightLedPin, LOW);


  // start the handshake
  while (Serial.available() <= 0) {
    digitalWrite(LED_BUILTIN, HIGH); // on/blink while waiting for serial data
    Serial.println("0,0"); // send a starting message
    delay(300);            // wait 1/3 second
    digitalWrite(LED_BUILTIN, LOW);
    delay(50);
  }
}

void loop() {
  // wait for data from p5 before doing something
  while (Serial.available()) {
    digitalWrite(LED_BUILTIN, HIGH); // led on while receiving data

    int left = Serial.parseInt();
    int right = Serial.parseInt();
    if (Serial.read() == '\n') {
      digitalWrite(leftLedPin, left);
      digitalWrite(rightLedPin, right);
      int sensor = analogRead(A0);
      delay(5);
      int sensor2 = analogRead(A1);
      delay(5);
      Serial.print(sensor);
      Serial.print(',');
      Serial.println(sensor2);
    }
  }
  digitalWrite(LED_BUILTIN, LOW);
}
*/


2. LED Brightness Control:

/* Week 11.2 bidi serial example
 * Originally by Aaron Sherwood
 * Modified by Mangtronix
 *
 * Add this library to Sketch files
 *  https://github.com/mangtronix/IntroductionToInteractiveMedia/blob/master/code/p5.web-serial.js files
 *
 * You must include this line in your index.html (in Sketch Files) to load the
 * web-serial library
 *
 *     <script src="p5.web-serial.js"></script>
 *
 * Arduino code:
 * https://github.com/mangtronix/IntroductionToInteractiveMedia/blob/master/code/Week11Serial.ino
 */

let rVal = 0;
let alpha = 255;
let left = 0; // True (1) if mouse is being clicked on left side of screen
let right = 0; // True (1) if mouse is being clicked on right side of screen

function setup() {
  createCanvas(255, 255);
  textSize(18);
}

function draw() {
  // one value from Arduino controls the background's red color
  background(map(rVal, 0, 1023, 0, 255), 255, 255);


  // the other value controls the text's transparency value
  fill(255, 0, 255, map(alpha, 0, 1023, 0, 255));

  if (!serialActive) {
    text("Press Space Bar to select Serial Port", 20, 30);
  } else {
    text("Connected", 20, 30);
    

    // Print the current values
    text('rVal = ' + str(rVal), 20, 50);
    text('alpha = ' + str(alpha), 20, 70);

  }


  // click on one side of the screen, one LED will light up
  // click on the other side, the other LED will light up
  if (mouseIsPressed) {
    if (mouseX <= width / 2) {
      left = 1;
    } else {
      right = 1;
    }
  } else {
    left = right = 0;
  }
}

function keyPressed() {
  if (key == " ") {
    // important to have in order to start the serial connection!!
    setUpSerial();
  }
}

// This function will be called by the web-serial library
// with each new *line* of data. The serial library reads
// the data until the newline and then gives it to us through
// this callback function
function readSerial(data) {
  ////////////////////////////////////
  //READ FROM ARDUINO HERE
  ////////////////////////////////////

  if (data != null) {
    // make sure there is actually a message
    // split the message
    let fromArduino = split(trim(data), ",");
    // if the right length, then proceed
    if (fromArduino.length == 2) {
      // only store values here
      // do everything with those values in the main draw loop
      
      // We take the string we get from Arduino and explicitly
      // convert it to a number by using int()
      // e.g. "103" becomes 103
      rVal = int(fromArduino[0]);
      alpha = int(fromArduino[1]);
    }

    //////////////////////////////////
    //SEND TO ARDUINO HERE (handshake)
    //////////////////////////////////
    
    let sendToArduino = mouseX + "," + mouseY + "\n";
    writeSerial(sendToArduino);
  }
}
// Week 11.2 Example of bidirectional serial communication

// Inputs:
// - A0 - sensor connected as voltage divider (e.g. potentiometer or light sensor)
// - A1 - sensor connected as voltage divider 
//
// Outputs:
// - 2 - LED
// - 5 - LED

int leftLedPin = 3;
int rightLedPin = 5;

void setup() {
  // Start serial communication so we can send data
  // over the USB connection to our p5js sketch
  Serial.begin(9600);

  // We'll use the builtin LED as a status output.
  // We can't use the serial monitor since the serial connection is
  // used to communicate to p5js and only one application on the computer
  // can use a serial port at once.
  pinMode(LED_BUILTIN, OUTPUT);

  // Outputs on these pins
  pinMode(leftLedPin, OUTPUT);
  pinMode(rightLedPin, OUTPUT);

  // Blink them so we can check the wiring
  digitalWrite(leftLedPin, HIGH);
  digitalWrite(rightLedPin, HIGH);
  delay(200);
  digitalWrite(leftLedPin, LOW);
  digitalWrite(rightLedPin, LOW);


  // start the handshake
  while (Serial.available() <= 0) {
    digitalWrite(LED_BUILTIN, HIGH); // on/blink while waiting for serial data
    Serial.println("0,0"); // send a starting message
    delay(300);            // wait 1/3 second
    digitalWrite(LED_BUILTIN, LOW);
    delay(50);
  }
}

void loop() {
  // wait for data from p5 before doing something
  while (Serial.available()) {
    digitalWrite(LED_BUILTIN, HIGH); // led on while receiving data

    int xPos = Serial.parseInt();
    int yPos = Serial.parseInt();
    if (Serial.read() == '\n') {
      analogWrite(leftLedPin, xPos);
      analogWrite(rightLedPin, yPos);
      int sensor = analogRead(A0);
      delay(5);
      int sensor2 = analogRead(A1);
      delay(5);
      Serial.print(sensor);
      Serial.print(',');
      Serial.println(sensor2);
    }
  }
  digitalWrite(LED_BUILTIN, LOW);
}

3. Part third

/* Week 11.2 bidi serial example
 * Originally by Aaron Sherwood
 * Modified by Mangtronix
 */
let velocity;
let gravity;
let position;
let acceleration;
let wind;
let drag = 0.99;
let mass = 50;

let LED_STATE = 0;

function setup() {
  createCanvas(640, 360);
  background(125, 125, 125);
  position = createVector(width / 2, 0);
  velocity = createVector(0, 0);
  acceleration = createVector(0, 0);
  gravity = createVector(0, 0.5 * mass);
  wind = createVector(0, 0);
}

let connected = false;

function draw() {
  background(255);
  fill(255, 200, 0);
  if (!serialActive) {
    text("Press SPACE to select Serial Port", 20, 30);
  } else {
    text("Connected", 20, 30);
  }

  if (connected === true) {
    applyForce(wind);
    applyForce(gravity);
    velocity.add(acceleration);
    velocity.mult(drag);
    position.add(velocity);
    acceleration.mult(0);
    ellipse(position.x, position.y, mass, mass);
    if (position.y > height - mass / 2) {
      velocity.y *= -0.9; // A little dampening when hitting the bottom
      position.y = height - mass / 2;
      LED_STATE = 0;
    } else {
      LED_STATE = 1;
    }
  }
}

function applyForce(force) {
  // Newton's 2nd law: F = M * A
  // or A = F / M
  let f = p5.Vector.div(force, mass);
  acceleration.add(f);
}

function keyPressed() {
  if (key == " ") {
    mass = random(15, 80);
    position.y = -mass;
    velocity.mult(0);
    setUpSerial();
  }
 
}

// This function will be called by the web-serial library
// with each new *line* of data. The serial library reads
// the data until the newline and then gives it to us through
// this callback function

function readSerial(data) {
  ////////////////////////////////////
  //READ FROM ARDUINO HERE
  ////////////////////////////////////

  if (data != null) {
    let fromArduino = split(trim(data), ',');
    if (fromArduino[0] < 512) {
      wind.x = map(fromArduino[0], 200, 512, -2, 0);
    } else {
      wind.x = map(fromArduino[0], 513, 1023, 0, 1);
    }
    //////////////////////////////////
    //SEND TO ARDUINO HERE (handshake)
    //////////////////////////////////
    let sendToArduino = LED_STATE + "\n";
    writeSerial(sendToArduino);

    connected = true;
  }
}
int leftLedPin = 2;
int rightLedPin = 5;


void setup() {
 // Start serial communication so we can send data
 // over the USB connection to our p5js sketch
 Serial.begin(9600);


 // We'll use the builtin LED as a status output.
 // We can't use the serial monitor since the serial connection is
 // used to communicate to p5js and only one application on the computer
 // can use a serial port at once.
 pinMode(LED_BUILTIN, OUTPUT);


 // Outputs on these pins
 pinMode(leftLedPin, OUTPUT);
 pinMode(rightLedPin, OUTPUT);


 // Blink them so we can check the wiring
 digitalWrite(leftLedPin, HIGH);
 digitalWrite(rightLedPin, HIGH);
 delay(200);
 digitalWrite(leftLedPin, LOW);
 digitalWrite(rightLedPin, LOW);


 // start the handshake
  while (Serial.available() <= 0) {
    digitalWrite(LED_BUILTIN, HIGH);  // on/blink while waiting for serial data
    Serial.println("0,0");            // send a starting message
    delay(300);                       // wait 1/3 second
    digitalWrite(LED_BUILTIN, LOW);
    delay(50);
  }
}


void loop() {
 // wait for data from p5 before doing something
 while (Serial.available()) {
   digitalWrite(LED_BUILTIN, HIGH);  // led on while receiving data


   int LED_STATE = Serial.parseInt();
   //int right = Serial.parseInt();
   if (Serial.read() == '\n') {
     digitalWrite(rightLedPin, LED_STATE);
     int sensor2 = analogRead(A1);
     delay(5);
     Serial.print(sensor2);
     Serial.print(',');
     Serial.println('Y');
   }
 }
 digitalWrite(LED_BUILTIN, LOW);
}


Final Project Idea

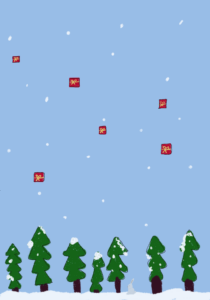
As a kid I used to love playing the game “winterbells” on my aunt’s PC. For my final project, i want to recreate that nostalgic experience with a twist.

Instead of the conventional keyboard controls, I want to introduce a hands-on approach. Players will have a physical bunny, a soft toy, that becomes the controller for the bunny’s movements on the screen. I will use an ultrasonic sensor to allow the bunny’s physical position to dictate the virtual bunny’s movements. There will also be a switch to allow the bunny to jump at the start of the game.

Given the project deadline aligns with the festive season, I want to infuse the game with a stronger Christmas theme. Here’s a sketch of what I’ve envisioned:

I also think it would be really fun if i could give players an incentive at the showcase: collect more than a certain amount of virtual gifts within the game to get a special Christmas gift at the showcase 🙂

Design Meets Disability


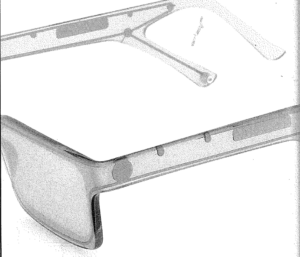
I think the reading was interesting it communicated the importance of design to disabilities and how it opens a new possibility to re-invent these pieces as fashion and not only for medical purposes. I enjoyed the part about glasses because it reminded me of the times when I would go shopping with my mom and I always try many on before picking one that suits me. I can not imagine a time when glasses were not stylized. Similarly, I think there is a sense of struggle when comes to designing things for disability, I will argue that maybe because the person designing these pieces is not disabled himself/herself which would be a problem because the designer would not know what the people who he/she is designing for wants. I think part of the design process is to know the consumers well. Their opinion, their style, and what they want. However, the reading lacked that part. Especially when it comes to design Ear- Wear and different body limbs.

It is good to design products that are more inclusive and toward the disabled like clickable audio buttons, or products that have braille on them. Further, how do we design products that can compensate people who lack some limps? Do we incorporate different limps to our design too or do we make our products useable in different ways but with the same effect? I do not think that the radio example is that inclusive it might be to a degree but I think it could be more inclusive if the designers would allow users to control it with voice, or even control it with brail and then would also have a small screen that writes whatever is being displayed in the radio

Week 11 – Final Project Idea

Concept: A Digital Petting Zoo

For the final project, as we are required to combine both Arduino and p5js, I decided to do a digital petting zoo. I take the inspiration from an actual petting zoo, which looks like this:

Petting zoos under threat following health inquiry

In this digital petting zoo, the p5js will act like a map of the zoo and shows the information about the animals. The visitor will be able to navigate the zoo using controllers connected to Arduino. In this zoo, I plan to have three to four animals. For these animals, I plan to make physical prototypes using cardboards and other materials. These physical prototypes will be equipped with different sensors according to different animals so that the visitor can interact with them. For example, some shy animal may have a distance sensor while outgoing one might have a light sensor so that it can sense the petting of the visitor.

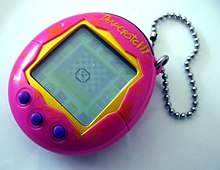
Additionally, to add some fun to the experience, there will be some tasks for the visitor to complete, such as feeding them, petting them, etc. This sort of imitates the famous old device, a Tamagotchi:

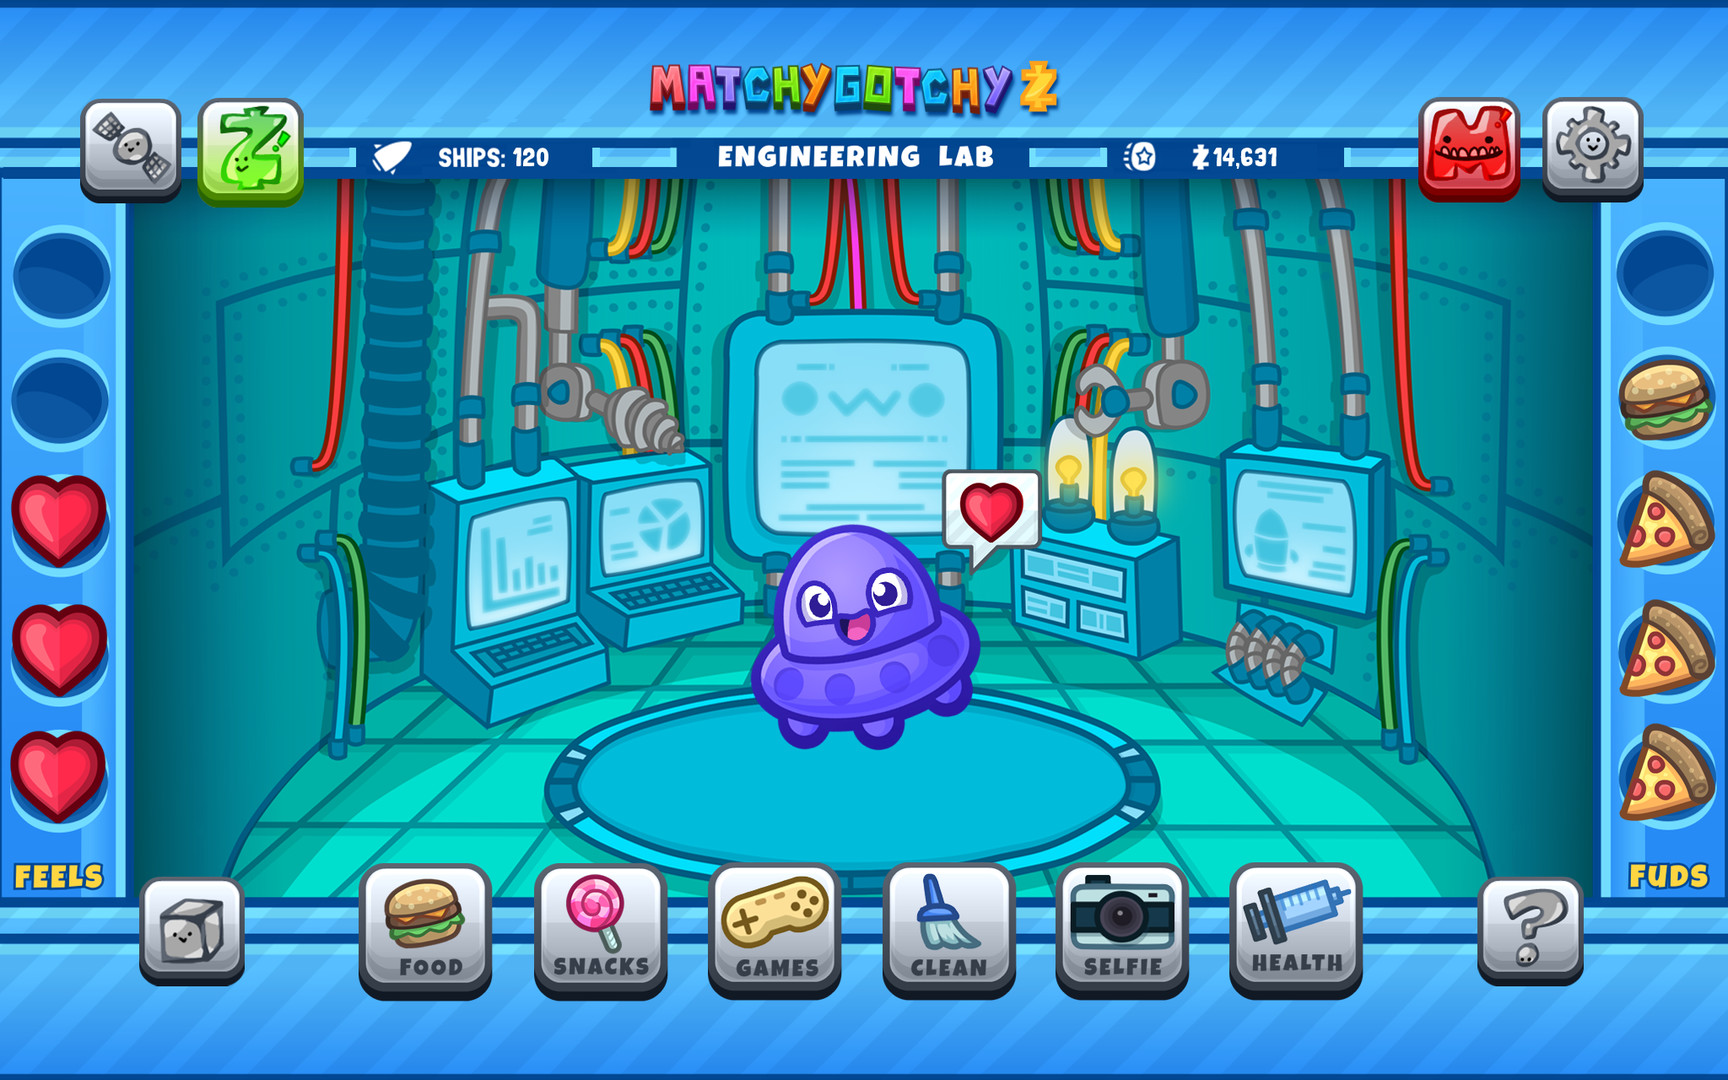
The user interface should represent something like this:

MatchyGotchy Z on Steam

Therefore, this project aims at making the visitor feel like walking around a petting zoo as well taking care of the animals there using Arduino and p5js.

3 Examples

Process:

For this assignment, we had to finish the three in-class examples that connect p5js and Arduino. In the beginning, I thought I understood the code and the connection but then I realized that I did not fully understand it. So I decided to review it line by line and try to understand the communication between Arduino and P5js.

Then Yupu and I decided to work together on these three examples we divided them so that he worked on the first one I worked on the second and we both worked on the third together. We helped each other debug the code and figure out how to implement it together. Honestly, this process of debugging helped me understand the communication between the two (P5js and Arduino) better.

Example 1: Circle Moving


// Week 11.2 Serial port - Light sensor, ball and light example 1 


int leftLedPin = 7;
int rightLedPin = 4;


void setup() {
 // Start serial communication so we can send data
 // over the USB connection to our p5js sketch
 Serial.begin(9600);


 // We'll use the builtin LED as a status output.
 // We can't use the serial monitor since the serial connection is
 // used to communicate to p5js and only one application on the computer
 // can use a serial port at once.
 pinMode(LED_BUILTIN, OUTPUT);


 // Outputs on these pins
 pinMode(leftLedPin, OUTPUT);
 pinMode(rightLedPin, OUTPUT);


 // Blink them so we can check the wiring
 digitalWrite(leftLedPin, HIGH);
 digitalWrite(rightLedPin, HIGH);
 delay(200);
 digitalWrite(leftLedPin, LOW);
 digitalWrite(rightLedPin, LOW);


 // start the handshake
  while (Serial.available() <= 0) {
    digitalWrite(LED_BUILTIN, HIGH);  // on/blink while waiting for serial data
      Serial.println("0,0");            // send a starting message
    delay(300);                       // wait 1/3 second
    digitalWrite(LED_BUILTIN, LOW);
    delay(50);
  }
}


void loop() {
 // wait for data from p5 before doing something
 while (Serial.available()) {
   digitalWrite(LED_BUILTIN, HIGH);  // led on while receiving data


   if (Serial.read() == '\n') {


     int sensor = analogRead(A1);  //potentiometer
     Serial.println(sensor);
   }
 }
 digitalWrite(LED_BUILTIN, LOW);
}


Example 2: LED Brightness

// Week 11.2 Example LED brightness


int leftLedPin = 6;

void setup() {
  // Start serial communication so we can send data
  // over the USB connection to our p5js sketch
  Serial.begin(9600);


  // We'll use the builtin LED as a status output.
  // We can't use the serial monitor since the serial connection is
  // used to communicate to p5js and only one application on the computer
  // can use a serial port at once.
  pinMode(LED_BUILTIN, OUTPUT);

  // Outputs on these pins
  pinMode(leftLedPin, OUTPUT);

  // start the handshake
  while (Serial.available() <= 0) {
    digitalWrite(LED_BUILTIN, HIGH);  // on/blink while waiting for serial data
    Serial.println("0,0");            // send a starting message
    delay(200);                       // wait 1/3 second
    digitalWrite(LED_BUILTIN, LOW);
    delay(200);
  }
}


void loop() {
  // wait for data from p5 before doing something
  while (Serial.available()) {
    digitalWrite(LED_BUILTIN, HIGH);  // led on while receiving data

    int brightness = Serial.parseInt();
    analogWrite(leftLedPin, brightness);
    if (Serial.read() == '\n') {
      Serial.println("0,0");
    }
  }
  digitalWrite(LED_BUILTIN, LOW);
}


Example 3:  Gravity, Ball, and LED

// week 11 example 3 sensor analg and digital light and abouncing ball 

int leftLedPin = 7;
int rightLedPin = 4;


void setup() {
 // Start serial communication so we can send data
 // over the USB connection to our p5js sketch
 Serial.begin(9600);


 // We'll use the builtin LED as a status output.
 // We can't use the serial monitor since the serial connection is
 // used to communicate to p5js and only one application on the computer
 // can use a serial port at once.
 pinMode(LED_BUILTIN, OUTPUT);


 // Outputs on these pins
 pinMode(leftLedPin, OUTPUT);
 pinMode(rightLedPin, OUTPUT);


 // Blink them so we can check the wiring
 digitalWrite(leftLedPin, HIGH);
 digitalWrite(rightLedPin, HIGH);
 delay(200);
 digitalWrite(leftLedPin, LOW);
 digitalWrite(rightLedPin, LOW);


 // start the handshake
  while (Serial.available() <= 0) {
    digitalWrite(LED_BUILTIN, HIGH);  // on/blink while waiting for serial data
    Serial.println("0,0");            // send a starting message
    delay(300);                       // wait 1/3 second
    digitalWrite(LED_BUILTIN, LOW);
    delay(50);
  }
}


void loop() {
 // wait for data from p5 before doing something
 while (Serial.available()) {
   digitalWrite(LED_BUILTIN, HIGH);  // led on while receiving data


   int LED_STATE = Serial.parseInt();
   //int right = Serial.parseInt();
   if (Serial.read() == '\n') {
     digitalWrite(rightLedPin, LED_STATE);
     int sensor2 = analogRead(A1);
     delay(5);
     Serial.print(sensor2);
     Serial.print(',');
     Serial.println('Y');
   }
 }
 digitalWrite(LED_BUILTIN, LOW);
}


Final Project Ideas

Idea 1

I would like to combine my midterm project with the final project, creating a tool that allows a person to learn to play the piano with a midi keyboard. My sketch on P5 will offer a user a variety of songs and an opportunity to add unique ones. The key that needs to be pressed will be shown on the screen, and if the right key is pressed, Sketch will show the next key.

Idea 2

During the last reading, I came up with the idea of creating a device that would allow blind and deaf, or blind people to read Braille. It would look like a small platform for a finger, which will have six points. The device will elevate the points according to the letters they represent in Braille. The user will be able to control the speed of the reading and upload their own text.

Week 11 – Final Project Ideas

Idea 1:

For my first (and main) idea, I want to work with the concept of IOT and Home Automation. In this case, as cliche as it might sound, I would like to have a central control unit for every interactive part of our houses. What this allows is to have direct control over every item in the house, which at the same time allows me to make the main part of this project, which is an assistant that will be able to act on every interactive item of the house. The multiple ways of connecting to it will allow a variety of options and ideas.

Idea 2:

For this project, the idea is to create a combination between 2 of the most popular game genres this year: rhythm games and combination games. The concept is to create a rhythm game that every time you get a perfect hit, a  ball will fall, which will allow the user to drop the balls in order to combine them and achieve a higher score.

Week 11 – Exercises

  1. Make something that uses only one sensor  on Arduino and makes the ellipse in p5 move on the horizontal axis, in the middle of the screen, and nothing on arduino is controlled by p5

    let rVal = 0;
    let alpha = 255;
    let left = 0;
    let right = 0;


    function setup() {
    createCanvas(640, 360);
    noFill();
    //create an ellipse with x position changing and y (300) position constant
    }
    
    
    function draw() {
    background(255);


    if (!serialActive) {
    fill(0)
    text("Press Space Bar to select Serial Port", 20, 30);
    } else {
    fill(0)
    text("Connected", 20, 30);
    }
    let xPos = 300;
    xPos = map(alpha, 0, 1023, 0,640);
    ellipse(xPos, 150, 50, 50);
    
    
    console.log(alpha);
    }
    
    
    function keyPressed() {
    if (key == " ") {
    // important to have in order to start the serial connection!!
    setUpSerial();
    }
    }


    For this question, we decided to create a simple ellipse that changes direction based on the values from the potentiometer.

  2. make something that controls the LED brightness from p5t
    function keyPressed() {
    if (key == " ") {
    // important to have in order to start the serial connection!!
    setUpSerial();
    }
    if (key== "1"){
    left = 50;
    }
    
    
    if (key== "2"){
    left = 100;
    }
    if (key== "3"){
    left = 255;
    }
    if (key =="4"){
    right = 50;
    }
    if (key =="5"){
    right = 100;
    }
    if (key =="6"){
    right =255;
    }
    }


    This one was pretty simple. Pressing the keys 1-6 increases/decreases the brightness of the left or right LED light. 1-3 correspond to the left, while 4-6 correspond to the right led.

  3. take the gravity wind example (https://editor.p5js.org/aaronsherwood/sketches/I7iQrNCul) and make it so every time the ball bounces one led lights up and then turns off, and you can control the wind from one analog sensor.
let rVal = 0;
let alpha = 255;
let left = 0;
let right = 0;
let velocity;
let gravity;
let position;
let acceleration;
let wind;
let drag = 0.99;
let mass = 20;


function setup() {
createCanvas(640, 360);
noFill();
position = createVector(width/2, 0);
velocity = createVector(0,0);
acceleration = createVector(0,0);
gravity = createVector(0, 0.1*mass);
wind = createVector(0,0);
}


function draw() {
background(255);
applyForce(wind);
applyForce(gravity);
velocity.add(acceleration);
velocity.mult(drag);
position.add(velocity);
acceleration.mult(0);
ellipse(position.x,position.y,mass,mass);
if (position.y > height-mass/2) {
velocity.y *= -0.9; // A little dampening when hitting the bottom
position.y = height-mass/2;


}
console.log(position.y);
if(position.y >= 330){
left = 1;
}
else if(position.y <= 330){
left = 0;
}
console.log(rVal);
wind.x = map(alpha, 0, 1023, -1, 1);


if (!serialActive) {
fill(0)
text("Press Space Bar to select Serial Port", 20, 30);
} else {
fill(0)
text("Connected", 20, 30);
}
}
function applyForce(force){
// Newton's 2nd law: F = M * A
// or A = F / M
let f = p5.Vector.div(force, mass);
acceleration.add(f);
}


function keyPressed() {
if (key == " ") {
// important to have in order to start the serial connection!!
setUpSerial();
}
if(key == "1"){
left = 1;
}


}


For changing the wind direction, we followed similar logic to the first question. The ball changes direction based on values mapped from the potentiometer.

Week 11 | Final Project Idea

Final Project Idea- Hello Kitty and her Friends Adventure route :

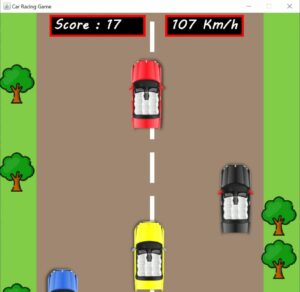
As I contemplated a concept for my final project, I realized my true desire was to create a game. But not just any ordinary car game with normal obstacles. Instead, I envisioned a Hello Kitty-themed adventure.

Sanrio, a beloved part of my childhood and still a cherished brand in my adult life, inspires me to incorporate their iconic imagery. My vision includes using a Sonic distance sensor as an innovative control mechanism for maneuvering Hello Kitty, though her adventure but I’m still brainstorming additional features to enrich the gaming experience.

I already have ideas about how to present this game and I can’t wait to actually proceed with this idea. It might appear as just a regular game, but this time, I am personally committed to creating one, especially since my last project was an experience rather than a game. I’m not only incorporating a significant part of my childhood into it, but also who doesn’t love car games especially with a twist?

Week 11 Exercises

Exercise 1

function draw() {
  background(250, 200, 152);

  if (!serialActive) {
    print("Press Space Bar to select Serial Port", 20, 30);
  } else {
    print("Connected");

    // ellipse
    noStroke();
    fill(255, 0, 0);
    ellipse(map(rVal, 0, 1023, 0, width), height / 2, 100, 50);
  }
}

Link to the sketch: Sketch Exercise 1 

Exercise 2

function draw() {
  background(250, 200, 152);

  if (!serialActive) {
    print("Press Space Bar to select Serial Port");
  } else {
    print("Connected");
    
    brightness = Math.floor(map(rVal, 0, 1023, 0,255));
    right = Math.floor(brightness);
  }
}

The only change in Arduino code I made was using analogWrite instead of digitalWrite.

Link to the sketch: Sketch Exercise 2

Exercise 3

function draw() {
  
  background(250,200,152);
  
  if (!serialActive) {
    print("Press Space Bar to select Serial Port");
  } else {
    if (state == 1){
    
    applyForce(wind);
    applyForce(gravity);
    velocity.add(acceleration);
    velocity.mult(drag);
    position.add(velocity);
    acceleration.mult(0);
    ellipse(position.x,position.y,mass,mass);

    if (position.y > height-mass/2) {
      velocity.y *= -0.9;  // A little dampening when hitting the bottom
      position.y = height - mass/2;
    } 

    if (position.y >= height - mass/2 - 5) {
      left = 1;
    } else {
      left = 0;
    }

  wind.x = map(rVal, 0, 1023, -1, 1)
    }
  }
}

For this sketch, I used the state machine to allow the Arduino to load before the ball starts to fall. Otherwise, the LEDs wouldn’t work properly.

Link to the sketch: Sketch Exercise 3

Video demonstration: VIDEO