Week 4 – Love Yourself :)

Overview:

For this assignment, I tried to utilize the typography concepts learned in class in combination with WebGL (Web Graphics Library), to create an interactive generative text.

Concept:

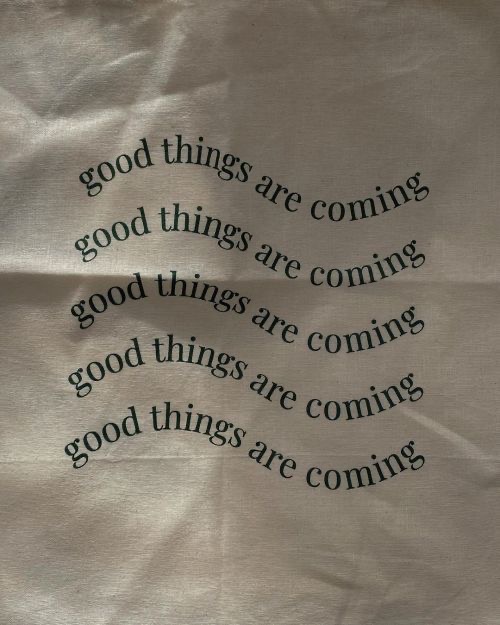
I’m really into typography and generative text art, so I particularly enjoyed working on this assignment. I was surfing though Pinterest for inspiration, and was inspired by the works below. Unable to choose between those two works, I decided to combine them.

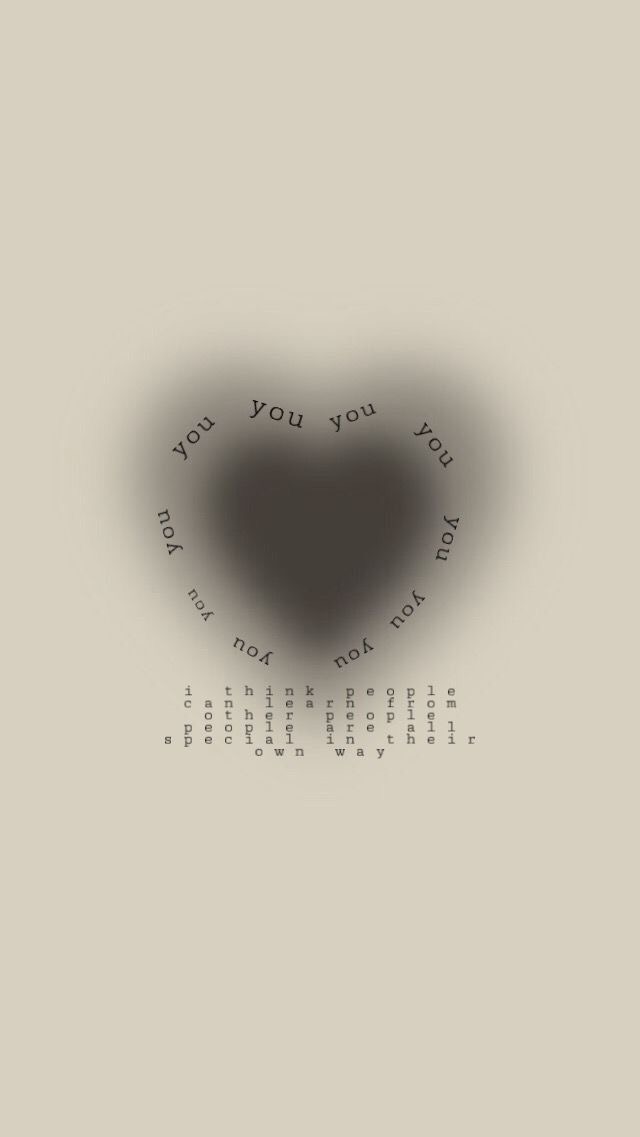
The concept of this work is self-love and simplicity. I like setting these kind of photos as my phone wallpaper as a reminder to not compare my journey with other’s journey, because it’s hard to forget it or ignore it when it’s right in front of my nose 🙂 Therefore,  I decided to create my own wallpaper using the code.

Since the concept is “self-love”, I relied on the colors associated with love, such as red, white and black (as they’re basic colors). I also played around with the opacity of the text, and created a fade-away effect for the text as it progresses down the row.

Code:

The major highlights of my code are the sine-wave text and heart made of the word “love”. First, I created a sine-wave by using by displaying the string character by character and using sin() function to make y-value dependent on the x-value of the text.

To draw the heart, I used the mathematical formula based on the polar coordinates which is described in this video. However, I adapted the formula used there to my code so that instead of the vertices, my shape will consist of  the words “love”. I used beginShape() and endShape() to connect the words together to form a heart shape, and I used push() and pop() to limit the rotation only to the heart. To make the rotation effect, I utilized the rotateY() function of the WEBGL library, which allows us to rotate the shape around the y-axis.

I also tried to integrate some interactivity to this work: the user would be able to change the “mode” of the artwork from bright to dark by pressing the mouse (when the mode changes, the main text also changes). Also, the user can control the rotation by stopping or continuing it through the key “s”.

Here are the parts of the code I referenced:

//draw the heart
  let letter= "love";
  textSize(sizeHeart);
  
  //create a shape to be able to rotate it later
  beginShape();
  //use push and pop to apply the rotation only to the heart shape
  push();
  
  if(toStop==false){
    //rotate the heart around the y-axis
      rotateY(millis() / 1000);
  }

  
  //opacity of the heart is modifiable
  fill(210, 4, 45,heartOpacity);
   stroke(0);
  
  //if we set a to be 0.01, we will get a heart with densely located letters 
  for(let a=0; a<TWO_PI; a+=0.05){
    let r=10;
    let x= r*16*pow(sin(a),3);
    let y=-r*(13*cos(a) - 5*cos(2*a) - 2*cos(3*a) - cos(4*a))
    text(letter,x,y);
  }
  pop();
  endShape();
//draw the text
  let textLength = msg1.length;
  let tWidth = textWidth(msg1);
  noStroke();
  textSize(sizeMsg);
  
  //plce the text in the center
  let textStart_x = 0 - (tWidth / 2) + 20;
  
   //make the characters of the string follow a sine wave pattern
  for(j=0; j<5; j++){
    
    //since we have 5 rows of the same text, each of the rows will start at different y locations
    let textStart_y = -20 + j*20;
    
    for(i=0; i<textLength; i++){
      
      //change the text and its opacity when the mouse is pressed
      if(mouseIsPressed){
        fill(255,255,255,80*(j+1));
        msg1="trust yourself trust yourself trust yourself trust yourself trust yourself";
      }
      else{
        fill(0,0,0, 30*(j+1));
        msg1="love yourself love yourself love yourself love yourself love";
      }
      
      //print the text by printing characters one by one
      text(msg1[i],textStart_x+i*10, textStart_y+10*sin((textStart_x+i*10)/30));
    }
  }

Reflection and future Improvements:

Overall, I really enjoyed working on this assignment (I enjoyed it as much as making my self-portrait, haha) and I’m content with how my work turned out as well. One of the suggestions for further improvement would be using more heart shapes of different size and making them rotate in different pace and direction to emulate the heart-shaped medallion. Also, playing around with the color of the text and applying different colors to different rows or characters is also one suggestion.

Week 3: Fireworks

Overview:

For this assignment, I tried to utilize the concepts of object-oriented programming (such as classes and arrays) to create a generative artwork with an element of randomness and interactivity.

Concept:

I was looking at different forms of generative examples on the Internet and got inspired by this generative art created on processing. So, I decided to imitate fireworks by programming the instances of objects (in my case, circles) to follow a specific movement aimed at creation an effect of explosion and dispersion as in the below photo.

I tried to choose bright range of colors to fit the concept of fireworks, and I  also added the trail at the end of the particles to create a slow dispersion effect. For this, I manipulated to opacity of the background, setting it to 90. The user can also interact with it by choosing the origin of the fireworks, which, in turn, changes the background color to different dark shades of red and green.

Code:

Even though this animation may not be that realistic because the particles were following a symmetrical path, I am still proud of how the explosion effect at he beginning and a random dispersion that follows turned out to be. The part of the code that is responsible for these is the update() function that calculates the movement of particles and adds and element of randomness.

Here’s the code for the reference:

//function to calculate the lcoation and movement of circles
 update(){
  
   //after the circles reach the pre-defined boundaries i.e. after the first explosion occurs
   if(this.x>this.xMax || this.y>this.yMax || this.x<this.xMin || this.y<this.yMin){
     
     //user can change the origin of the salute by clicking on the screen
     if(mouseIsPressed == true){
       
       this.x=mouseX
       this.y=mouseY 
       
       //when they click the screen, the background color will also change to random shades of red and green to resemble the sky during the fireworks show
     background(random(0,100),random(0,100),random(0,100),opacity);
     }
     
     //in times when the user doesn't click on the scree, the origin of fireworks will be determined by the randomn() function
     else {
       this.x=random(0,400)
       this.y=random(0,400) 
     }
     
   } 
   
   //make the circles move on a specific manner
   this.x+=this.xspeed;
   this.y+=this.yspeed;   
 }

Future Improvements:

As I’ve mentioned above, one of the improvements for this code to create a more realistic firework imitation would be to make the particles follow not such a strict symmetric path. Also, instead of making them move in the straight line, it would be a good idea to make them move on an arc, accelerate when falling and decelerate when exploding. I tried to incorporate these concepts to this code as well, however I faced few challenges during the process, especially when making the particles fall to the ground imitating an arc-like movement.


Week 2: Generative Art

Concept:

For this assignment, my concept was to create a dynamic generative art by using just a one shape – ellipse. I was interested in how ellipse can be manipulated to create an outline of various figures such as circles, triangles, blobs, etc.

As I started to play around with the ellipses, I was stuck on the problem of how I can make the ellipses follow the outline of a circle. After using some math, I eventually succeeded in forming the half-circle with ellipses, and then I applied the similar logic with x-axis reflection to form the other half.

I tried to utilize the concepts that we learned during the previous classes (translation, rotation, randomization, etc.) as much as possible, so I ended up creating an interesting form of generative art composed of 4 large and 1 small vibrating circles. The frame rate can be manipulated to change the speed of vibrations, in my case it is set to 5. The vibrations are achieved by manipulating the gaps between the ellipses and their width as well.

As for the color choice, I wanted to match the dynamic concept and the “wavy” vibe it gave, so I chose a black color for the background and a gradient color for the ellipses forming circles, which is achieved by manipulating the RGB values.

Code:

A code that I’m particularly proud of is the one where I draw circle by forming it from ellipses.  I used the Pythagorean theory (x^2+y^2=z^2) to get the length of a line that connects  two points in the circle which lie on the same line, and which is parallel to the diameter of the circle.  I used the for loop to gradually increment the width of the ellipse, and used x-axis reflection to form the other half of the circle.

//function to draw the circles
function drawCircle(radius,gap,upperCircleI){

  for(i=0; i<91; i+=gap){
    let circleWidth = 5;
    
    //upper part of the circle
    fill(255,150,2*i);
    ellipse(width/4, 10+i, 2*(sqrt(radius*radius -   upperCircleI*upperCircleI)), circleWidth);
    upperCircleI-=gap;
    
    
    //lower part of the circle
    fill(2*i,150,255);
    ellipse(width/4, 100+i, 2*(sqrt(radius*radius - i*i)), circleWidth);
    
  } 
}


Reflection and future improvement:

One of the ways this artwork could be improved is by increasing the size of the circles (i.e. making it 8×8) and applying a rotation effect that will make the circles rotate about the origin point. Another possible improvement would be randomizing the size and locations of the circles to create a more dispersed and random images.


Week 1: Self-Portrait

Overview:

For this assignment, I tried to utilize basic programming principles and primitive shapes to create a portrait of myself using p5.js.  I started my work with a preliminary sketch to figure out which shapes best represent different aspects of my facial features. When drawing it on the p5.js,  I relied mainly on the shapes such as circles, triangles, rectangles, arcs, and ellipses. Additionally, even though we weren’t asked to implement animation or any kind of interactivity, I decided to add some minor touches and make my avatar a bit interactive. Overall, this assignment helped me get familiar with the p5.js platform and understand how to translate complex designs and features into simple, primitive shapes.


Concept:

My concept for this assignment was creating a cartoon-style version of myself. It may not be 100% realistic, but I tried to convey my main facial features such as oval-roundish head, brown hair and eyes, round eyes, long neck, and etc. I also wanted to keep it realistic and minimalistic, therefore I didn’t add any special effects or accessories (except for a necklace).

Preliminary sketch:

Code:

The highlights of my code would be pupils that follow the direction of the mouse and a mouth that imitates talking when the mouse is clicked. I was inspired by a “Koala portrait” provided as a sample example in the homework description, so I decided to apply a similar concept to my work as well. The main idea behind moving pupils is that the location of the circles that are forming my pupils are dependent on the X and Y coordinate of the mouse. Those X and Y locations are multiplied by a small scalar number (in my case, it’s 0.02) and are added to the center of the circles.

With regards to the talking mouth animation, the shape of the mouth depends on whether the mouse is clicked or not. When it is clicked, the arc that is forming the mouth is drawn a bit thinner, but when it is not, the arc has a larger width.

I’m also proud of how proportions of different facial features turned out to be. All of these proportions were calculated with regards to the center of the ellipse that is forming my head.


Future Improvements:

One of the ideas for future improvements would be adding more details to my face such as eyelashes, make-up,  a detailed outline of the lips, etc. I would also work on my bangs as they didn’t turn out as much realistic as I wanted them to be. In terms of interactivity,  I think that making the eyelids close occasionally when talking (i.e. once in 7 mouse clicks) would make the talking animation more realistic.