Nourhane Sekkat’s Week 8 Reading Response

In reflecting on Don Norman’s “Emotion & Design: Attractive Things Work Better,” I find myself intrigued by the psychological interplay between aesthetics and perceived functionality. Norman posits that attractive products trigger our creative thinking and problem-solving abilities, enhancing our emotional state, which in turn can actually improve performance. This suggests an intimate connection between our emotional responses and cognitive processes. In my experience, this connection seems valid. A well-designed interface or product often feels more intuitive, perhaps because the positive emotional response engenders a more forgiving and patient interaction. However, Norman could be subject to confirmation bias, as designs that are perceived as attractive may not universally lead to better performance across different users and contexts. This raises questions about the universality of design principles: Are there cultural or individual differences in how aesthetics influence usability?

The article on Margaret Hamilton, “Her Code Got Humans on the Moon—And Invented Software Itself,” underscores the impact of individual contributions to technology, highlighting how Hamilton’s work laid the foundation for modern software engineering. The narrative is inspiring, showcasing the transformative power of innovation and meticulous problem-solving. This reflection doesn’t dispute the facts presented, but it prompts me to consider the unsung heroes of technological advancement. The author’s focus on Hamilton’s groundbreaking achievements is merited, yet one wonders about the many contributors to the space program whose stories remain untold. This reading has reinforced my belief in the importance of recognizing collaborative efforts in tech advancements. It leaves me curious about the dynamics of team contributions and the recognition of individual achievements within such contexts. It also raises a question: How many other pioneers like Hamilton are there whose stories we have yet to acknowledge and celebrate?

Chin-Chin with a twist

Concept:

What’s a party without lights? A boring one. So I decided to spice it up and make cups light up a light bulb once they’re chin-chined. The idea was to add a little extra sparkle to festivities by integrating a fun, interactive element into our toasts. With some basic materials and a dash of creativity, I embarked on crafting a set of party cups that wouldn’t just hold beverages but also serve as a luminous centerpiece for the occasion.

Video:

Chin-Chin

Materials:
    • Arduino Uno
    • Breadboard
    • USB cable for Arduino
    • LED
    • Resistor
    • Tin Foil
    • Jumper wires
    • Ribbon
    • Party cups
Step-by-Step Guide:

1. Setting Up the Circuit: I started by setting up a basic circuit on a breadboard. LED was connected to the breadboard then I added a resistor, connected a wire to the ground on the Arduino and to the board, and another one to the 5V.

2. Closing the Circuit: I added a wire that goes from the same row as the end of the resistor and another one from the 5V wire row and connected the end of each of those to jumper wires.

3. Creating the Cups: I got party cups from the IM Lab and covered them up in tin foil to make them conductive and decorated the stem with ribbons to make it prettier and party-fitting.

4. Connecting the Cups: To close the circuit I added the other end of each jumper wire to the back of each cup in the foil area.

5. End Result: Once you chin-chin the cup together, the light bulb turns on becoming the life of the party and making the toast even more special and festive

Reflection:

I really love how it came out in the end, my vision really came to life. For the future though I would love to make the design sleeker and more aesthetic to look at and maybe make the bulb part of a sculpture or something like that to make it also make more sense and again prettier.


Whack-A-Mole-Land

One word “Finally”! This project was one of the worst ones I’ve worked on in a long time, I was met with error after error and pure confusion more than once.

But in the end and after millions of trial and error and hours in the lab this is my little baby and I couldn’t be happier and prouder of how it turned out:

Link to the full screen version (Zoom out to 60% or 75% for the best experience): https://editor.p5js.org/nourhane/full/vzSr13gm7

Whack-a-mole with a twist, I choose to focus a lot on the visuals of the game to make it reach the vision I had in mind but furthermore, I choose to add new features that the normal whack-a-mole didn’t have like bombs, and magic worms.

 Highlights:

The game begins at the main menu, inviting players to dive into the frenzied world of moles, bombs, and worms. Clicking on the screen transitions to an instruction page, which succinctly explains the game mechanics and objectives.

if (this.gameState === "mainMenu") {
    if (mouseY > height * 0.6) {
        this.gameState = "instructions";
    }
}

Moles sporadically appear from their designated holes, and the player must click on them to score points. However, there’s a twist! Occasionally, bombs disguised as moles pop up, and clicking them deducts lives. Additionally, friendly worms grace the screen, offering bonus points if clicked.

One of the features I’m particularly proud of is the random appearance logic of moles, bombs, and worms. It keeps players on their toes, ensuring every game session is unpredictable and challenging.

if (frameCount % 60 === 0 && game.gameState === "playing" && !game.paused) {
    let moleToShow = random(game.moles);
    moleToShow.visible = true;

    setTimeout(() => {
      if (!game.paused) {
        moleToShow.visible = false;
      }
    }, random(500, 1500));
  }

  if (frameCount % 80 === 0 && game.gameState === "playing" && !game.paused) {
    let showWorm = random() < 0.15; // 15% chance to show the worm
    if (showWorm) {
      game.worm.resetPosition();
      game.worm.visible = true;

      setTimeout(() => {
        if (!game.paused) {
          game.worm.visible = false;
        }
      }, random(500, 1500));
    }
  }
}

The game’s immersive experience is further enhanced with dynamic sound effects, creating an auditory feedback loop that’s satisfying and engaging.

Issues faced:

One of the main issues that took me hours to figure out was the score. It wasn’t increasing no matter how many times I clicked on the mole even though the mouse was telling me that it was clicked. I tired everything to fix it and used thousands and thousands of console.log statements to try and pin point the issue but nothing, looked on the internet, asked unix tutors, no one was able to figure it out, till it jumped to me “THE HAMMER, THAT’S THE ISSUE, IT’S NOT ALIGNED WITH THE MOUSE” at that moment I couldn’t feel happier but also dumber because it was such an easy fix yet i had to rake my mind and go crazy to find it.

Another main issue I had was with the sound, for some reason it kept giving me “undefined” and crashing my entire game and once again after hours of looking and console.loging, the issue was easy, I didn’t play the sound where it should. I was loading but not playing them in their respective spots (stupid right?)

Improvement:

In the end I’m so so so proud of it and couldn’t be happier with how it turned out. But no project or game is ever done, there always room for better and in this case they could be:

Game Dynamics: While the game offers a good mix of unpredictability with the random appearance of moles, bombs, and worms, adding more diverse game elements or increasing levels of difficulty could enhance the player’s experience. Introducing different types of moles with varying speeds, for instance, or adding power-ups and penalties, could make gameplay more dynamic and engaging.

User Interface and Graphics: The user interface, though functional, could benefit from a more refined design. Enhancing the graphics, smoothing out animations, and possibly introducing a thematic storyline could make the game more immersive. A more intuitive and interactive menu system could also be introduced, allowing players to adjust settings, view high scores, or access tutorials

Mobile Compatibility: Given the growing number of mobile gamers, optimizing the game for touch controls and ensuring it’s responsive to different screen sizes would be a significant improvement.

Conclusion:

However, considering my coding level and how far I got from the beginning and how much effort I put into it. Whack-a-mole Land is easily one of my favorite projects I worked on and I’m so proud of it and of myself as well.

Overthinker-

As usual finding an idea for assignment 4 was a challenge of its own and as I was scrolling through instagram I saw a video about the overthinking brain and there it was, my generative text artwork. The mind is an amazing thing but the overthinking mind is an epitome as it lies to its owner and paralyses him in negativity.  So through my artwork I wanted to create a simulation of that but have the positive thoughts “win” and create a sense of peace and victory in the end.

This is what I came up with in the end:

First, I started off with a simple black background and positive and negative words just floating around and the negative words disappear when colliding with the positive to symbolize that we should not let the negative thoughts our head lies to us with win.

Highlight of code:

The mechanism of the colliding and disappearing is honestly what I’m most proud of because it took a lot of researching and trial and error but in the end it came out exactly how I envisioned it.

Initially, each word is represented as an object, complete with its position, velocity, and type. Using the dist() function, a foundational function in p5.js, the code assesses the distance between two word objects. If this distance is less than a specified threshold, it infers that the two words are overlapping or colliding. Given the creative intent, the code dictates that if either of the two colliding words is negative, it should be removed from the display. However, directly manipulating (like removing items from) an array while iterating over it can lead to skipped iterations or index out-of-bound errors. To circumvent this, the code first logs the indices of words slated for removal in a separate removalIndices array. Only after all overlap checks are completed does the code loop through removalIndices to remove the identified words from the main displayedWords array. This ensures a safe, error-free removal process. Such collision-detection methodologies are commonplace in game development and interactive visualizations.  Daniel Shiffman’s tutorials on The Coding Train on YouTube were extremely helpful in figuring all of this out, especially object collision pt1, object collision pt2, and  his video about adding and removing from arrays

// Update and display each word
for (let i = displayedWords.length - 1; i >= 0; i--) {
    displayedWords[i].display();
    displayedWords[i].move();

    // Count negative words
    if (displayedWords[i].wordType === "negative") negativeWordCount++;

    // Check for overlapping words
    for (let j = i - 1; j >= 0; j--) {
        if (dist(displayedWords[i].position.x, displayedWords[i].position.y, displayedWords[j].position.x, displayedWords[j].position.y) < 30) {
            if (displayedWords[i].wordType === "negative" || displayedWords[j].wordType === "negative") {
                if (displayedWords[i].wordType === "negative" && !removalIndices.includes(i)) {
                    removalIndices.push(i);
                }
                if (displayedWords[j].wordType === "negative" && !removalIndices.includes(j)) {
                    removalIndices.push(j);
                }
            }
        }
    }
}

// Remove words based on indices stored in removalIndices list
for (let index of removalIndices) {
    displayedWords.splice(index, 1);
}

However, I didn’t like how simple and plain it looked so I started thinking of what other things I could add and started building the mind of my dreams. First, the background was to plain so I made it into a gradient of black and added particles that symbolizes the other thoughts and memories that are present in the mind and that alone made it look better and more lively like a real mind. Then I moved on to the words themselves and decided I wanted to make them look more distinctive so I went ahead and changed their color palette making the positive words lighter and cheerful and the negative more dark and gloomy. After that I remembered the goal I wanted to have which was a sense of peace and victory that comes with letting the positive thoughts win and decided to represent that with a beautiful sun that appears (symbolizing the radiance and happiness one feels when we don’t believe the lies our mind tells us) once all the negative thoughts are whooshed away and is surrounded by a peaceful find filled with nothing but positive words floating around.

Reflection:

The journey was both challenging and rewarding. The task started simply: display positive and negative words on a canvas. But as the requirements grew more complex – making words move, detecting overlaps, and having words disappear based on specific conditions – the code had to evolve. There’s a beauty in the simplicity of the final visualization: negative words being “overpowered” and disappearing when they encounter other words, and the eventual appearance of the sun symbolizing the triumph of positivity. However, behind that simplicity was a series of problem-solving steps, from collision detection to safely modifying arrays during iteration. In the end i’m so happy with the end result and what I was able to come up with in the end and of course the message it conveys.

Ideas for Future Work and Improvements:
  1. Interactive Elements:
    • Allow users to add their own words to the positive and negative lists, personalizing the experience.
    • Let users click on words to manually remove them or promote them.
  2. Animations and Transitions:
    • Instead of immediately removing negative words, they could fade out or shrink, making the disappearance smoother.
  3. Sound Integration:
    • Add background music or sound effects, enhancing user engagement. For instance, a calming tune could play, with chimes or effects when words disappear or when the sun appears.
  4. Narrative or Storytelling:
    • The visualization could be part of a larger narrative or game where users have to actively combat negativity.
  5. Adaptive Challenges:
    • Introduce “boss words” that require more effort to remove.

Midterm Progress- Wack-a-mole

After thinking for what felt like forever and hating a ton of games i tried to design an idea came to my mind, why not go old school and turn a physical game into a digital game and what’s better than using my favorite stress relief game “Wack-a-mole”, the game that generations have played, so why not give it a modern twist.

Description: A game where moles appear from various holes on a hill and the user must “whack” them by clicking on them. The aim is to get as many moles as possible within a certain time frame.

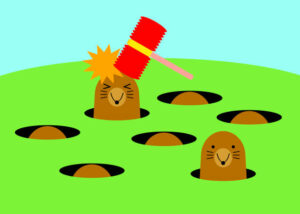
This is the inspo i want to recreate:

And this is the rough sketch i came up with so far:

I choose to leave the visuals till later and start off with what was frightening me the most at the time which was having the mole appear in exact random holes and for the mouse click to be able to detect it no matter where it’s touched which I was able to fix using a dist() function, ensuring precise and reliable click detection. However, other challenges remain such as making the game visually appealing to fit the inspo picture as much as possible and in general just look good and fun, adding the score, and as time gets closer to finish the game becomes harder yet remaining seamless.

Risks and ways to minimize them:

  1. Game becomes boring: The speed gets faster as time goes by

User Interaction Design:

The end result will have:

  1. Start Screen: Press “Start” to begin the game with instructions above.
  2. Gameplay: Moles pop up from holes at random intervals. The player clicks on them to score points. (I’m thinking of making the mouse be a mallet and have the mallet hit the moles but i’m not really sure how to do that)
  3. Timer at the bottom: A long 40 sec bar that runs down as time passes that changes color based on time left and in the last 10 second it will print the remaining time under
  4. Sound feedback: Every time a mole is hit a funny sound will play
  5. Difficulty increase:As the timer gets close to running out the moles will become faster at disappearing
  6. Scoring: Player earns points for each mole whacked.
  7. End Screen: Displays score when time runs out and an option to replay.


Nourhane Sekkat’s Reading response week #5

Golan Levin’s “Computer Vision for Artists and Designers” addresses a pivotal intersection in the contemporary world: the confluence of technology and art. By targeting novice programmers, particularly those with roots in the arts, Levin emphasizes the transformative potential of computer vision. This isn’t merely about enhancing artistic endeavors with technology; it’s about a fundamental shift in the capabilities and representations of art in the digital realm. One significant aspect of Levin’s work, inferred from the search results, is the “demystification” of computer vision. This underscores two primary challenges: the intrinsic complexity of the discipline and potential reservations artists might feel towards such a technical domain. By striving for accessibility, Levin advocates for a broader, more inclusive landscape where technology is not a barrier but an enabler.

The exploration of new applications of computer vision in the arts suggests a forward-thinking and innovative approach. This showcases not only the diverse ways artists are leveraging technology but also presents technology as an active collaborator in the artistic process. Such insights could serve as an inspiration, illuminating the expansive possibilities when art and technology seamlessly intertwine. While the search results don’t explicitly indicate Levin’s biases, his emphasis on interdisciplinary collaboration suggests a strong belief in the synergy of art and technology, potentially challenging traditional notions of their separateness.

Reflecting on this raises intriguing questions like: How might computer vision redefine traditional artistic mediums? As tech becomes an intrinsic part of art, how does the role of the artist evolve? Are there ethical ramifications, especially concerning surveillance and privacy, when integrating computer vision into art? Which highlight the evolving dynamics of art in the age of rapid technological advancements and the imperative to navigate this landscape thoughtfully.

Nourhane Sekkat’s Reading Response week #4

“The Psychopathology of Everyday Things” from “The Design of Everyday Things” by Don Norman delves into the intricacies of design in everyday objects. Reflecting upon the reading, one can undoubtedly identify with Norman’s perspective, especially when considering our daily interactions with objects around us. For instance, modern technology and gadgets, despite their advances, can often be counterintuitive in their designs. I’ve personally faced challenges with certain digital interfaces, which, instead of simplifying processes, make them more convoluted, aligning with Norman’s argument about poor design leading to user errors.

However, one might argue that as technologies and needs evolve, there’s a learning curve associated with new designs, making it imperative for users to adapt. This suggests that not all design ‘errors’ are solely the fault of the designer. In terms of bias, Norman does seem to lean towards placing the onus on the design rather than the user. While his points are valid, it’s essential to consider that user education and adaptation play roles in how effectively one interacts with a design.

This reading has indeed made me more observant and critical of the designs I encounter daily. Instead of solely blaming myself for misusing an object, I now consider whether its design might be contributing to the confusion. Which leads to the following questions, how can modern designers better incorporate user feedback? To what extent should designs cater to established user habits versus introducing new paradigms?

Nourhane’s Reading Response week#3

Chris Crawford’s “The Art of Interactive Design” provides a thought-provoking exploration into the intricacies of interaction in the digital realm. His distinction between simple reactivity and genuine interactivity sets a clear framework for understanding the depth and quality of user experiences. Crawford challenges the reader to move beyond superficial engagements and to recognize the profound difference between merely responding to a user’s input and providing a deep, meaningful interactive experience. His insights, derived from his extensive experience in game design, highlight the importance of thoughtful design in creating truly interactive digital products.

However, one might argue that while Crawford’s insights are invaluable, they are also rooted in his personal experiences and biases towards complex interactions, possibly overshadowing simpler but equally meaningful interactive experiences. As technology continues to evolve, the boundaries of what constitutes genuine interactivity might also shift, and Crawford’s definitions, though foundational, might need to be revisited. Since, in reflecting upon this reading, I find myself thinking about technologies like virtual reality and augmented reality that are gaining traction, and how might Crawford’s definitions and boundaries of interactivity evolve? And more importantly, how can designers ensure that as interactions become more complex, they retain the depth and meaningfulness championed in this seminal work?

80s disco with a twist

Concept:

While trying to find an idea and looking back at my dance floor from last week I knew it was missing the life that I wanted to give it in order to be as 80s as possible so i choose to add some movement to it using rotating tiles to give it life but also to stimulate the sensation of dancing till we are tired since I imagined this was a common thing in the crazy 80s additionally.

Move the mouse across to see it come to life!

Highlight of the code

// Display the tile at its position, with a specific effect based on its position relative to the circle
display(insideCircle) {
  push();
  translate(this.x + 10, this.y + 10);
  rotate(this.angle);
  if (insideCircle) {
    fill(this.col);
  } else {
    fill(150, 150, 220, 150);
  }
  rect(-10, -10, 20, 20);
  pop();
}

// Rotate the tiles outside the circle
rotate() {
  this.angle += 0.02;

My favorite part of the project was seeing my idea quite literally come to life as the tiles started rotating, it was beautiful and magical in my opinion because i had never use the translate function and as a first time I think it cam out pretty good and exactly how i wanted it to be when i first re-started this piece. Through the rotating tiles I wanted to give the dance floor life but also wanted to through a subtle reference to the funky shapes and neon colors that were trendy at the time hence the choice of color and tile shape and choice to use rotation because I knew that once they are together they will make those funky shapes I was trying to get. Once again I used OpenProcessing (refer to last post to see the details about how to use this goldmine) but also the youtube video “Rotating Tiles and Animation in Tiles” by steve’s makerspace to be able to understand how to do it.

In details, display(insideCircle) draws a tile on the canvas, with its appearance varying based on its position relative to a circle. With the use of push and pop, all of the transformations and styles are localized. It shifts the drawing’s origin to the tile’s center with translate, and then rotates it and sets the tile’s color to be specific randomized color to the tile using an if else, if it’s inside the circle then it will be color, else it will be semi-transparent blue. The tile is drawn centered on the new origin with and the rotate function gradually increases the tile’s rotation angle, creating a spinning effect for tiles outside the circle.

Future changes:

In the future, I would love to be able to add a song and synch the tiles movement to it to make it more rave like and more alive but overall i’m really really happy that i continued to work on it and now has more life than I thought I could give it.

80s Disco Dance Floor

Concept

When I started out I had absolutely no idea what I wanted to do and just kept browsing in a rabbit whole of links till I found the holy grail, a website with tons of examples done by students that had their code attached to them in order to understand the how of every part of their code (https://openprocessing.org/). That’s when the current idea hit me, 80s Disco Dance Floor, an interactive and dynamic representation of what I see the funnest most alive era to be like.

Highlight of my code

let circleRadius;
let squareColors = [];

function setup() {
  createCanvas(400, 400);
  circleRadius = width / 2;

  // Initialize square colors with some transparency 
  for (let i = 0; i < width / 20; i++) {
    squareColors[i] = [];
    for (let j = 0; j < height / 20; j++) {
      squareColors[i][j] = color(random(255), random(255), random(255), 150);
    }
  }
}

function draw() {
  background(255);

  // Dynamic concentric circles based on mouse position, which changes the radius of the first one based on the position of mouseX
  strokeWeight(2);
  for (let r = 30; r < circleRadius; r += 30) {
    ellipse(width / 2, height / 2, r * 2);
  }
  circleRadius = map(mouseX, 0, width, 70, width / 2);

  // Drawing a grid of squares and calculate the distance between the center of the current square and the center of the canvas.
  for (let i = 0; i < width; i += 20) {
    for (let j = 0; j < height; j += 20) {
      let d = dist(i + 10, j + 10, width / 2, height / 2);
      if (d < circleRadius) {
        fill(squareColors[i / 20][j / 20]);
      } else {
        fill(150, 150, 220, 150);
      }
      rect(i, j, 20, 20);
    }
  }
}


Honestly, I’m proud of the entire thing because it took a ton of trial and error to get the initial idea through but in the end I love what I came up with as a compromise I made with myself since I started of wanting to create a turning disco ball but after a ton of trial and error I just was not able to figure it out and went with the next best thing about the 80s, the colors and life of the dance floor itself. To create the “dance floor” I created a global variable to store the colors of the each squares then I used a nested loop to generate random colors for each of the dance floor tiles, and then added another loop in the draw function to make several squares in order to have a proper dance floor.

After the base was done, my initial idea was to have a mouseClicked function that would just make the colors change each time the mouse is clicked but found it not to be an accurate representation of the 80s vibe I was going for. So after thinking about it, I decided to give the disco ball another try but with a different approach and in the end I got the idea to make the disco “ball” several circles that as you moved you mouse across the drawing would keep getting bigger and bringing life to the dance floor with it just like real disco balls do. To do that I added a new global variable for the radius of the circle then set it to be half the width of the canvas. After that I created a loop to draw the concentric circles with randomized colors, drawn all from the same center of the canvas, and with a distance of 30 pixels between each. After that to make it come to life, I added a map function to follow the mouseX value width range to make it the circles “grow” to where the mouse is. So basically the further the user goes from left to the right the wider and more circles there are and eventually fill up the entire canvas. Then I added a conditional to the previous for loop I made that draws the squares to use the distance function to check whether or not the center of each square is inside the current circle radius then if it is then it would color the tile a random color stored in the squareColor variable if not then it would get the default color, lavender.


Future ideas:

I still would love to find out how to make the disco ball of my dreams since a part of me still feels disappointed that it didn’t work out so I will keep going with my research and experiments and see if I can figure it out to put my mind at ease. Other than that I also want to add audio to it to bring it closer to the 80s disco vibe I was aiming for.

References:

I mainly browsed through the OpenProcesing website for ideas and how people did things using the keyword search option to get inspired but other than that I also used the reference page from P5.js along with class and past knowledge.

How to make most of the OpenProcesing website:

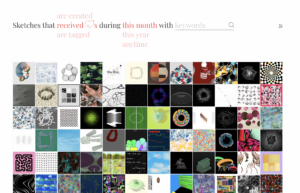
Step one: scroll till you see the following image then click on the tiny “See all” on the bottom right of it

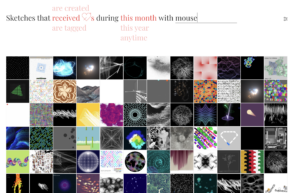
Step 2: Write anything you are looking for in the key word section and filter to however long ago you would like

ex: I wanted to check out mouse position examples and how to implement them so I wrote “mouse” in the keyword spot and it gave me all of the examples that used such technique.