CONCEPT
My final project is a Sign Language glove that translates American Sign Language (ASL) to English and vice versa. The aim is to facilitate communication and improve accessibility for individuals who are deaf or hard of hearing. This is an idea I have had for years but I finally have the technical skills to implement it. My motivation arises from my aim to break down the boundaries that hinder people with disabilities in society. Unfortunately, sign language is not a common skill for hearing people. On the other hand, while some people with hearing impairment know lipreading, for most of them, Sign Language is their first language.
This interactive system enables individuals that use sign language to have two-way communication with non-sign language users effectively. The user wearing the glove can fingerspell words using the American Sign Language alphabet. The program then vocalizes the word to assist Sign Language users with speech. On the other hand, a hearing person can type their word into the program which will display the signs for each letter so the Sign Language user can interpret it.
IMPLEMENTATION
p5 sketch full screen mode: https://editor.p5js.org/aneekap/full/ZHrr0suY-
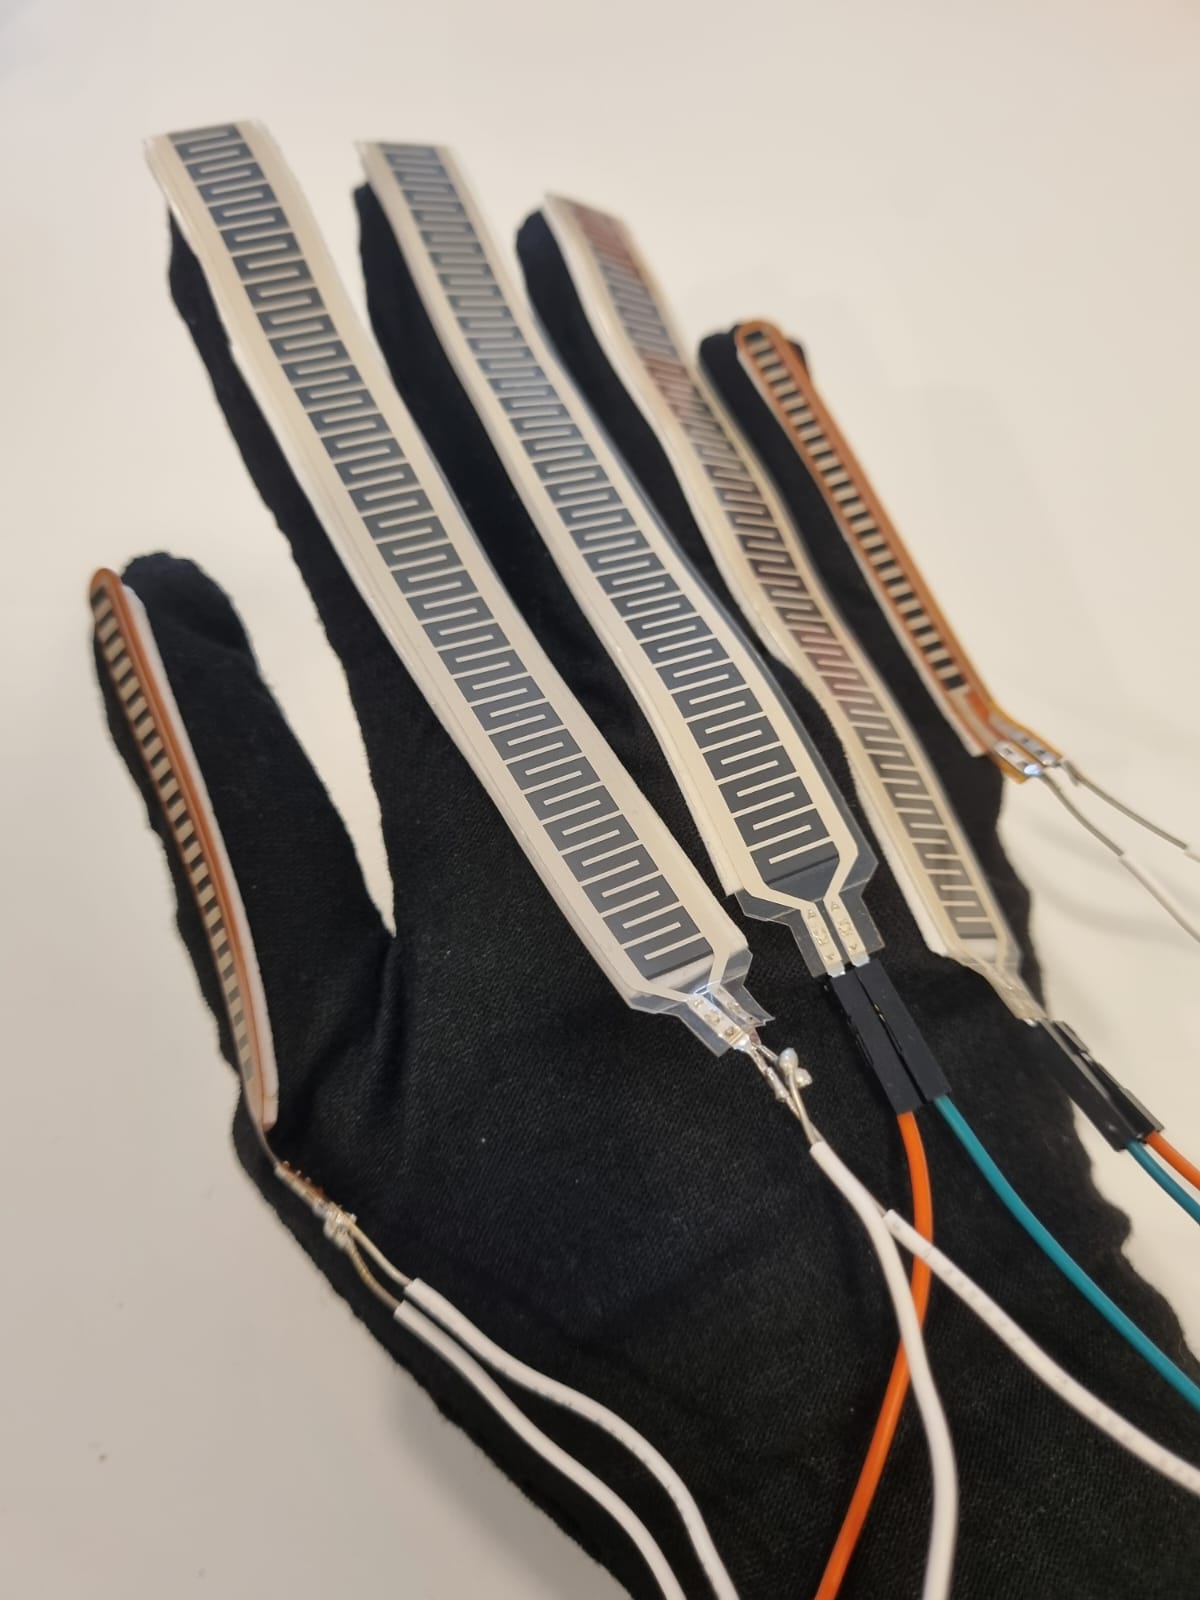
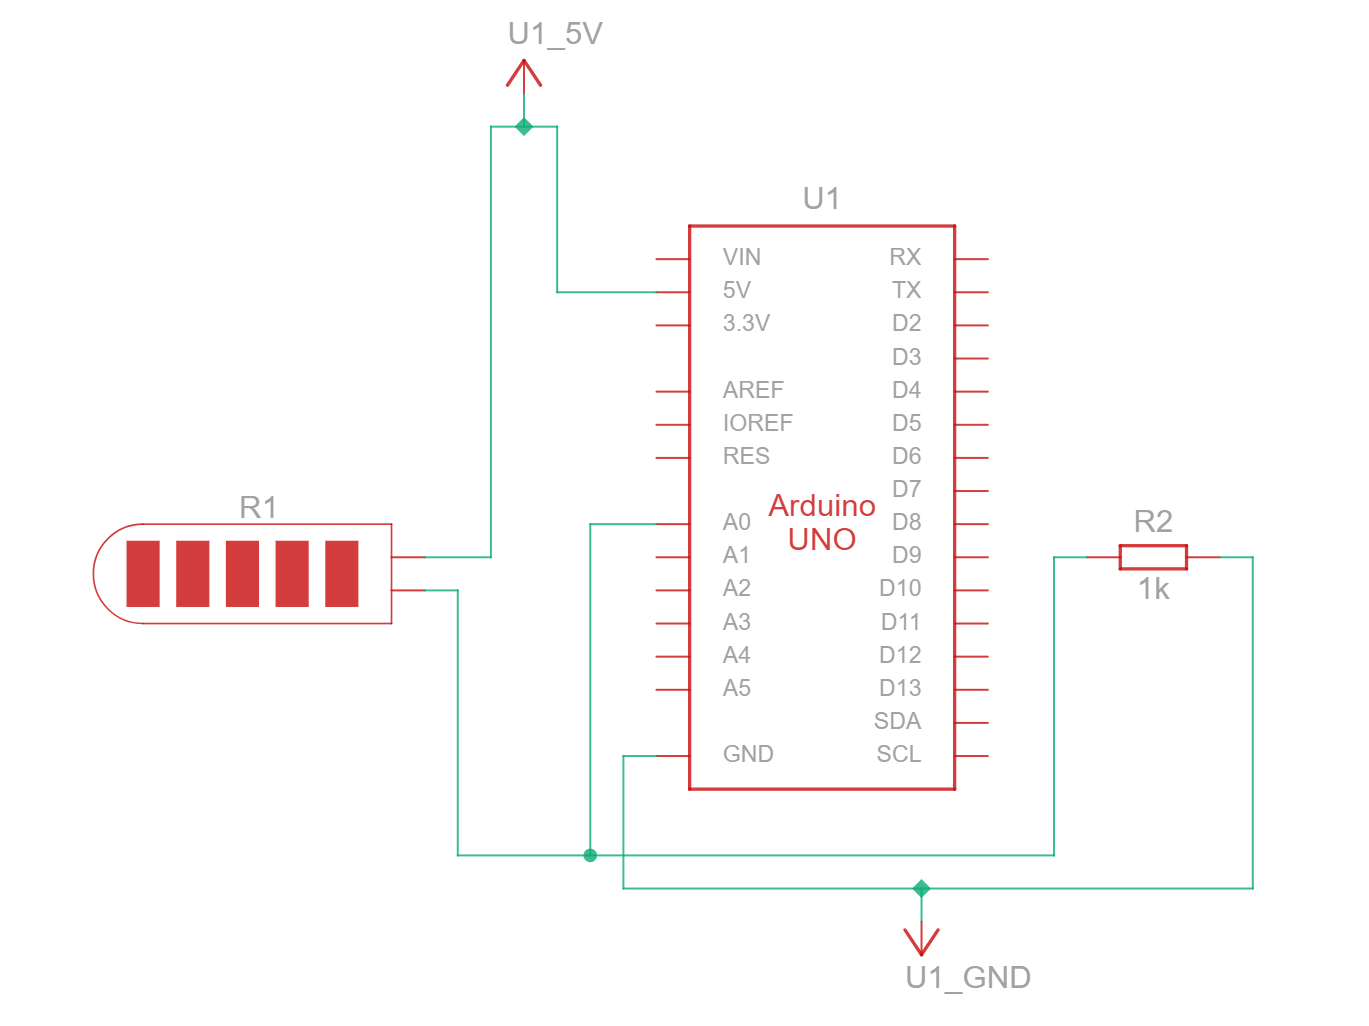
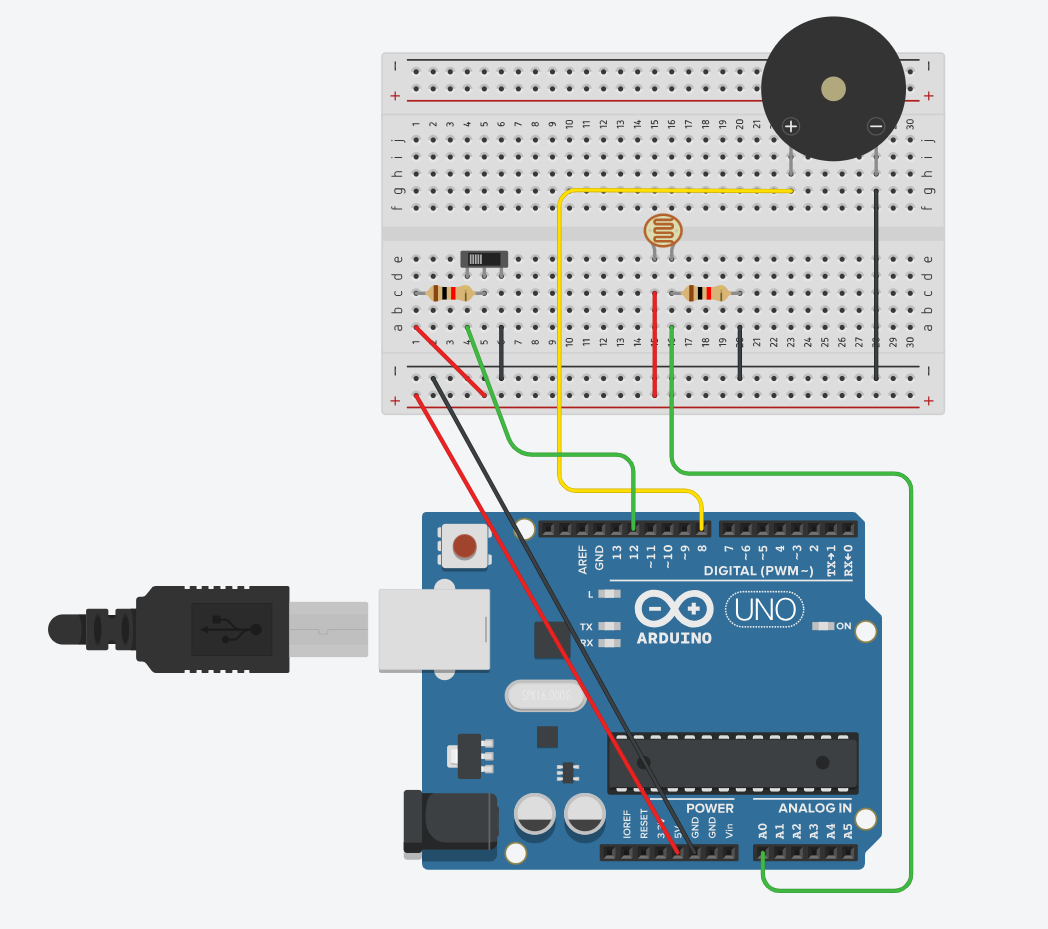
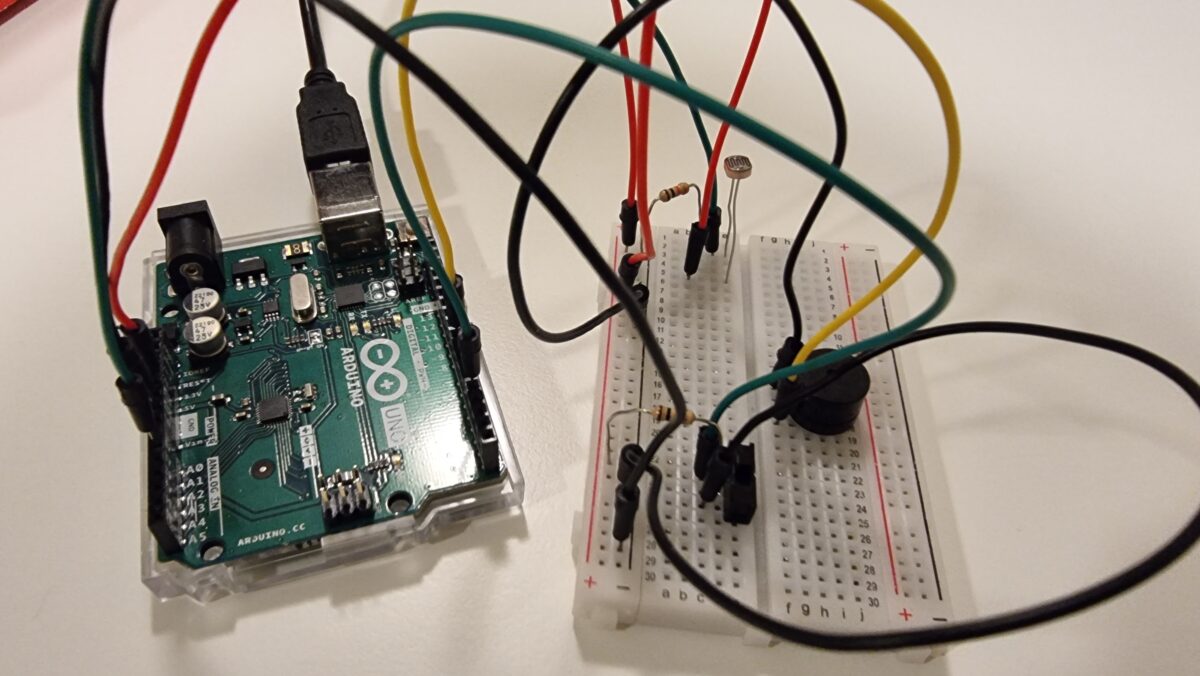
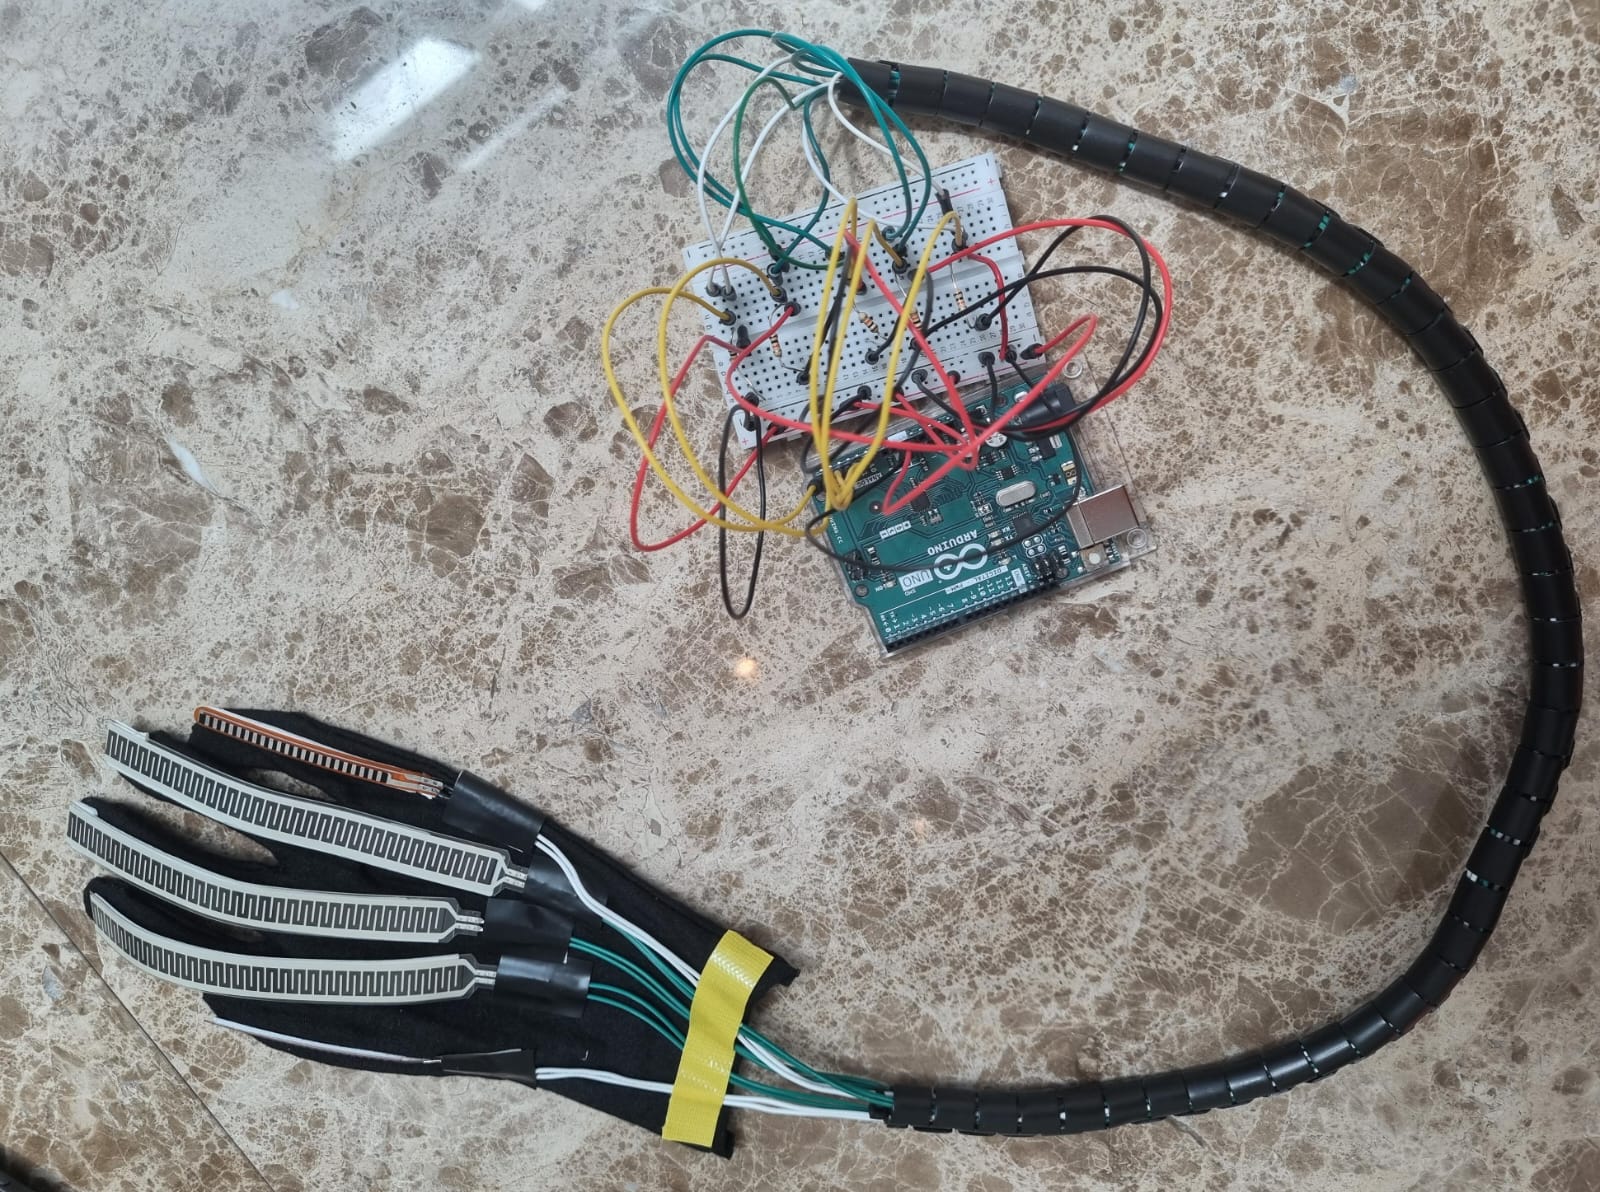
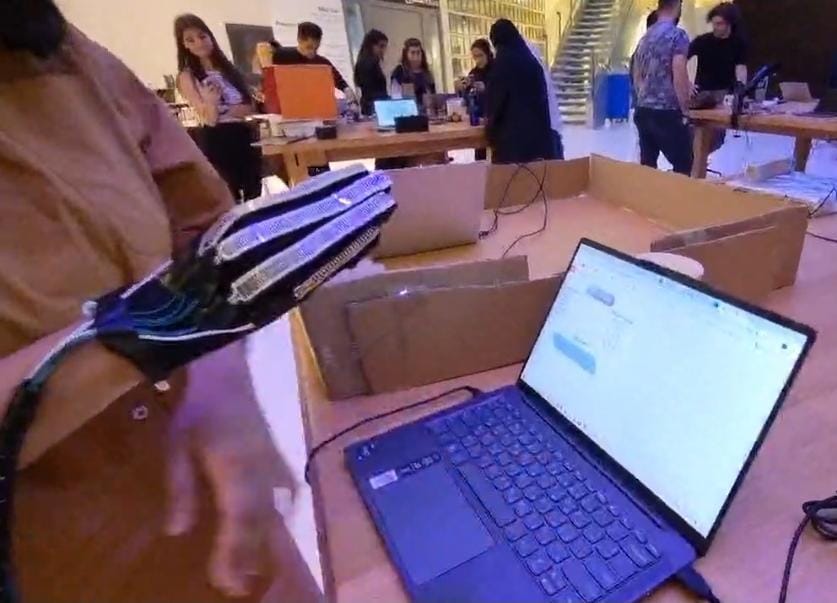
The glove incorporates flex sensors on each finger which detects how much the finger is bent. Arduino processes this data and sends the finger configurations to the p5.js sketch.
//fingers
int flexPin1 = A1;
int flexPin2 = A2;
int flexPin3 = A3;
int flexPin4 = A4;
int flexPin5 = A5;

void setup() {
  // Start serial communication so we can send data
  // over the USB connection to our p5js sketch
  Serial.begin(9600);
}

void loop() {
  // Read flex sensor values
  int pinky = analogRead(flexPin1);
  int ring = analogRead(flexPin2);
  int middle = analogRead(flexPin3);
  int index = analogRead(flexPin4);
  int thumb = analogRead(flexPin5);

  // Send flex sensor values to p5.js
  Serial.print(pinky);
  Serial.print(",");
  Serial.print(ring);
  Serial.print(",");
  Serial.print(middle);
  Serial.print(",");
  Serial.print(index);
  Serial.print(",");
  Serial.print(thumb);
  Serial.println();

  delay(100);
}
The p5.js sketch interprets the gestures to recognize the corresponding letters of the alphabet. This is done using the signRecognition function below which checks whether each flex sensor value is in the appropriate range.
function signRecognition() {
  //letter recognition
  if ((120<pinky && pinky<200) && (90<ring && ring<400) && (160<middle && middle<400) && (100<index && index<300) && (240<thumb && thumb<280)) {
      text('a', 102, 255);
      letter = 'a';
    }
  else if ((230<pinky && pinky<255) && (0<=ring && ring<50) && (0<=middle && middle<50) && (0<=index && index<50) && (175<thumb && thumb<250)) {
      text('b', 102, 255);
      letter = 'b';
    }

  else if ((220<pinky && pinky<250) && (0<=ring && ring<100) && (0<=middle && middle<100) && (30<index && index<190) && (220<thumb && thumb<270)) {
      text('f', 102, 255);
      letter = 'f';
    }
  else if ((130<pinky && pinky<250) && (100<ring && ring<270) && (135<middle && middle<280) && (index==0) && (250<thumb && thumb<283)) {
      text('g', 102, 255);
      letter = 'g';
    }
  else if ((205<pinky && pinky<245) && (70<ring && ring<280) && (80<middle && middle<220) && (70<index && index<240) && (210<thumb && thumb<265)) {
      text('i', 102, 255);
      letter = 'i';
    }
  else if ((120<pinky && pinky<210) && (60<ring && ring<330) && (50<middle && middle<300) && (30<index && index<300) && (190<thumb && thumb<240)) {
      text('m', 102, 255);
      letter = 'm';
    }
  else if ((150<pinky && pinky<220) && (0<=ring && ring<100) && (0<=middle && middle<110) && (0<=index && index<50) && (220<thumb && thumb<250)) {
      text('o', 102, 255);
      letter = 'o';
    }
  else if ((135<pinky && pinky<220) && (80<ring && ring<220) && (0<=middle && middle<20) && (0<=index && index<50) && (230<thumb && thumb<290)) {
      text('p', 102, 255);
      letter = 'p';
    }
  else if ((170<pinky && pinky<200) && (20<ring && ring<220) && (0<=middle && middle<190) && (0<=index && index<100) && (195<thumb && thumb<260)) {
      text('u', 102, 255);
      letter = 'u';
    }
  else {
      text('-', 102, 255); // Display '-' if no specific configuration is matched
      letter = ' ';
    }

}
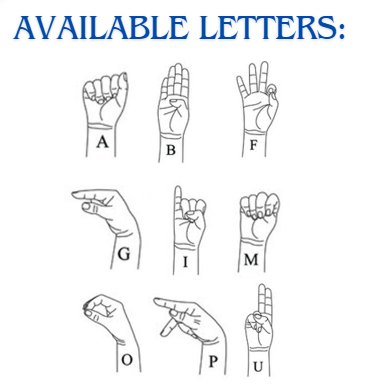
It is limited to only 9 letters for now. I did implement a few more letters but later removed it to avoid clashes between the letter ranges. The reason for this is a lot of ASL signs have very similar finger configurations and I would require additional or more accurate sensors to implement all 26 letters.
There will be two options the user can select from: translating ASL to English and translating English to ASL. For the first program, the user spells out a word using the sign for each letter and pressing right arrow to confirm the letter and move to next position. You can edit the word if you made a mistake by using backspace, and to add a space you input no letter. This is done using the keyPressed() function.
function keyPressed() {
  if (key == " ") {
    setUpSerial();
  }

  if (keyCode === ENTER) {
    if (page === 1) {
      page = 2;
    } else if (page === 2) {
      page = 3;
    } else if (page === 4) {
      finalizeWord();
      // page = 3; // Go back to options page
    }
  } else if (keyCode === BACKSPACE && page === 4) {
      Word = Word.substring(0, Word.length - 1);
  } else if (keyCode === RIGHT_ARROW && page === 4) {
      Word += letter;
  } else if (keyCode === LEFT_ARROW && (page === 4 || page === 5)) {
      page = 3; // Go back to options page
      Word = '';
  }

  if (keyCode >= 65 && keyCode <= 90) { // Check if the pressed key is a letter
    enteredWord += key.toLowerCase(); // Add the lowercase letter to the entered word
  } else if (keyCode === BACKSPACE) { // Handle backspace key
    enteredWord = enteredWord.slice(0, -1); // Remove the last character from the entered word
  }
}
The p5.js screen reads the word aloud using text-to-speech, using the SpeechSynthesis interface which is a part of the Web Speech API.
For the second program, users will have the option to input a word via keyboard to display the corresponding ASL sign for each letter on the screen below the word.
function translateEnglishPage() {
  image(eng, 0, 0, width, height);
  text(enteredWord, width/2 - 120, height/2+5);

  // Check each letter of the entered word and display the corresponding sign
  let startX = width/2 - 130;
  let startY = height/2 - 70;
  let letterSpacing = 35; // Spacing between images
  for (let imgIndex = 0; imgIndex < enteredWord.length; imgIndex++) {
    let currentLetter = enteredWord.charAt(imgIndex).toLowerCase();
    //calculate position of image based on letter
    let imageX = startX + imgIndex * letterSpacing;
    let imageY = startY+120;

    // Display the image corresponding to the current letter
    if (currentLetter === 'a') {
        image(sign_a, imageX, imageY, 35, 50); }

    // and so on for each letter ...
}
USER TESTING
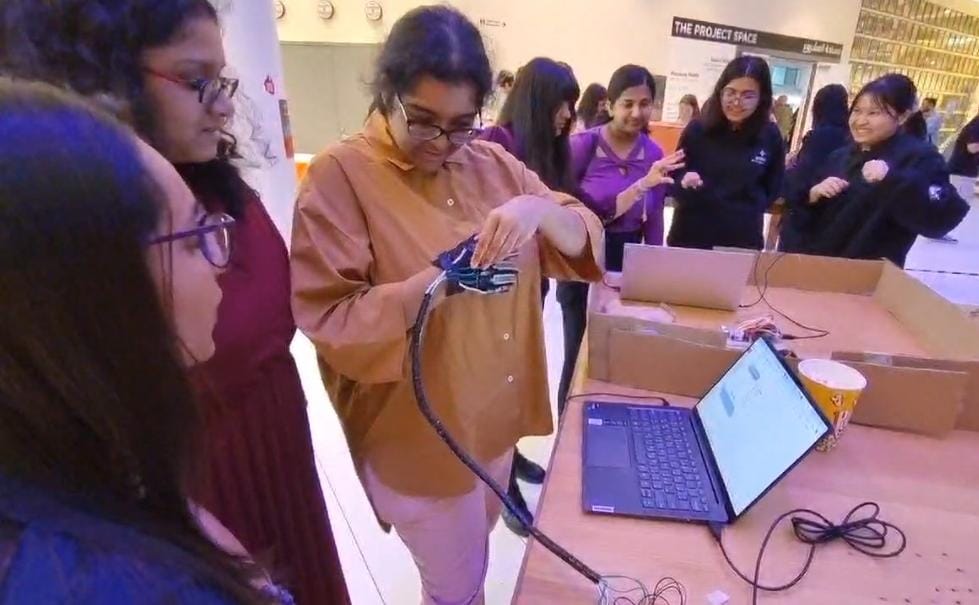
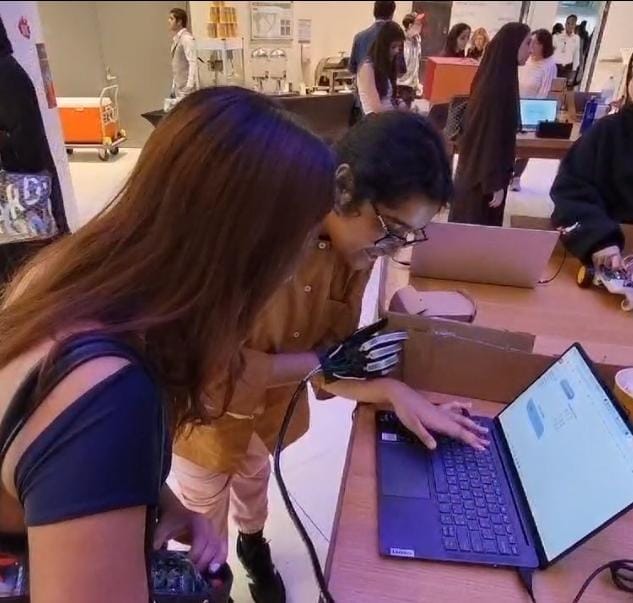
User testing was helpful but also a bit worrying. The gesture configurations were calibrated to my hand and fingers. I later noticed that it wasn’t working exactly the same with other people’s hands. I thus had to make the ranges less strict to incorporate other hand shapes. However, editing these ranges caused more issues such as introducing clashes between the letters.
challenges and improvements:
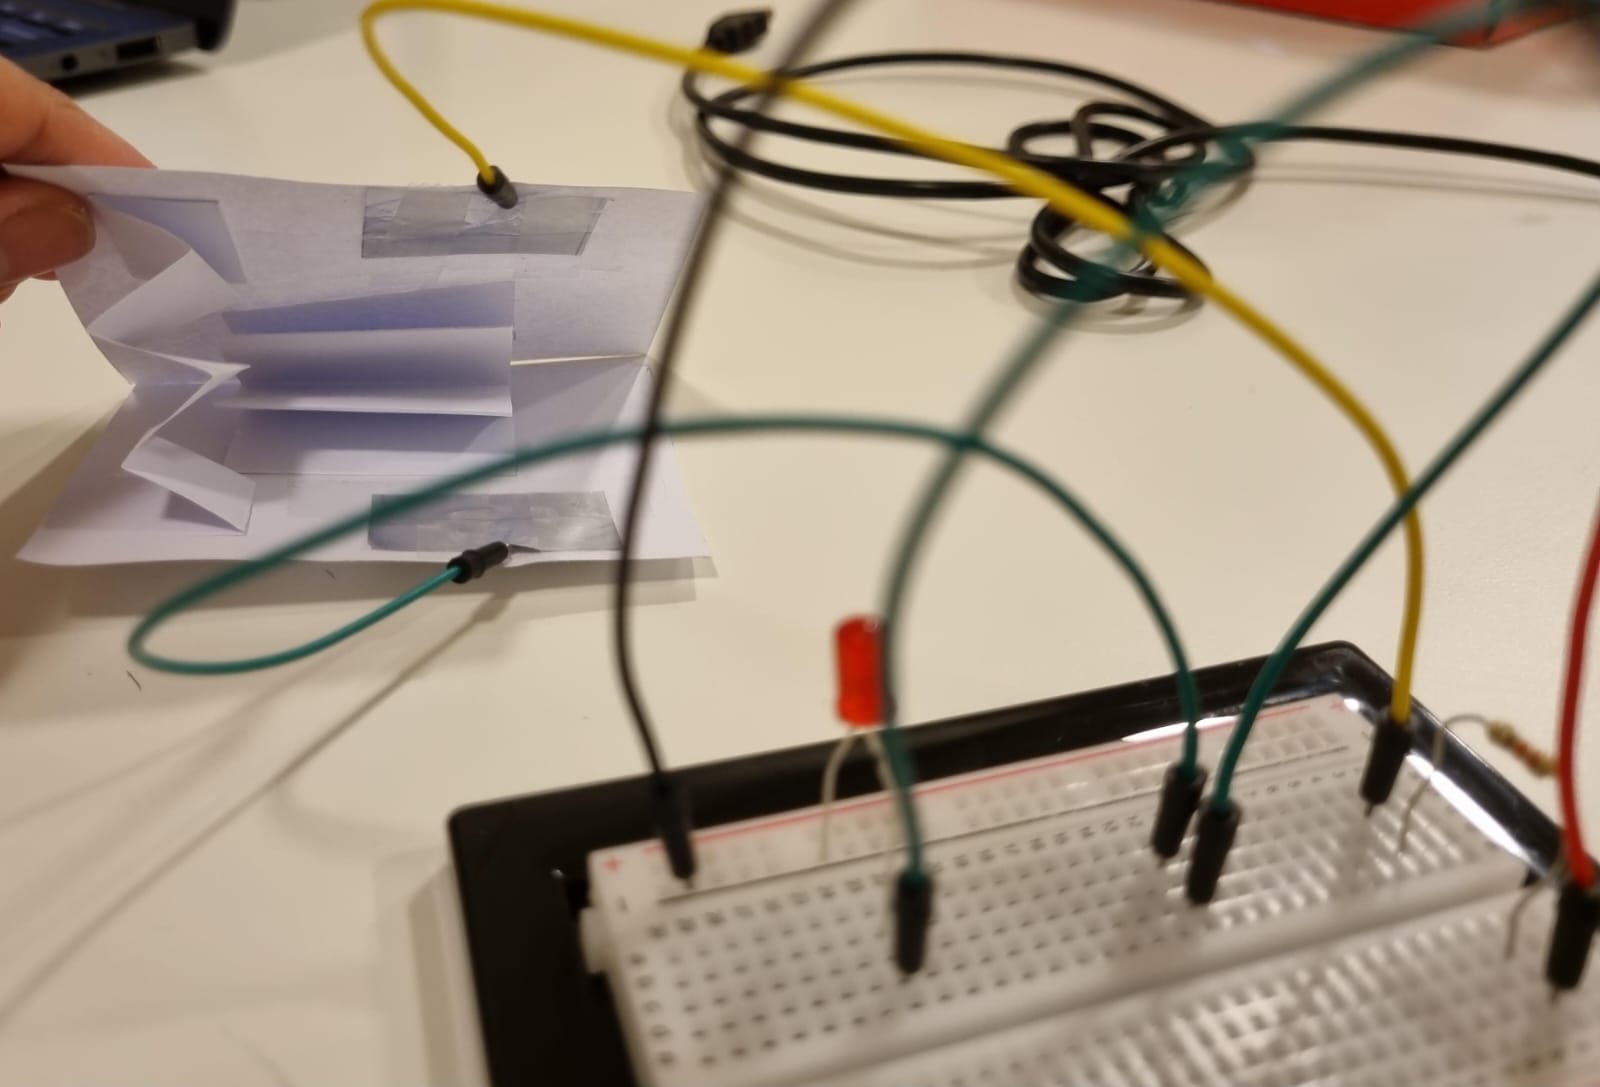
The main challenge was calculating the gesture configurations one by one. The flex sensors are pretty sensitive and tend to randomly give different values. I am using two types of flex sensors: 3 thin film pressure sensors and 2 short flex sensors, so I had to calibrate them differently as well. On top of that, one of my flex sensors stopped working midway so my project came to a stop. Thankfully, Professor came to the rescue and bought a new flex sensor for me promptly. Soldering and arranging the wires were also a hassle but I finally got them to look neat.
I am proud of coming up with the idea in the first place. I wanted to create something that was unique and something I am passionate about. I am also proud of sticking to it despite the challenges and making it as accurate as possible.
There is a lot to improve and I started this as a prototype for a long-term project. One major issue is that since some of the finger configurations are so similar, it mixes up between the letters. I also couldn’t implement the entire alphabet. I could add an accelerometer to detect movements as well. I could alternatively try using ML5 for more accurate configurations. I hope to get it to work for entire words as well. I aim to one day create a fully functional portable Sign Language glove.
IM Showcase
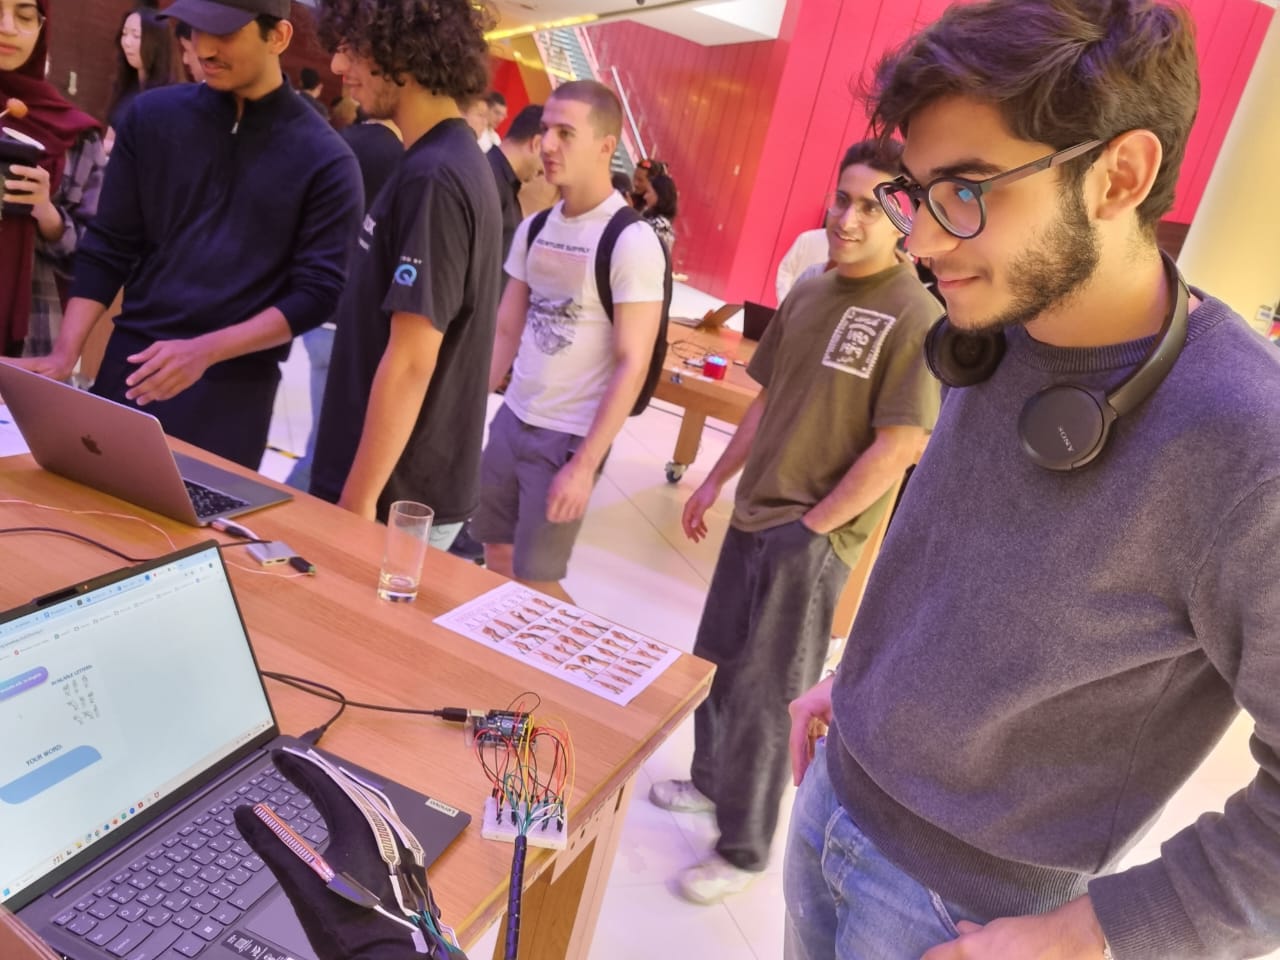

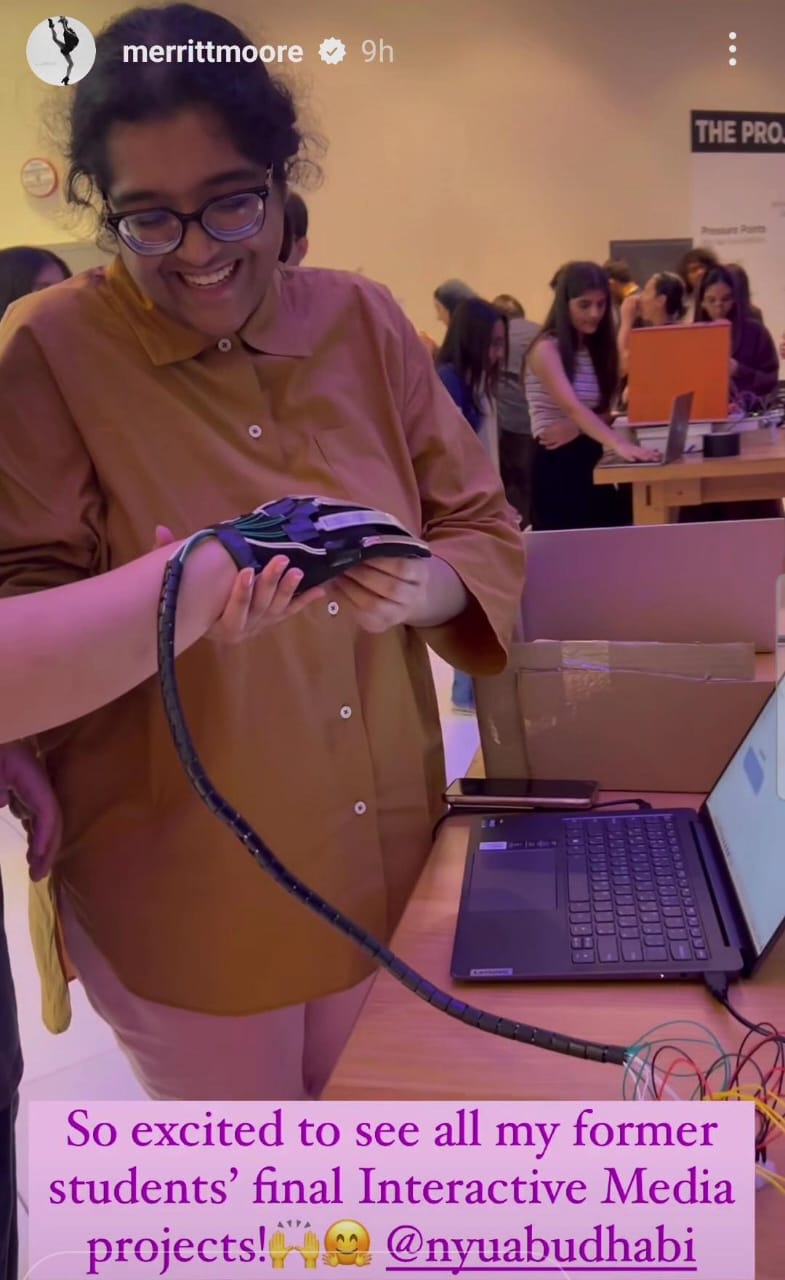
I made a few changes before I presented my project at the showcase: I recalibrated the ranges for the letters to make it work smoother, I removed a few letters according to Professor’s advice to reduce clashes between letters, and I improved the UI.
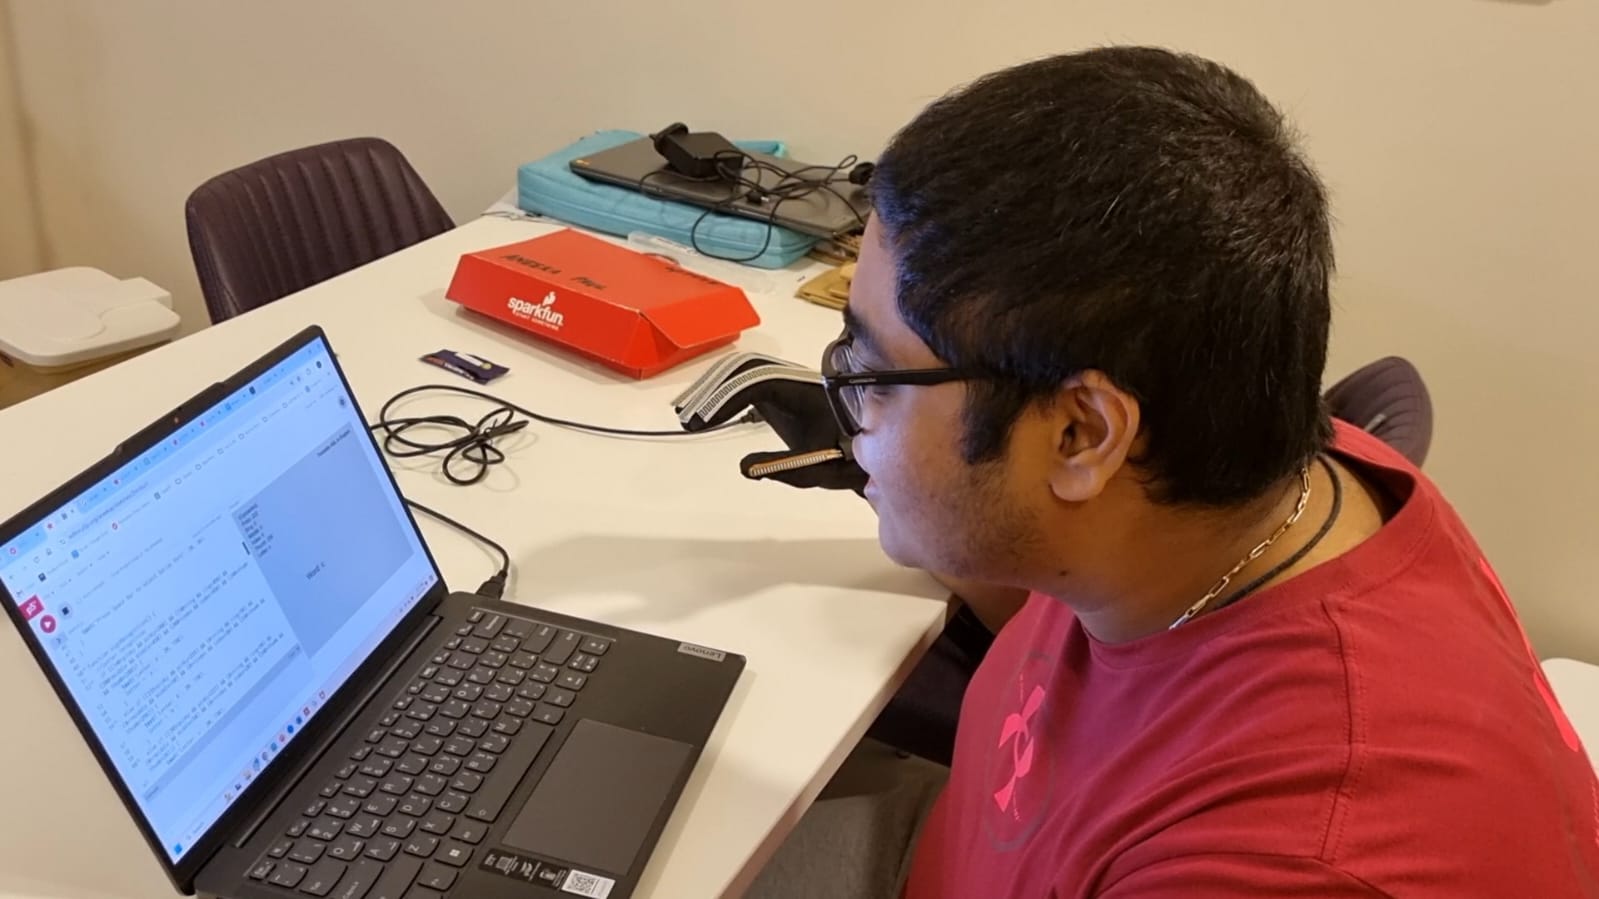
During the IM show, when a few people tried on my glove, the tape and wires started coming off, and I had to run back to the IM lab to fix it. Moreover, most of the letters were not working for them since it was still only optimal for my hand. This was because the bending of the flex sensors vary a lot between different hand shapes and sizes. I unfortunately had to resort to only providing them a demonstration after that point and instead gave them the challenge to provide me a word using those letters.
Nevertheless, I had a fun time at the showcase presenting my project and engaging with other people’s projects. I also thoroughly enjoyed taking this course overall and using my creativity and technical skills to come up with projects every week.