
CONCEPT

“The Heist: Unlock the Safe” is an exciting puzzle/math game that challenges your mind to decode a sequence of numbers given a few hints, with each of them guiding you in eliminating potential numbers. It’s pretty simple, the user is provided with instructions which then allows them to use their skills and crack the code. The theme behind it is to provide a sense of thrill of cracking a safe, just like in a bank robbery (not advised) or an escape room!
DOCUMENTATION
1) Teaser Video (pre-showcase)
2) Demo Video (how to play?)
3) Final video (showcase day!)
IMPLEMENTATION
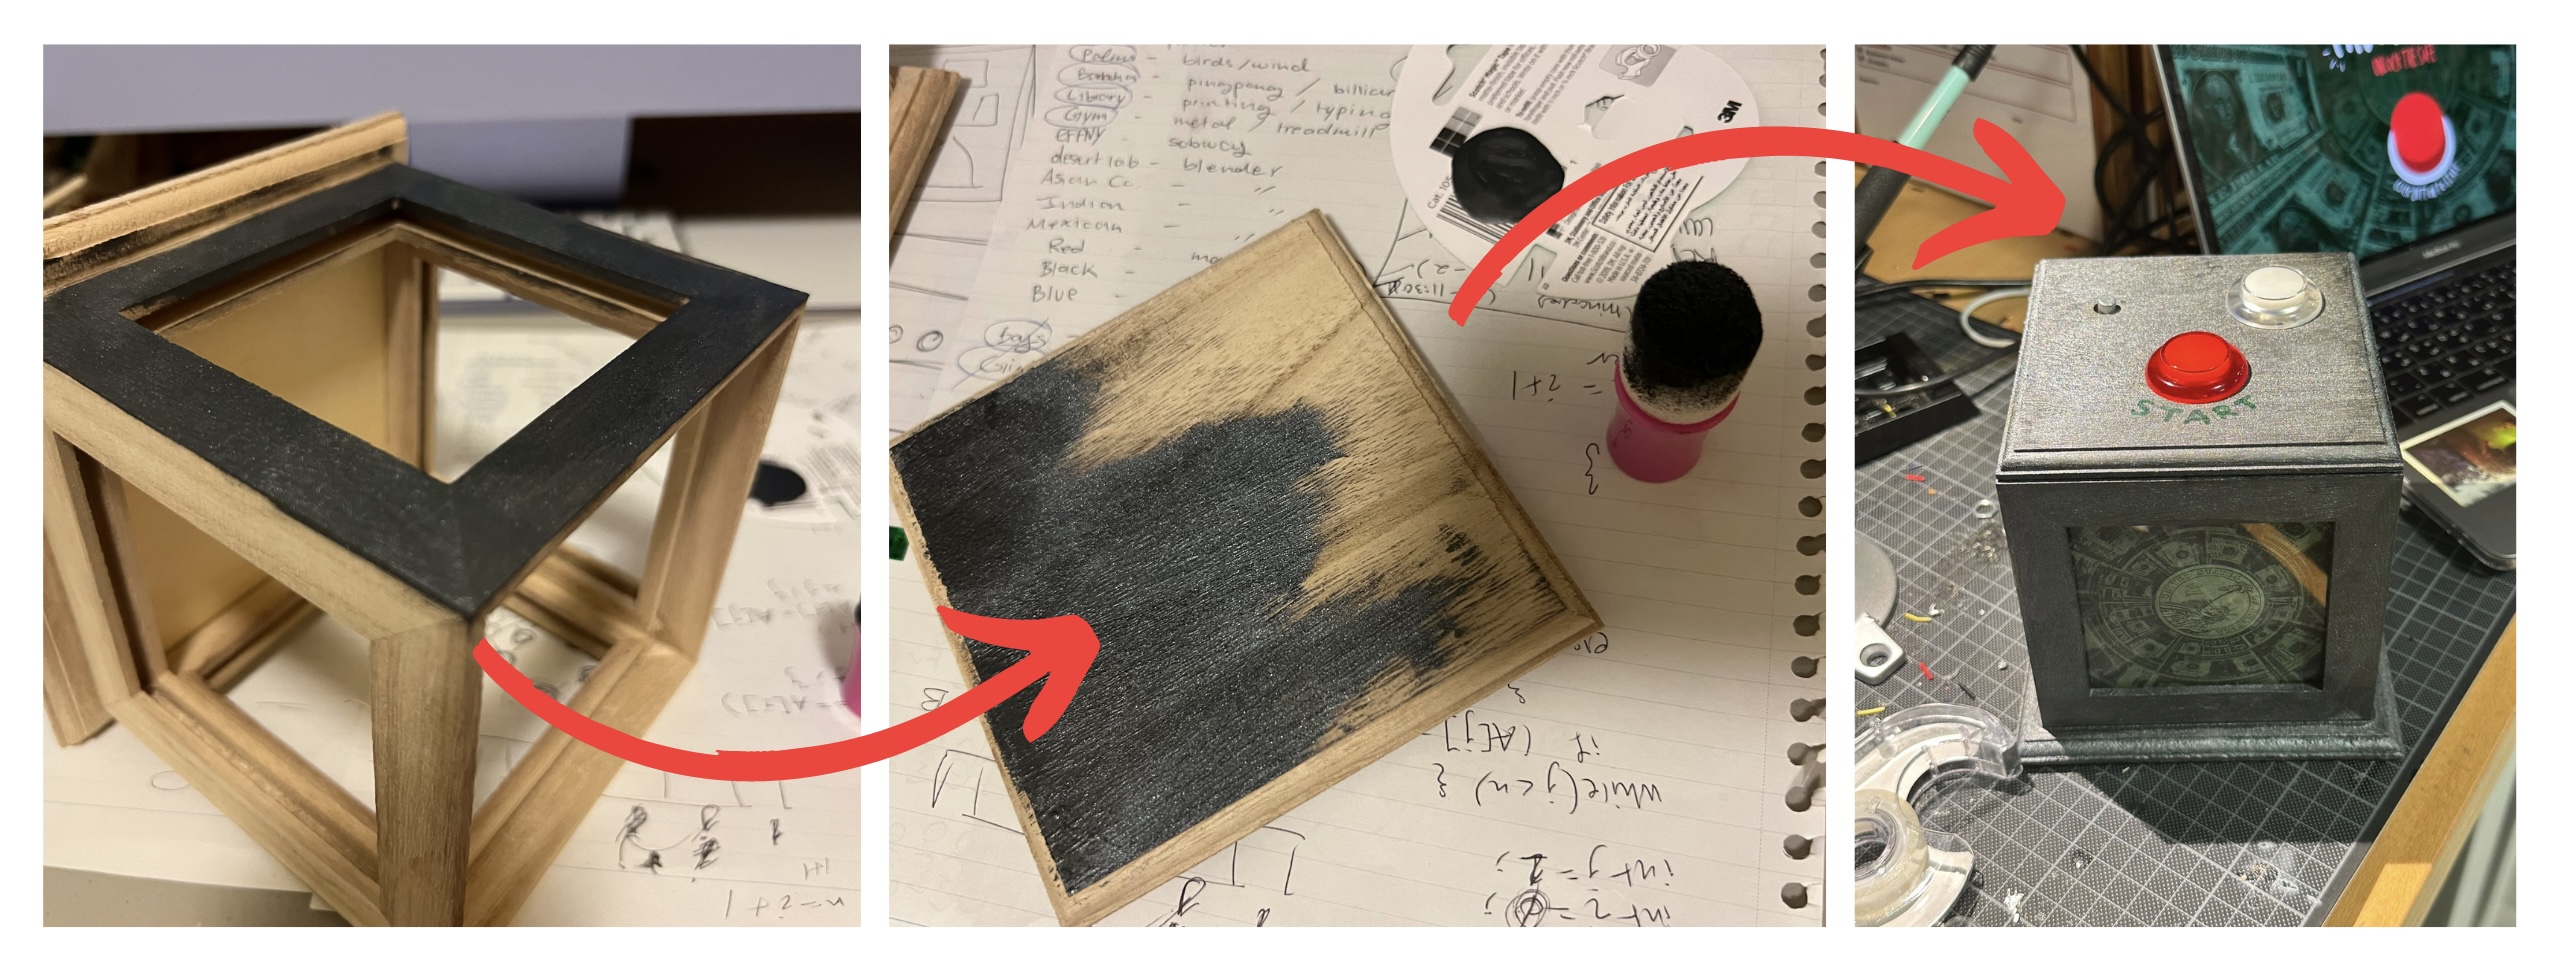
Interaction Design
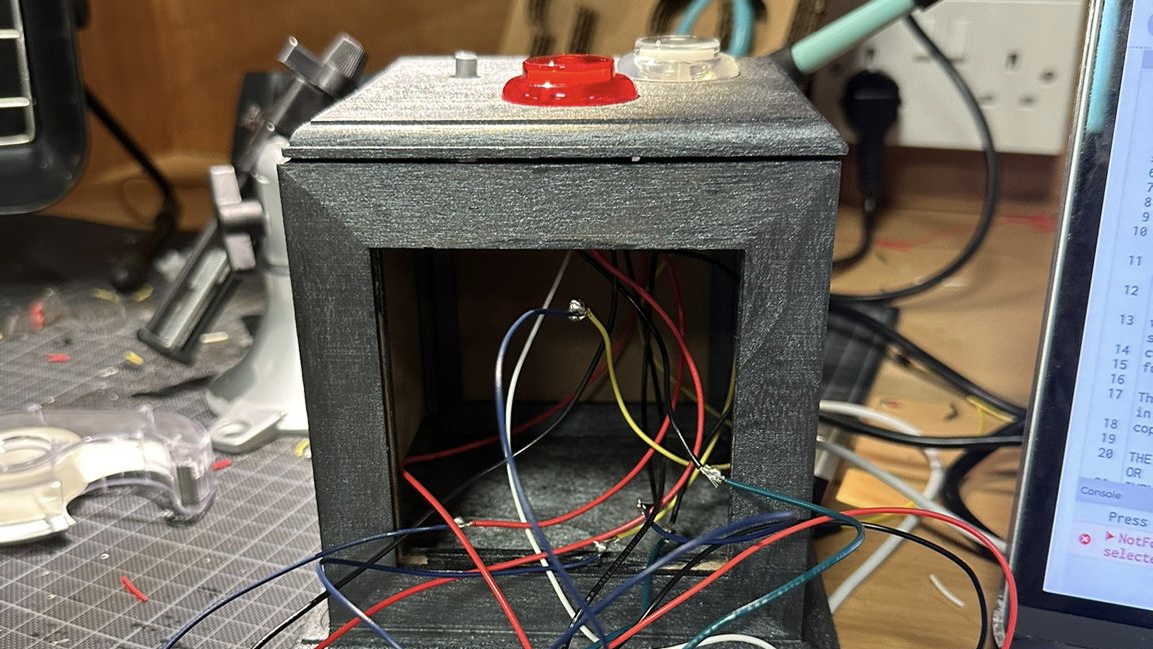
The box I created features two buttons and a potentiometer, positioned for user convenience. The red button, placed farthest from the user, serves as the game initiator and state mover, designed for occasional use. On the other hand, the knob (potentiometer) & white button are situated closer to the player, allowing easy access as they will be frequently used during the game to guess the code. Further, the box was designed to match the game’s theme, in terms of color and aesthetic (materials used: wood, wood paint, sponges, tape, glue, equipment, etc.).
Arduino
The Arduino code sets up the game with a three-digit combination lock (three possible combinations). It initializes variables such as the game state, the entered codes, and the correct combination. The safe can be in the following states: Menu (‘M’), Instruction (‘I’), Play (‘P’), and End (‘E’). Buttons and a potentiometer are used to input digits, and a servo motor controls the lock mechanism. The program continuously checks for button presses, serial input, and the correctness of the entered code. If the correct code is entered, the safe unlocks the servo motor, indicating success. Otherwise, it remains locked, prompting the user to retry. However, it’s worth noting that the initial plan to control the lock mechanism with the servo was later removed from the code. The checkCode() function, verifies if the entered code matches the correct combination when the game state is ‘E’ (End). It iterates through each digit of the entered code, comparing it with the corresponding digit in the correct combination. If any digit doesn’t match, it sets the correct flag to false and breaks out of the loop. If all digits match, meaning a correct code, it unlocks the safe by setting locked to false and open to true. Link to Arduino Sketch.
P5.js
The p5.js code begins by declaring variables such as various image files required for the game. Key components for communicating with an Arduino are included, such as variables to read data from Arduino (digit, button1, button2, locked) and variables to send data to Arduino (open, codes, button1State, button2State, buttonPressCount). The `keyPressed()` and `preload()` functions handle necessary setup tasks, such as loading sound and image files. The `setup()` function initializes the canvas and starts the game by calling the `restart()` function. The `draw()` function renders different game screens based on the current `gameState`, which then displays images accordingly. The `readSerial()` function manages data received from the Arduino, updating game variables accordingly.
Communication
At first, I used one button for both entering digits and moving to different game parts. But p5.js got mixed up with the signals from Arduino. So, I split the tasks between two buttons. Now, one button only enters digits (white button), and the other button (red button) handles moving between game states. In the communication between the Arduino & p5.js, the serial monitor informs p5.js about the status of buttons and the number from the potentiometer. Each line of data received has four parts (initially): two “true/false” statements indicating button states, followed by numbers representing the potentiometer reading. Using this data, p5.js updates variables like `button1`, `button2`, and `digit`, which helps control the game. For instance, if `button1` is true and `button2` is false, it means a certain action from the player, like moving to the next stage or entering a code digit. Dealing with serial communication was certainly one of the challenges I encountered in the process.
PROUD MOMENTS
 I am particularly proud of how the box turned out in terms of its design matching the game aesthetic. I am also proud of how much I have learned throughout the process and through many many many many mistakes that costed hours of my time, but it was all worth it. Safe to say, I’m almost fluent in Arduino. I was also proud of the short amount of time I had to work on it and pulled through hours on end in the lab, especially given that I had missed the class where soldering was practiced, so I had to figure that out with the help of endless YouTube videos. Surprisingly, I am glad that I did not add a time element to the game because some people were taking less than a minute while others more than 5; a time limit would not have been ideal, I believe. More than anything, I am proud of how this project has brought many of me and my classmates together, and I am happy with how it turned out. If you had told me that I’d do this on the first day of classes, I would not have believed it was possible!
AREAS OF IMPROVEMENT
I initially had more in mind, such that the box would unlock and a beam of light would appear, or even better, serve some chocolate! Yet, I was faced with the unexpected measurement issue when the box was too small, and I underestimated how much space the wires would take. Regardless, I attempted to put something inside, and the wires kept moving and unplugging, leading to disaster every time I got close to it. To add to that, halfway through the showcase, the potentiometer stopped reaching the number 9, so I had to quickly edit my code & delete the possibility of a code generating a combination with the number 9. Other than that, it ran very smoothly. Another thing would have been to signify what the white button was, although many instinctively knew, given that the red button was labeled. Learned a lot, to say the least! Thank you!