
Group members: Muhammed Hazza, Iqra Bano
Concept
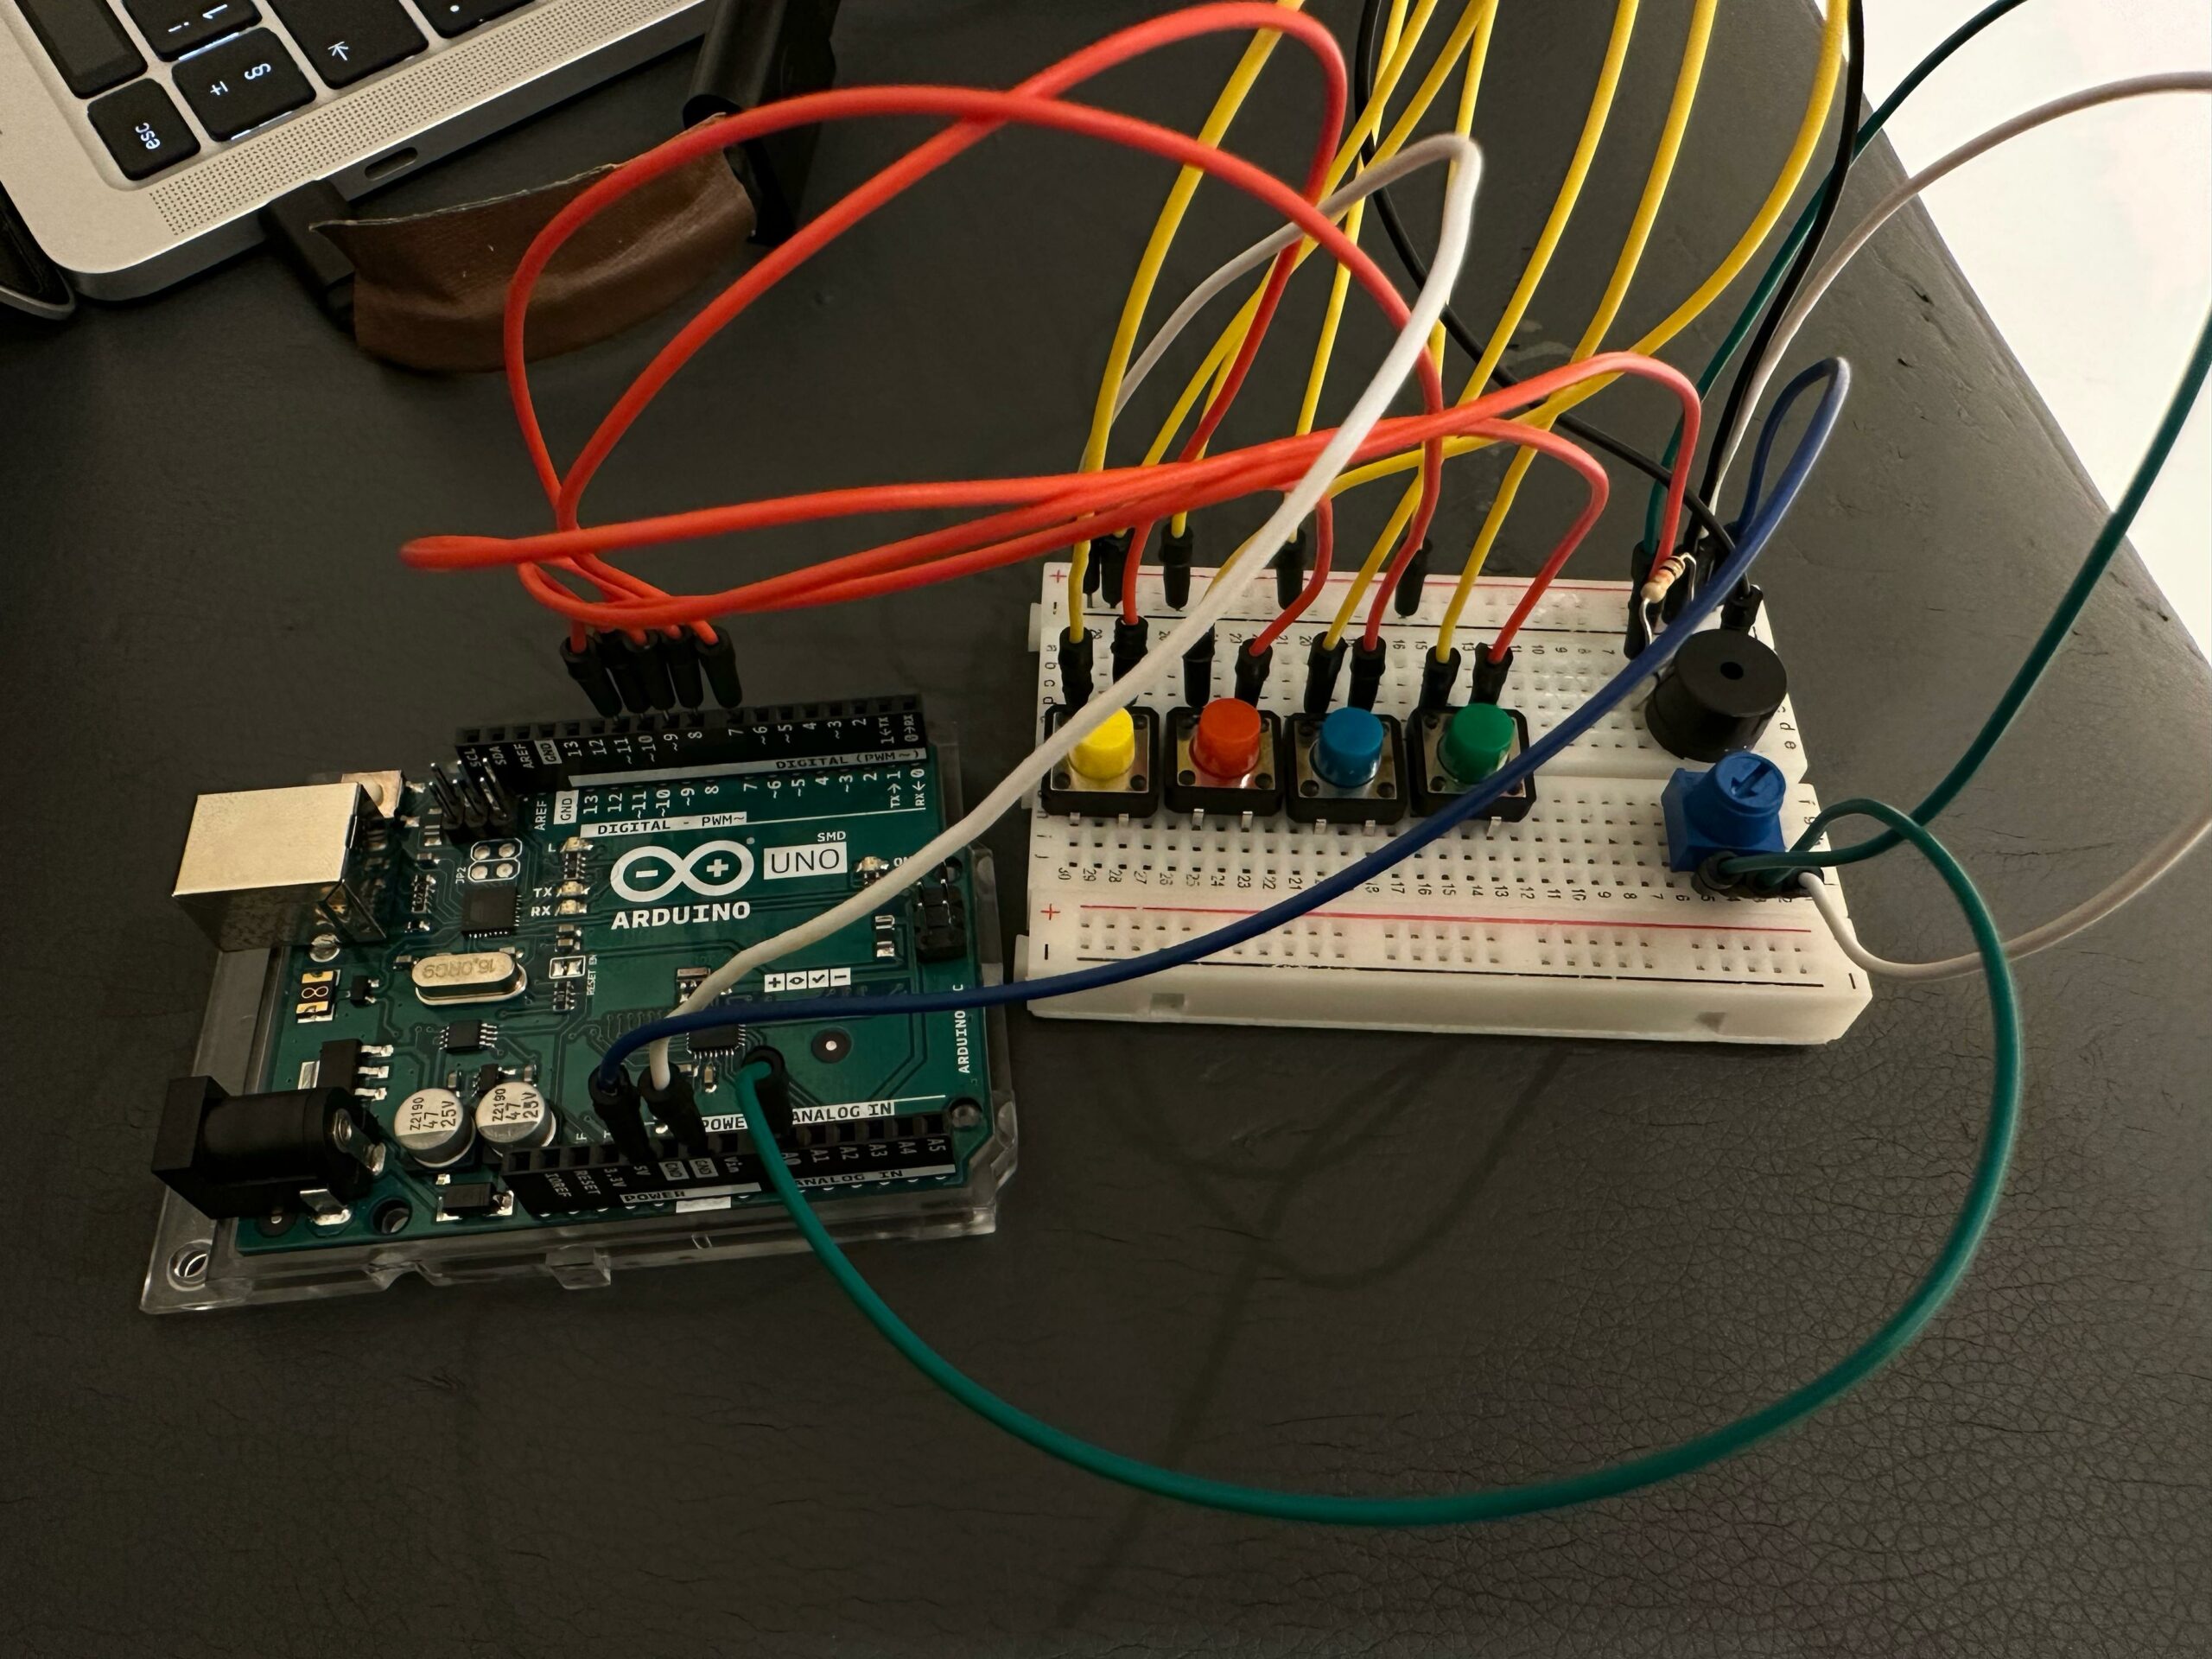
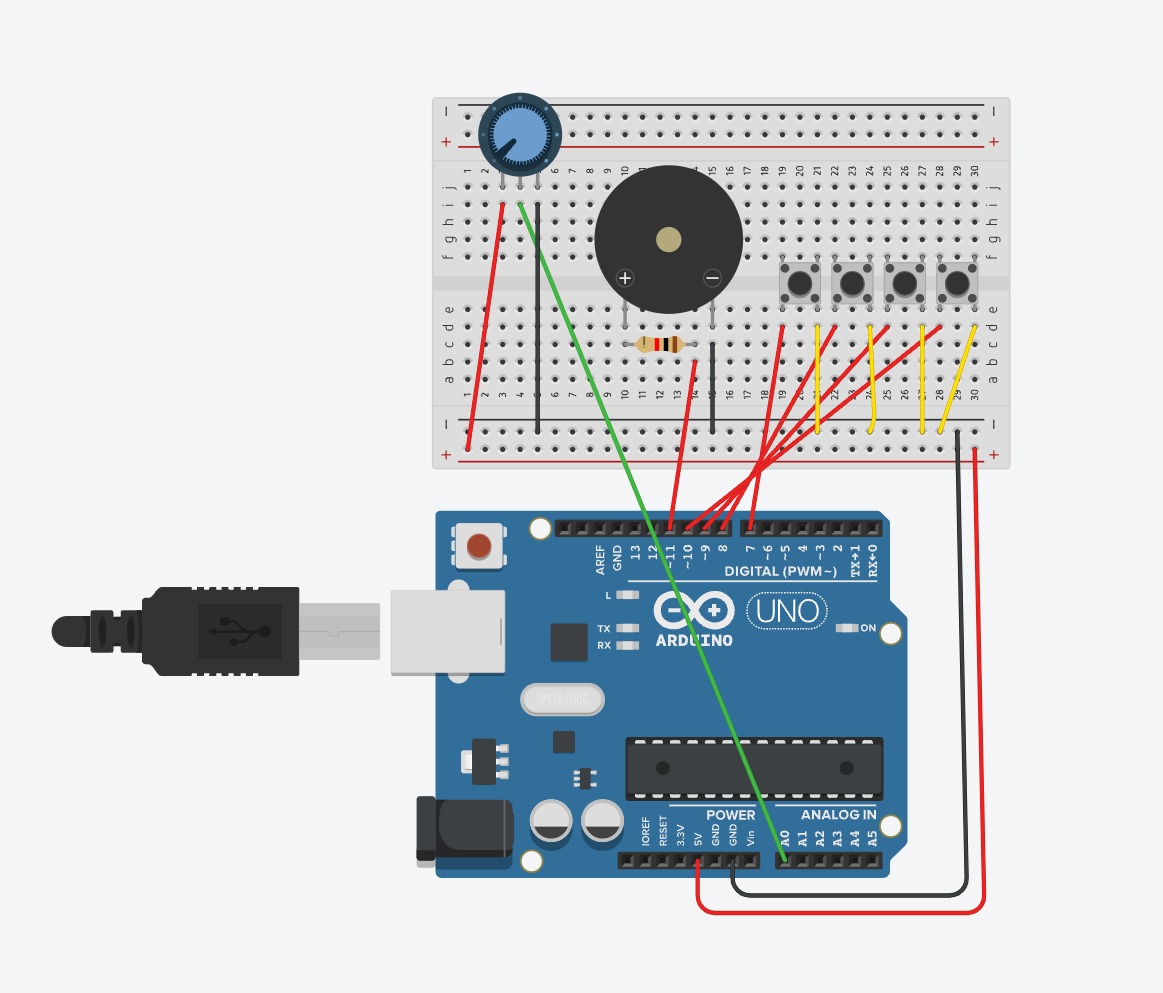
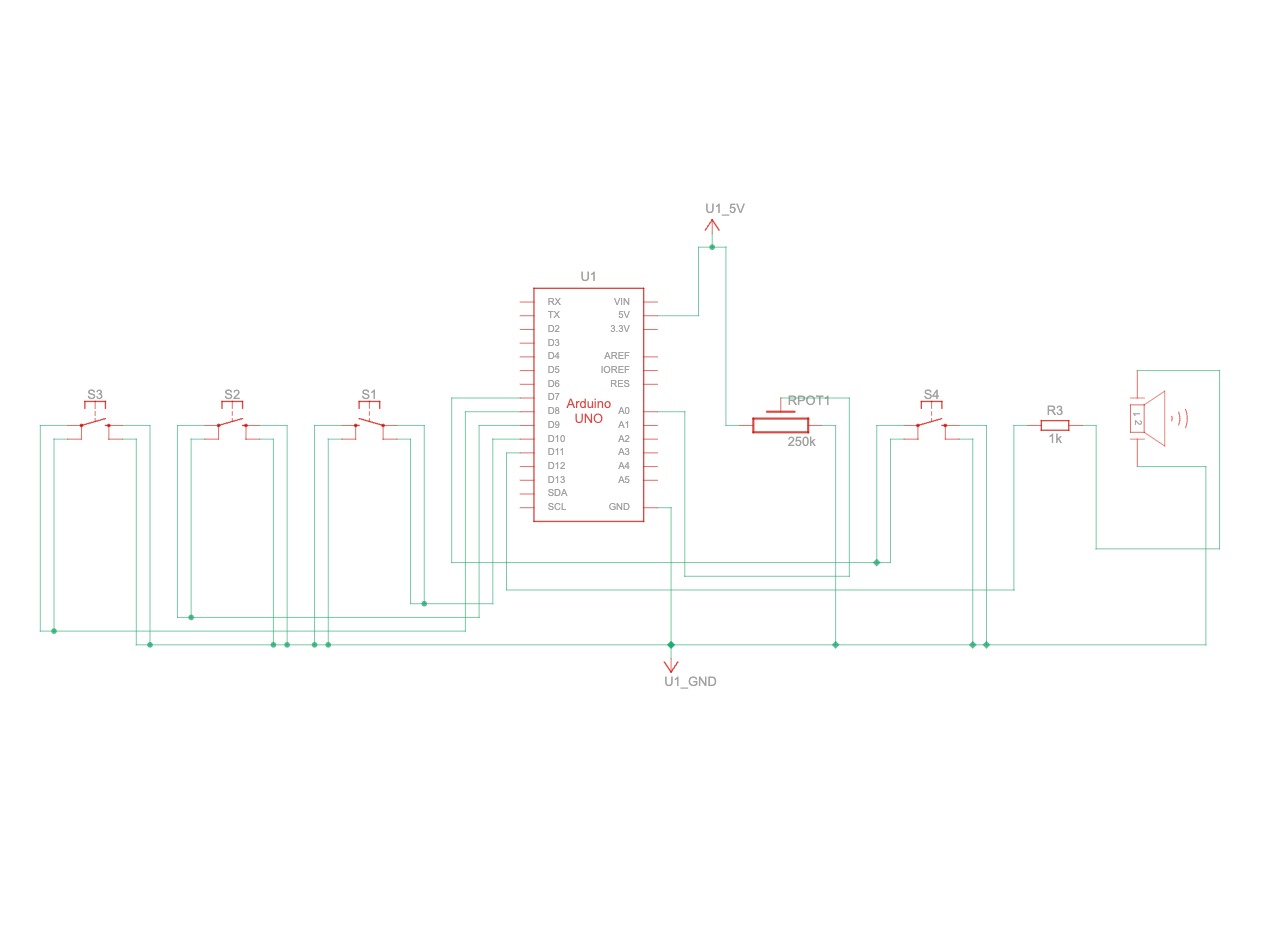
For our assignment, we’ve decided to create a musical instrument, and we settled on making a piano with four keys. Each key, when pressed, will produce a different tone. Our circuit is straightforward, utilizing four push buttons and a buzzer. However, we’ve added an extra component: a potentiometer. This potentiometer allows us to change the frequency of the tones produced by the buzzer. By turning the potentiometer, we can adjust the pitch of the notes, adding more flexibility and range to our piano.
Video Demonstration
Materials we used
- Arduino Uno board
- Breadboard
- 330-ohm resistor
- 4x Tactile push-button switch
- Potentiometer
- Jumper wires
- Piezo buzzer
TinkerCad Diagram
Code
#include <Tone.h>

// Define the notes with more distinguishable frequencies.
#define NOTE_C 262 // Middle C (C4)
#define NOTE_G 392 // G above Middle C (G4)
#define NOTE_C_HIGH 523 // One octave above Middle C (C5)
#define NOTE_G_HIGH 784 // G above C5 (G5)

#define ACTIVATED LOW

const int PIEZO = 11;
const int LED = 13;

const int BUTTON_C = 10;  // Will play Middle C
const int BUTTON_D = 9;   // Will play G (above Middle C)
const int BUTTON_E = 8;   // Will play High C
const int BUTTON_F = 7;   // Will play High G

const int POTENTIOMETER = A0; // Analog input pin connected to the potentiometer

Tone toneGenerator;

void setup() {
  pinMode(LED, OUTPUT);

  pinMode(BUTTON_C, INPUT_PULLUP);
  pinMode(BUTTON_D, INPUT_PULLUP);
  pinMode(BUTTON_E, INPUT_PULLUP);
  pinMode(BUTTON_F, INPUT_PULLUP);

  toneGenerator.begin(PIEZO);
  digitalWrite(LED, LOW);
}

void loop() {
  int potValue = analogRead(POTENTIOMETER); // Read the potentiometer value
  int frequencyAdjustment = map(potValue, 0, 1023, 0, 255); // Map to a quarter of the full range for adjustment

  if (digitalRead(BUTTON_C) == ACTIVATED) {
    toneGenerator.play(NOTE_C + frequencyAdjustment); // Adjust Middle C frequency
    digitalWrite(LED, HIGH);
  } else if (digitalRead(BUTTON_D) == ACTIVATED) {
    toneGenerator.play(NOTE_G + frequencyAdjustment); // Adjust G frequency
    digitalWrite(LED, HIGH);
  } else if (digitalRead(BUTTON_E) == ACTIVATED) {
    toneGenerator.play(NOTE_C_HIGH + frequencyAdjustment); // Adjust High C frequency
    digitalWrite(LED, HIGH);
  } else if (digitalRead(BUTTON_F) == ACTIVATED) {
    toneGenerator.play(NOTE_G_HIGH + frequencyAdjustment); // Adjust High G frequency
    digitalWrite(LED, HIGH);
  } else {
    toneGenerator.stop();
    digitalWrite(LED, LOW);
  }
}
Functionality
- Upon pressing a button, the Arduino reads which button is pressed and plays a specific tone. The potentiometer’s position adjusts the base frequency of this tone, making the sound higher or lower based on its rotation.
- The piano uses the Arduino’s built-in “tone” library to handle tone generation, which simplifies the creation of audible frequencies through digital pins.
Future Improvements
For future improvements we would like to:
- Enhance the clarity and volume of the piano’s notes.
- Add more keys and different types of tones to the piano.
- Integrate LEDs to make it look more attractive and visually appealing.