Emotion & Design: Attractive Things Work Better + Margaret Hamilton

Donald A. Norman’s “Emotions and Attractive” and “Her Code Got Humans on the Moon—And Invented Software Itself,” provided me with valuable insights that resonate deeply. One standout story is that of Margret Hamilton, serving as an inspiring example for young women aspiring to make their mark in a predominantly male-dominated field. Her journey, which started without a clear goal, ultimately led to the creation of software crucial to the Apollo missions at NASA, laying the foundation for modern computer software. It embodies the timeless principle of “just do it.”

The remarkable journey of Hamilton, from initiating something without a clear plan to creating an industry worth $400 billion, illustrates the incredible results that can emerge from hard work and dedication. This narrative connects with Norman’s readings by highlighting that Hamilton didn’t create something just for its own sake; her work was both functional and aesthetically appealing, leaving an indelible mark on history. It emphasizes the importance of striking a balance between usability, aesthetics, intention, and purpose.

Margret Hamilton didn’t chance upon the code we now recognize as software; she meticulously crafted it with usability and a form of beauty appreciated by programmers of her time. Her intentional approach propelled her to the position she holds today, serving as a genuine source of inspiration for my own career aspirations. Her story encourages me to pursue a path that combines functionality and artistry, mirroring her groundbreaking work.

Final Project Draft 2: HFR

Concept
In my previous blog post, I introduced the idea of creating a Human Following Robot inspired by sci-fi movies like Wall-E. The concept revolves around developing a robot companion that autonomously follows a person, adjusting its position based on their movements. This project aims to bring a touch of cinematic magic into real life by utilizing sensors as the robot’s eyes and ears, allowing it to perceive the presence and actions of the person it follows.

Key Components
1. Ultrasonic Sensor:
Role: Measures the distance between the robot and a person.
Functionality: Enables the robot to make decisions about its movement based on the person’s proximity.
2. DC Motors and Motor Driver:
Role: Facilitates the robot’s movement.
Functionality: Allows the robot to move forward, backward, and turn, responding to the person’s position.
3. Servo Motor:
Role: Controls the direction in which the robot is facing.
Functionality: Adjusts its angle based on the horizontal position of the person, ensuring the robot follows the person accurately.
4. P5.js Integration:
Role: Provides visualization and user interface interaction.
Functionality: Creates a graphical representation of the robot’s perspective and the person’s position. Visualizes the direction of the servo motor, offering a clear indicator of the robot’s orientation.

Finalized Concept
Building upon the initial concept, the finalized idea is to implement a real-time human following mechanism. The robot will utilize the input from the ultrasonic sensor to determine the person’s distance, adjusting its movement accordingly. The servo motor will play a crucial role in ensuring the robot faces the person, enhancing the user experience.

Arduino Program
Inputs: Ultrasonic sensor readings for distance measurement.
Outputs: Control signals for DC motors based on a person’s proximity.

Video 1

P5 Program
The P5 program will focus on creating a visual representation of the robot’s perspective and the person’s position. It will receive data from the Arduino regarding the robot’s orientation and the person’s horizontal position, updating the graphical interface accordingly. (I’m thinking of representing an ellipse where the closer you are to the sensor the smaller the ellipse and the further you are the larger it gets). Furthermore, I have tried to implement a clickable control in p5 where it can move the robot frontwards and backwards by clicking on the right and left side of the p5 sketch.

Video 2 


Week 12 – Final Project Proposal/Design Documentation

Psychic Hotline Fortune Teller

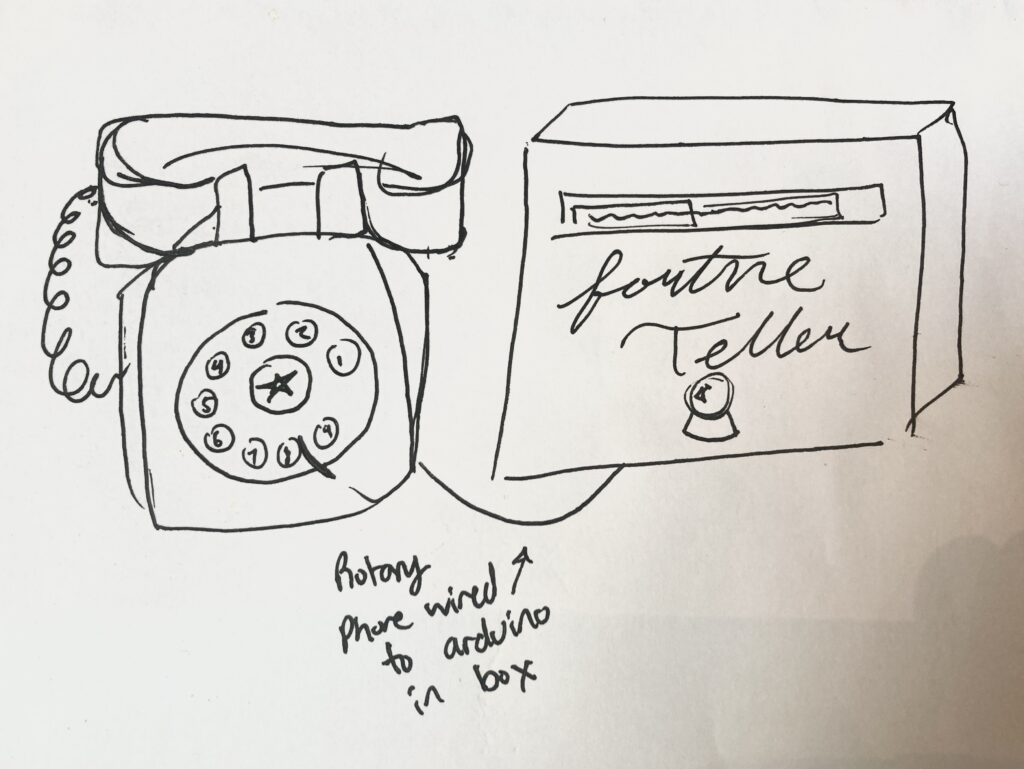
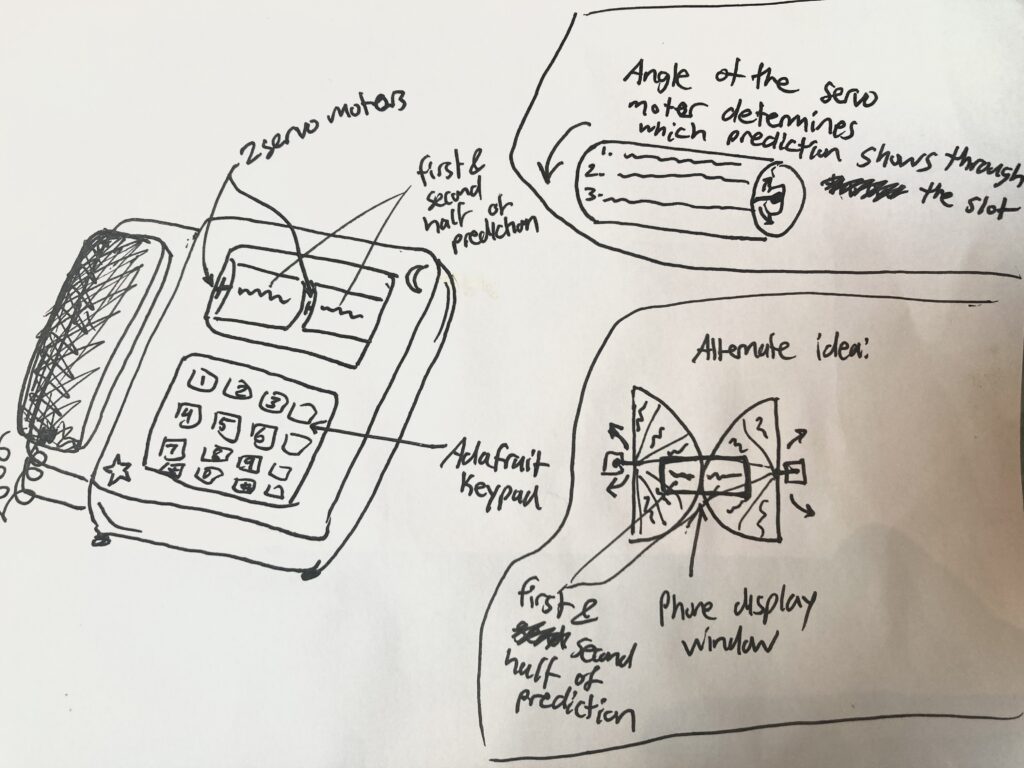
My final project will be a “fortune teller” machine, where users can inquire into 3 categories: relationships, the future, and yes/no questions. The fortune teller will resemble an landline telephone, where users can dial various phone numbers to receive different fortunes on a slot-machine-like cardboard display. The concept is basically that of a Magic 8 ball, but with more specific predictions and a “psychic” aesthetic.

This is how I visualize the project to work:

Another option is to make the display and phone interface separately, to allow for more flexibility. The phone could still be powered by the Adafruit Trellis keypad, or if I have the time and resources, Professor Shiloh’s rotary phone could be connected to Arduino to add a novel tactile experience for the user.


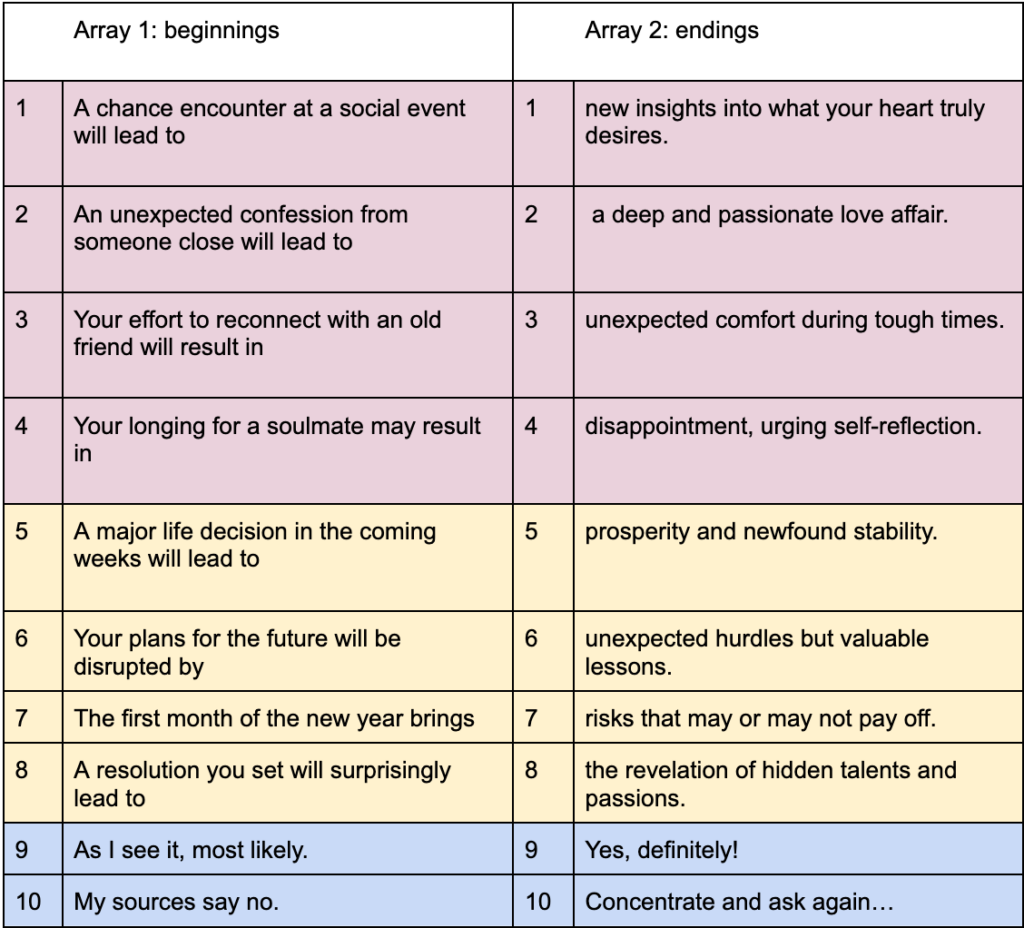
To fully utilize servo motors’ 180-degree rotation and the limited physical space I will have to write the fortunes, I was inspired by Professor Shiloh’s suggestion to have sentence beginnings and endings. These will mix and match to result in a total of 16 possible fortunes for “relationship” inquires, 16 possible fortunes for “future” inquires, and 4 answers to yes/no questions. I now realize that it might not be possible to have 4 answers, because for yes/no questions one of the rolls must be blank, to avoid the display showing “As I see it, most likely Yes, Definitely!”, which would be confusing. I used ChatGPT to help me generate some sentence beginnings and endings, and picked my favorites:

The input to Arduino will be the number sequence the user punches in on the keypad, and the output will be a randomized combination of 2 servo rotation angles to produce 1 sentence.

*Note: my project does not have P5 integration because Professor Shiloh approved an exception.

Musical Instrument (Nourhane & AYA)

CONCEPT:

This assignment was complicated in terms of finding a concept for it. We had a couple of cool ideas to do at the beginning (ie. soda cans drums) but their implementation was a fail. We decided to use our favorite part of the kit: the ultrasonic sensor, and get a concept out of it.

Both our previous assignments used ultrasonic sensors as distance detectors. So we thought to base this assignment on the same concept.

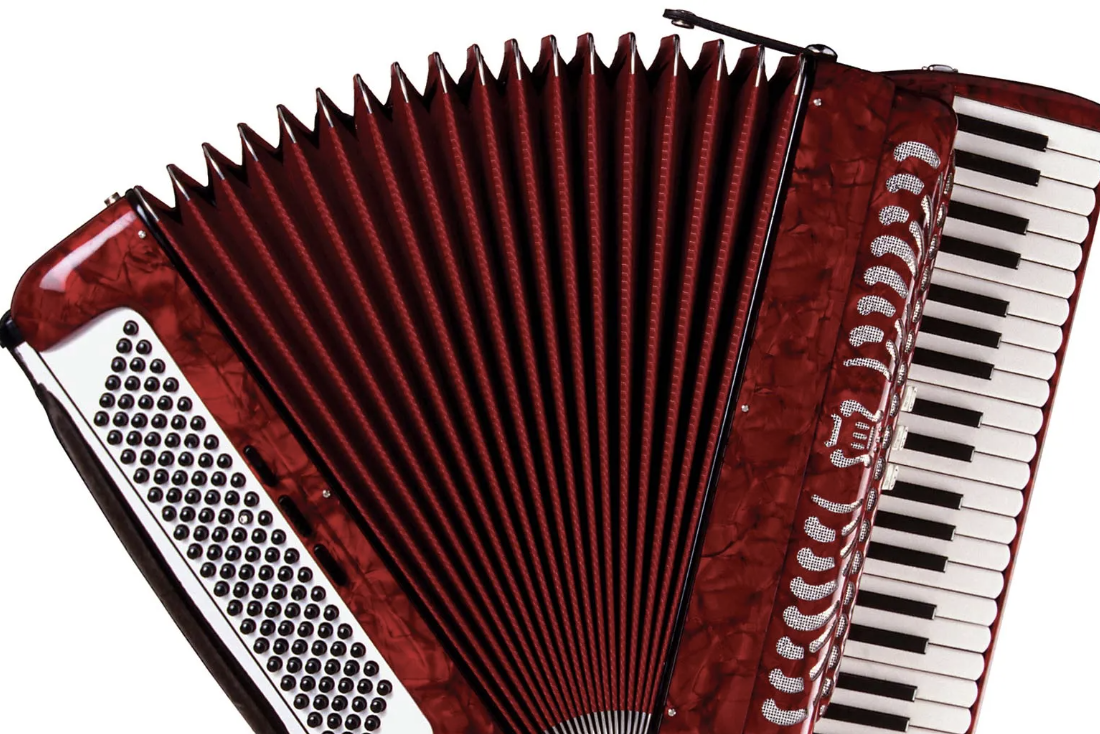
This musical instrument is inspired by the Accordion instrument (with a twist):

Using a plastic spiral, we are mimicking the same movement of an accordion to produce different notes. The distance between the hand and the sensor is what is producing the different notes (each distance range was assigned a different note). The circuit has a switch to turn on/off the instrument.

Here is a video of what I’m talking about:

IMG_8161 2

CODE:

Again assembling the circuit was a hard part but it worked! The code is pretty simple and consists of an ultrasonic sensor and a switch. The `loop` function repeatedly triggers the ultrasonic sensor, measures the distance to an object, converts it to centimeters based on the speed of sound. Depending on these values, it determines whether to play a musical note. If the distance is outside a defined range or the force is below a certain threshold, it stops playing the note. Otherwise, if sufficient force is applied, it maps the distance to an array of musical notes and plays the corresponding note using a piezo buzzer.

int trig = 10;
int echo = 11;
long duration;
long distance;
int force;

void setup() {
  pinMode(echo, INPUT);

  pinMode(trig, OUTPUT);

  Serial.begin(9600);
}

void loop() {
  digitalWrite(trig, LOW); //triggers on/off and then reads data
  delayMicroseconds(2);
  digitalWrite(trig, HIGH);
  delayMicroseconds(10);
  digitalWrite(trig, LOW);
  duration = pulseIn(echo, HIGH);
  distance = (duration / 2) * .0344;    //344 m/s = speed of sound. We're converting into cm


  int notes[7] = {261, 294, 329, 349, 392, 440, 494}; //Putting several notes in an array
  //          mid C  D   E   F   G   A   B

  force = analogRead(A0); //defining force as FSR data


  if (distance < 0 || distance > 50 || force < 100) { //if not presed and not in front

    noTone(12); //dont play music

  }

  else if ((force > 100)) {  //if pressed

    int sound = map(distance, 0, 50, 0, 6);  //map distance to the array of notes
    tone(12, notes[sound]);  //call a certain note depending on distance

  }


}
REFLECTION AND IMPROVEMENTS:

Though I found this assignment difficult, I enjoyed the process of implementation and finding a concept. If I could improve the instrument, I would work on the notes and their frequency to sound more natural. Now it sounds like an EKG machine with notes instead of an instrument, but I think it fulfills the requirement of fictional instrument.

Final Project so far:

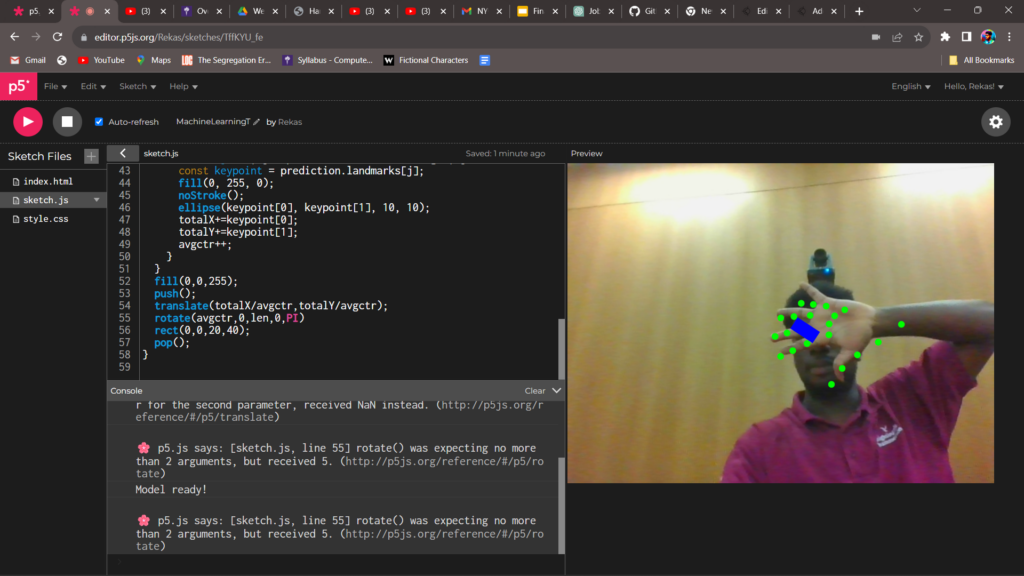
I have been looking into the machine learning library, and so far, I have achieved the poseNet creation for the palms but I am now looking into how this can be used to control my steering wheel. What steering wheel you might be wondering. So I have created a steering wheel that I plan to use to control the wheels of the car I would create. That is if I should choose to create a car. The p5 sketch for the steering wheel so far is below

So I continue to look into how to do the integration but for the ML so far this is what I have below:

Its not much but its cooking. Inshallah!

Alien Intelligence w/Professor Leach


I was so happy to attend Professor Leach’s talk about AI! The conversation of AI has recently come up in a discussion with some of my peers and it reminded me of a few of the topics that were discussed in Professor Leach’s talk. In conversation, we were discussing the role of AI in the arts and how AI can be quite harmful to artists, at least that’s what I believe. My friends disagreed (quite loudly if I may add) and maintained the stance that AI will never be able to create art in the same way a human can. They went on to say that you simply can’t program creativity, so AI would be unlikely to replace human artists.

Here are my thoughts.

As an artist myself, I feel that we are entering a very tricky time. For me, it isn’t about my art vs the AI-generated art. It’s more so these questions: Will people be able to tell the difference or care who made the art? Will art become devalued and seen as something that can be simply generated by AI? Why would you pay for artists and their work when you can recreate their work or make something even more artificially “perfect” with AI?

These questions have yet to be answered and are quite difficult to answer. I wonder what the future will look like for artists who ultimately will have to compete with not only other artists like themselves, but AI as well.


Final Project – Design and Description

Concept:

The main concept of this project is to have a in-position interactive robot that can talk with, think and reply to the user. Furthermore, a conversation can influence the robot’s mood depending on which its outward interactions will change. These moods will be chosen from a series of 4-5 discrete moods. The outward movements that move include a head that turns towards the user depending on where they are talking from, ears that move when you pat them. Eyes that blink as the character talks, changing facial expressions and lights that indicate the robot’s current mood. Finally, I incorporate minimal movement using 2 DC motors.

P5 Design:

The code uses the p5.Speech library for speech recognition. the ElevenLabs API for realistic text to speech and the OpenAI ChatGPT library for text generation and reasoning. We use regular expressions to interpret the prompt engineered ChatGPT responses, and maintain a list of moods and a class that consists of actions based on every mood type. Finally, the remaining code handles the handshake mechanism between the Arduino and p5. The program will receive light sensor/distance sensor data from the Arduino, and various button related state data such as that to start a new conversation.

Arduino Design:

The Arduino design is relatively simple with Servo motors for head movement, eye blinking and facial expression changes. I use LED lights as is, but may choose to use different lights for a more aesthetic result. I use various sensors such as the light sensor on the head to get results when we attempt to pat the robot and distance/light sensors on the body to get information about how far a person’s hand/other objects are. The Arduino passes all the relevant sensor data to the p5 program and gets all relevant data from the program. Some minimal interactions such as basic ear movements or movements motivated by proximity of any sort are handled directly within the Arduino itself.

FINAL PROJECT PROPOSAL

For my final project, I wanted to do something that was related to sound since I have a great interest in all things music/sound-related. After much research and contemplation, I decided to recreate one of the most important tools in my line of work, a midi controller. I use my MIDI controller for all of my musical creations because it is not only convenient but works incredibly well with my DAWs (digital audio workstations). The primary instrument that I use in many of my pieces is the synthesizer. This instrument inspires so many of my songs and allows me to manipulate sound in ways I could have never imagined. 

For this project, I will be taking inspiration from this tutorial ( https://www.youtube.com/watch?v=cHiTPoNCv1w ) and recreating my own controller. I hope to have quite a few buttons that will mimic a synthesizer and also add some sound effects for percussion (like a drum kit). I have yet to figure out how I want to implement p5 in all of this but I am thinking of trying to create a sound visualization in p5 that will maybe move whenever a button in Arduino is pressed. 


Here is the sample code for the Arduino portion of my project.

#include <Control_Surface.h> // Include the Control Surface library

// Instantiate a MIDI over USB interface.
USBMIDI_Interface midi;

// Instantiate a NoteButton object
NoteButton button {
  5,                             // Push button on pin 5
  {MIDI_Notes::C(4), Channel_1}, // Note C4 on MIDI channel 1
};

void setup() {
  Control_Surface.begin(); // Initialize Control Surface
}

void loop() {
  Control_Surface.loop(); // Update the Control Surface
}

These are the two sound libraries that I needed to download for this code to make a bit more sense.

https://github.com/arduino-libraries/MIDIUSB

https://tttapa.github.io/Control-Surface-doc/Doxygen/index.html

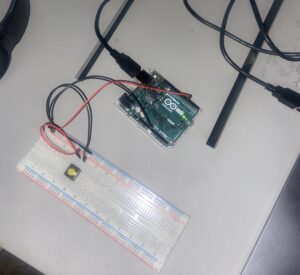
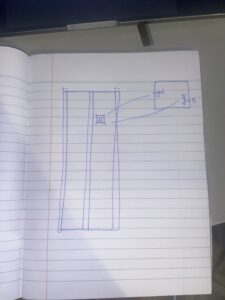
I attempted to draw the basic circuit 😔

Week 12 – Final Project Proposal and Design Documentation

Concept

For the final project, I have committed to the digital petting zoo idea, in which the user can interact with different animals on screen with one physical model and other props.

Design Documentation

p5: In this project, p5js will primarily be the user interface of the petting zoo. It will show the mapping of the zoo, the animals, instructions, and the need of different animals.

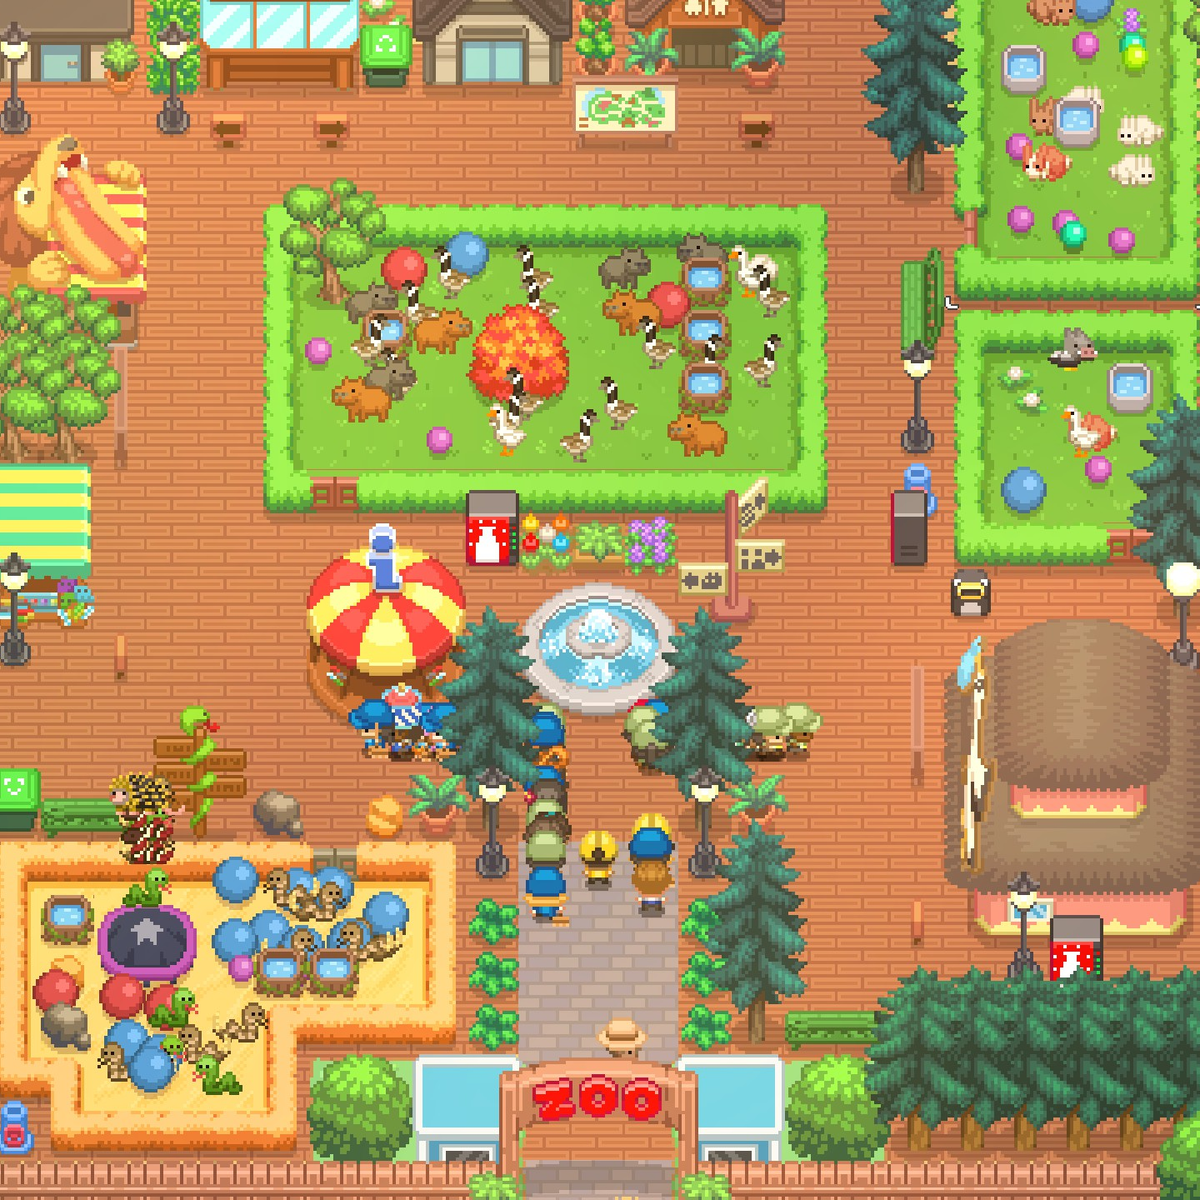
The general appearance should represent something like this (but surely a simplistic version):

Let's Build A Zoo review: an absorbing tycoon game that relishes chaos | Rock Paper Shotgun

This interface will be composed of several colliders and the user can walk around and trigger different interactions. A wireframe of this idea is live on p5js now: The big blocks are animal areas and the small one is the player. The player now can walk around with the arrow keys on the keyboard and different messages will be displayed on the LCD screen connected to the Arduino (will explained below) when the player collides with different blocks, showing that they are entering different animal areas.

Arduino: The Arduino will be the controller of the player and the place will physical interactions with the animals on the screen could happen. I plan to craft a model that represents the animal that will be in the zoo with a LCD display that will tell the player which animal it is based on the location of the player in the zoo. There might be other parts connected to this model, such as servo motors and other sensors, which make the interactions possible. There will also be a control panel with four buttons, allowing the player to walk in the zoo, just like the arrow buttons on the keyboard.

week11.reading – Design Meets Disability

In this chapter from Graham Pullin’s book Design Meets Disability, the author delves into the history, complications, applications, and interplay between designs and life-enhancing devices. I believe the main ideas that Pullin is trying to address are highly evident through the examples of eyewear. As mentioned, the concept of physical lenses was never initially intended to be a part of fashion nor to embrace the physical complications. Nevertheless, with time, glasses became a significant part of fashion, even though their main purpose was to enhance the vision and life of those who have physical limitations in regard to their eyesight. The chapter discusses numerous such instances where engineers and scientists develop systems without an idea of the physical design in mind, but society can gradually adapt and change these systems, integrating them seamlessly into our lives.

However, it is critical to comprehend that a balance must exist between design and functionality. Certainly, with devices such as hearing aids, one cannot focus fully on the best visual design and neglect the functionality of the product. Similarly, this ideology influences the progressive and innovative technologies that we see today. When creating such systems, individuals must also consider what are the societal, cultural, and other external influences that will either enhance or diminish the need or usefulness of the product. Ultimately, I believe that this reading has given me a new perspective on how design meets disability and how societies are able to remarkably influence the adaptation and usefulness of products that might have been designed with no intention of including a good visual design.