
Concept
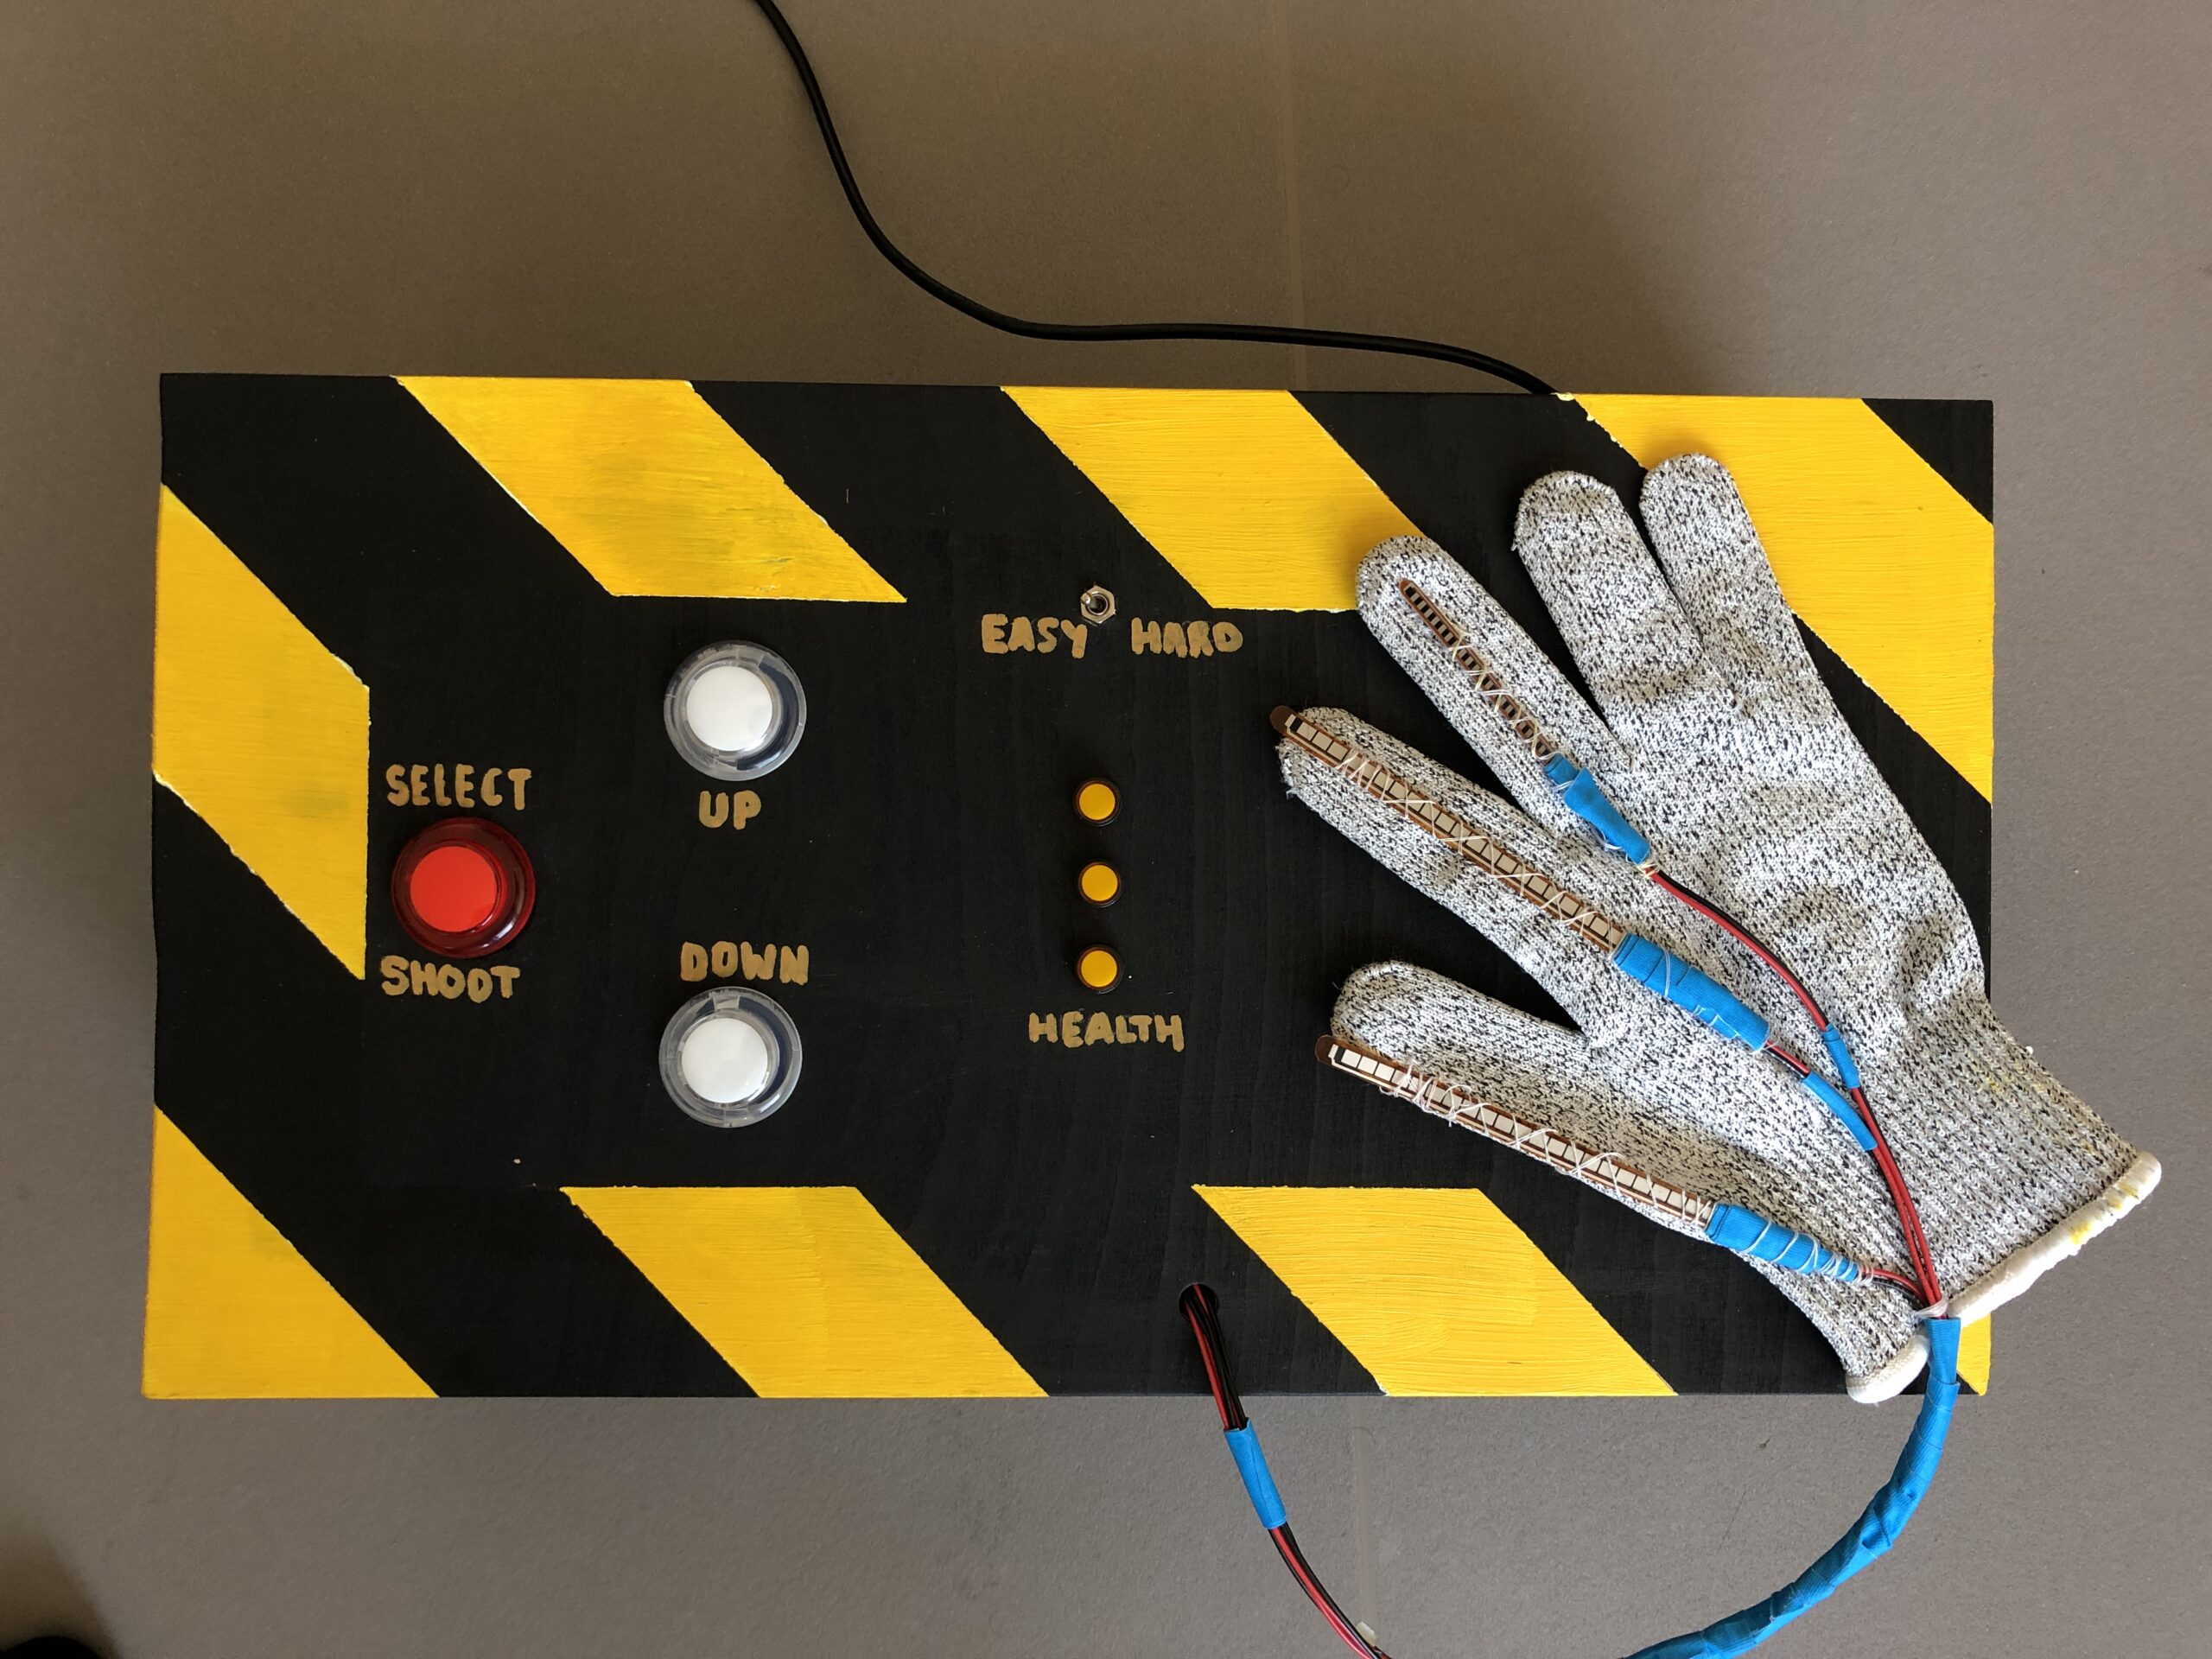
I decided to implement my idea of creating a unique controller for a video game, which in my case, was gesture control with a glove. I had decided to continue with the initial design; however, I decided to add an additional switch to change between simple button controls and using the glove to control the game. The game was a mash-up of Plants vs. Zombies and Space Invaders. I drew all the graphics for the game myself, and the game would be a high-score-based experience where each player can try to beat the previously set high score. Additionally, the enemies in the game spawn infinitely, and the difficulty increases with each wave of incoming enemies. The difficulty is dependent on the time that has passed since the start of the game and is measured by the speed at which the enemies come at you. Additionally, the game is fully controllable through the arcade-styled “controller box,” which has “SELECT, UP, DOWN” buttons and a toggle switch to change between “HARD” (glove controlling) and “EASY” (button control). Overall, I found the design quite intuitive, as did many others. Additionally, while working on the code, I added a feature to control the game through keyboard inputs, which can be activated by uncommenting the specified code segments.
User-Testing + Images & Videos
I had numerous friends try and use the project I have created, and the results were highly positive. The design was intuitive, and after just one or two tries, the testers got the hang of how the box and glove functioned. Overall, I think a big issue was that at the show, people did not spend much attention reading the instructions, which resulted in me having to restate what was written there verbally; in a more focused environment, I am sure this project would be very understandable and easy to use. It is, however, challenging to get used to controlling the player with the glove, and thus, it was called the HARD mode. Additionally, due to the issue of not being able to reuse the red button for switching between screens, I had to add some unique features for it to be better understood. In the instructions, I explicitly mention that you must first press the up and then start buttons, and after the game is over, the up and down buttons start blinking, indicating that you must press them together to restart the game. I will surely try to structure the code a bit differently whenever similar projects come up in the future.
Implementation
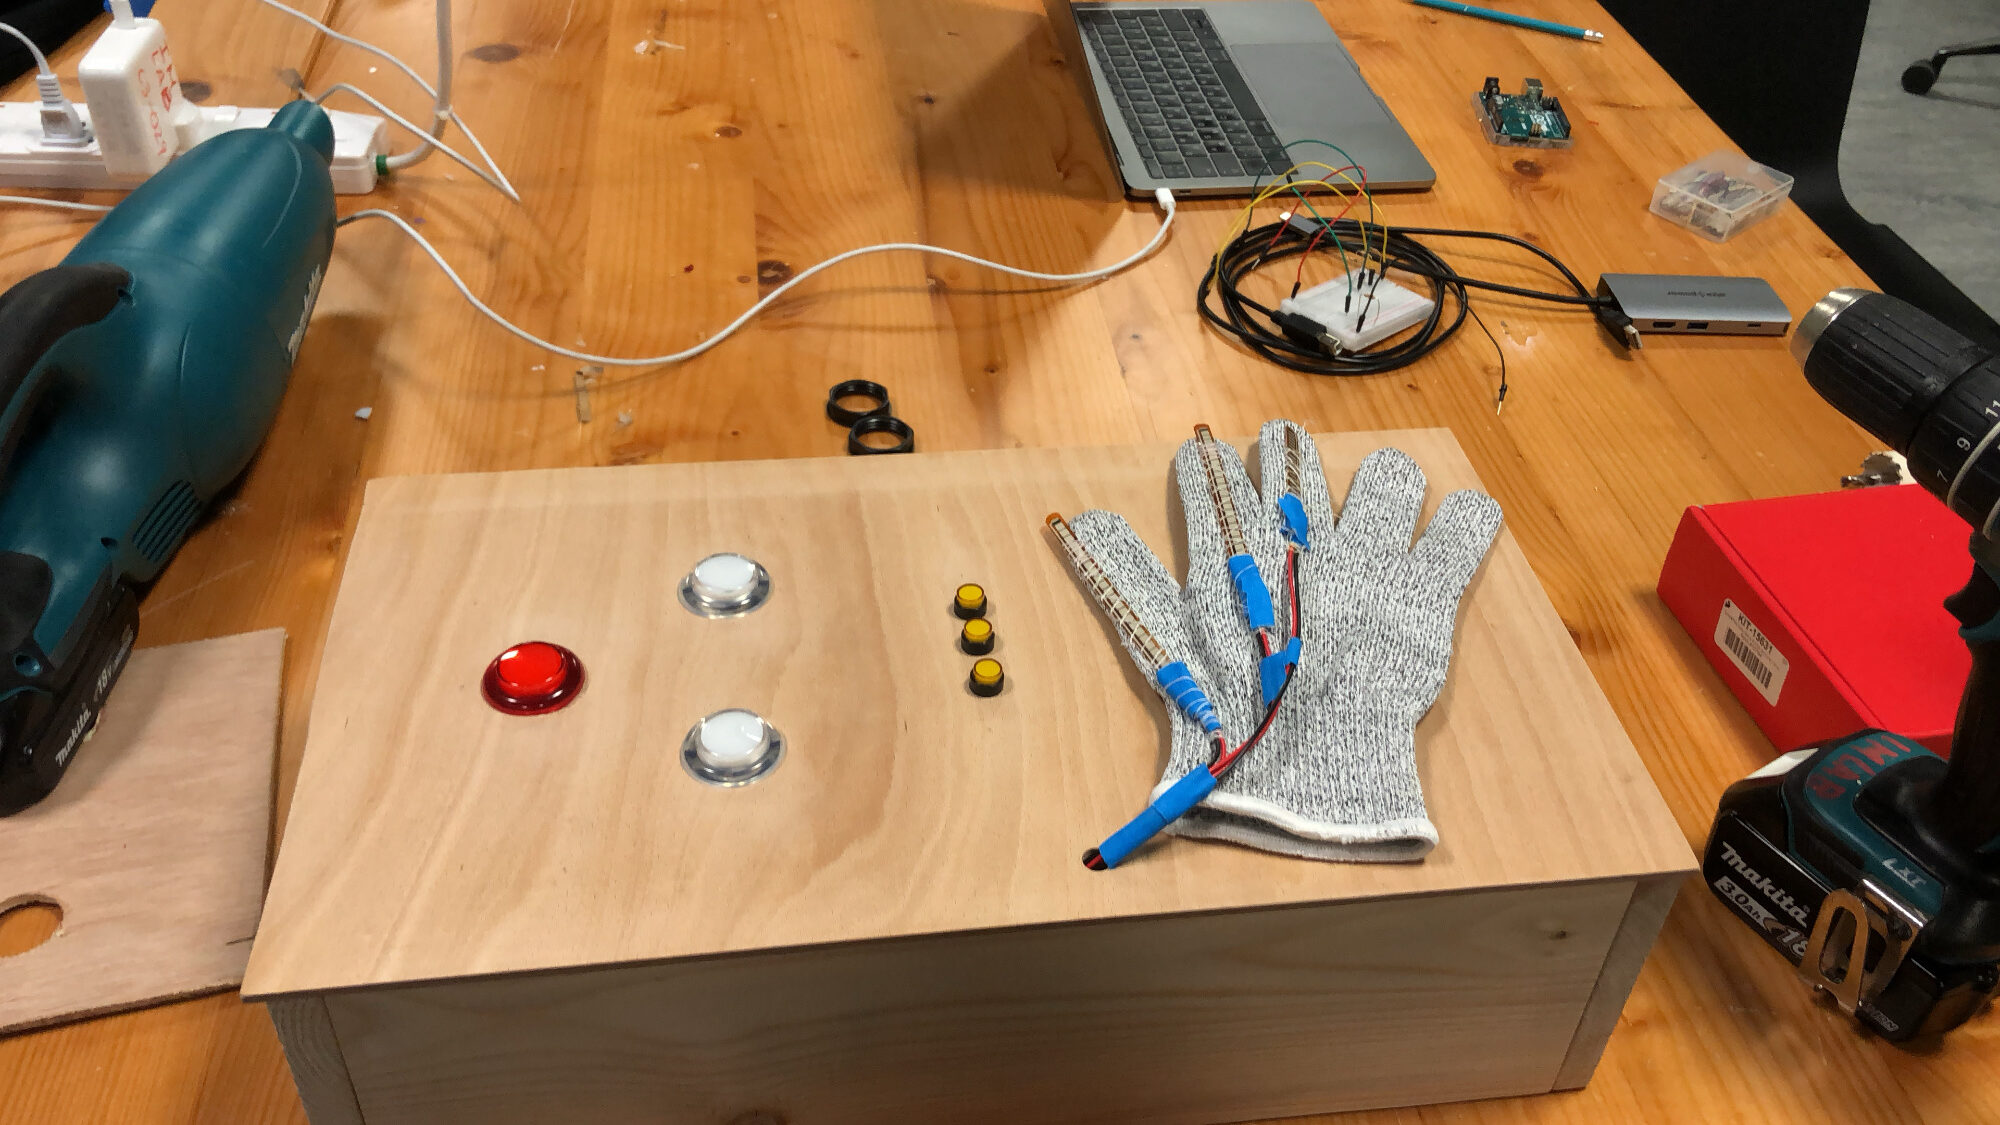
Interaction + Physical Design: My main intention with the design of this project was to make it reminiscent of the old-school arcade-style games, from the big light-up buttons, LEDs, and switches to the pixelated game characters and animations. I wanted to create a satisfying and nostalgic experience for the players of the game of a time when they had been to an arcade as a child. As I later found out, many people in the community here have not had these experiences before; therefore, it was also a new experience for them. However, the implementation of the glove provided a futuristic and high-tech twist to the old-school-styled project. This also interested many because who wouldn’t want to try playing a simple game with controls that are so different than what we are used to? Overall, I spent many hours designing, painting, and ensuring the physical structure of the box was well-thought-out and intuitive. A few images of the construction can be seen below.
Arduino
Surprisingly, the Arduino implementation of my project was much simpler than I had expected. The entire Arduino code is shown below:
//flex sensors and their respective fingers/input pins
int thumb = A2;
int index = A1;
int middle = A0;

//thersholds for the flex sensors
int bend = 800;
int thumb_bend = 730;


//inputs for digital switches
int mode_switch = 2; /// left side is 1 right is 0
int health_led1 = 3;
int health_led2 = 4;
int health_led3 = 5;
int white_switch1 = 6;
int white_switch1_led = 7;
int white_switch2 = 8;
int white_switch2_led = 9;
int red_switch = 10;
int red_switch_led = 11;


//variables to send to p5
int move_up = 0;
int move_down = 0;
int shoot = 0;
int still = 0;
int mode = 0;
int white_up = 0;
int white_down = 0;
int red = 0;

// variable from p5
int health = 3;

void get_gesture() {
  int thumb_value = analogRead(thumb);
  int index_value = analogRead(index);
  int middle_value = analogRead(middle);
  if (thumb_value < thumb_bend && index_value > bend && middle_value > bend) { // condition for move up -- every finger bent except thumb
    move_up = 1;
    move_down = 0;
    shoot = 0;
    still = 0;
  } else if (thumb_value > thumb_bend && index_value > bend && middle_value > bend) { // condition for move down -- every finger bent
    move_up = 0;
    move_down = 1;
    shoot = 0;
    still = 0;
  } else if (thumb_value < thumb_bend && index_value < bend && middle_value > bend) { // condition for shooting -- only middle finger bent
    move_up = 0;
    move_down = 0;
    shoot = 1;
    still = 0;
  } else if (thumb_value < thumb_bend && index_value < bend && middle_value < bend) { // condition for no movement -- no fingers bent
    move_up = 0;
    move_down = 0;
    shoot = 0;
    still = 1;
  }
}

void get_switch_values() {  /// this function gets the buttons/switches values (1 or 0), to send to P5
  mode = digitalRead(mode_switch);
  white_up = digitalRead(white_switch1);
  white_down = digitalRead(white_switch2);
  red = digitalRead(red_switch);

  //make the leds with switches turn on with toggle and if pressed.
  if (mode == 1 && health != 0) {
    digitalWrite(white_switch1_led, HIGH);
    digitalWrite(white_switch2_led, HIGH);
    digitalWrite(red_switch_led, HIGH);
  } else if (mode == 0) {
    digitalWrite(white_switch1_led, LOW);
    digitalWrite(white_switch2_led, LOW);
    digitalWrite(red_switch_led, LOW);
    if (white_up == 1) {
      digitalWrite(white_switch1_led, HIGH);
    } else if (white_up == 0) {
      digitalWrite(white_switch1_led, LOW);
    }
    if (white_down == 1) {
      digitalWrite(white_switch2_led, HIGH);
    } else if (white_down == 0) {
      digitalWrite(white_switch2_led, LOW);
    }
    if (red == 1) {
      digitalWrite(red_switch_led, HIGH);
    } else if (red == 0) {
      digitalWrite(red_switch_led, LOW);
    }
  }
}
const long interval = 700;
unsigned long previousMillis = 0;
int ledState = LOW;

void show_health() {  // TURN ON LEDS DEPENDING ON HEALTH, BLINK UP AND DOWN BUTTONS IF DEAD
  if (health == 3) {
    digitalWrite(health_led1, HIGH);
    digitalWrite(health_led2, HIGH);
    digitalWrite(health_led3, HIGH);
  } else if (health == 2) {
    digitalWrite(health_led1, LOW);
    digitalWrite(health_led2, HIGH);
    digitalWrite(health_led3, HIGH);
  } else if (health == 1) {
    digitalWrite(health_led1, LOW);
    digitalWrite(health_led2, LOW);
    digitalWrite(health_led3, HIGH);
  } else if (health <= 0 && mode == 1 || mode == 0) {
    digitalWrite(health_led1, LOW);
    digitalWrite(health_led2, LOW);
    digitalWrite(health_led3, LOW);
    digitalWrite(red_switch_led, LOW);
    unsigned long currentMillis = millis();

    if (currentMillis - previousMillis >= interval) {
    // save the last time you blinked the LED
    previousMillis = currentMillis;

    // if the LED is off turn it on and vice-versa:
    if (ledState == LOW) {
      ledState = HIGH;
    } else {
      ledState = LOW;
    }

    // set the LED with the ledState of the variable:
    digitalWrite(white_switch1_led, ledState);
    digitalWrite(white_switch2_led, ledState);
  }
  }
}

void setup() {
  // Start serial communication so we can send data over the USB connection to our p5js sketch
  Serial.begin(9600);

  //defining the pins
  pinMode(LED_BUILTIN, OUTPUT);
  pinMode(health_led1, OUTPUT);
  pinMode(health_led2, OUTPUT);
  pinMode(health_led3, OUTPUT);
  pinMode(white_switch1, INPUT);
  pinMode(white_switch1_led, OUTPUT);
  pinMode(white_switch2, INPUT);
  pinMode(white_switch2_led, OUTPUT);
  pinMode(red_switch, INPUT);
  pinMode(red_switch_led, OUTPUT);
  pinMode(mode_switch, INPUT);

  //start the handshake
  while (Serial.available() <= 0) { // everything blinks while waiting for serial data from p5
    Serial.println("0"); // send a starting message
    digitalWrite(health_led1, HIGH);
    digitalWrite(health_led2, HIGH);
    digitalWrite(health_led3, HIGH);
    digitalWrite(white_switch1_led, HIGH);
    digitalWrite(white_switch2_led, HIGH);
    digitalWrite(red_switch_led, HIGH);
    delay(300);
    digitalWrite(health_led1, LOW);
    digitalWrite(health_led2, LOW);
    digitalWrite(health_led3, LOW);
    digitalWrite(white_switch1_led, LOW);
    digitalWrite(white_switch2_led, LOW);
    digitalWrite(red_switch_led, LOW);
    delay(300);
  }
}

void loop() {

  // wait for data from p5 before doing something
  while (Serial.available()) {
    digitalWrite(LED_BUILTIN, HIGH); // led on while receiving data
    health = Serial.parseInt();

    if (Serial.read() == '\n') {
        get_gesture();
        get_switch_values();
        show_health();
        delay(1);

        Serial.print(move_up);
        Serial.print(",");
        Serial.print(move_down);
        Serial.print(",");
        Serial.print(shoot);
        Serial.print(",");
        Serial.print(still);
        Serial.print(",");
        Serial.print(mode);
        Serial.print(",");
        Serial.print(white_up);
        Serial.print(",");
        Serial.print(white_down);
        Serial.print(",");
        Serial.print(red);
        Serial.println();
    }
  }
  digitalWrite(LED_BUILTIN, LOW);
}
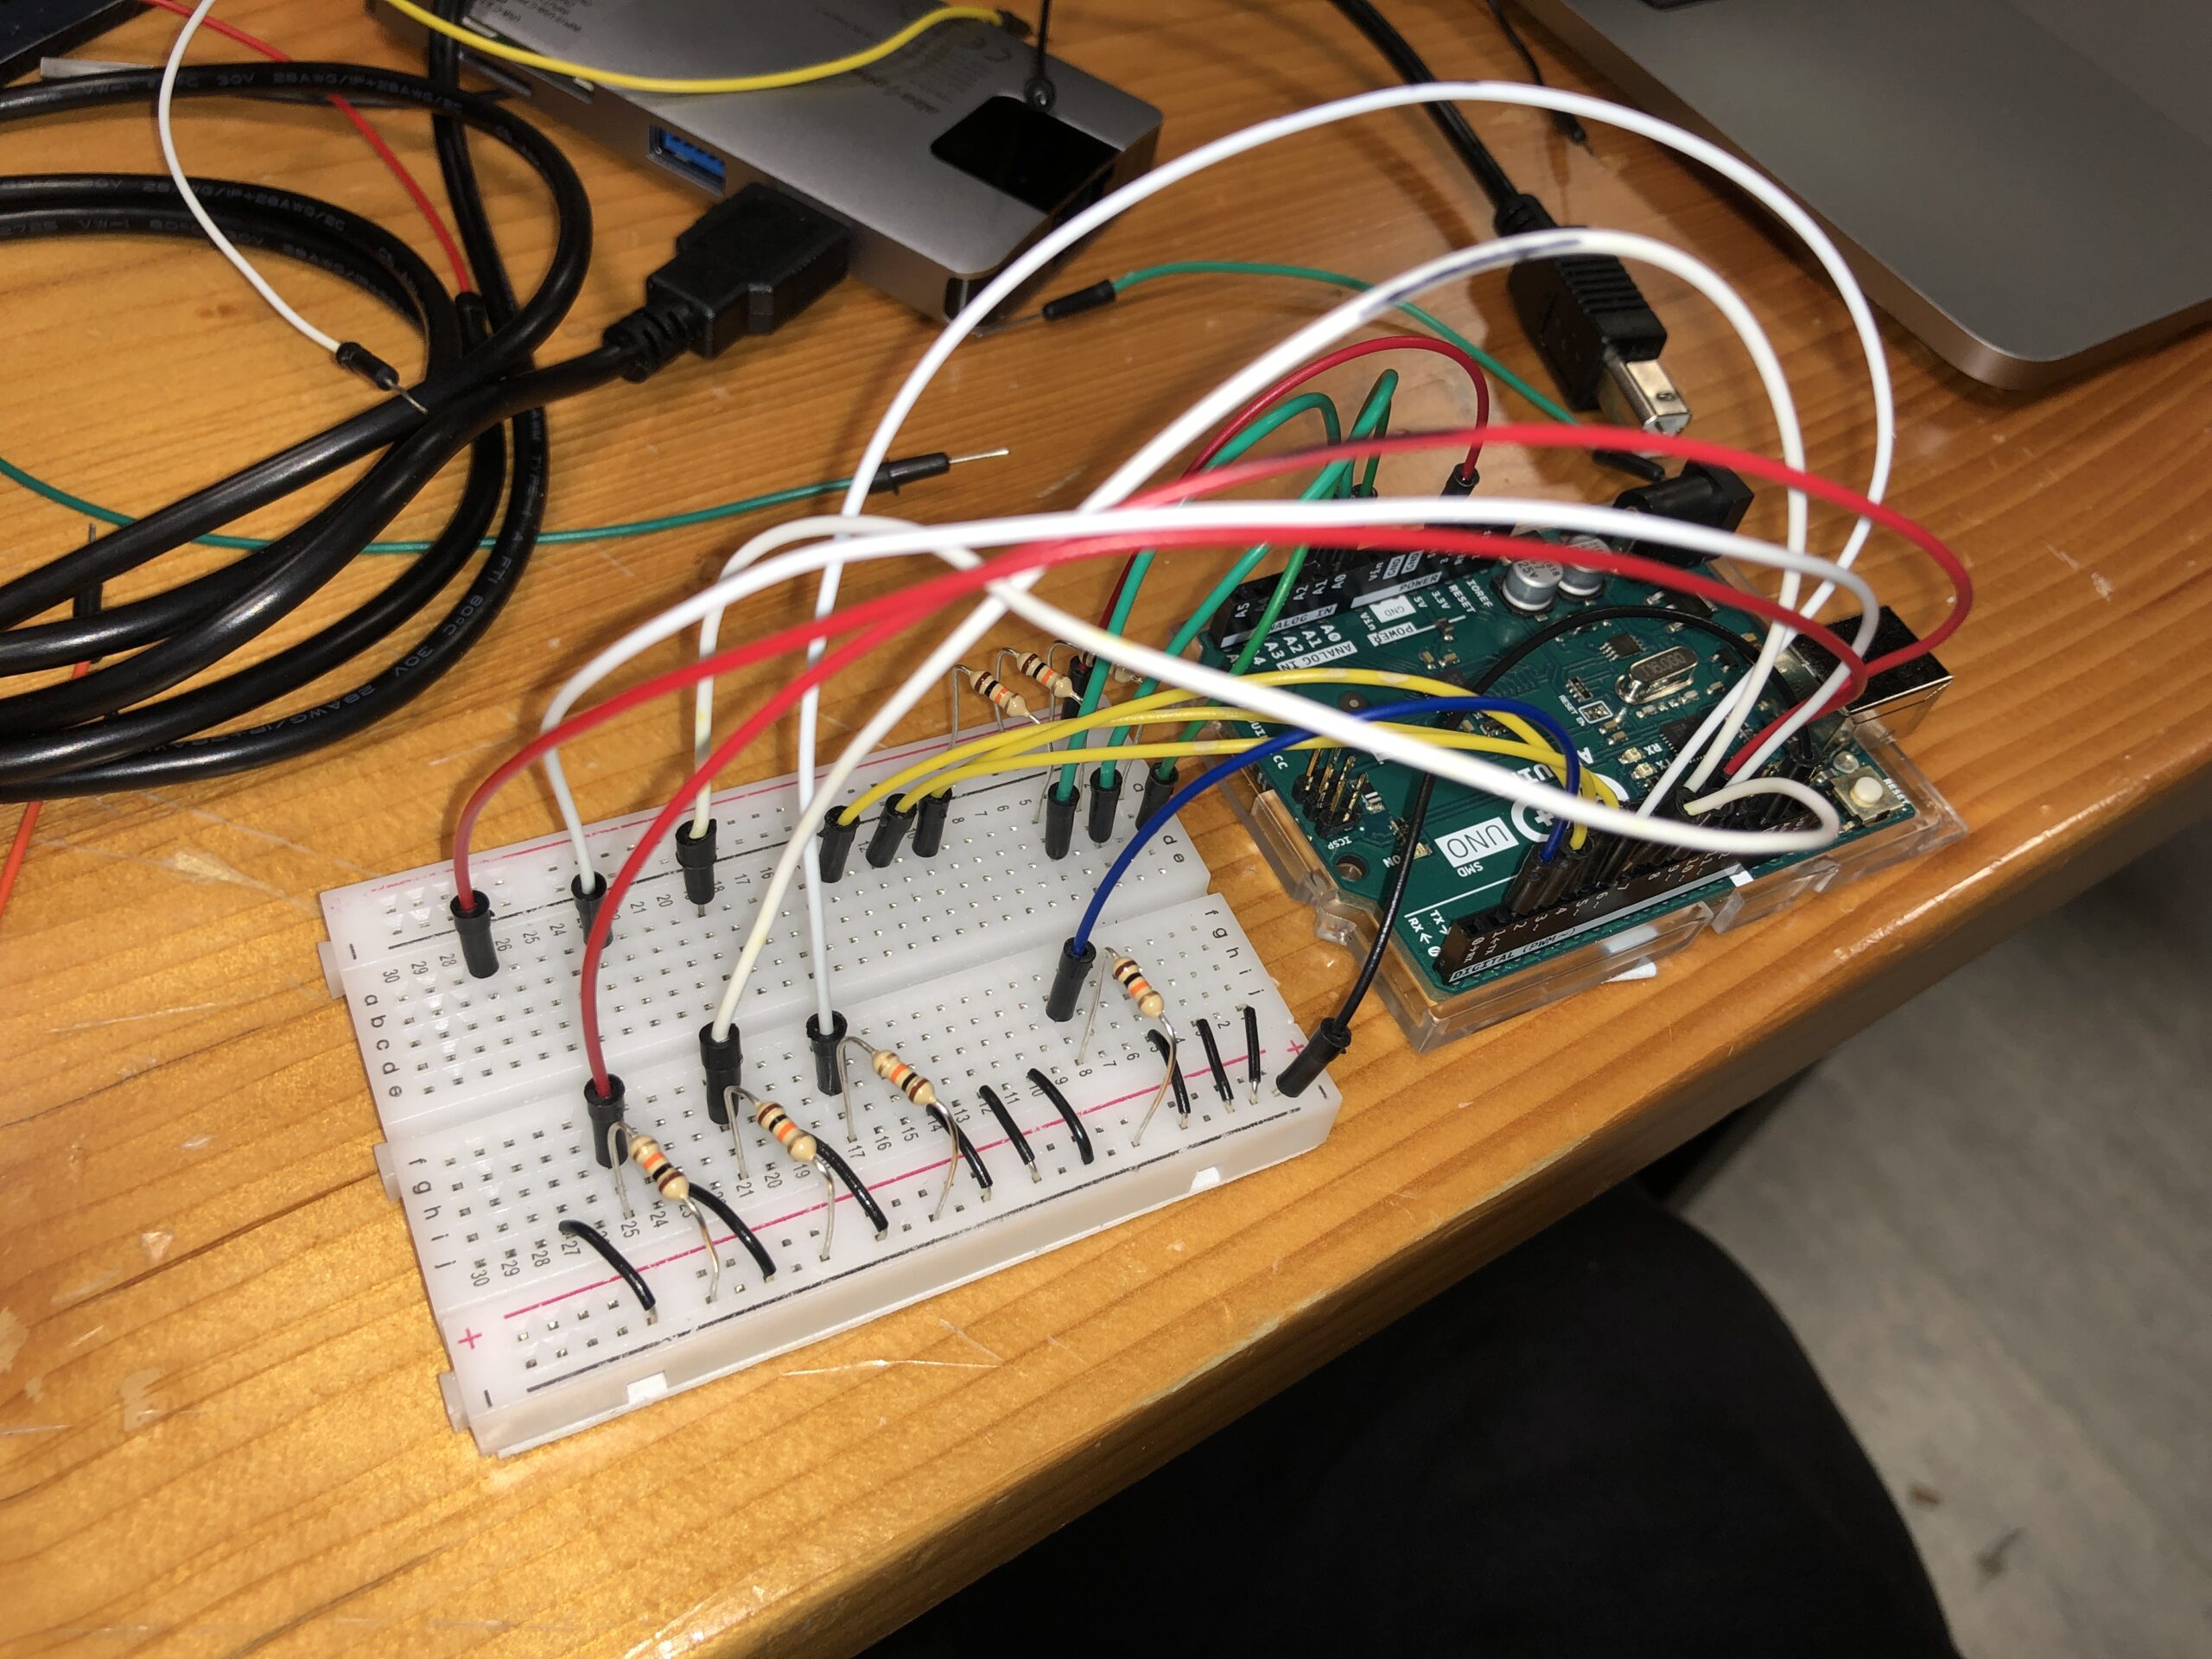
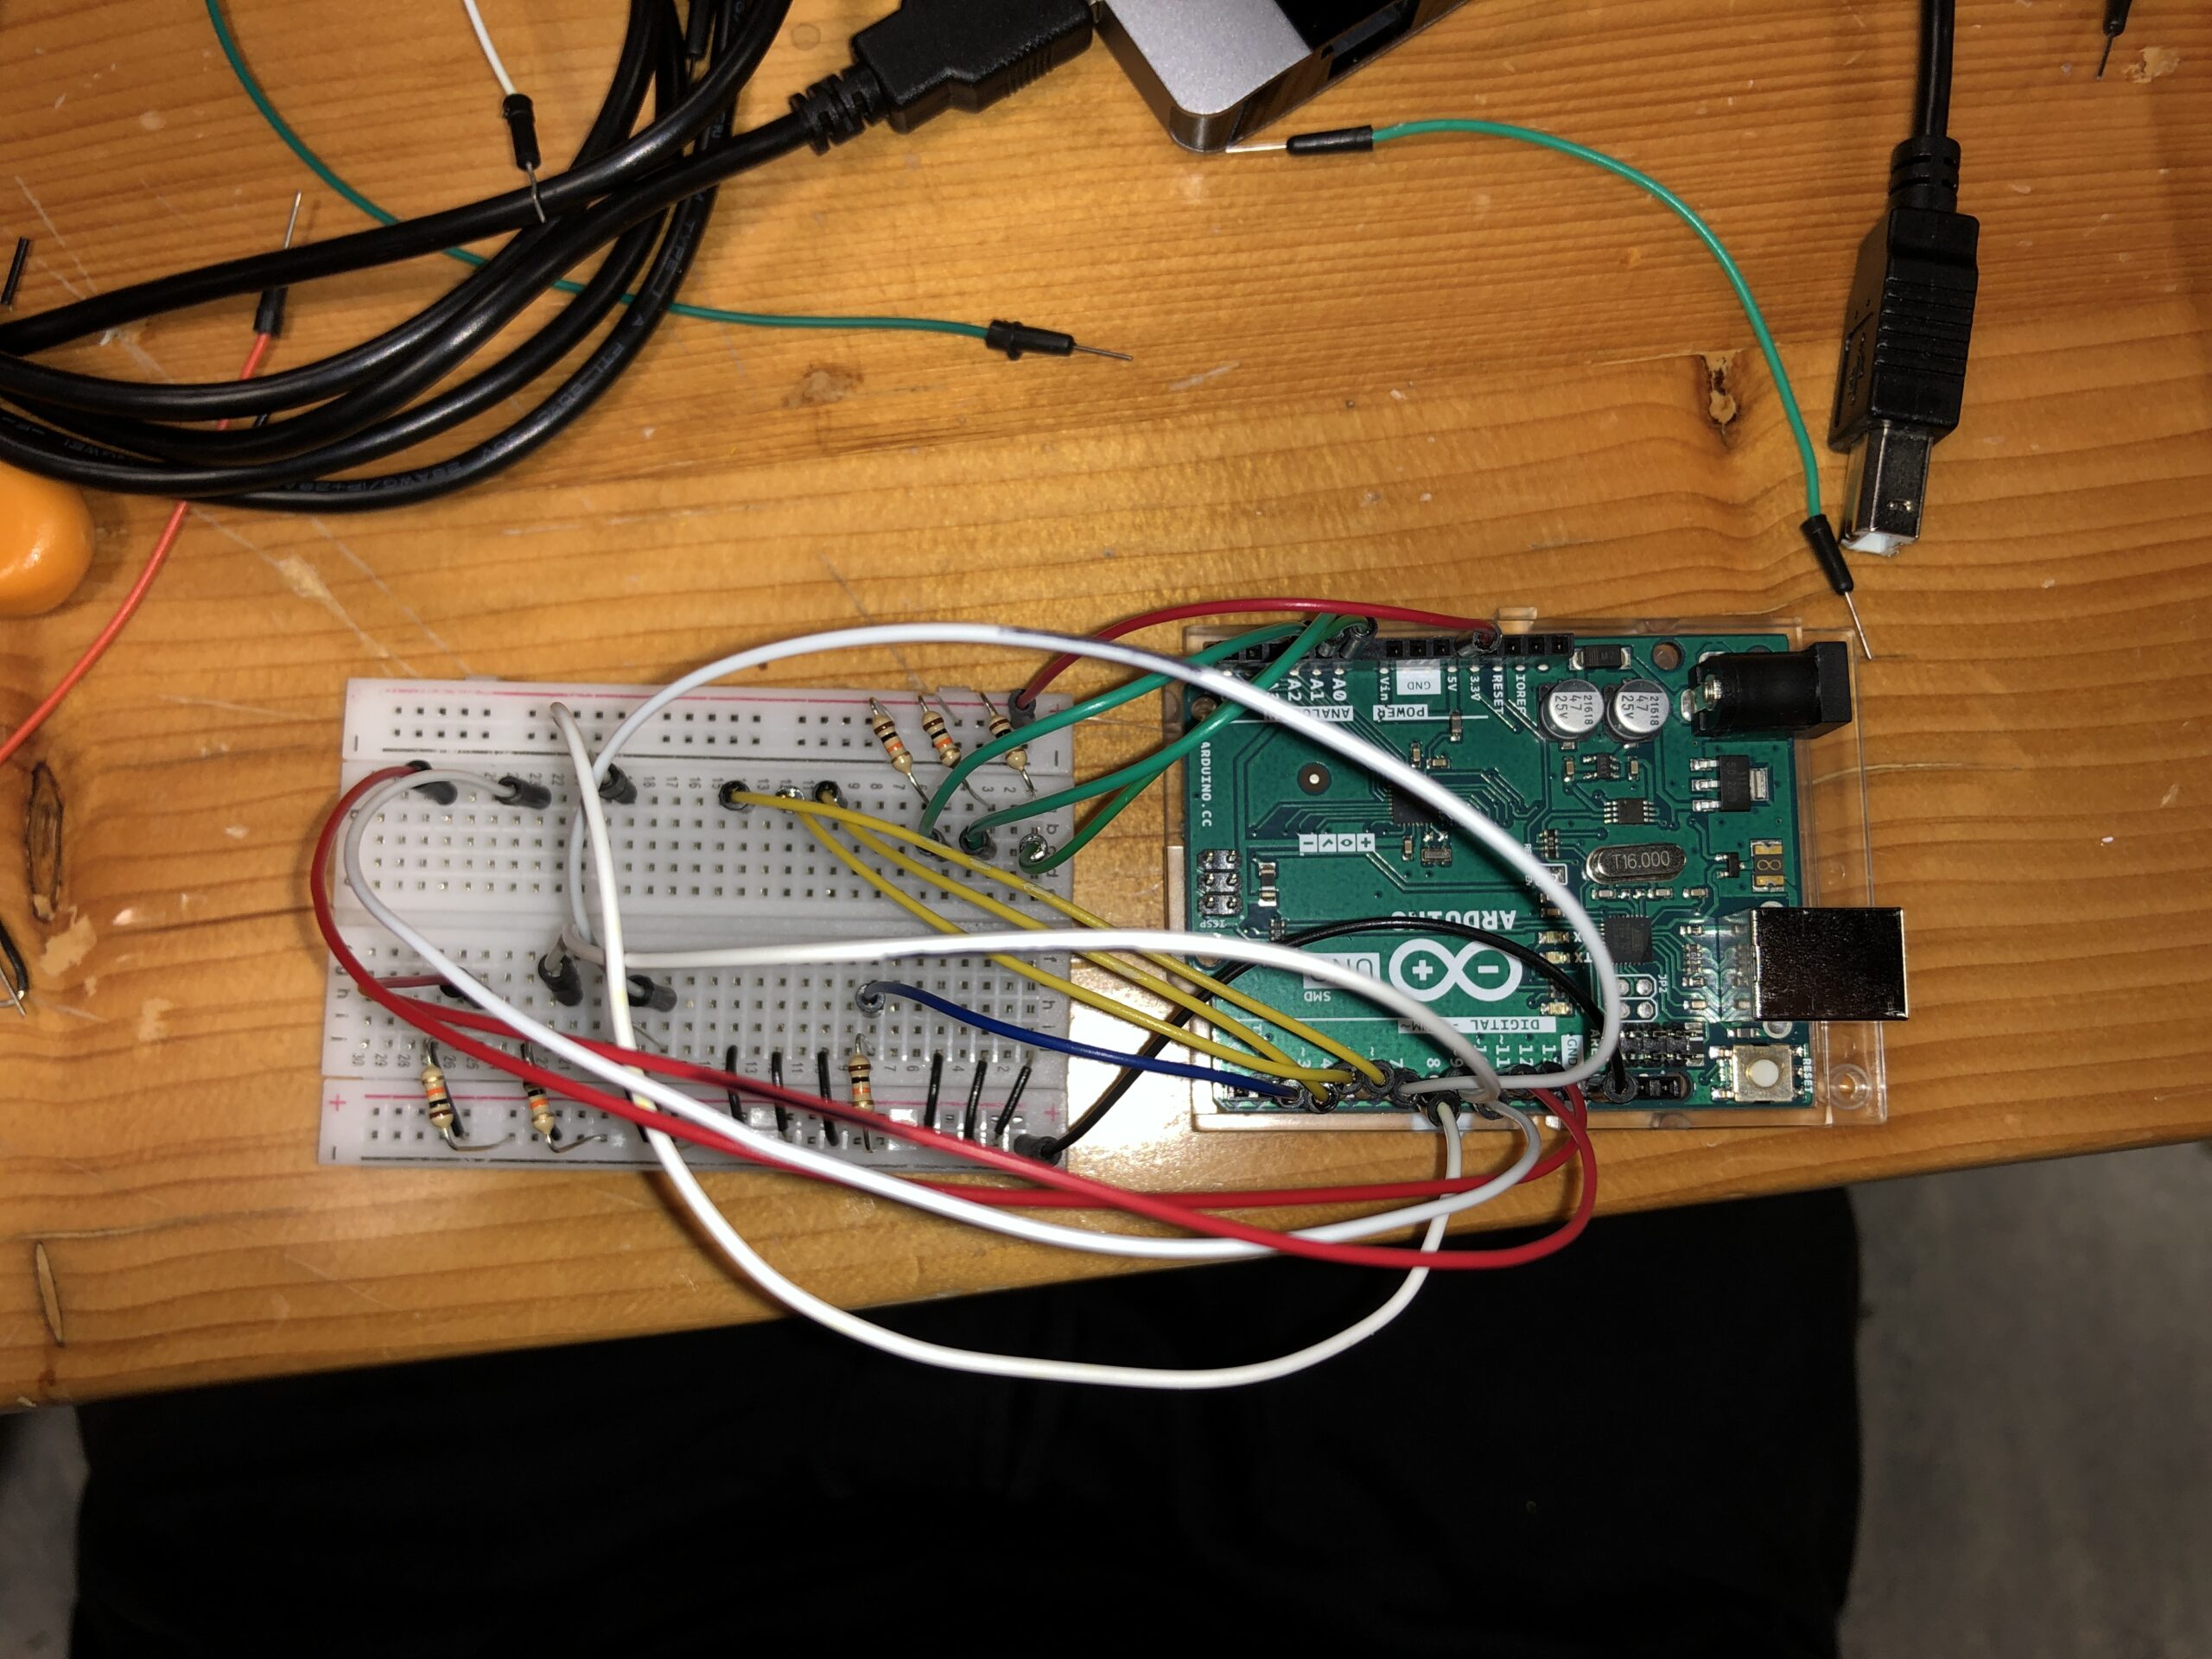
I decided to create functions for each of the actions needed for Arduino to keep the serial communication loop a lot cleaner. Additionally, the gestures are recognized within the Arduino, and then the according values for move_up, down, and so on are sent to P5. Additionally, the circuit design and connections can be seen below:
P5JS
The P5JS code is too long to post here and can be found by following the embedded sketch. The segment below is the one I struggled most with:
check_collision() {
  // check for collisions between bullets and enemies
  for (let b = this.bullets.length - 1; b >= 0; b--) {
    if (this.bullets[b].active) {
      for (let enemy = game.enemies.length - 1; enemy >= 0; enemy--) {
        if (game.enemies[enemy].alive) {
          let enemy_x = game.enemies[enemy].x;
          let enemy_y = game.enemies[enemy].y;
          let bullet_x = this.bullets[b].x;
          let bullet_y = this.bullets[b].y;

          if (dist(bullet_x, bullet_y, enemy_x, enemy_y) < 150) {
            // Bullet hits the enemy
            game.enemies[enemy].explode();
            this.score += 1;
            this.bullets[b].inactive();
          }
        }
      }
    }
  }

  // remove inactive bullets that go beyond the right edge
  this.bullets = this.bullets.filter(
    (bullet) => bullet.active && bullet.x < width
  );

  // check for collisions between enemies and the player
  for (let enemy = game.enemies.length - 1; enemy >= 0; enemy--) {
    if (game.enemies[enemy].alive) {
      let enemy_x = game.enemies[enemy].x;
      let enemy_y = game.enemies[enemy].y;
      let player_x = this.x;
      let player_y = this.y;
      let player_r = this.w / 2;
      let enemy_r = game.enemies[enemy].img_w / 2;

      if (!game.enemies[enemy].collided_with_player) {
        if (dist(player_x, player_y, enemy_x, enemy_y) < player_r + enemy_r) {
          // enemy hits the player
          game.enemies[enemy].explode();
          game.enemies[enemy].collided_with_player = true;
          this.health -= 1;
        }
      }

      // check for enemies reaching the left side of the screen
      if (enemy_x <= 0 && !game.enemies[enemy].collided_with_player) {
        game.enemies[enemy].explode();
        game.enemies[enemy].collided_with_player = true;
        this.health -= 1;
      }
    }
  }
  // remove exploded enemies
  game.enemies = game.enemies.filter((enemy) => enemy.alive);
}
In order to implement functional collision detection between the enemies, bullets, player, and “earth” (left side of the screen), I had to iterate through many lists and add many additional attributes to every class. This method is called in the game class when the game is played. I had to research a new way of removing elements from a list since I ran into MANY issues with the objects being deleted and then another loop trying to access their attributes. Therefore, I decided to look into the “.filter” method in JavaScript to remove certain objects AFTER the loops had finished. The resource I used is linked below. Apart from this, it was also challenging to manage the input of buttons since the Arduino would send 1s and 0s hundreds of times a second. This was resolved by adding a few flags and conditions, which can be found in one of the methods in the game class in the p5 sketch.
Communication – Arduino <-> P5JS
I found the communication between Arduino and P5JS to be very simple and understandable. From the Arduino, I sent 8 values to P5, which can be seen in the Arduino code. I then used these values (1s or 0s) in P5JS to control the character and everything else. Therefore the input from the mouse or keyboard was unnecessary, apart from initially connecting the Arduino to the serial port. P5 sends Arduino the health value of the player, which is then displayed by the LEDs on the mainframe of the box. Unfortunately, the LEDs I used were not as bright as I wanted them to be. However, the function worked well. Overall, I found the communication process quite intuitive and easy to understand.
Challenges & Reflection
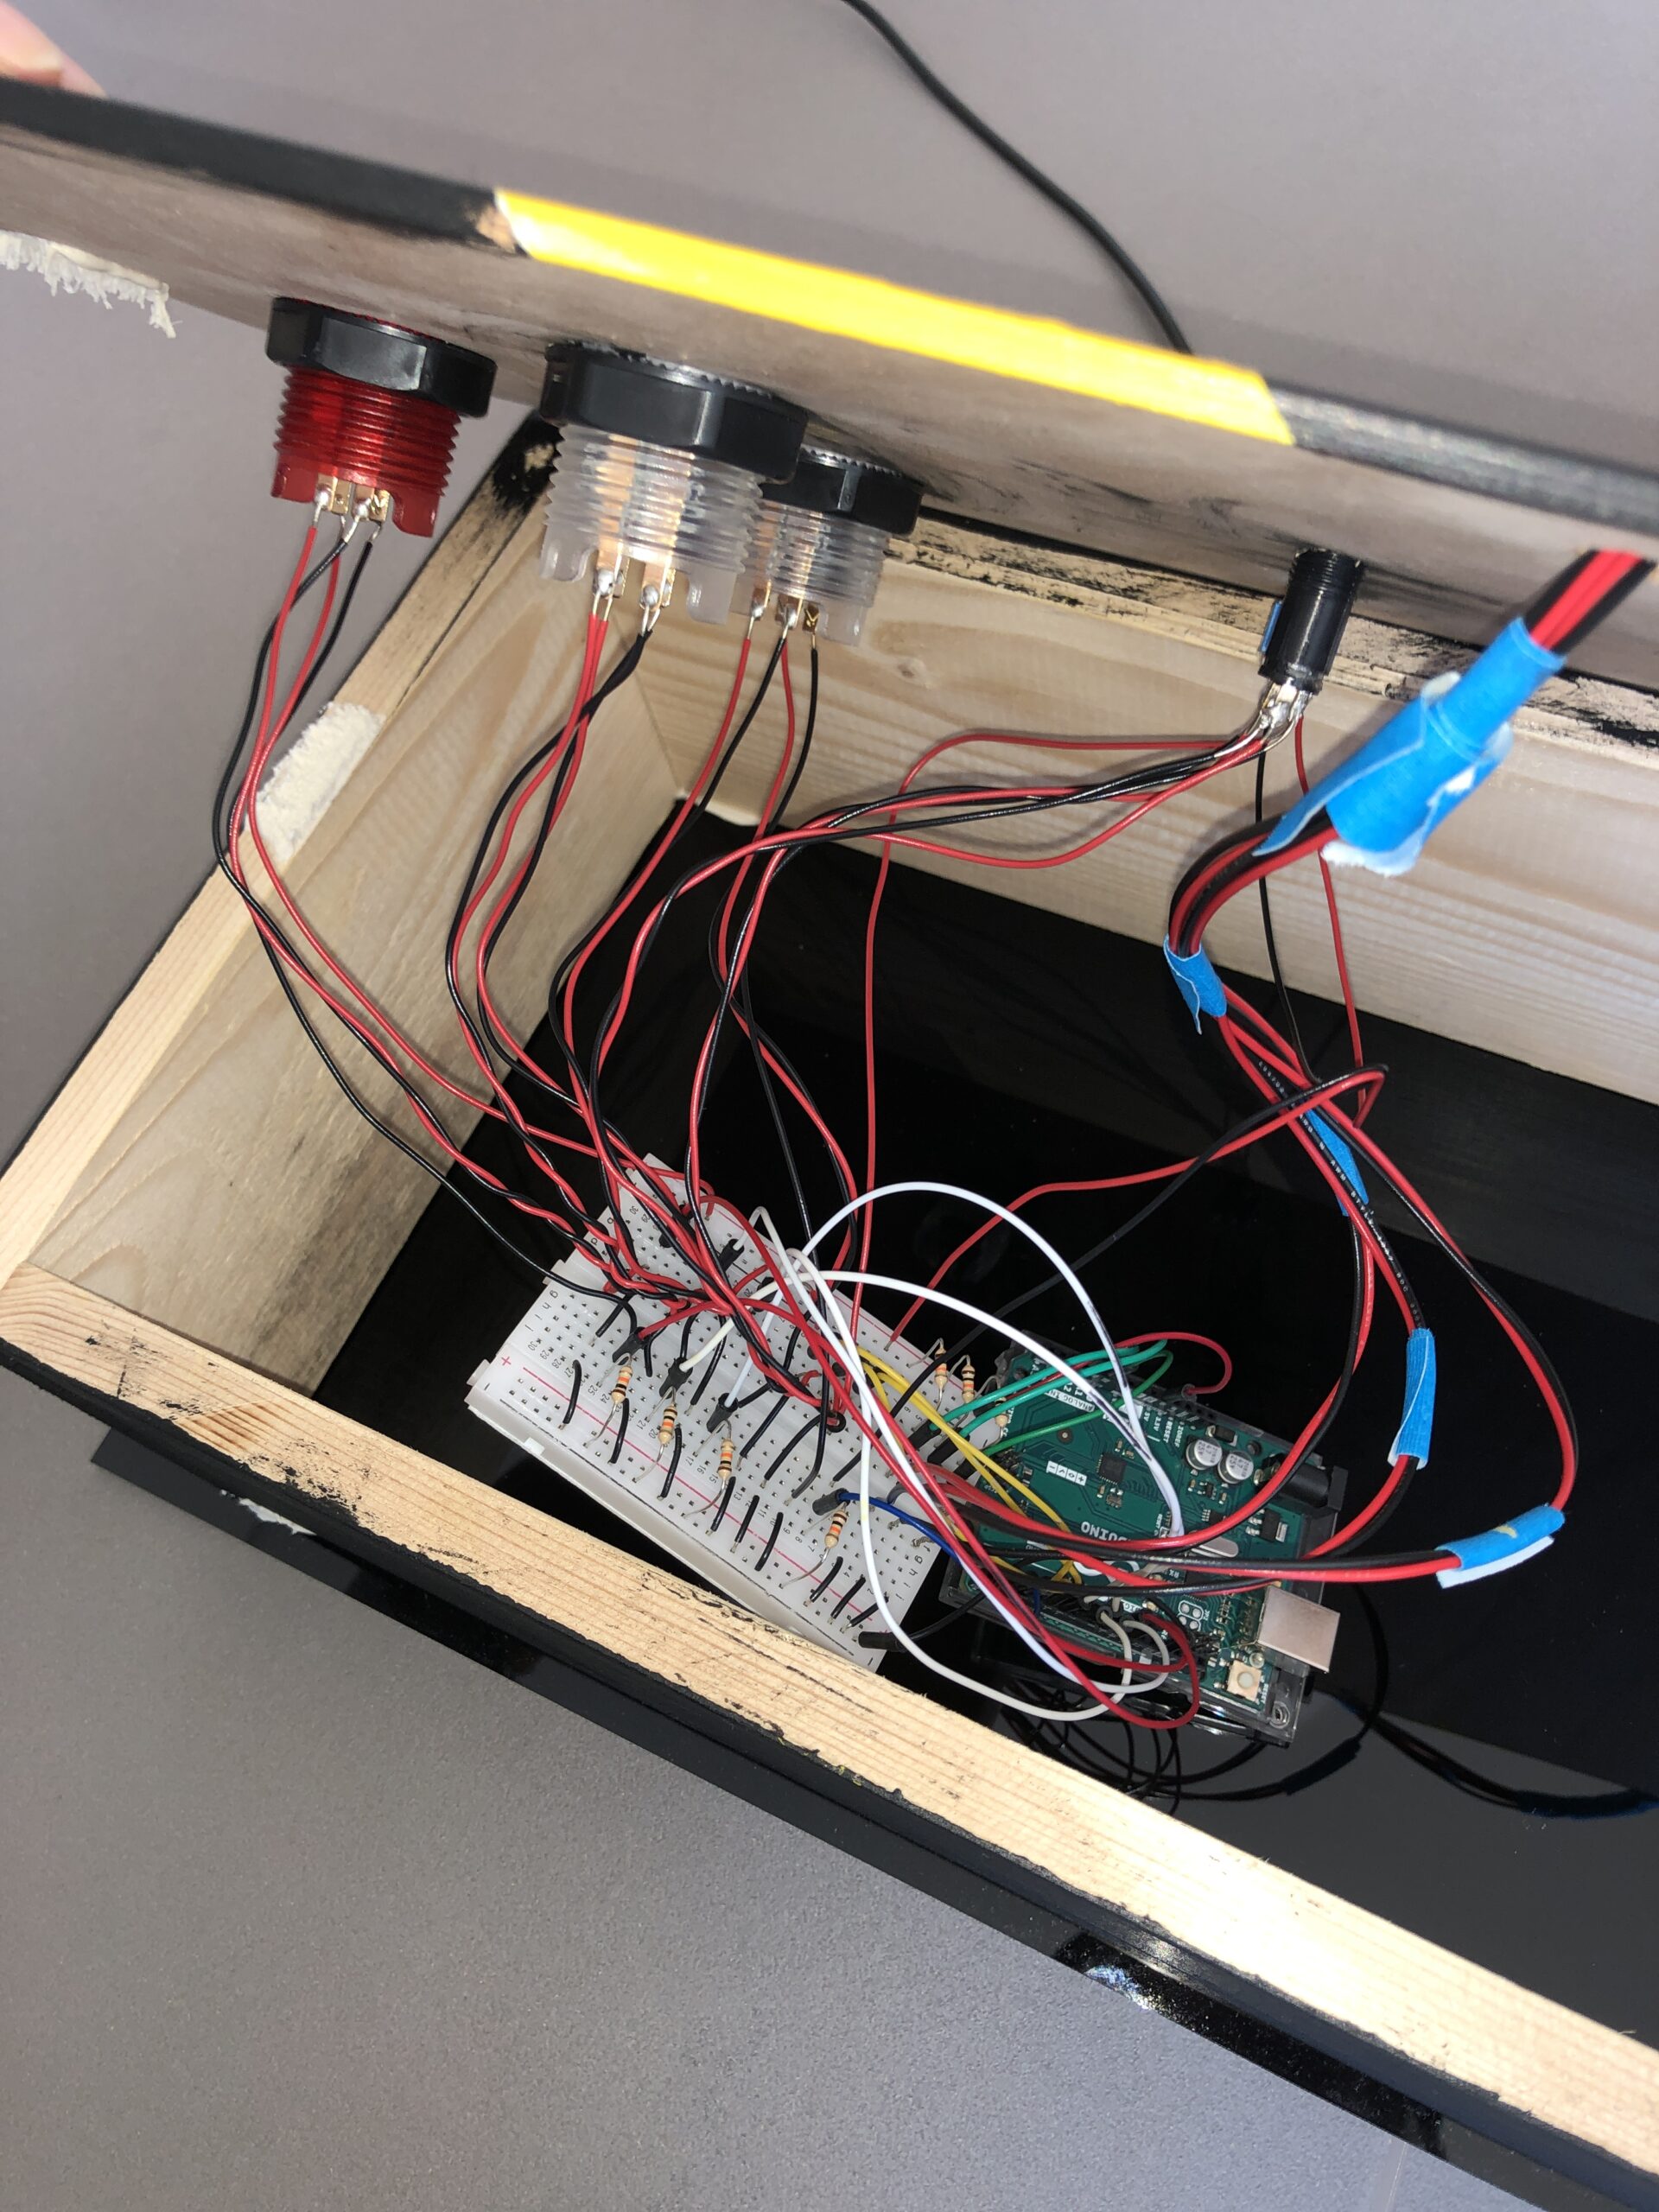
Overall, I found this experience extremely enjoyable since I have never before had a chance to create something that is so advanced (at least for me as a starting interactive media and computer science student). However, there have been many challenges and long nights spent trying to figure out how to make things work. I faced my first challenge when constructing the glove and the enclosure. The flex sensors needed to be able to move and bend; therefore, I had to hand-sow each sensor to the glove instead of gluing them down, which took a lengthy amount of time. Additionally, once I had all the buttons, switches, and LEDs attached to the box, it was highly challenging to insert the wires into the breadboard since there was little space and everything was very tight-knit. Once the box had been constructed, even more challenges arose in P5. The code I had written previously was not working well. Specifically, the collision detection between the bullets and the enemies was not working. It took me over 5 hours of trying to debug the code and test various ways to fix the issue. However, yet again, another issue arose. As I was trying to use one button to change between the screens (states of the game), since the input of the button was read continuously, it was extremely difficult to try to find a way to use one button for different actions on different screens as the readings would be changed right as the state changed. I am sure there is a solution to this; however, as I was running out of time, I had to use an alternative and different buttons for switching between screens. Ultimately, despite the many challenges and difficulties that I have faced, I enjoyed the process and am particularly proud of making the game fully functional and using the glove as an input for controls. I am excited to pursue similar projects in the future. On a side note, I wish I had more time to implement some extra features to my project. For instance, I would have liked to add extra buttons for other features, such as power-ups or a separate restart/start button, and so on. The possibilities are wide, but I am content with my final result.
Sources
https://builtin.com/software-engineering-perspectives/javascript-filter