
Concept
For the purpose of this Assignment we had to get information from at least one analog sensor and at least one digital sensor, and use this information to control at least two LEDs, one in a digital fashion and the other in an analog fashion, in some creative way. What can be more creative than a game?! So I decided to create a mini game using photoresistor, button and three different LEDs. The aim of the game is to try to get all the three LEDs on and catching that moment by clicking the button. If you would be able to simultaneously light up all three LEDs and press the button you won the game which will be indicated by mini disco show at the end. This game is not easy as the gamer should predict the distance of his finger from the photoresistor and find that sweet spot where all the three LED conditions for turning on are satisfied. Furthermore, player needs to use his/her reflexes to immediately click on the button.
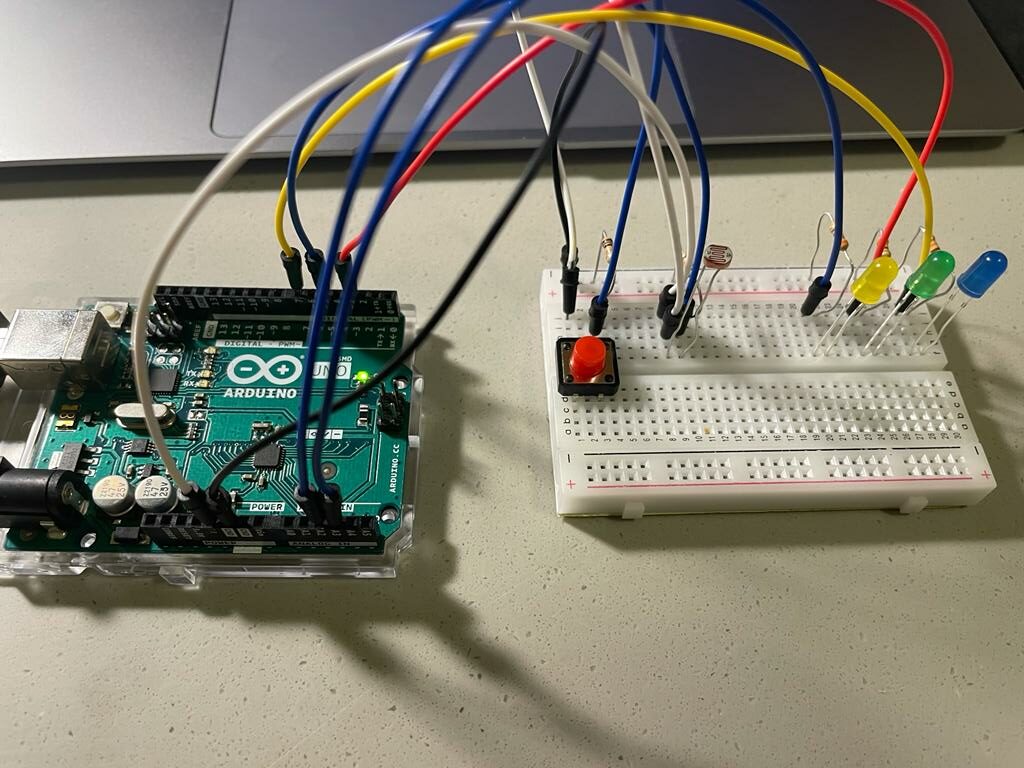
Circuit
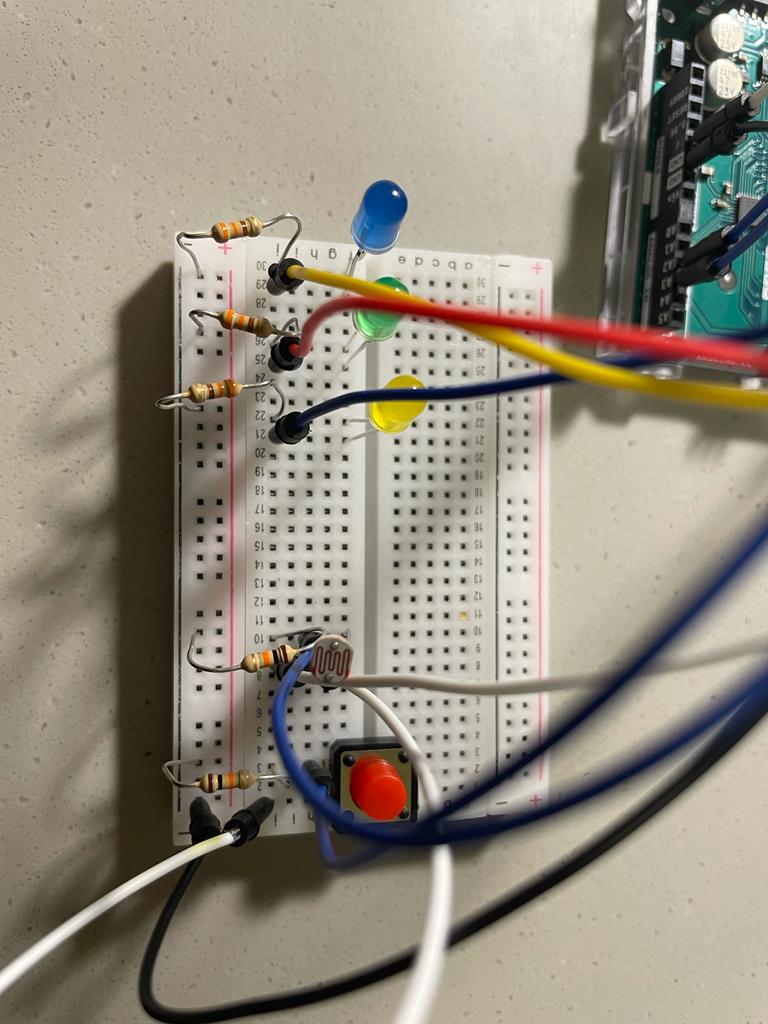
Implementation
The Arduino board has three LED lights, with three of them being regulated by an analog input device called a photoresistor. The photoresistor will determine the intensity of the red, blue, and yellow lights. I created a sensor value variable which is
sensorValue = analogRead(LDR);

  if(sensorValue < 620){
    analogWrite(blue, 255);
    analogWrite(green, 0);

  }
  else if(sensorValue > 520 and sensorValue < 610){
    analogWrite(blue, 255);
    analogWrite(green, 255);
    analogWrite(yellow,255);

  }
  else if(sensorValue > 520 and sensorValue < 650){
    analogWrite(blue, 0);
    analogWrite(green, 255);

  }
For the digital interaction the led lights will be controlled by digital input, the button, and under very specific circumstances when the all three LEDs are on and the player was able to successfully catch that second and click the button the mini discoteca show at the end will depict their win. The code below if for this function:
void discoteca(){
  digitalWrite(yellow, HIGH);
  delay(100);
  digitalWrite(yellow, LOW);

  digitalWrite(green, HIGH);
  delay(100);
  digitalWrite(green, LOW);

  digitalWrite(blue, HIGH);
  delay(100);
  digitalWrite(blue, LOW);

  delay(200);

}

if( digitalRead(yellow)==1 and digitalRead(blue)==1 and digitalRead(green)==1 and digitalRead(SWITCH)==HIGH) {
    digitalWrite(yellow, HIGH);
    delay(400);
    disoteca();
    disoteca();
    disoteca();
  }
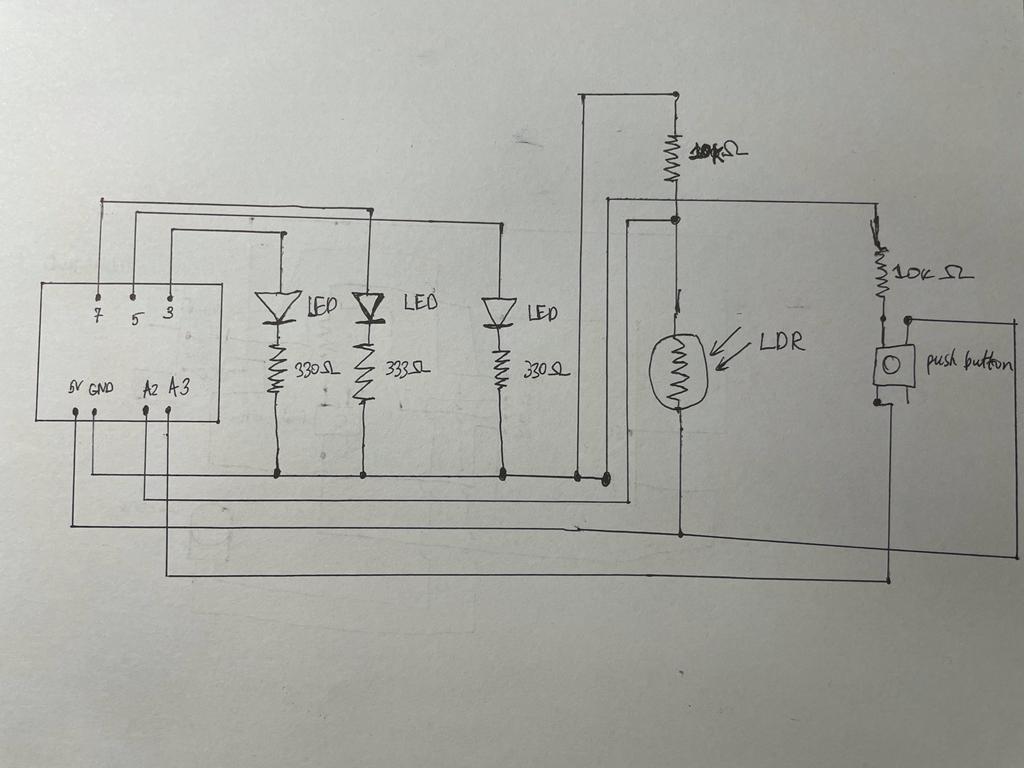
Schematic Diagram
Video Demo
Reflection & Future Improvements
Developing this Arduino project was an exciting and challenging experience for me. It allowed me to combine my knowledge of analog and digital sensors, LED lights, and programming to create an entertaining mini game. there are several areas where I can improve it in the future. For instance, I could incorporate a timer that counts down the seconds before the LEDs turn off, which would add an additional level of difficulty to the game. Another possible improvement would be to incorporate different levels of difficulty, such as changing the optimal distance of the player’s finger from the photoresistor or increasing the number of LEDs required to win the game. Overall, this project was a great learning experience for me, and I look forward to implementing these improvements and exploring other creative Arduino projects in the future.