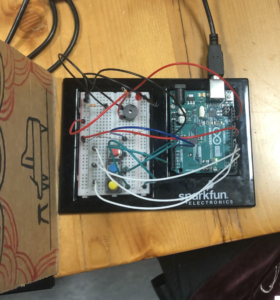
Week 10: Musical Instrument

Concept

We wanted to make a device that allows artists to simulate high-hats in drill beats according how they bob their heads. We realized that sound engineers move their body in a unique way. We used an ultrasonic sensor and novel equation to track this movement and produce a drill beat with a correlated frequency.

Code & Schematic

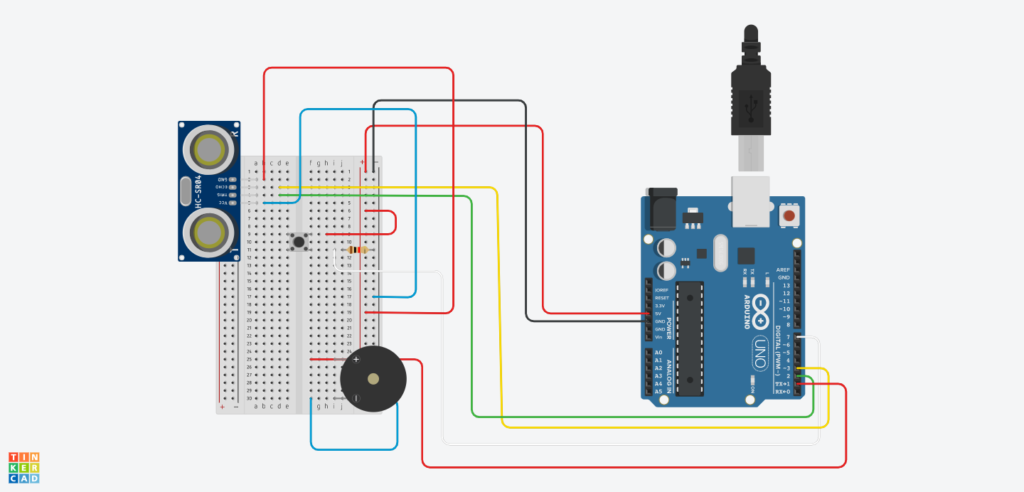
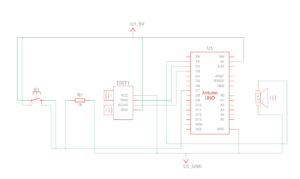
We used an ultrasonic sensor to obtain distance measurements, a switch to implement a function to introduce delay and slow the sound down.  Also the inspiration for the code to produce a melody was inspired by Prof. Michael Shiloh’s implementation.

We used these inputs to make a device that produces a sound continuously sampled and responds to the distance of the user from the sensor.

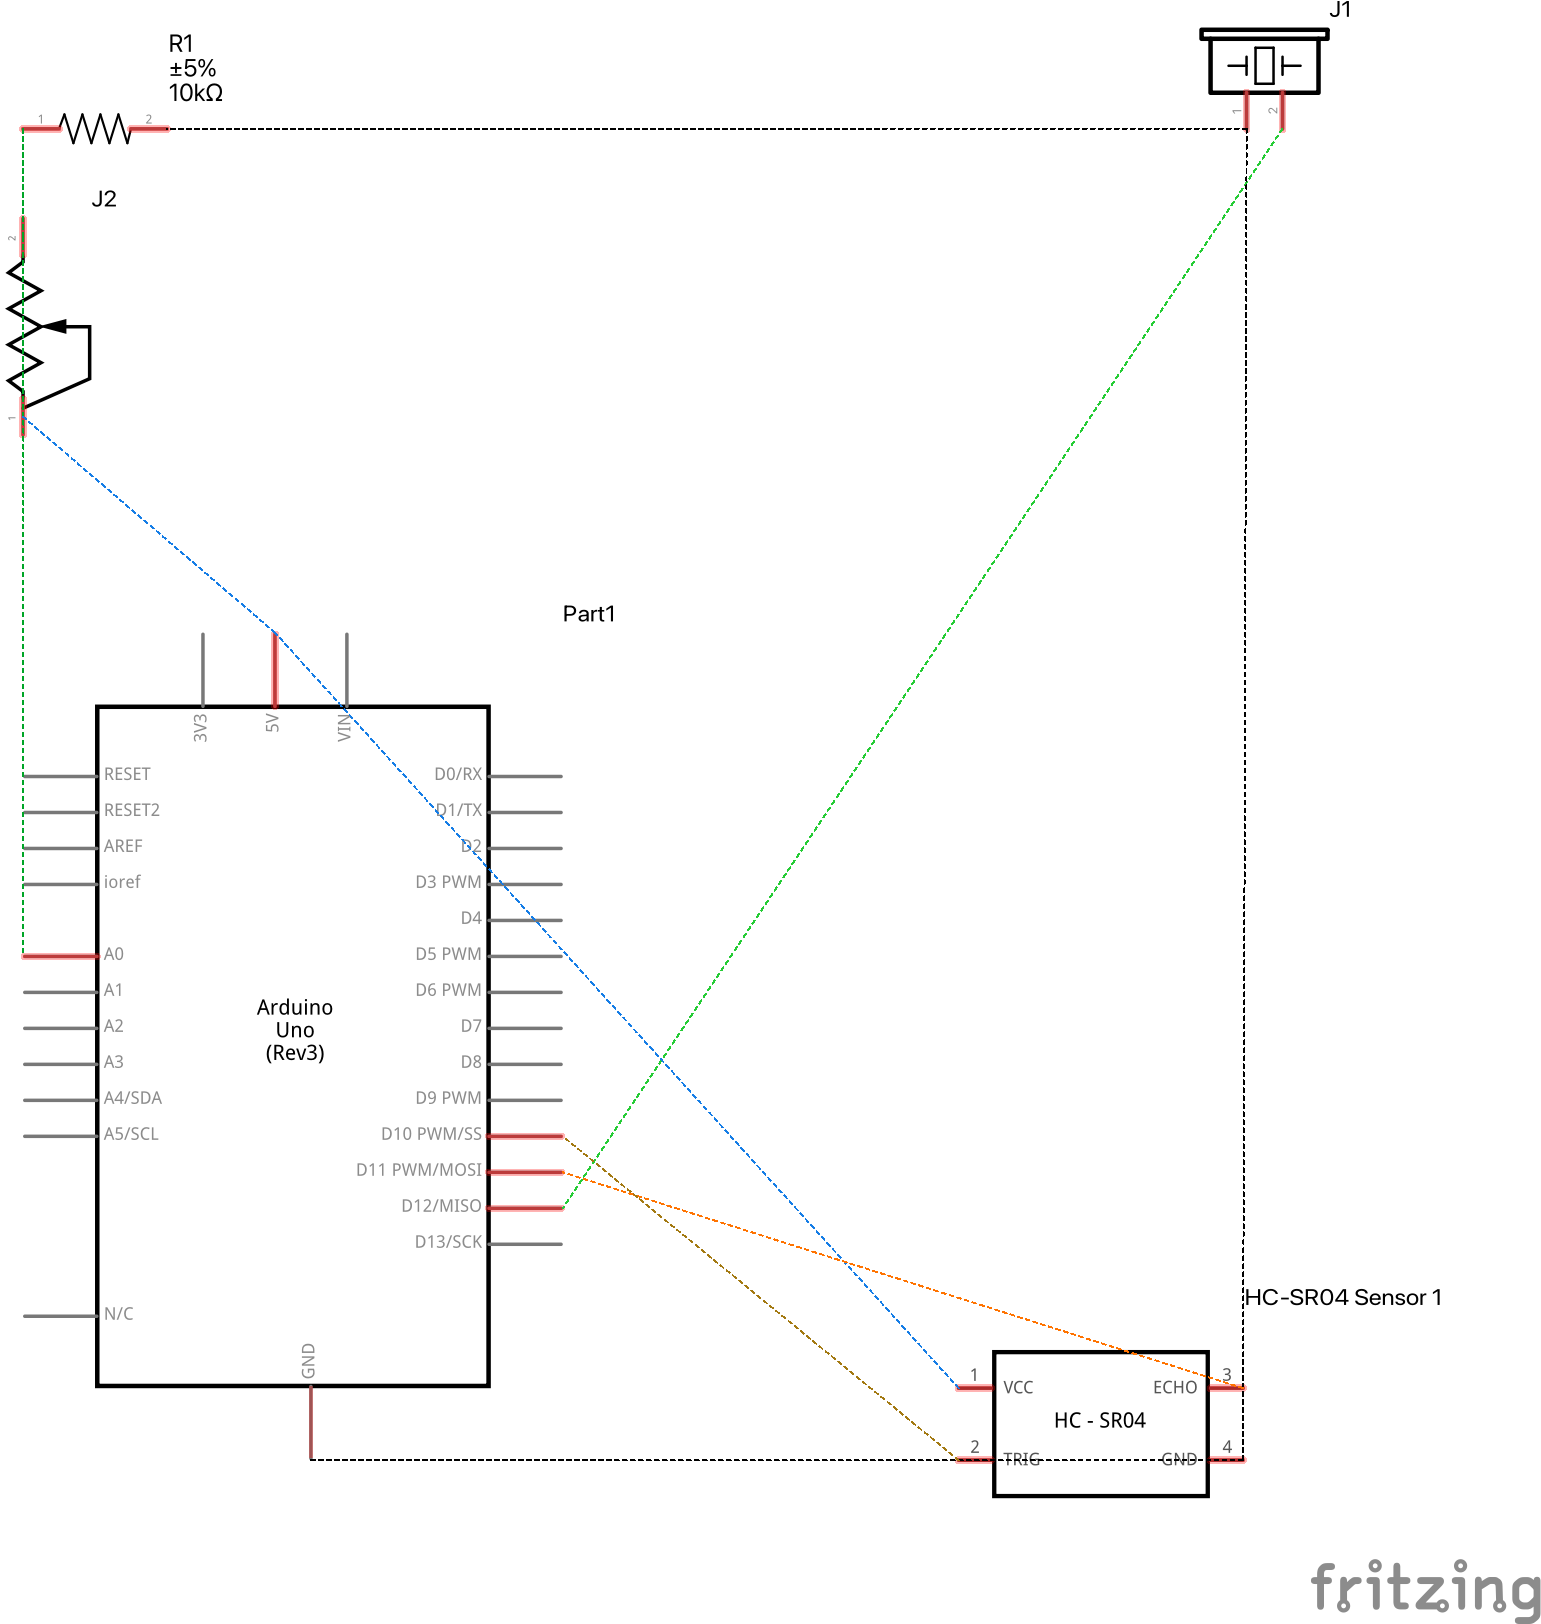
Here are the schematics for the circuit implementation:

#include "pitches.h"
#define echoPin 2 
#define trigPin 3 

int pushButton = 7;
const int sPin = 1;
int melody[] = {
  NOTE_C4, NOTE_G3, NOTE_G3, NOTE_A3, NOTE_G3, 0, NOTE_B3, NOTE_C4
};

int noteDurations[] = {
  4,4,5,4,5,4,5
};

unsigned long currentNoteStartedAt = 0;

int thisNote = 0;

int millisToNextNote = 0;

int currentLedState = LOW;
unsigned long currentLedStateStartedAt = 0;
long ledDelay = 100;


long duration;
int distance; 

void setup() {
  pinMode(trigPin, OUTPUT); 
  pinMode(echoPin, INPUT); 
  Serial.begin(9600); 
  
  pinMode(pushButton, INPUT);
}
void loop() {
  
  digitalWrite(trigPin, LOW);
  delayMicroseconds(2);
  digitalWrite(trigPin, HIGH);
  delayMicroseconds(10);
  digitalWrite(trigPin, LOW);
  
  duration = pulseIn(echoPin, HIGH);
 
  distance = duration * 0.034 / 2; 
    unsigned long currentMillis = millis();

  if (currentMillis - currentNoteStartedAt >= millisToNextNote) {

    int noteDuration = 1000 / noteDurations[thisNote];

    tone(3, melody[thisNote], noteDuration);
    millisToNextNote = log10(distance) * 1300;
    currentNoteStartedAt = currentMillis;
    thisNote++;

   
    if ( thisNote >= 8 ) {
      thisNote = 0;
    }
  }

  
  if (currentMillis - currentLedStateStartedAt >= ledDelay) {

   
    if (currentLedState == LOW) {
      currentLedState = HIGH;
    } else {
      currentLedState = LOW;
    }
    currentLedStateStartedAt = currentMillis;
  }

  int buttonState = digitalRead(pushButton);
  if (buttonState==true){
    Serial.println(buttonState);
    delay(100);}

}

Result / Future improvements

We wanted to implement a loudness altering function to the piezo speaker and tested the schematic on tinker cad as well, however during the implementation it did not seem to work out. Some improvements that could made are the ability to give the user more flexibility with what sounds to choose.

Week 10- Musical Instrument (Drill beat maker)

Concept

We wanted to make a device that allows artists to simulate high-hats in drill beats according how they bob their heads. We realized that sound engineers move their body in a unique way. We used a ultrasonic sensor and novel equation to track this movement and produce a drill beat with a correlated frequency.

Implementation

#include "pitches.h"
#define echoPin 2 
#define trigPin 3 

int pushButton = 7;
const int sPin = 1;
int melody[] = {
  NOTE_C4, NOTE_G3, NOTE_G3, NOTE_A3, NOTE_G3, 0, NOTE_B3, NOTE_C4
};

int noteDurations[] = {
  4,4,5,4,5,4,5
};

unsigned long currentNoteStartedAt = 0;

int thisNote = 0;

int millisToNextNote = 0;

int currentLedState = LOW;
unsigned long currentLedStateStartedAt = 0;
long ledDelay = 100;


long duration;
int distance; 

void setup() {
  pinMode(trigPin, OUTPUT); 
  pinMode(echoPin, INPUT); 
  Serial.begin(9600); 
  
  pinMode(pushButton, INPUT);
}
void loop() {
  
  digitalWrite(trigPin, LOW);
  delayMicroseconds(2);
  digitalWrite(trigPin, HIGH);
  delayMicroseconds(10);
  digitalWrite(trigPin, LOW);
  
  duration = pulseIn(echoPin, HIGH);
 
  distance = duration * 0.034 / 2; 
    unsigned long currentMillis = millis();

  if (currentMillis - currentNoteStartedAt >= millisToNextNote) {

    int noteDuration = 1000 / noteDurations[thisNote];

    tone(3, melody[thisNote], noteDuration);
    millisToNextNote = log10(distance) * 1300;
    currentNoteStartedAt = currentMillis;
    thisNote++;

   
    if ( thisNote >= 8 ) {
      thisNote = 0;
    }
  }

  
  if (currentMillis - currentLedStateStartedAt >= ledDelay) {

   
    if (currentLedState == LOW) {
      currentLedState = HIGH;
    } else {
      currentLedState = LOW;
    }
    currentLedStateStartedAt = currentMillis;
  }

  int buttonState = digitalRead(pushButton);
  if (buttonState==true){
    Serial.println(buttonState);
    delay(100);}

}

We used a ultrasonic senor to obtain distance measurements, a switch to implement a function to introduce delay and slow the sound down.  Also the inspiration for the code to produce a melody was inspired by Prof. Michael Shiloh’s implementation.

We used these inputs to make a device that produces a sound continuously sampled and responds to the distance of the user from the sensor.

Here are the schematics for the circuit implementation:


Reflections

We wanted to implement a loudness altering function to the piezo speaker and tested the schematic on tinker cad as well, however during the implementation it did not seem to work out. Some improvements that could made are the ability to give the user more flexibility with what sounds to choose.


Musical Instrument

Concept

For this week’s assignment, Daniel and I constructed a musical instrument that measures the distance between the ultrasonic sensor and anything placed in front of it (i.e., your hand). Depending on how far you place your hand/ an object from the sensor, the piezo buzzer will play one of 8 different notes we inputted into the code.

To do this, we used a force-sensing resistor that you had to press on whenever you wanted the ultrasonic sensor to detect your hand and a piezo buzzer that would play the sound as output.

Inspiration:

https://www.youtube.com/watch?v=J8XNTHETgxU&list=PL9sNGWKp-dXUYcIGeJQFZ2mal6_zI-p5h&index=1&t=123s

Schematic

Code

int trig = 10; // digital 10
int echo = 11; // digital 11
long duration;
long distance;
int force;
 
 
void setup() {
 // runs once
 pinMode(echo, INPUT); // digital 11 
 pinMode(trig, OUTPUT); // digital 10
 Serial.begin(9600); // open serial monitor to track
}
 
void loop() {
 // runs repeatedly
 digitalWrite(trig, LOW);
 delayMicroseconds(2);
 digitalWrite(trig, HIGH);
 delayMicroseconds(10);
 digitalWrite(trig, LOW);
 duration = pulseIn(echo, HIGH);
 distance = (duration / 2 * 0.0344);
 
 int notes[7] = {233, 261, 293, 311, 349, 392, 440};
 //              Bb    C   D     Eb    F   G   A    
 
 force = analogRead(A0); // analog 0
 
 if (distance < 0 || distance > 50 || force < 100){
   noTone(12);
 
 } else if (force > 100){
   int sound = map (distance, 0, 50, 0, 7);
   tone(12, notes[sound]);
  
 }
}

The seven notes we inputted are:

  • Do (233)
  • Re (261)
  • Mi (293)
  • Fa (311)
  • So (349)
  • La (392)
  • Ti (440)

Video

Daniel is shown playing Twinkle, Twinkle, Little Star using the instrument.

Link to video

Reflection and Improvements

  • The ultrasonic sensor was very sensitive to movement very close to it, but the farthest note (Ti), was very hard to detect just because it was so far away from the sensor. This made the sound laggy when it came out of the piezo buzzer, which made the song sound very untuned and the note inconsistent.

Progress Report: Midterm Assignment

The Professor has not put any constraints on our projects other than the requirement of being creative. This really forced me to think out of the box and go back to my interests in high school. In high school, I took a class called Global Perspectives. For the final, I wrote an essay on the roles of Big Tech companies and their chokehold on the modern market.

This sparked the idea.

Idea:

How about a chess game? Since that is what people claim life is. But instead of being a fair game of the minds and strategy, it is absurd and completely one-sided. Also similar to what life is like.

Enter Capitalism Chess. The game is supposed to be an ironic commentary on the ‘subscribe-to-enjoy’ culture created with all the subscription-based services that are popular nowadays.  The game should have playable pieces for the player to give some semblance of fairness but no matter what move is being made, thee player should always lose.

Some inspiration and guidance:

Build A Chessboard In P5JS (Part 1) | Math + Code For Primary and Highschool

Chess – powered by p5js

Assignment 4: Data Visualisation

Idea:

In class, the professor made us an example of a procedurally generated poem which was extremely fascinating. It was almost like an AI until you understood that the professor had already stored the words in an array that the program was accessing to create unique combinations. Initially, I wanted to try something similar but with more variety. However, while researching for this assignment I came across the following video by the Coding Train on Youtube:

Coding Challenge #97: The Book of Pi – Part 1

This piqued my interest greatly and I wanted to implement something similar for my assignment.

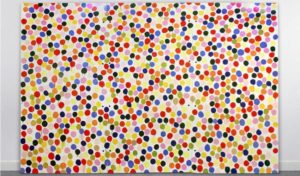
Similarly, I was also fascinated by neo-pointilist artists’ ability to make a matrix of dots into extremely satisfying art:


Process:

The first step was to find a list of digits that I could use to create my piece. My candidate was the Golden Ratio which I have been studying a lot recently, first through Professor Song’s  Bioinspiration and afterward while researching bio-aesthetics. I wanted to see if there was a secret hidden pattern in the golden ratio if I visualised it similar to the video.

I used the website https://www.goldenratio.org/ to extract the first 1,000,000 digits of the Golden Ratio and put it into a text file which was uploaded to the terminal to be preloaded.

To visualize the numbers I assigned each of them from 0 to 9 to a color of the spectrum. The colors I used were purposely not the same shades to give the maximum contrast when the image was rendered. the colors were stored in an array from which the program accessed the values depending upon what digit was supposed to be represented, e.g., for 2 it would be the color in the second row, and so on.

Probably the most challenging part of the assignment was figuring out how to make the program read a continuous line of numbers and rendering them row-by-row. However, the solution was quite simple and required only the following snippet of code:

// draw a whole row of digits
for (let columnNumber = 0; columnNumber < columnsTotal; columnNumber++) {
  const Index = columnsTotal * rowNumber + columnNumber;
  const GoldenRatioDigit = int(GoldenRatioString.substring(Index, Index + 1));
  const Color = colors[GoldenRatioDigit];

In this for() loop,  there are 3 key actions happening simultaneously:

  1. Index is being updated with the number of digits that have been already read so that the next digit may be read
  2. The digit of the golden ratio is being read and recorded
  3. The digit is being assigned its respective color values

The code ends when the rowNumber reaches the RowsTotal value; the noLoop() function stops the for() loop from repeating.

Embedded Sketch:


Problems:

There were several coding challenges I faced during this assignment but perhaps the biggest obstacle that almost cost me a few hours was the following error message:

Error: [object Arguments]is not a valid color representation.

Initially, I thought my code was not working properly or the .txt file was corrupted. I tried using random numbers instead in the .txt file which worked fine. So then I assumed its perhaps had something to do with the golden ratio. however, after a simple stackoverflow.com search, I discovered there was something in my code that was not a recognized digit. And it turned out to be the decimal point on the second position of the .txt file… Needless to say I was very happy that it took me just a few minutes to figure it out.


Reflections:

The data, although beautifully represented, did not show any semblance to a pattern nor did it do justice to the reputation of the beauty of the Golden Ratio. In the future, while choosing ways to represent my data, I will research more to find out what works best for it. Furthermore, I also discovered the expansive world of Data Visualisation in P5JS and JavaScript overall. It was very exciting for me as a budding coder since I have always wanted to explore data visualization more but was constrained by the lack of knowledge of different visualization-specific languages. By studying P5JS more I can establish a strong base on which to build my skills on.


Assignment 10- Musical Instrument

Concept 

For this assignment, we decided to remake a piano, but add some adjustments to its stage presence. We all know that there are a lot of stage lights mechanisms when a pianist performs, but what happens when there is no light or lights are directed at people? Our piano changes its tunes and how it sounds. The main technology behind this piano is the usage of the photoresistor which sends different sensor values and with the changing frequency of the sensor, the note fluctuates.

Materials used-

  • LED
  • 3 Switches (digital)
  • Photoresistor (analog)
  • Wires 
  • Resistors – 10 K ohm and 330 ohm

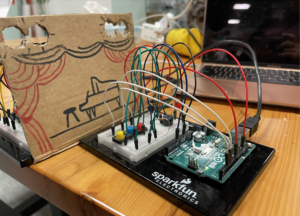
Here is the spotlight session in progress,


Code and Schematic

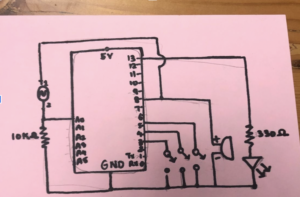
The code that we used starts off with the assignment of a variable to each component of the circuit. The piezo buzzer is connected to three switches that produce a different tone each time a different switch is pressed. After arranging the switches in a series, we added an LED that lights up every time a piano note is played. We mainly added the tone() function to generate a square wave of a certain frequency on three pins that were attached to their respective switches.  Lastly, to play with the concept of a stage spotlight, we added a photoresistor and mapped the values within it so that the frequency of the note that is playing fluctuates when a flashlight is shone or the stage is put in the dark.

int piezoPin = 8;

int LED = 13;

int button1 = 5; //Set up the input pins connected to the buttons. 
int button2 = 4; 
int button3 = 3; 

int frequency = 0; 

int sensorPin = 0;
int sensorValue = 0;

const int delayTime = 500; //Set up a constant for the variable of delay time in the tone() function.
void setup() {
pinMode(button1, INPUT_PULLUP); 
pinMode(button2, INPUT_PULLUP); 
pinMode(button3, INPUT_PULLUP); 
pinMode(LED, OUTPUT);
}
void loop() {
  sensorValue = analogRead(sensorPin);
  //Map the different values of the potentiometer to a set of frequencies for each of the three buttons. 
  if (digitalRead(button1) == LOW) {
  frequency = map(sensorValue, 0, 1023, 400, 499); 
  digitalWrite(LED,HIGH);
  }
  else if (digitalRead(button2) == LOW) {
    frequency = map(sensorValue, 0, 1023, 300, 599); 
    digitalWrite(LED,HIGH);  
  }
  else if (digitalRead(button3) == LOW) {
    frequency = map(sensorValue, 0, 1023, 500, 599); 
    digitalWrite(LED,HIGH);  
  }
  else {
    frequency = 0; 
    digitalWrite(LED,LOW);
  }
  tone(piezoPin, frequency, delayTime); //Set up the tone() functions with variables. 
}

Reflections and Future Improvements

Overall, we are happy with the playfulness of the output but would like to experiment with other notes. We had some difficulties with creating more audible differences when the light settings changed. Perhaps, it was due to the little difference photoresistor could detect, or we could play around changing the value, but it didn’t really work out as it was making the noise bad as the mapped values were being changed. Moreover, the LED just switches on and off when the switch is pressed perhaps its brightness could also be changed when a new note is played.


Assignment 10: Musical intstrument

Concept 

For this assignment, we decided to remake a piano, but add some adjustments to its stage presence. We all know that there are a lot of stage lights mechanisms when a pianist performs, but what happens when there is no light or lights are directed at people? Our piano changes its tunes and how it sounds. The main technology behind this piano is the usage of the photoresistor which sends different sensor values and with the changing frequency of the sensor, the note fluctuates.

Materials used

LED

3 Switches (digital)

Photoresistor (analog)

Wires 

Resistors – 10 K ohm and 330 ohm

Schematic

Code

Code starts off with the assignment of a variable to each component of the circuit 

The tone() function is used to generate a square wave of a certain frequency on three pins that are attached to their respective switches.  

int piezoPin = 8;
 
int LED = 13;
 
int button1 = 5; //Set up the input pins connected to the buttons.
int button2 = 4;
int button3 = 3;
 
int frequency = 0;
 
int sensor = 0;
int value = 0;
 
const int delayTime = 500; 
void setup() {
pinMode(button1, INPUT_PULLUP);
pinMode(button2, INPUT_PULLUP);
pinMode(button3, INPUT_PULLUP);
pinMode(LED, OUTPUT);
}

void loop() {
 value = analogRead(sensor);
 //Map the different values of the photoresist to a set of frequencies for each of the three buttons.
 if (digitalRead(button1) == LOW) {
 frequency = map(value, 0, 1023, 400, 499);
 digitalWrite(LED,HIGH);
 }
 else if (digitalRead(button2) == LOW) {
   frequency = map(value, 0, 1023, 300, 599);
   digitalWrite(LED,HIGH); 
 }
 else if (digitalRead(button3) == LOW) {
   frequency = map(value, 0, 1023, 500, 599);
   digitalWrite(LED,HIGH); 
 }
 else {
   frequency = 0;
   digitalWrite(LED,LOW);
 }
 tone(piezoPin, frequency, delayTime); //plays a tone() functions mapped frequencies.
}


An LED also lights up when a note is played

The photoresistor also causes the fluctuation in the tone i.e. the frequency when the sensor value is mapped.

Reflections

Happy with the playfulness of the output but would like to experiment with other notes. We had some difficulties with creating more hearable differences when the light setting changed. Perhaps, it was due to the little difference photoresistor could detect, or we could play around changing the value, but it didn’t really work out as it was making the noise bad. Moreover, the LED just switches on and off when the switch is pressed perhaps its brightness could also be changed when a new note is played.

Assignment 2: Computer Graphics Art

For this assignment, I wanted to play around a bit with the randomizer function in P5Js. the idea stemmed from the movie 2001: A space odyssey where in which there are scenes with psychedelic imagery, flashing on the screen in seemingly unending patterns;

Implementation: 

however, when I wanted to create the art, I decided on using squares instead because I wanted to portray reality as large messy pixels. for the color, I decided to have all the perimeters set to random so that it could have random RGB colors instead of just shades of white/black

for that I used this certain line of code:

fill(random(0, 255), random(0, 255), random(0, 255));


Additionally, I wanted it to change the moment I pressed my mouse so for that I used mousIsPressed() function to detect if the button had been pressed.

Initially I faced problems while deciding how to change the imagery from flashing cubes to the text but I decided to use an if() loop so that I could have the engine check for the conditional statement (mouseIsPressed) continuously and change the moment it became true. when it did become true it allowed the text to be generated along with the circles.

Embedded Sketch:

Reflection:

In the following classes after this assignment, I discovered game states and how useful they are so I could have used those to create a more efficient and functional way to change the images on the screen.

Additionally, I would have also benefitted from using the 3D rendering properties that p5js has to create a more visually appealing art piece.


Assignment 1: Self Portrait

As a newbie with Java Script and P5Js, I was hesitant initially and did not know what exactly to draw. However, after watching a meme video on youtube I got the idea of creating a simple vector-like face that represented the following emotion perfectly:

Embedded code:

The art is simple but it allowed me to experiment with the placement of elements in a simple Js background and manipulating them to present different features


Reflection:

I would have liked to make the portrait more interesting by playing around with different commands such as noStroke, Fill, etc. But this experience gave me an opportunity to work with the holes in my own experience which I look forward to filling going forwards.


[Assignment 10] Creative Instrument

Concept

For this project, we decided on creating a creative musical instrument using a distance sensor. The device calculates the distance of an object (in this case, the object behaves as a percussion beater), and based on its location, tunes of varying frequencies are produced. The device allows the user to set the base note using a pushdown switch; once the switch is pressed, the distance calculated at that phase is used as an initial point. Thus, the user can move the beater to and fro in order to create a musical track. Similarly, using the potentiometer, the user can further control the duration and type of sound produced by the buzzer.

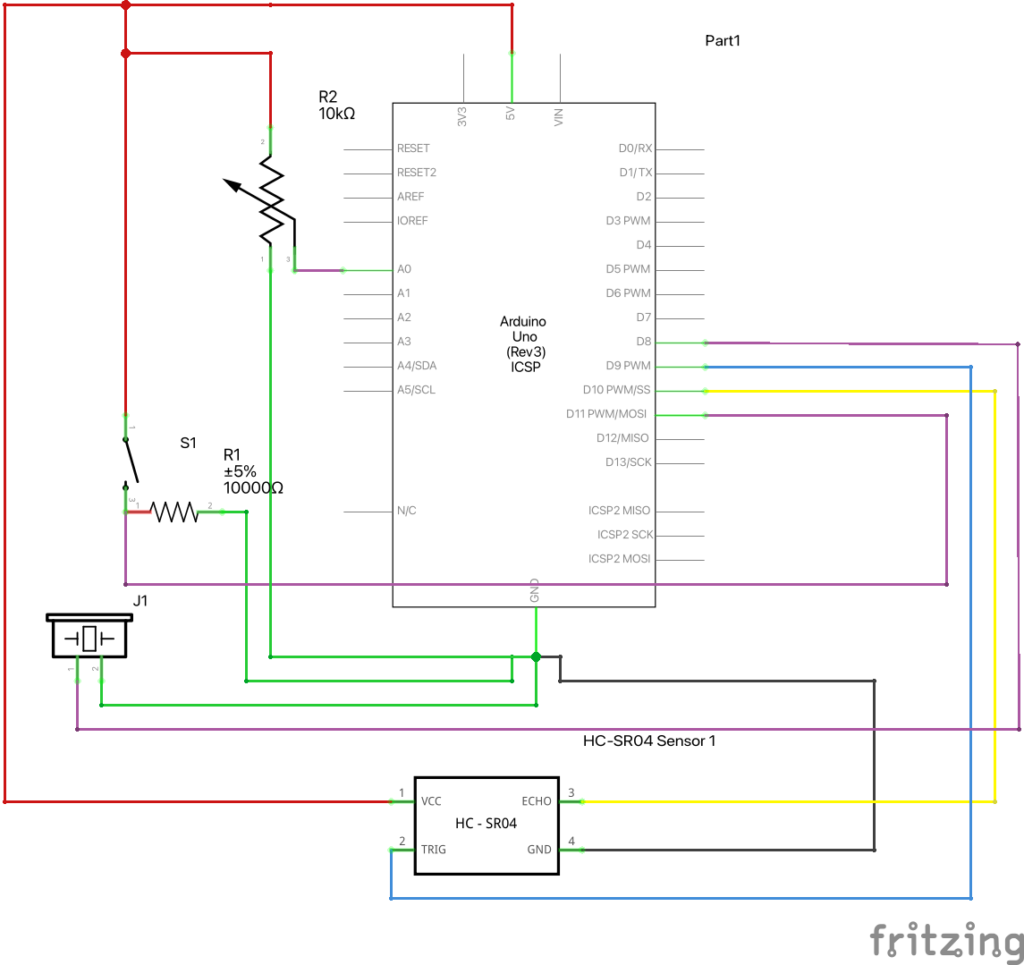
The devices used in the system are:

    • One ultrasonic distance sensor
    • One potentiometer
    • One piezo buzzer
    • One pushdown switch
    • One 10 000 ohm resistor

The design of the instrument is based on the schematics as shown below:
Codes

Our code mainly consists of 4 parts: ultrasonic sensor reading, button reading, potentiometer reading, and piezo buzzer output. We first started with ultrasonic sensors, referring to online code for simple distance measurement (Reference). We have slightly modified the original code to our needs.

int findDistance() 
{
  digitalWrite(trigPin, LOW);
  delayMicroseconds(2);

  // Sets the trigPin on HIGH state for 10 micro seconds
  digitalWrite(trigPin, HIGH);
  delayMicroseconds(10);
  digitalWrite(trigPin, LOW);

  // Reads the echoPin, returns the sound wave travel time in microseconds
  long duration = pulseIn(echoPin, HIGH);
  return (duration * 0.034 / 2);
}

This code above is a function that we used to measure distance using the ultrasonic sensor for each loop. Depending on the position of the object, the buzzer will produce different pitches of sound.

Then, the button comes in. Button is used to offset the starting position of the instrument. By placing an object in front of the sensor and pushing the button, the object’s position will automatically be set as a C4 note. Using this button, a player can adjust the instrument in a way that he or she is most comfortable with.

  if (millis() - currentTime > 200 || currentTime == 0) 
  {
    // If the switch is pressed, reset the offset
    if (digitalRead(11) == 1) 
    {
      distanceOffset = findDistance();
      Serial.print("new offset: ");
      Serial.println(distanceOffset);
      currentTime = millis();
    }
  }

  int distance = findDistance() - distanceOffset;

As shown above, when the button is pressed, the program will subtract the offset from the sensor reading.

int pitch_ = intoNotes(map(distance, 0, 20, 1, 7)); 

int pitch = pitch_ * myList[0];
int toneDuration = myList[1];

if(distance <= 20)
  {
    tone(pPin, pitch,toneDuration);                              // Controls 1. PinNumber, 2. Frequency, 3. Time Duration
  }
else
  {
    noTone(pPin);
  }

float intoNotes(int x)
{
  switch(x)
  {
    case 1:
      return 261.63;
    case 2:
      return 293.66;
    case 3:
      return 329.63;
    case 4:
      return 349.23;
    case 5:
      return 392.00;
    case 6:
      return 440.00;
    case 7:
      return 493.88;
    default:
      return 0;
  }
}

The code above is how a program produces different pitches depending on the distance. The program maps 20 cm into 7 different integers; depending on the value of the mapped value, intoNotes() will return a specific pitch value accordingly. If the distance is above 20cm, the instrument will simply not produce a sound.

The code consists of two more functionalities which is facilitated by the function titled “noteModifier()”. It is a void function that takes the data read from the potentiometer as an argument.

void noteModifier(int volt)
{
  float val1 = 0;

  if (volt > 4 && volt <= 4.6)
    val1 = 5;
  else if (volt > 3 && volt <= 4)
    val1 = 4;
  else if (volt > 2 && volt <= 3)
    val1 = 3;
  else if (volt > 1 && volt <= 2)
    val1 = 2;
  else
    val1 = 1;

  myList[0] = val1;
  myList[1] = val1 * 1000;
  
}


As a potentiometer is an analog sensor, it is connected to the A0 pin for a contiguous set of data that ranges from 0 to 1023. Before using this data as input, the values are mapped to a new scale of (1.0 to 5.0) V as the maximum emf in the circuit is 5V. The conversion is done by these lines of code at the beginning of the loop() function.

pVoltRead = analogRead(potentioPin);
trueVolt = (pVoltRead * 5.0/1023);
Serial.println(trueVolt);

Once the true volt in the potentiometer is calculated, the function noteModifier() uses a set of if-conditions to determine the value of a variable named ‘val1’. As seen in the code, the value of ‘val1’ varies based on the range of the true volt argument. The true purpose of using val1 is to alter the content of a global list “myList[]” declared at the beginning of the project. The list consists of two elements: (1) the first element is a coefficient that scales the frequency of the sound produced by the buzzer and (2) the second element is the duration of a single tone produced by the buzzer.

This way, the function determines two primary arguments — frequency and time duration — of the Arduino’s inbuilt function tone().

The idea here is to replicate the real-life application of the project. A user can rotate the knob in the potentiometer; consequently, different tones are produced for varying lengths of time. In short, including a potentiometer provides one additional layer of user interaction to the system. The second demo clip shows the functionality of the potentiometer and how it can be used to produce different tunes.

Reflection / Future Improvements

Working on this assignment was very entertaining and exciting. We were able to use different sensors in the kit and use them to create an object that we can physically interact with, unlike p5js. We believe the instrument came out as we initially expected, but there are a few points that we can improve upon:

      • Ultrasonic Sensor
        • Ultrasonic sensor uses sound waves to measure the distance. This means the measurement can be inaccurate and unreliable depending on the surface of the object the wave is hitting. Due to this, we found out our instrument malfunctions when trying to play it with our own hands. To improve this, we would like to use a laser distance sensor that is less affected by the object’s surface.
      • Piezo Buzzer
        • Piezo Buzzer is very simple to use, but its sound quality is great. If we use a better speaker, we may be able to add more interesting functionalities, such as producing different sounds of instruments when a button is pressed.

Watch demos of the instrument here:

Without potentiometer:

With potentiometer: