
![]() Inspiration:
Inspiration:
Wouldn’t it be really cool if we built an instrument that made us feel like a DJ? Gathering inspiration from the current use of DJ Consoles and launchpads in the live music industry, we decided on constructing an instrument focused on rhythm and remixing of sounds. We wanted a nice-looking interface that would allow us to modify specific values of sound, and trigger desired notes/mp3’s. But how did we want it to sound?
Have any of you ever asked Siri to beatbox? We had, and so had the internet. From this response from our voice assistant, through which we reference this week’s class discussions, we gave the instrument a name and an initial set of sounds. However, by tapping into the options available by Serial Communication between the P5.js and Arduino, we realized the potential versatility of our instrument. Our instrument did not need to have a specific set of sounds!
Product:
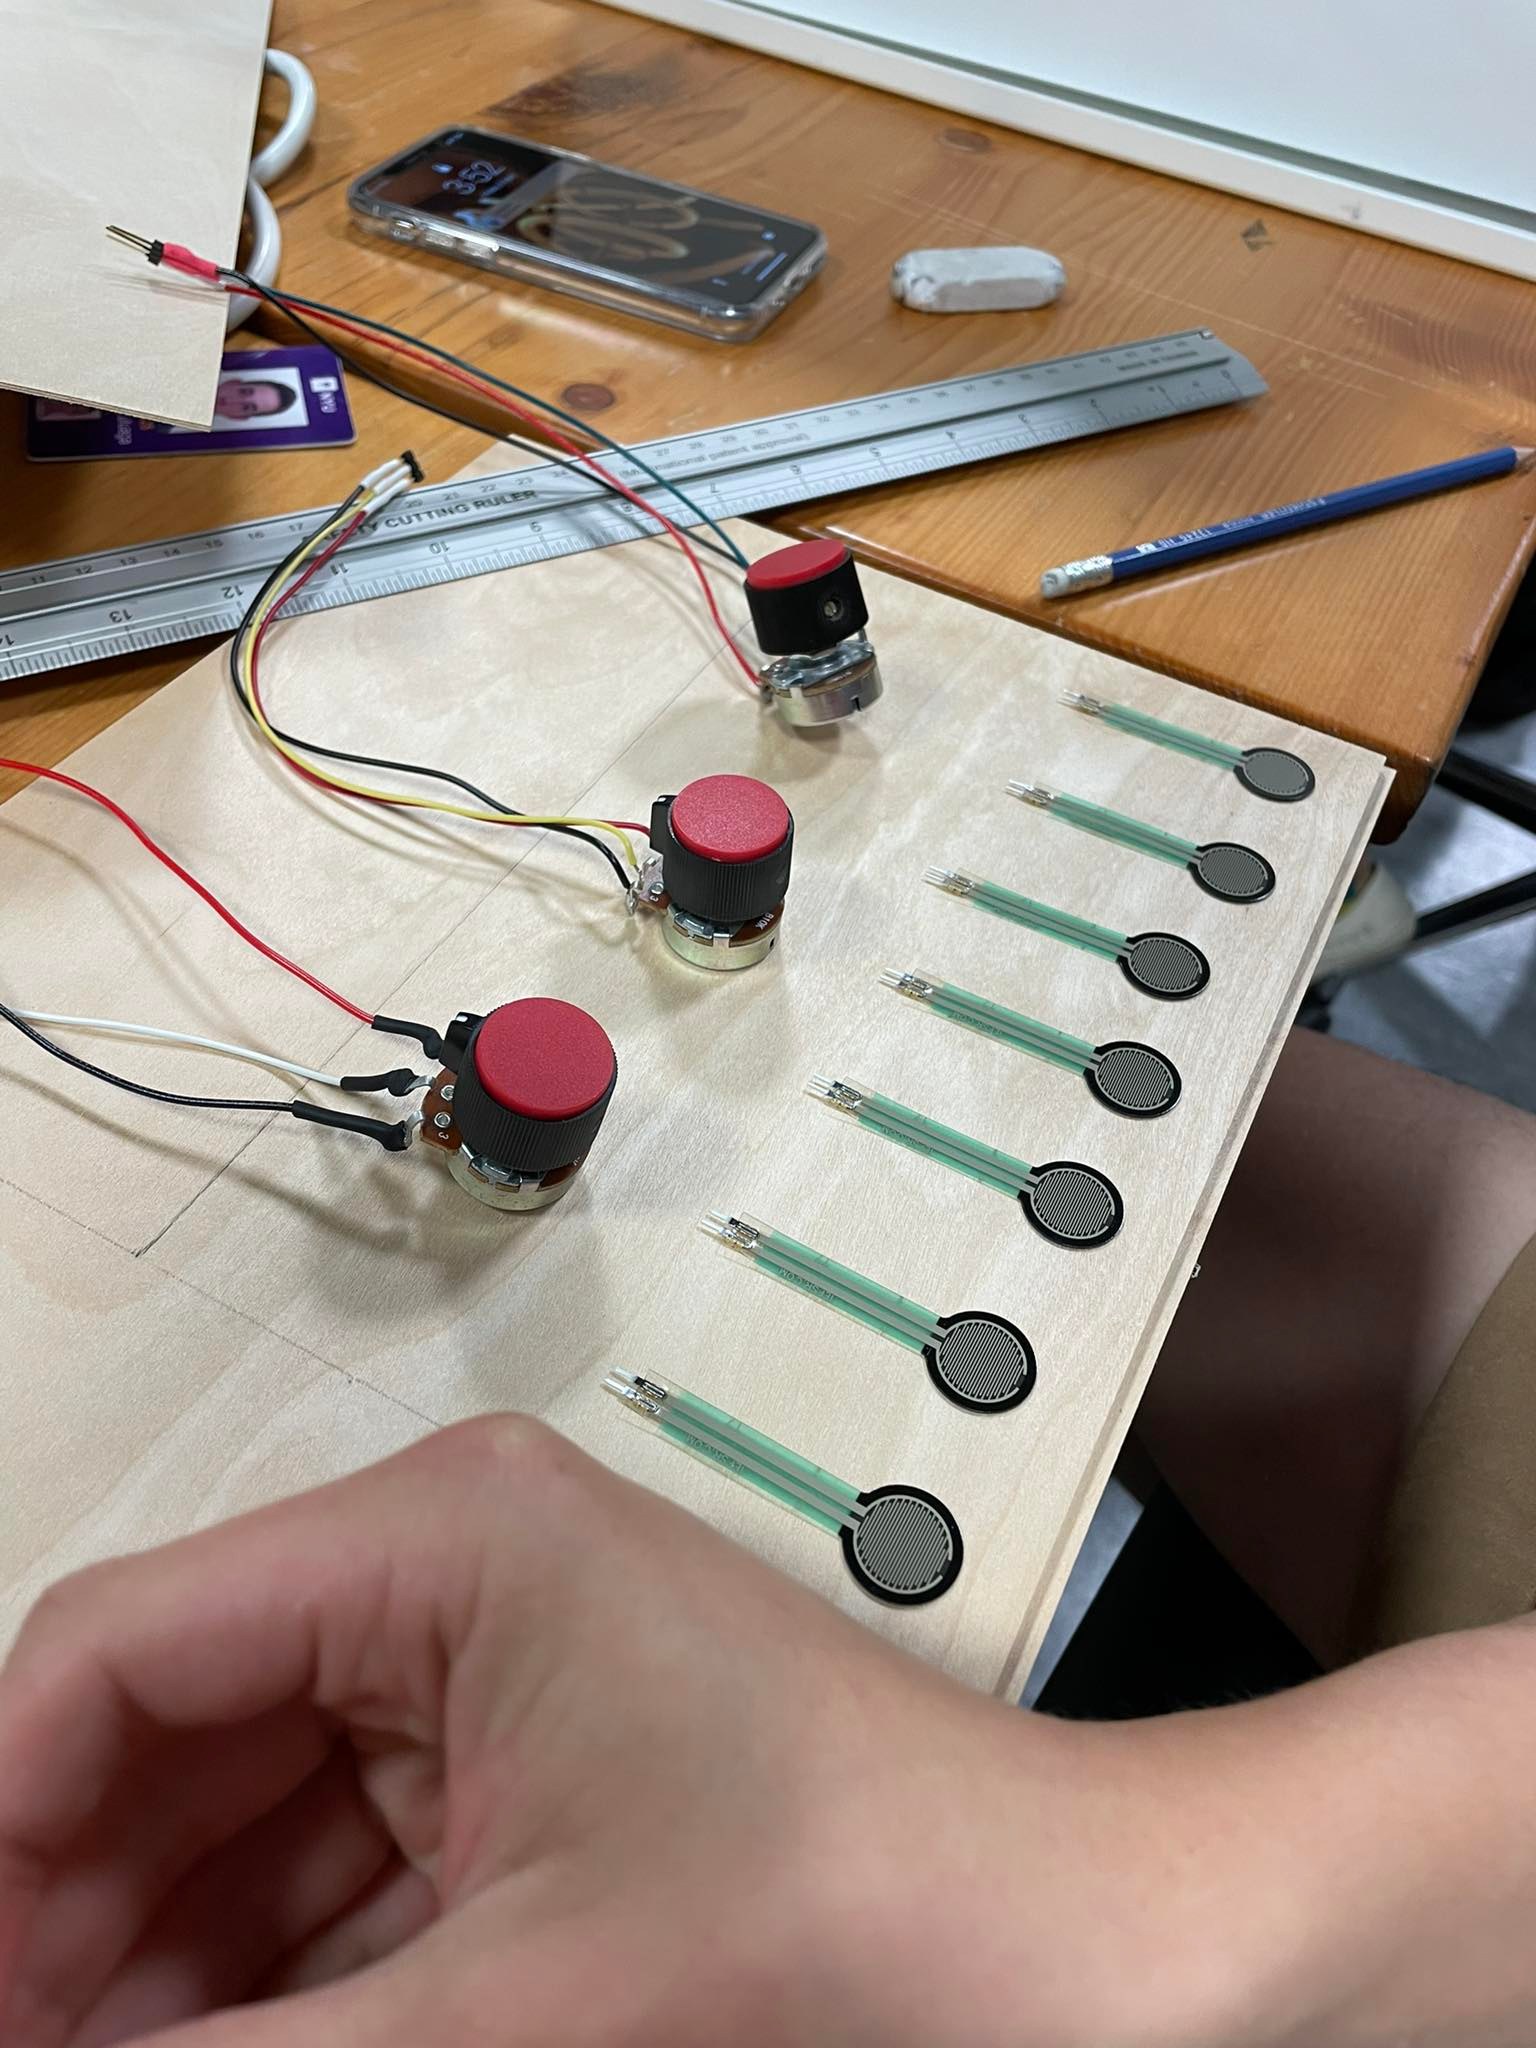
As preparation for the final project, and further Interactive Media endeavors, we wanted to explore the resources available to us in the Interactive Media lab by creating a neat interface and the serial connection. Thus, we built a wooden box with laser-cut sheets that would hold the cables inside/behind. This box has 3 potentiometers, which we soldered that control the volume of 3 different looping sounds. The first one from the left also controls the color of an RGB LED light (which you toggle on/Off with a button) to allow for a more immersive DJ experience. It also has a board with 7 pressure sensors that play a specific sound each.
With the way our code works, you are able to easily upload any .mp3 file to replace the current ones, and thus, completely change the sound of Cats and Box. This makes it similar to a launchpad in that you can completely customize the sounds you input.
Because we had 10 Analog inputs, we had to use two Arduinos, and write two different sets of code. Nevertheless, the premise is the same: We Serial.print a string of the values of each sensor in the arduino. This string is received by P5.js, assigning each value to a specific output. In P5.js we use if statements and variables to control the sounds and volumes.
Here are our codes:
Arduino – Juan’s Laptop
void setup() {
  Serial.begin(9600);
}
void loop() {
  int oneValue = analogRead(A0);

  int twoValue = analogRead(A1);

  int threeValue = analogRead(A2);

  int fourValue = analogRead(A3);

  int fiveValue = analogRead(A4);

  int sixValue = analogRead(A5);


    int sensorValue = oneValue;
    Serial.print(sensorValue);
    Serial.print(",");
    sensorValue = twoValue;
    Serial.print(sensorValue);
    Serial.print(",");
    sensorValue = threeValue;
    Serial.print(sensorValue);
    Serial.print(",");
    sensorValue = fourValue;
    Serial.print(sensorValue);
    Serial.print(",");
    sensorValue = fiveValue;
    Serial.print(sensorValue);
    Serial.print(",");
    sensorValue = sixValue;
    Serial.print(sensorValue);
    Serial.println();
    delay(1);
  }
P5.Js – Juan’s Laptop
Arduino – Lily’s Laptop
const int redPin= 9;
const int greenPin = 10;
const int bluePin = 11;

const int buttonPin = 2;
byte prevButtonState = LOW;
int currentButtonState;

unsigned long timer = 0;
bool blinking = false;
bool onOff = LOW;

const int colour_number = 7;
int ledState = LOW;

void setup() {
  Serial.begin(9600);
  pinMode(redPin, OUTPUT);
  pinMode(greenPin, OUTPUT);
  pinMode(bluePin, OUTPUT);
  currentButtonState = digitalRead(buttonPin);
}

void loop() {
int potValue1 = analogRead(A3);
int colourChoice = potValue1 / (1024 / colour_number);

//for checking if circuit is on or off
  byte currentButtonState = digitalRead(buttonPin);


  if(currentButtonState == HIGH && prevButtonState == LOW) {

    // toggle state of LED
    ledState = !ledState;

    // control LED arccoding to the toggled state

  if (colourChoice > colour_number - 1) {
    colourChoice = colour_number - 1;
  }

  else if (colourChoice == 0) {
    SetColor(18, 221, 54);
  }
  else if (colourChoice == 1) {
    SetColor(235, 242, 39);
  }
  else if (colourChoice == 2) {
    SetColor(234, 31, 37);
  }
  else if (colourChoice == 3) {
    SetColor(0, 255, 0);
  }
  else if (colourChoice == 4) {
    SetColor(249, 88, 212);
  }
  else if (colourChoice == 5) {
    SetColor(29, 33, 168);
  }
  else if (colourChoice == 6) {
    SetColor(0, 193, 249);
  }
  } else {
    digitalWrite(redPin, LOW);
    digitalWrite(greenPin, LOW);
    digitalWrite(bluePin, LOW);
    }
 // Serial.println(potValue1);
 // read the incoming byte - always read whether you need that info or not
   int inByte = Serial.read();

   int sensorValue = analogRead(A0);
    Serial.print(sensorValue);
    Serial.print(",");
    sensorValue = analogRead(A1);
    Serial.print(sensorValue);
    Serial.print(",");
    sensorValue = analogRead(A2);
    Serial.print(sensorValue);
    Serial.print(",");
    sensorValue = analogRead(A3);
    Serial.print(sensorValue);
    Serial.println();
    delay(300);
  }

void SetColor(int R, int G, int B) {
  analogWrite(redPin,   R);
  analogWrite(greenPin, G);
  analogWrite(bluePin,  B);
}
P5.Js – Lily’s Laptop
Process:
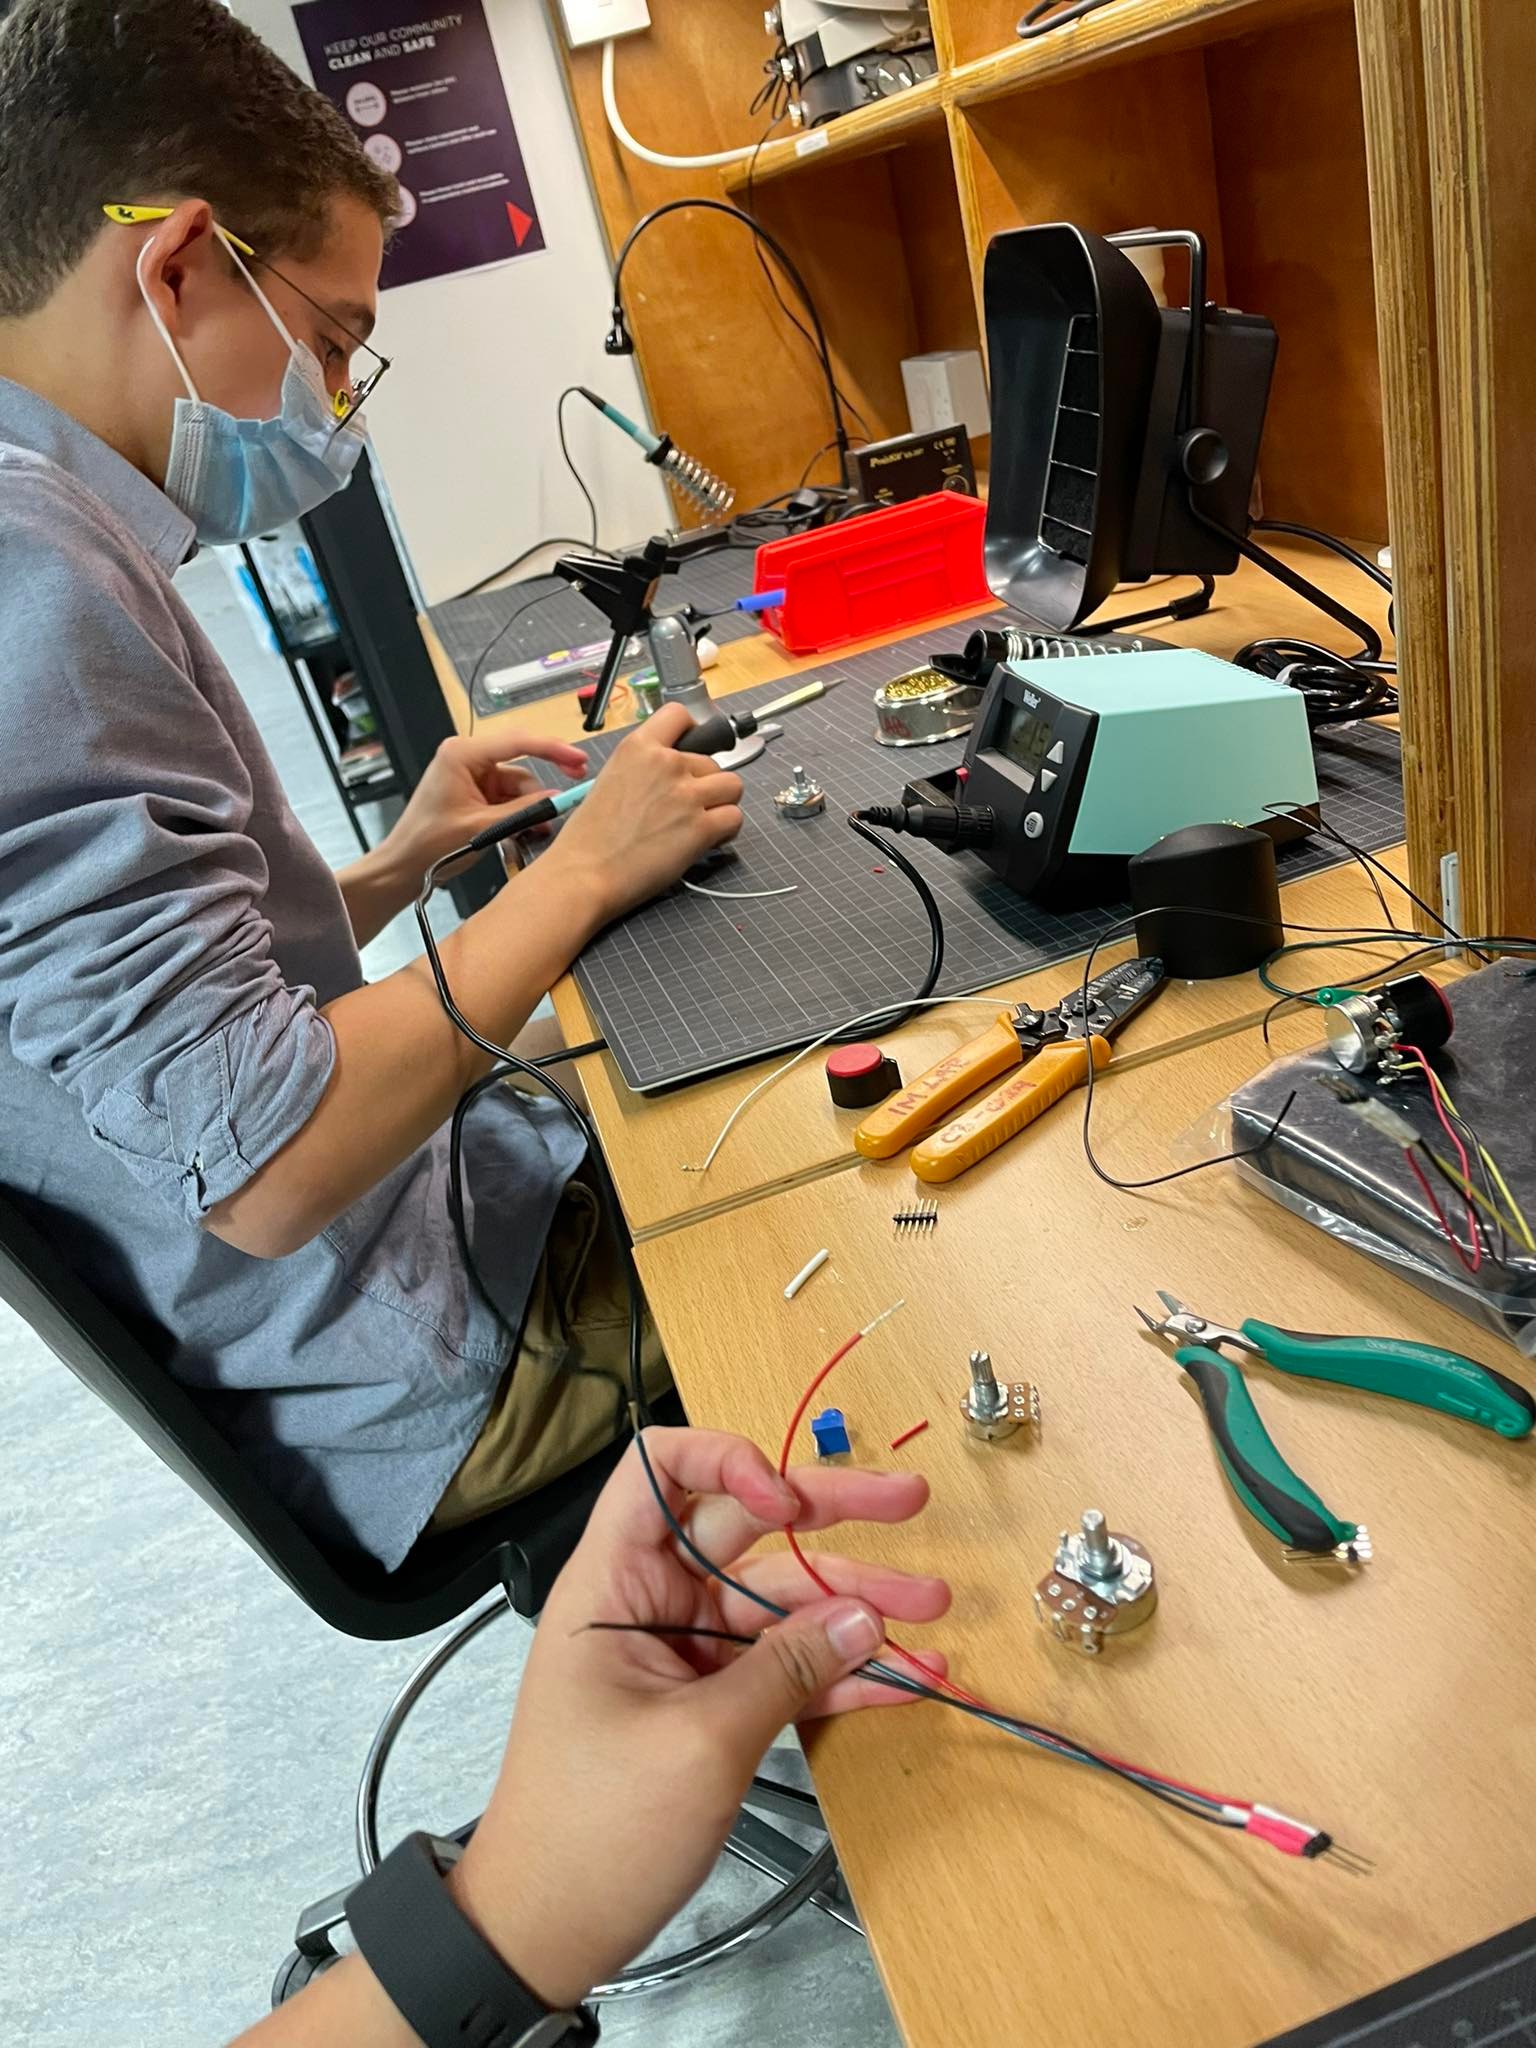
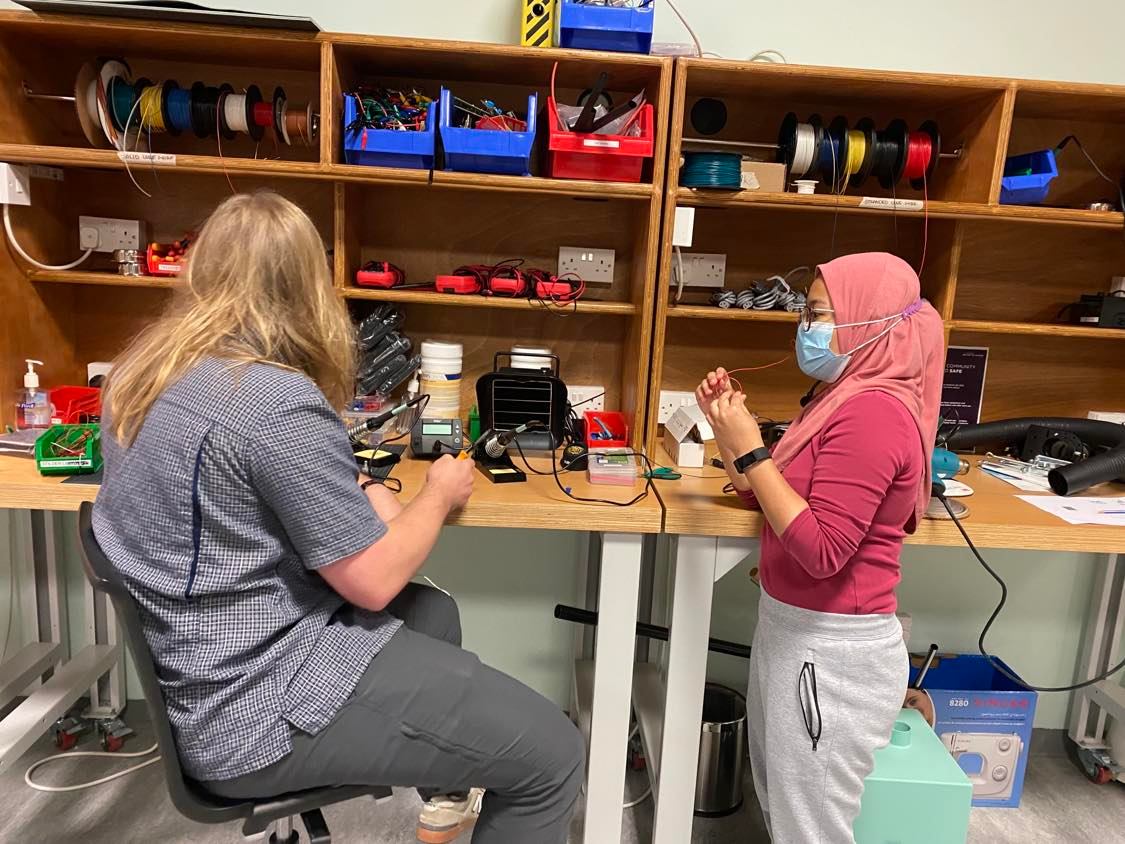
As previously mentioned, we needed to learn and study a lot to build Cats and Box. The first step was learning how to solder. During last week, Kyle Adams and other IM lab assistants were explaining the process to us, guiding us through safety procedures, and helping us with the brainstorming. Kyle, Zion and Alima dedicated a lot of time to guide us through the laser cutting for the box. Without them, we would be very very lost. Once we figured out our interface, building the code with the Serial connection was a big challenge. We struggled to understand the “handshake” and had to watch a few tutorials and read many, many articles to properly manipulate and update the code. Nick and Shamma were an incredible support for us. After many hours of work, we got everything functioning. And then, it was only a matter of assembly and fine-tuning.
Some pictures –
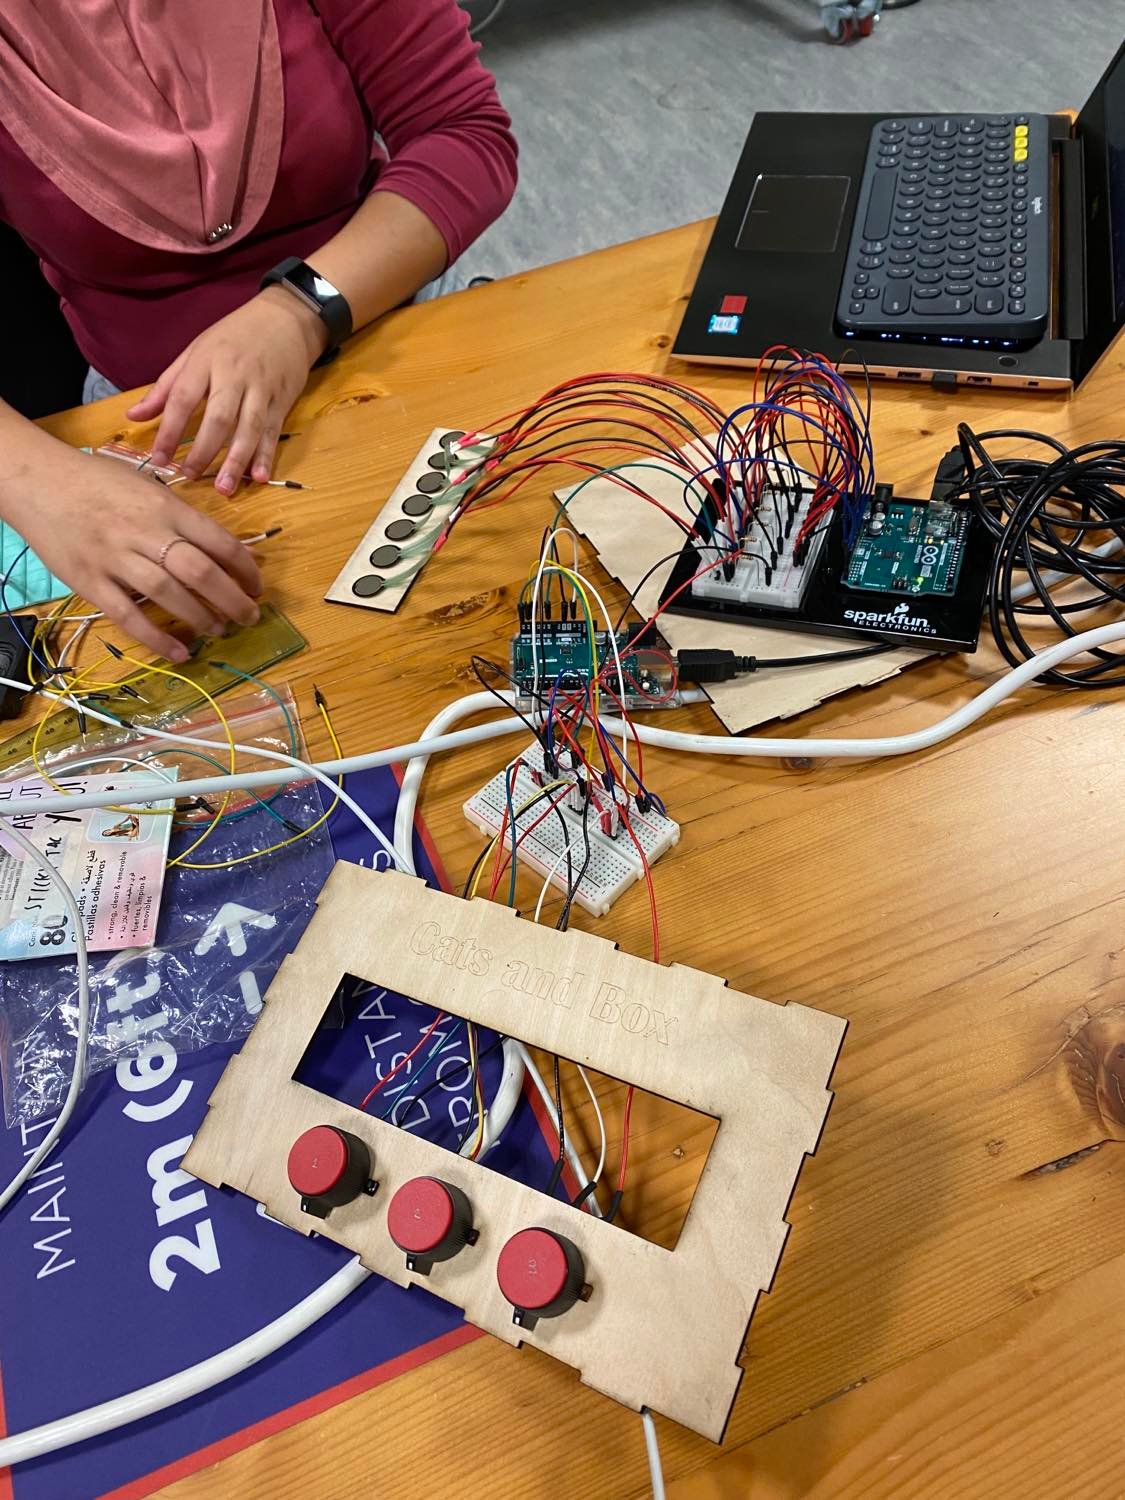
Here is our Final Product:
Reflection:
Juanma: I am very very proud of how our instrument looks. It is the product of countless hours spent in the IM lab and a representation of our steep learning curve. We decided to include many elements that were optional/outside of our scope in order to strengthen our toolbox, and I am very happy we did. In the future, I would like for the sounds to be a bit more seamless, to figure out a way to trigger them multiple times in a row without having to wait for it to end or creating noise, and to include a laser cut space for the LED and cables. However, these are the things that we will keep in mind in future projects and that don’t take away from the awesomeness of Cats and Box. Furthermore, I am very grateful for all the IM students and staff that were more than eager to teach us and help us reach our goal.
Lily: This assignment felt more like a final project than it does a weekly assignment – it took us several late nights to get the p5.js code functioning alongside the arduino. The arduino code was straightforward and it was fun to figure out how to work the RGB lights and button in line with that. However, more work definitely needs to be done to understand integrating sound through p5.js and arduino. Overall I’m very happy with what we came up with and working with Juan was seamless – he was good at things that I’m not good at and vice versa. I’m also very very thankful for Kyle and other IM lab assistants who were very happy to teach us new things like soldering, which truly is what made the mechanics of our instrument work.