Final Project Progress

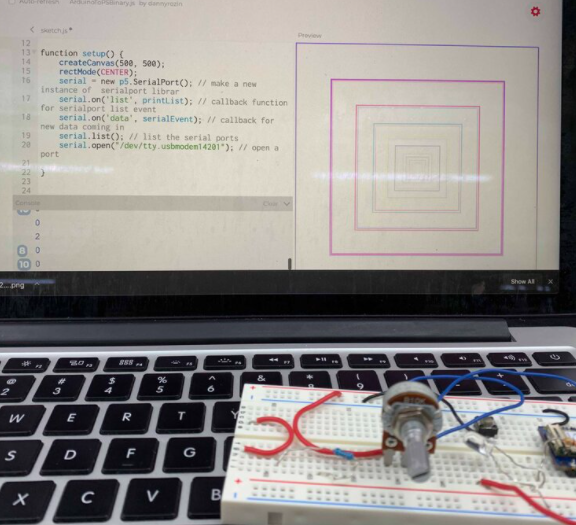
Aligned with the requirements for the final project, I have finalized my general idea to create an interactive artwork in processing where the movement of the objects on the screen is dependent on the values of the analog sensors controlled by the user.

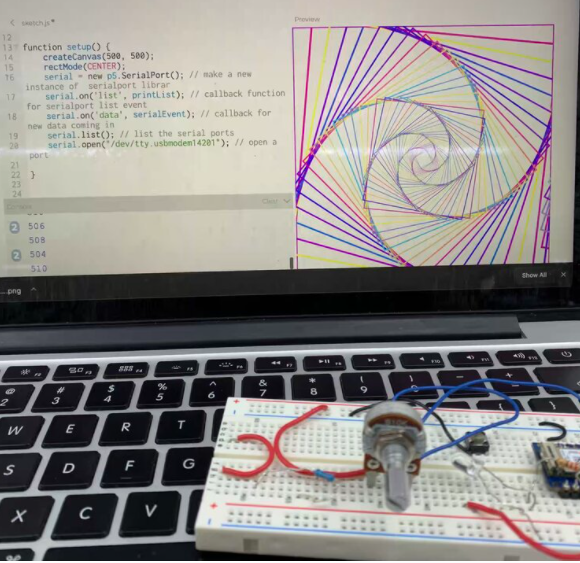
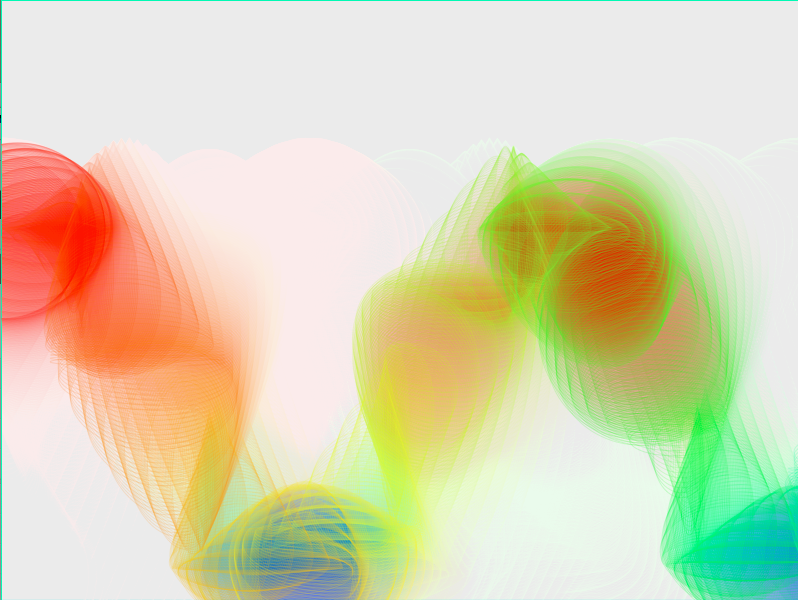
The specifics of the project involve an art piece that involves balls/ circles of random sizes falling from the top of the screen and bouncing off the bottom of the screen until they finally fade away. Some current progress can be seen below

The program would allow the user to control the color of the object through a potentiometer, with values mapped to a sort of below color wheel. In terms of aesthetics, I am still deciding on the range of colors accessible. 

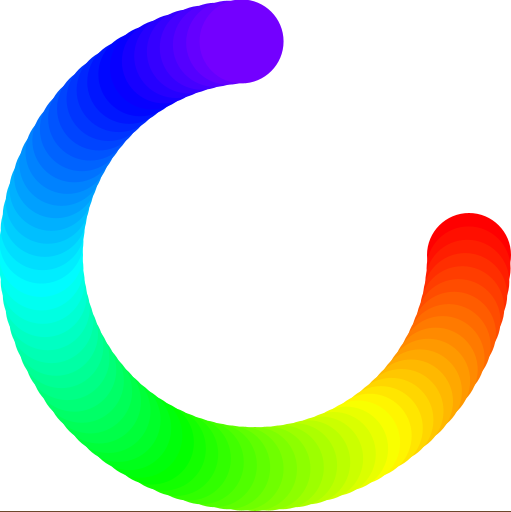
Alongside, I plan to allow users to adjust the speed of the each newly added falling objects based on the values of an ultrasonic sensor. The idea is the closer the user is to the sensor/art, the more disturbance they cause to the artwork.

Additionally, I intend to incorporate sound and some additional output in form of LEDs. However, this is entirely dependent on the progress under time constraints amid finals.

In terms of the materials required, I plan to have a bit larger display than my 13inch laptop and some materials to aid with better technical design during the showcase.

1x  >= 21'' screen
Multicolored LED strip/ LEDs (maybe)
1x  Knob 
1x  Vertical Slider (could be DIY incase not available)
1x  Speaker (maybe)
1x  Ultrasonic Sensor

The hardest parts, I believe, in this project are the technical implementation and the efficient communication between the sensors and the code. For this, I have already started with coding the artwork and plan to slowly build up the features dependent on the analog sensors. As soon as possible, I plan to start working on building and assembling the user control system for the sensors for interaction.


Final project progress: mini-Tesla car

Idea:

For my final project, I am planning to build a mini-Tesla car that will feature both autopilot mode and manual mode. When the autopilot mode is enabled, the car will be able to move around and avoid all obstacles. Whereas for the manual mode, the user will be able to control the car through processing using the arrows/buttons.

The car will be using an ultrasonic sensor mounted on a servo to detect obstacles around it, and DC motors to spin the wheels. Basically, the car will move forward until an obstacle comes within the range of the sensor. The servo is then used to rotate the sensor, and decide on which direction the car should move. If both sides are blocked, the car will turn around and drive back out the way it came. 

The processing display window will show a menu with a couple of options (autopilot mode, manual mode, instructions) that the user can choose from. If manual mode is chosen, arrows/buttons will be displayed and will enable the user to control the car’s movement.

Material needed:
x1 L298N motor driver shield
x1 Servo
x4 DC motors
x4 wheels
x1 Ultrasonic sensor
x4 LEDs (2 yellow, 2 red)
x1 Battery pack
Hardest Part:

I think the hardest part would be figuring out the perfect algorithm for the autopilot mode and choosing the minimum distance. The car will have to decide which way is free depending on the results received from the ultrasonic sensor. Even though the ultrasonic is the most suitable component to use, it is still inaccurate, and might have some difficulties in reading the distance from curved objects, and maybe very thin ones too. The noise might also affect the algorithm so I will try to discard it.

Progress:

As for now, I am working on the coding part on both Arduino and Processing. I have set the basic layout (necessary functions, variables, flags, etc…), and I believe I will have the hardest parts done by Nov 30th. I am also waiting to get the rest of the material needed from the IM lab, to proceed with the circuits, and build the car.

Gopika & Bhavicka – Final Project

We were supposed to finalize our final project idea today and I am going ahead with the interactive murder mystery project as a group project with Bhavicka.

The interactive murder mystery game would let the user play detective at a murder scene. They will get a sense of the murder scene and characters in the beginning. Followed by this, they can inspect objects from the murder scene and get clues. Finally, the user can select who the murderer is.

As for the storyline, we have developed a pretty vague idea. We want the murder victim to be a rich man who was at their holiday home in a hill station in south India. We want to add in some supernatural elements (like Yakshi) to add to the thrill. For aesthetics, we want to have a soundscape that would consist of typical murder mystery elements like a nursery rhyme out of place,  jumpscares, etc.

Materials/Space Needed

      • Projector – we were thinking this would add to the aesthetics – but we are unsure about this
      • Slider – to choose menu options, choice of character, etc.
      • Gloves
      • Aluminum Foil

Timeline of the Game

      • Set the story – user interaction includes using buttons to go to the next scene and during this part of the game, the player gets to understand the characters, the story, and the motive of the game.
      • Clues inspection – in this part, the user gets to interact with the objects from the murder scene and find clues. The story develops in parallel as the user interacts with the objects to find clues. We were thinking of having the story progress once the user finds, for example, 2 clues. Rather than having a timer to reveal the story. So, the story goes at the pace of the player. Here are some ideas we’ve had for the clues:
        • Morse code with LEDs – have it seem like the supernatural element is communicating the clues to the player
        • Hidden switch in one of the objects to reveal a clue
        • Letters/messages/diary notes are revealed
        • Set up a switch that requires simultaneous pressure on multiple items. We were also thinking of having the pressure points be tapped in a certain sequence and a sequence is revealed by an earlier clue.
      • User chooses their pick – they can reach this phase by either pressing a button mid-game deciding to finalize their pick or after they’ve found all the clues.

The user has access to all the clues they found so far – throughout the game – they can access it by clicking a button. This helps them review all the clues they’ve gotten so far as they progress through the game. 

Hardest Part

The hardest part would be to develop a storyline that is engaging enough for the player to continue interacting with. We think that once we have the story and aesthetics finalized, it should get better to implement them in code. The clues can be coded separately using different sensors so, integrating code for the clues would be easier. We also want to make sure the clues are easy enough to crack but not too easy so that the user has fun playing the game and is not bored/finds it too hard.

Final Project Progress – Jade

IDEA

For my final project, I plan to simulate a Claw Toy Grabber Machine.  A window showing the claw and toys should be displayed on Processing. On Arduino, there will be a joystick to control the movement of the claw, and a button which makes the claw go down to grab.  I also want to make a coin pusher where player should first toss a coin into the box to start the game.


Materials

  1. joystick
  2. wooden box/ drilling tools
  3. piezo + sponge
  4. a larger button


Hardest Part

I think the hardest part is the coding part on Processing. Since I want to add physical collisions to the claw and the toys, I think it would be challenging to develop the mechanism of the claw machine, especially for the part where the claw grabs the toy. To make it more real, I want to design in a way that there are several cases when the claw touches a toy. If the player is lucky enough, and the position is correct, then the toy should be lifted up. But the toy might fall off because the claw is loose. So I assume the codes would be complex.

Also I think the physical setting will also be difficult. I want to make a wooden box which has a joystick and a button on it outside my Arduino, and another box for the coin pusher. I have scheduled to borrow the joystick, but I haven’t studied how to use it, so I am not sure about how the setting would look like.


Progress

I am currently working on the coding part on Processing. I have already done the visual part (background, toys, claw), and I have also added physical attributes to the toys and the claw, so that there is gravity and they can collide with each other. I am still thinking about how to make the claw detect that it has touched a toy, and then to lift it up. I am kind of stuck at this part.

I plan to start connecting the circuits on Nov.28 and start writing serial communication. When I am off the lab, I would continue writing the codes on Processing.

Toomie’s final project progress: JJK Video Game


Hello everyone!

As you might remember from Wednesday, my final project idea is a Jujutsu Kaisen themed video game! As I mentioned in my previous post, the main character in the anime, Yuji, swallows a cursed finger and is now a vessel to a cursed spirit, Sukuna. Now, he has to collect all 20 of Sukuna’s fingers so he can exorcise the curse and save the world, I guess..

As of season 1, Yuji has eaten 4/20 fingers. So, in my game, the player is going to collect the remaining 16 fingers in a set time. I was thinking of adding an HP bar, but I think something like this would be more doable:

Pixel Heart Game Lives Images, Stock Photos & Vectors | Shutterstock

The mechanics are quite simple, I plan on making a button for attacks towards curses, a joystick to move across the screen, and a button for collecting fingers. Every time an enemy is close to the sprite for more than 5 seconds without being defeated, the player will lose a heart. Lose 5 hearts to lose!

I’ve already started planning out the code on processing, but I haven’t actually started writing any code yet, I just typed out the general structure of my code and wrote down comments of my plan throughout.  I wrote down a few variable names and image names that I will use later on while coding, including a gamemode variable, which I used in my midterm project. I will use this variable to switch between pages in my game!

Im thinking of making the final layout of my project something like this:


Steve Aoki teamed up with Capcom on a Street Fighter arcade cabinet and  clothing line - The Verge
maybe I can build a cardboard box around my laptop?

Materials

I will need 2 buttons, a solderable breadboard , a joystick or a slider(depending on if the avatar will move across one axis or both axes, I still haven’t decided), and spare wires .  I might need a cardboard box as well.

So far, I think the materials I mentioned are all I’ll need, but we’ll find out soon if I need anything else…

Hardest Parts

I think serial communication might be a bit challenging for me to figure out, and making the Arduino components respond correctly with Processing.

Also, I think I might need to make my own sprite sheet for Yuji, as I couldn’t find a sprite sheet for his character online.

Other than that, I’ll have to figure out how to code the hearts system as well as the timer system, and how to make a finger appear after defeating a set number of curses.

As for the number of curses to beat per finger and the duration of the timer, I think I’ll decide on that after user testing.

Final Project Idea

GENERAL IDEA

I was thinking of making a game that was themed around an anime called Jujutsu Kaisen. In the anime, the main character swallows a cursed finger and is now a vessel to a cursed spirit, Sukuna. So for my game, I was thinking of making the player fight cursed spirits (with a controller) and collect one of Sukuna’s fingers after defeating a set amount of enemies. I might add a timer, and people can see how many fingers they can collect with the given time, OR it can be a challenge, like collect 5 fingers in the given time or you lose! Something like that.

PROCESSING

The processing code will be the game interface itself, and there will probably be code similar to collision detection whenever you are near a finger, so you press a button on the controller to collect it. Maybe I can add an HP bar and it keeps decreasing when enemies are near the sprite, so it’s taking damage. If it gets to 0, game over. But if I add an HP bar, maybe I don’t need the sprite to move around the screen, maybe similar to Space Invaders? I’m still not 100% sure how this will work..

ARDUINO

I’m planning on making a controller that is connected to Arduino, with buttons for fighting enemies and collecting fingers and maybe a joystick for moving. The buttons will work like an on/off switch , but I’m still not sure about how the joystick will work yet. Everything on the controller will send info to Processing so that the game can respond on screen.

That’s my idea!

Final Project Proposal

Concept:-

The idea is basically, I would be using a pulse sensor to display the heart rate onto the screen and play around with it to see if I can do something cool.

I would try to represent the data provided by the pulse sensor to make a pulse/ heart rate and some variations.

I would also want to add the buzzer to make different sounds for different rates, which I think would be pretty cool!

I think I’ll get more ideas after I start playing with the sensor and get some feedback on the basis of that.


Final Project: A Music/Dancing Concept

inspiration 

From the dancing games in the arcade, where you step on pads to create sound or match the falling arrows.

game

The game entails 5 pads, each representing one note on the pentatonic scale. In processing, there will be five circles corresponding to the five pads. The game would give you a sequence of notes by lighting up the circles in processing and, through Arduino, the LEDs surrounding the pads. The player would have to recreate the sequence by stepping on the pads. The LEDs and the circles would light up as the player jump between the pads.

POTENTIAL FUNCTION

  1. Key change, using analog function
  2. Ear training game

Final Project Proposal : Generative Art

Task: 

Create a physically interactive system of your choice that relies on a multimedia computer for some sort of processing or data analysis. The Final should use BOTH Processing AND Arduino.

Idea: 

I intend to design a generative art piece on processing using analog controls such as a potentiometer and distance sensor connected to Arduino. One such implementation could be to create a spiral where the potentiometer can control the direction and the distance sensor could control the design/ noise level/ thickness of the lines.

My inspiration are following example projects

The rotation of the squares is controlled by the potentiometer

The values from the pulse sensor are visualized in form of a sine wave generative art

Concerns:

At the moment, I am unsure if my project idea is good enough to be the final project for the course and if it will turn out to be as intended or not.

The four elements of nature: interactive art using processing and Arduino

Idea:

The four elements of nature are water, air, earth, and fire. The idea is to create 4 generative art pieces for each of these elements, that represents them in some way(using different patterns and colors etc..). Then audience member will be asked to choose which element they want to interact with. The processing art piece created for that element will move with the person interacting with it so that they feel like they are controlling the elements in a way or are In harmony with them.

Method #1:

I am planning to use a kinect in order to detect the movement of the audience, and program a Processing sketch that will analyze the data from the Kinect and translate that into patterns and colors. Arduino will be used as kind of the controller in the project. Basically, Arduino will be used to choose which element you want to interact with.

I am also not sure if this is possible, but I want to use the potentiometer to enhance on the generative art, for example if someone is interacting with the fire element, turning the potentiometer would draw even more flames and enhance on the drawing. Or if someone is interacting with the earth element turning the potentiometer would make more towers and trees grow etc..

Method #2:

the second method to do this would be just by using an ultrasonic distance sensor and whenever someone comes close to the sensor the generative art piece would gradually fade in. Whenever they remove their hand it would gradually fade out.

I prefer the first method but it is much more complex and a lot of issues may arise.