Pi-Final Project Documentation : Pi’s Moving Castle

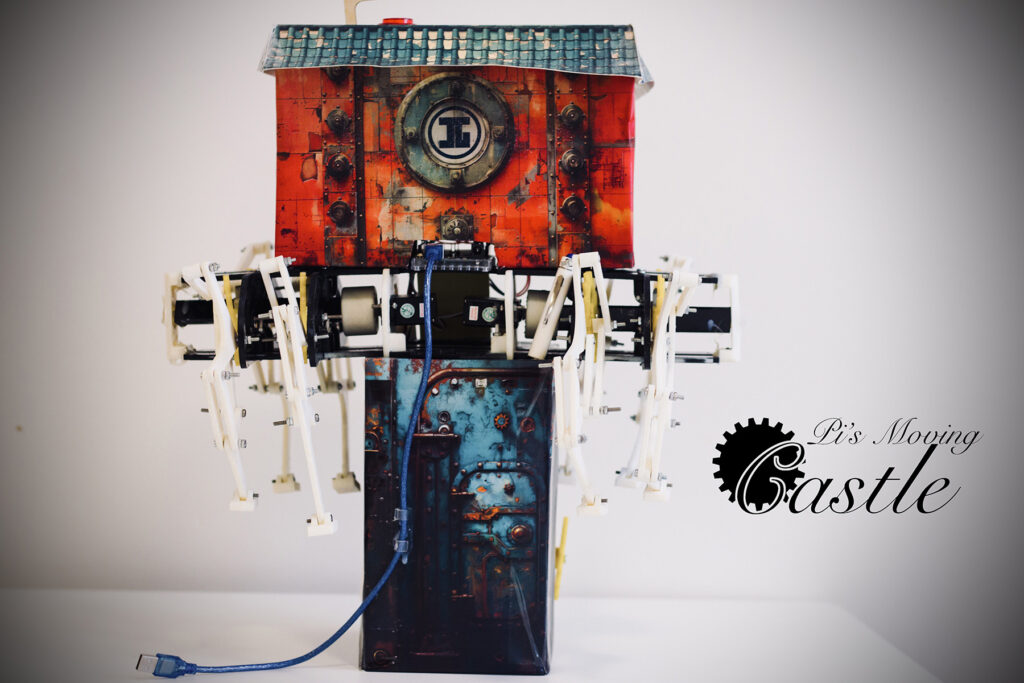
Pi’s moving Castle is a p5js + Arduino interactive game by Pi.

Pi has a moving castle, but it is broken down by the presence of rust gremelins in the machinery. You have to help Pi eliminate these gremelins so that the castle can walk again.

Here’s a more visually appealing version of the story.

Documentation Video

instagrammable goodies

DeMo & Concept

So the project consists of 2 parts.  A p5js computer game, and a castle with walking legs and some user inputs (potentiometer and a switch). You control a cannon on the computer screen, using the potentiometer to rotate the cannon and shoot it with the switch. But there is a catch, Some of the gremelins, you cannot aim at them directly, so you need to make the cannonballs bounce off the walls to deliver justice to these monsters. Finally once you have cleared all the monsters, the castle can start walking and will physically walk. Below is a demo video of me playing the full experience.

Arduino Code

The arduino code is below. It always send back serial data with the potentiometer and switch readings back to the computer, and it will wait for a single serial int. If computer sends a 1, castle walks, and if computer sends a 0, it stops walking. Depending on the game state it changes.

#include   // Include the Servo library

Servo myServo;  // Create a servo object
Servo myServo2; // Create a servo object
float lastVoltage = -1; // Variable to store the last voltage
// Arduino code for button, which detects the counts
const int buttonPin = 2;  // the number of the pushbutton pin
const int ledPin = 3;    // the number of the LED pin

// variables will change:
int buttonState = 0;         // variable for reading the pushbutton status
int lastButtonState = HIGH;  // variable for reading the last pushbutton status
unsigned long lastDebounceTime = 0;  // the last time the output pin was toggled
unsigned long debounceDelay = 50;    // the debounce time; increase if the output flickers
int pressCount = 0;  // count of button presses


//Potentiometer
float floatMap(float x, float in_min, float in_max, float out_min, float out_max) {
  return (x - in_min) * (out_max - out_min) / (in_max - in_min) + out_min;
}


void setup() {
  pinMode(ledPin, OUTPUT);   // initialize the LED pin as an output
  pinMode(buttonPin, INPUT_PULLUP);  // initialize the pushbutton pin as an input with internal pull-up resistor
  myServo.attach(9);  // Attach the servo signal pin to digital pin 9
  myServo2.attach(10); // Attach the servo signal pin to digital pin 10
  Serial.begin(9600); // Initialize serial communication at 9600 bits per second
  stopRotation(); // Stop servos by default
}

void loop() {
   int reading = digitalRead(buttonPin);

  //Output potentiometer
  // Read the input on analog pin A0:
  int analogValue = analogRead(A0);
  // Rescale to potentiometer's voltage (from 0V to 5V):
  float voltage = floatMap(analogValue, 0, 1023, 0, 5);
 

  // check if the button state has changed from the last reading
  if (reading != lastButtonState) {
    // reset the debouncing timer
    lastDebounceTime = millis();
  }

  if ((millis() - lastDebounceTime) > debounceDelay) {
    // if the button state has changed:
    if (reading != buttonState) {
      buttonState = reading;

      // only toggle the LED if the new button state is LOW
      if (buttonState == LOW) {
        digitalWrite(ledPin, HIGH);
        pressCount++;  // increment the press count
      } else {
        digitalWrite(ledPin, LOW);
      }
    }
  }

  // save the reading. Next time through the loop, it will be the lastButtonState:
  lastButtonState = reading;
 
  Serial.print(pressCount);  // print the count to the serial monitor
  Serial.print(",");
  Serial.println(voltage);          // Print the distance to the Serial monitor
  delay(100);                        // Short delay before next measurement

 
  if (Serial.available() > 0) { // Check if data has been received
    int state = Serial.read() - '0'; // Read the first byte available and convert from ASCII
    if (state == 1) {
      rotate(); // Rotate servos
    } else if (state == 0) {
      stopRotation(); // Ensure servos are stopped
    }
  }
}

void rotate() {
  myServo.writeMicroseconds(4000); // Example value for rotation
  myServo2.writeMicroseconds(4000); // Adjust if necessary
}

void stopRotation() {
  myServo.writeMicroseconds(1500); // 1500 usually represents a stopped servo
  myServo2.writeMicroseconds(1500); // Adjust if necessary
}

p5js Sketch

In the game, players help Pi clear rust gremlins from a mechanical castle using a turret that shoots cannonballs, controlled by a physical potentiometer and switch. The game mechanics include obstacles where cannonballs need to be bounced off boundaries to hit some gremlins. The game features a visual and auditory loading sequence with gremlin and turret images, background music, and sound effects for actions like shooting and gremlin deaths. The Arduino setup facilitates interaction by receiving turret control signals from the potentiometer and switch, while sending back movement commands to make the castle walk when the game is completed.

The embedding of the p5js sketch is below (Note that you need the castle to play the game).

Communication between Arduino and p5js

As mentioned above, the communication between p5js and Arduino is serial data. Arduino sends 2 values (a float reading for potentiometer, and an int counting the number of times the button has been clicked). This controls the rotation of the cannon and firing of the cannon in the game.

From the computer (p5), Arduino only receives one number all the time that is either 1 or 0. This dictates whether or not to move the castle and make it walk (it walks when the game is complete.)

What I am proud of

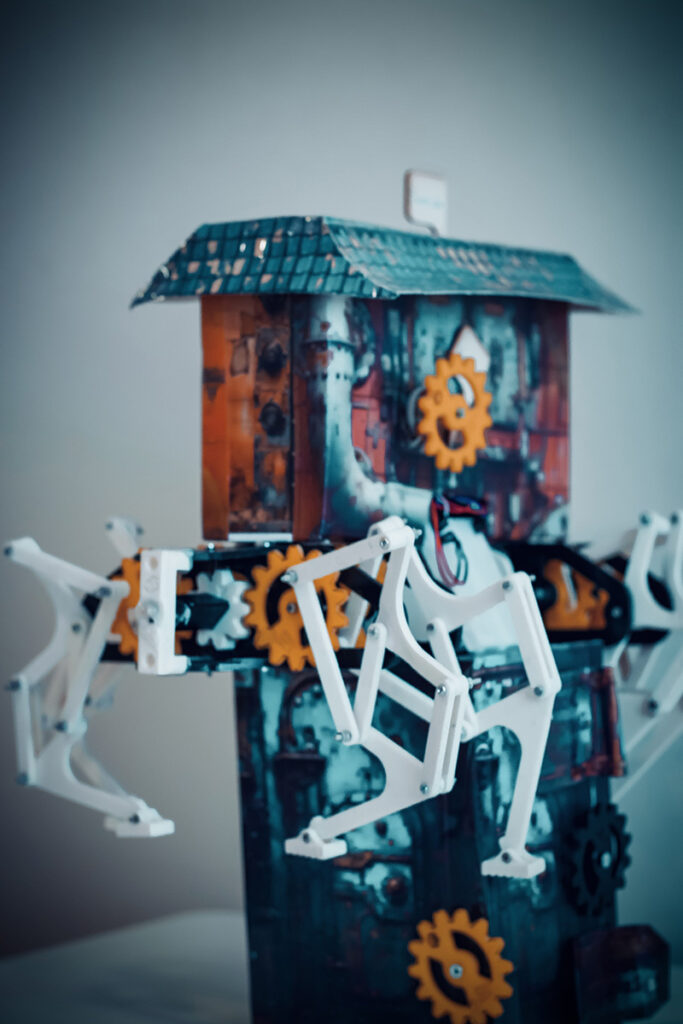
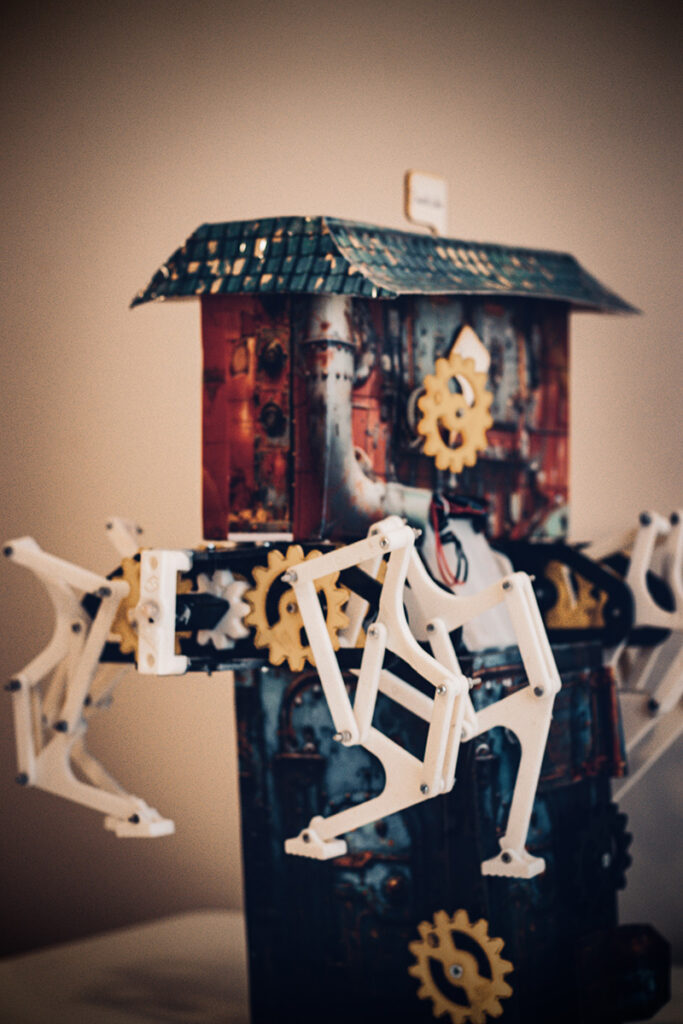
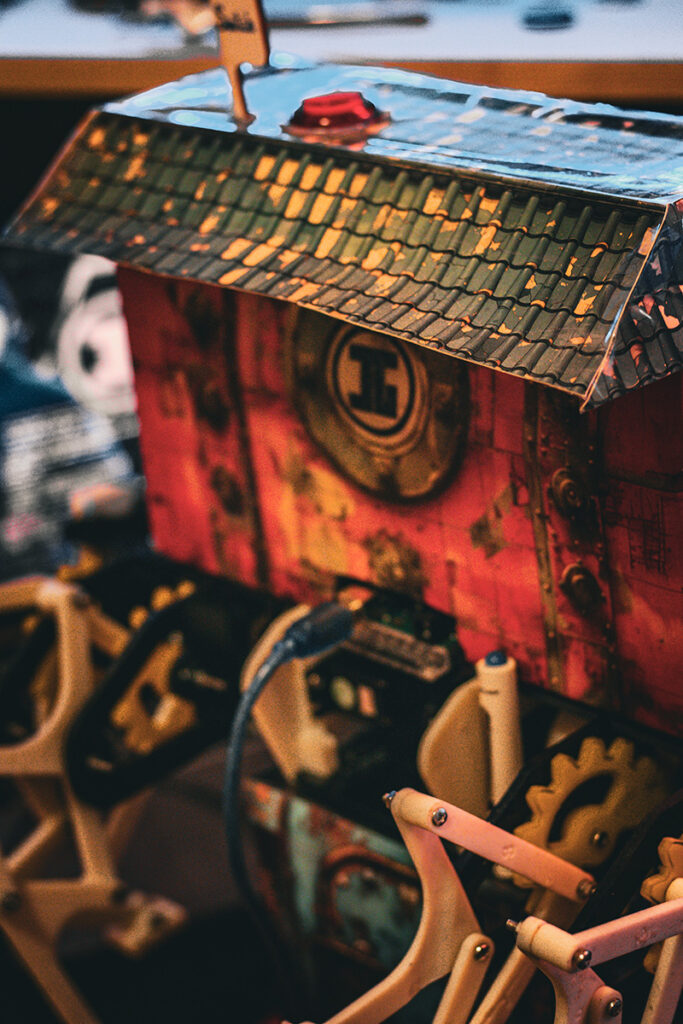
I am particularly very proud of the visual design, the storyline and the walking mechanism. This looks almost unreal to me, I was not expecting that sticking the midjourney textures on an Amazon cardboard box would look sooo good.

Future Improvements

For future improvements, I will integrate what the users have told me during the user tests.

Final Project User Testing – Pi

For my project, I did 9 user test in total, with the people who did not know about my game at all. The procedure is such that I invite them, I start the p5js sketch, set up the camera and let them work out without saying anything.

Gladly, out of 9 subjects, only 2 needed instructions from me, and others at one point were able to figure out the entire experience withotu instruction. The average play time/ or time needed for them to enjoy the experience without needing instructions is 3 minutes. Below are 3 sessions of the user testing.

The only parts where I needed to explain for the 2 users are (1) the user did not read the instructions on the screen and did not know they have to touch the castle and (2) The user did not connect to the right serial port.

In general, this is the feedbacks I get for improvement suggestion.

  1. Cover the breadboard of the castle with a ladder texture to make the design more consistent and hide the electronics.
  2. I need to be more specific in telling which serial port to choose (now I only say usbmodem).
  3. Take out all the debugging functionalities I made for myself in the actual game.
  4. Tell the people to stand up and play (It is more comfortable than sitting down).
  5. Sometimes the bullet hit the enemy, but the enemy  did not die (I need to adjust the collider radius).
  6. Some users did not get the full background story, so probably have a mini comic printed out so that whoever interested can read.

Special Thanks

Special Thanks to Guglielmo Fonda, Aditya Pandhare, Aneeka Paul, Megan Marzolf, Salma Mansour, Sashank Neupane, Lingfen Ren, Lexie and Nastassja for testing my project.

Week 12 : Pi Final Project Progress

As for the progress on my final project this week, the body frame is already built. I am still assembling the legs (They take time).

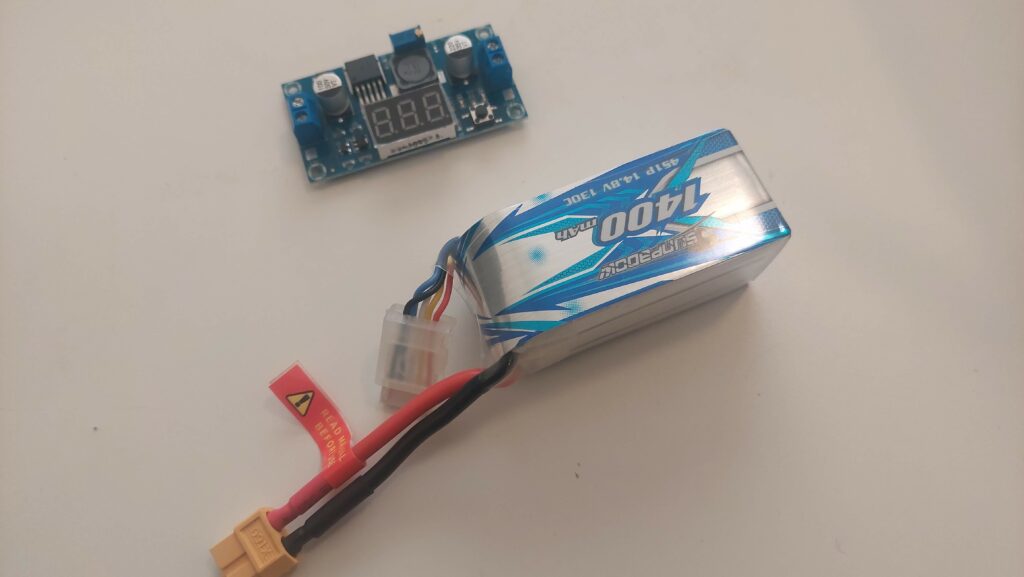
Also, in terms of the electronics, I need to order an additional Li-Po battery and a voltage converter to supply the power to the servo motors.

Also, for the cardboard castle above the walker, I began generating the textures in Midjourney. Still in the progress of assembling.

I unfortunately lost my ESP32 chip, so need to re-order it again.

Week 12 Reading (Pi) – Graham Pullin’s Design Meets Disability

“It’s not a weapon, it’s more of a highly advanced prosthesis.” ― Tony Stark (when the court asks if his Iron Man suit is a weapon)

Reflecting upon Graham Pullin’s Design Meets Disability, I find myself musing about this quote from Tony Stark in Iron Man. The suit, while seemingly a robust piece of technology, parallels a fashionable prosthesis, both functional and aesthetically pleasing with its intricate yet discreet components. Indeed, his suit is a prosthesis. This amusing interpretation not only highlights the suit’s dual nature but also aligns with broader design principles.

Transitioning from the fictional world of Iron Man to the real-world impact of design, Charles Eames’s perspective that “design depends largely on constraints” resonates deeply with me. This principle is vividly illustrated in the creation of the Eames leg splint during wartime—a necessity that spurred innovation. The splint was not only functional but also aesthetically pleasing, subsequently influencing mainstream furniture design. This example beautifully encapsulates the dance between limitation and innovation, challenging the preconceived notion that design for disability must forsake beauty for functionality.

The juxtaposition of fashion and discretion in disability design is equally eye-opening. The evolution of eyewear from a stigmatized medical appliance to a fashion accessory exemplifies a significant shift in societal perception. However, the underlying desire for discreet devices reveals a lingering societal discomfort with visible signs of disability. Graham Pullin’s insights provoke a reevaluation of this narrative, advocating for a shift from concealing disabilities to celebrating and empowering individuals.

Pullin’s text not only expands my understanding of functional design but also reaffirms the importance of aesthetics in user-centered design. Whether it pertains to physical objects like a leg splint or digital solutions like software interfaces, the essential principle remains the same: effective design must resonate with users on both functional and aesthetic levels, thereby enhancing their interaction and experience.

Week 12 : Production (Pi, Darko)

These are IM Week 12 Assignments by Pi and Darko

Production 1

Make something that uses only one sensor  on Arduino and makes the ellipse in p5 move on the horizontal axis, in the middle of the screen, and nothing on arduino is controlled by p5

let rVal = 0;
let alpha = 255;
let left = 0; // True (1) if mouse is being clicked on left side of screen
let right = 0; // True (1) if mouse is being clicked on right side of screen
let xPos = 0; // Position of the ellipse

function setup() {
  createCanvas(640, 480);
  textSize(18);
  noStroke();
}

function draw() {
  // one value from Arduino controls the background's red color
  background(255, 255, 255);

  // Update the position of the ellipse based on the alpha value
  // Mapping alpha to the width of the canvas
  xPos = map(alpha, 0, 1023, 0, width);

  // Draw an ellipse that moves horizontally across the canvas
  fill(255, 0, 255, 255); // Same mapping as the text transparency
  ellipse(xPos, height / 2, 50, 50); // Position ellipse at center height with a diameter of 50

  if (!serialActive) {
    text("Press Space Bar to select Serial Port", 20, 30);
  } else {
    text("Connected", 20, 30);

    // Print the current values
    text('rVal = ' + str(rVal), 20, 50);
    text('alpha = ' + str(alpha), 20, 70);
  }

}

function keyPressed() {
  if (key == " ") {
    // important to have in order to start the serial connection!!
    setUpSerial();
  }
}

function readSerial(data) {
  if (data != null) {
    let fromArduino = split(trim(data), ",");
    if (fromArduino.length == 2) {
      rVal = int(fromArduino[0]);
      alpha = int(fromArduino[1]);
    }
   
    let sendToArduino = left + "," + right + "\n";
    writeSerial(sendToArduino);
  }
}


Production 2

Make something that controls the LED brightness from p5

let rVal = 0;
let alpha = 255;
let left = 0; // True (1) if mouse is being clicked on left side of screen
let right = 0; // True (1) if mouse is being clicked on right side of screen
let xPos = 0; // Position of the ellipse
let ledState = false; // To toggle LEDs


function setup() {
  createCanvas(640, 480);
  textSize(18);
  noStroke();
}

function draw() {
  // one value from Arduino controls the background's red color
  background(255, 255, 255);

  // Update the position of the ellipse based on the alpha value
  // Mapping alpha to the width of the canvas
  xPos = map(alpha, 0, 1023, 0, width);


  if (!serialActive) {
    text("Press Space Bar to select Serial Port", 20, 30);
  } else {
    text("Connected", 20, 30);

    // Print the current values
    text('rVal = ' + str(rVal), 20, 50);
    text('alpha = ' + str(alpha), 20, 70);
  }
 
 
  text("Then, press A to flash the police lights.",20, 100)
  //Edit the code below
  // Toggle LED state every frame if space is held down
  if (keyIsDown(65)) { // 32 is the ASCII code for space
    ledState = !ledState;
    if (ledState) {
      left = 1;
      right = 0;
    } else {
      left = 0;
      right = 1;
    }
  }
  // Edit the code above

}

function keyPressed() {
  if (key == " ") {
    // important to have in order to start the serial connection!!
    setUpSerial();
  }
}

function keyReleased(){
  if (key == "a") {
   left = 0;
      right = 0;


  }
}

function readSerial(data) {
  if (data != null) {
    let fromArduino = split(trim(data), ",");
    if (fromArduino.length == 2) {
      rVal = int(fromArduino[0]);
      alpha = int(fromArduino[1]);
    }
   
    let sendToArduino = left + "," + right + "\n";
    writeSerial(sendToArduino);
  }
}


Gravity Wind

Take the gravity wind example (https://editor.p5js.org/aaronsherwood/sketches/I7iQrNCul) and make it so every time the ball bounces one led lights up and then turns off, and you can control the wind from one analog sensor

let velocity;
let gravity;
let position;
let acceleration;
let wind;
let drag = 0.99;
let mass = 50;
let rVal = 0;
let alpha = 255;
let left = 0; // True (1) if mouse is being clicked on left side of screen
let right = 0; // True (1) if mouse is being clicked on right side of screen
let serialSetup = false;
// Declare a variable to store the time at which to trigger the action
let triggerTime = 0;

function setup() {
  createCanvas(640, 360);
  noFill();
  position = createVector(width / 2, 0);
  velocity = createVector(0, 0);
  acceleration = createVector(0, 0);
  gravity = createVector(0, 0.5 * mass);
  wind = createVector(0, 0);
  // Set the trigger time to be 5 seconds after setup runs
  triggerTime = millis() + 5000;
  textSize(20);
}

function draw() {
  // Check if the current time has passed the trigger time
  if (millis() >= triggerTime && !serialSetup) {
    serialSetup = true;
  }
  push();
  fill(0);
  if (!serialSetup) {
    text("Simulation starts in 5 seconds. Press a to set up serial.", 20, 50);
  }
  pop();

  if (serialSetup) {
    background(255);
    let windtext = "";
    if (alpha < 300) {
      wind.x = -1;
      windtext = "Wind : Right";
    } else if (alpha > 800) {
      wind.x = 1;
      windtext = "Wind : Left";
    } else {
      wind.x = 0;
      windtext = "No wind.";
    }

    push();
    fill(0);

    text(windtext, 20, 50);
    pop();

    applyForce(wind);
    applyForce(gravity);
    velocity.add(acceleration);
    velocity.mult(drag);
    position.add(velocity);
    acceleration.mult(0);
    ellipse(position.x, position.y, mass, mass);
    if (position.y > height - mass / 2) {
      velocity.y *= -0.9; // A little dampening when hitting the bottom
      position.y = height - mass / 2;
      console.log(
        "Bounce! Position Y: " + position.y + ", Velocity Y: " + velocity.y
      );
      left = 1;
    } else {
      left = 0;
    }
  }
}

function applyForce(force) {
  // Newton's 2nd law: F = M * A
  // or A = F / M
  let f = p5.Vector.div(force, mass);
  acceleration.add(f);
}

function keyPressed() {
  if (keyCode == LEFT_ARROW) {
    wind.x = -1;
  }
  if (keyCode == RIGHT_ARROW) {
    wind.x = 1;
  }
  if (key == " ") {
    mass = random(15, 80);
    position.y = -mass;
    velocity.mult(0);
  }
  if (key == "a") {
    // important to have in order to start the serial connection!!
    setUpSerial();
  }
}

// This function will be called by the web-serial library
// with each new *line* of data. The serial library reads
// the data until the newline and then gives it to us through
// this callback function
function readSerial(data) {
  ////////////////////////////////////
  //READ FROM ARDUINO HERE
  ////////////////////////////////////

  if (data != null) {
    // make sure there is actually a message
    // split the message
    let fromArduino = split(trim(data), ",");
    // if the right length, then proceed
    if (fromArduino.length == 2) {
      // only store values here
      // do everything with those values in the main draw loop

      // We take the string we get from Arduino and explicitly
      // convert it to a number by using int()
      // e.g. "103" becomes 103
      rVal = int(fromArduino[0]);
      alpha = int(fromArduino[1]);
    }

    //////////////////////////////////
    //SEND TO ARDUINO HERE (handshake)
    //////////////////////////////////
    let sendToArduino = left + "," + right + "\n";
    writeSerial(sendToArduino);
  }
}


Week 11 : Pi’s Moving Castle – A not-so-preliminary concept for final project

“Pi, you are cursed as the Artistic Engineer. Artists and engineers alone don’t share this burden.

But you, your unconscious artist within dreams the idealistic, fictional, perfect beauty, and the conscious engineer within, uses any methods possible, uncompromisingly, to bring that perfect fiction into reality.

Yet, when reality falls short of your dreams, a piece of your soul dies each time.

~ Pi’s father, after Pi surviving the panic attack

Yes, this is my greatest curse. I dream perfection, and kill my soul little by little. I have put myself into life threatening situations…. People warn me… Pi, Pi, life is not always the wholesome Ghibli films.

I mean… Duh 🤷‍♂️ ! I have this poster above my bed.

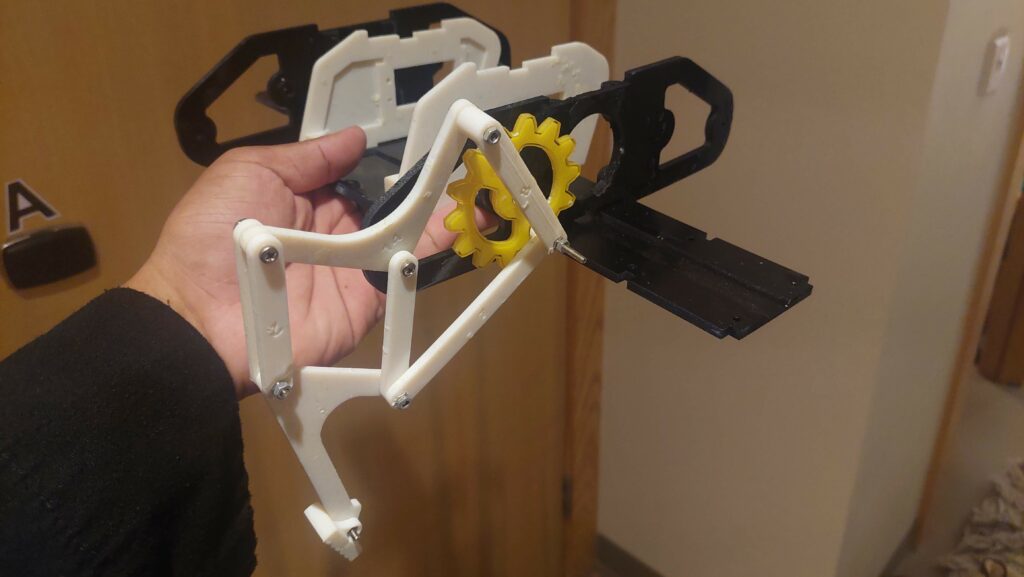
I religiously worship Hayao Miyazaki, and have always been inspired by the the Dutch kinetic sculptor Theo Jansen. Jansen is one of the few people who managed to bring my Ghibli dreams into reality. He developed a planar leg mechanism, which converts rotatory motion into a living creature.

[Jansen’s Linkage Simulation – Source Wiki ]

And, Pi heart was hurt very very deeply with great pain. So we have –

  • Ghibli Movies
  • Walking Mechanism and
  • Pi’s heart pain

And smashing them together gives…. wait for it –

Hence, ladies and gents (and everyone in between), I present …


Backstory

In a realm of both steam and green, Pi the artistic engineer lived in a castle on legs of iron and steam. His home, grand and tall, walked on land with ease. Pi, in his chamber of echoes, wove art, spun gears, and melodies spilled like whispers of a stream.

The castle’s pulse, Pi’s own heart encased in a labyrinth of cogs and sparks, pushed it to dance across the valleys and peaks. It moved with the rhythm of his boundless dreams.

One sad day, the heart stopped. The castle stood still, and so did Pi.

Now, you stand before this slumbering giant. To wake it, to heal Pi, you must delve into the heart’s core, where steam circuits lie in wait of knowing hands. Each piece you fit, each puzzle you solve, is a beat returned, a hope rekindled, and will wake up the castle and Pi again.

So the idea is super simple. You play a p5js puzzle game on the computer, which is to repair Pi’s mechanical heart. And we will have an actual physical steampunk robot which is not moving. But as the user solves the puzzle through stages, the castle will wake up, and finally be able to walk again. (Once it walks, the user can program the path of the castle 😉 … i.e. like Scratch)

Pi’s moving castle looks like this.

Q: Alright Pi, stop your arty-farty nonsense and tell us how it’s gonna work.

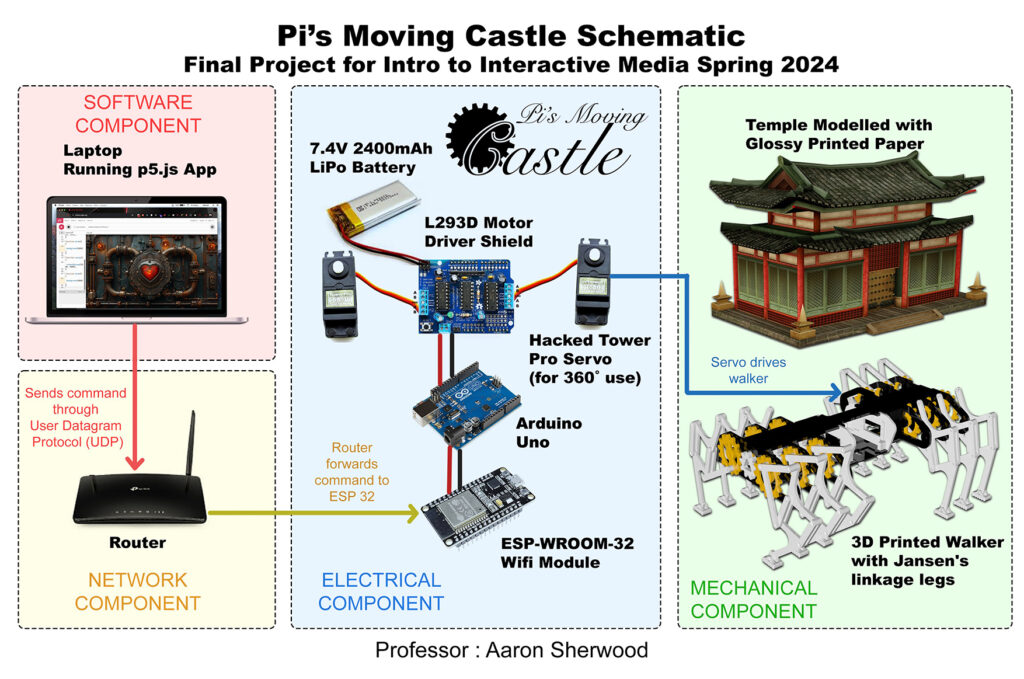
A: Here’s a not so complicated Schematic. The diagram should be self explanatory.

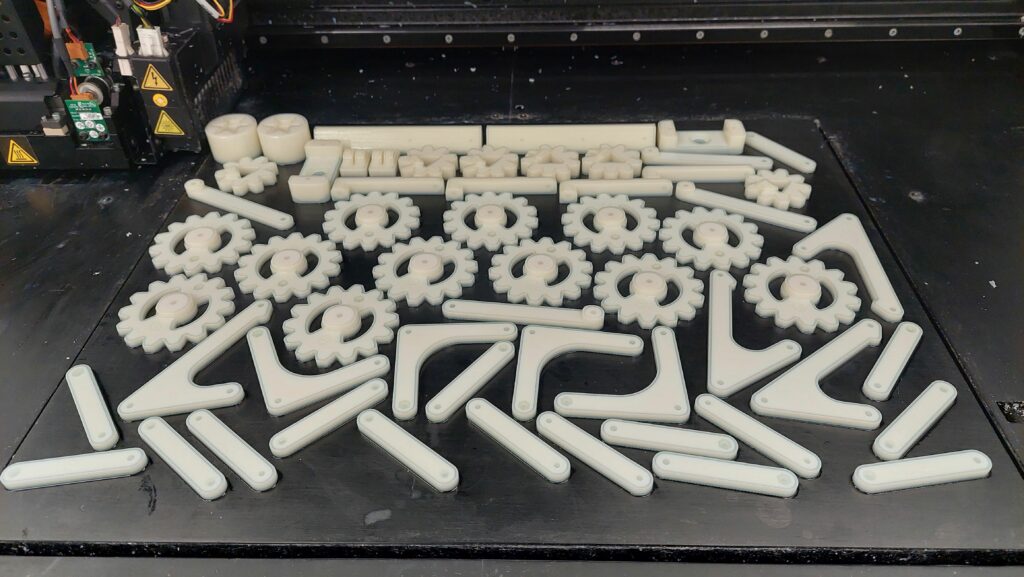
Pi :  So, for the base frame, I began by 3D printing the model I stole (I mean… **cough** **cough** legally obtained) from https://cults3d.com/en/3d-model/gadget/strandbeest-arduino-robot-stl-files

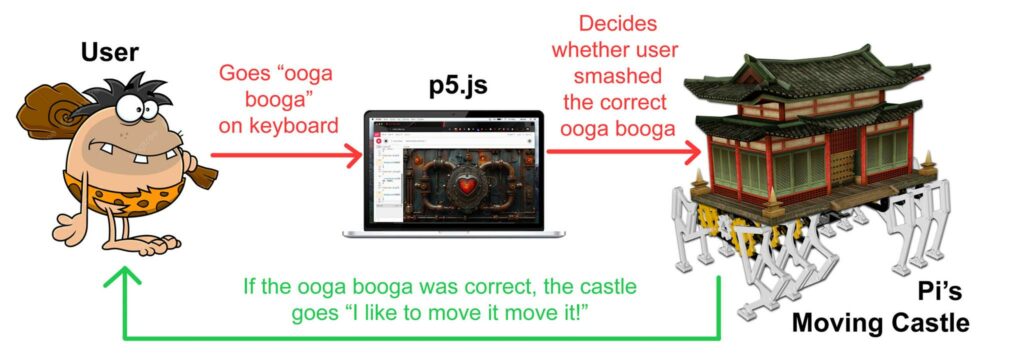
Q: Good. How does it fulfill the … umm..err… the good o’d listening, thinking, and speaking from both parties..? 

A: Well, here. The feedback loop is closed.

Q: Cool cool, do you think you can implement it on time and get it working before you graduate?

A: Well, this is a preliminary concept so I am only talking about the non-tangible ideas, planning stuff here. But I will let you sneak peak into the actual tangible stuff below.

(3D Printed Castle Parts)

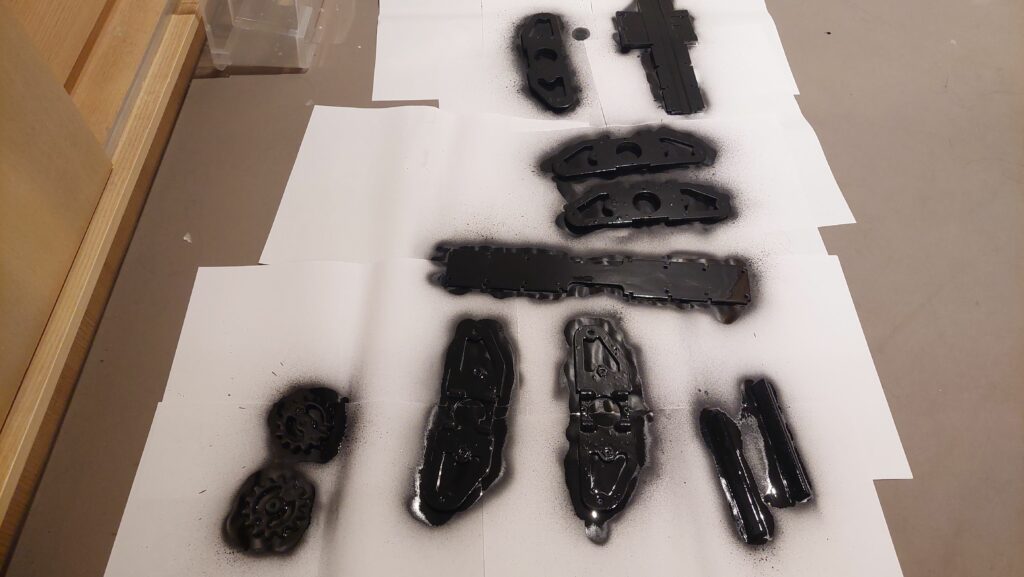
(Black Paint to make it… steam punky)

(Steam Punky 3D Printed Castle Parts)

And below is one of the legs and the linkage working.

Q: Great. What if I do not approve this Final Project?

A:  Pi will cry.


Week 11: (Pi / Darko) Overengineered Guitar – An Arduino Based Musical Instrument

Introduction

This is the “Overengineered Guitar” by Pi Ko and Darko Skulikj.

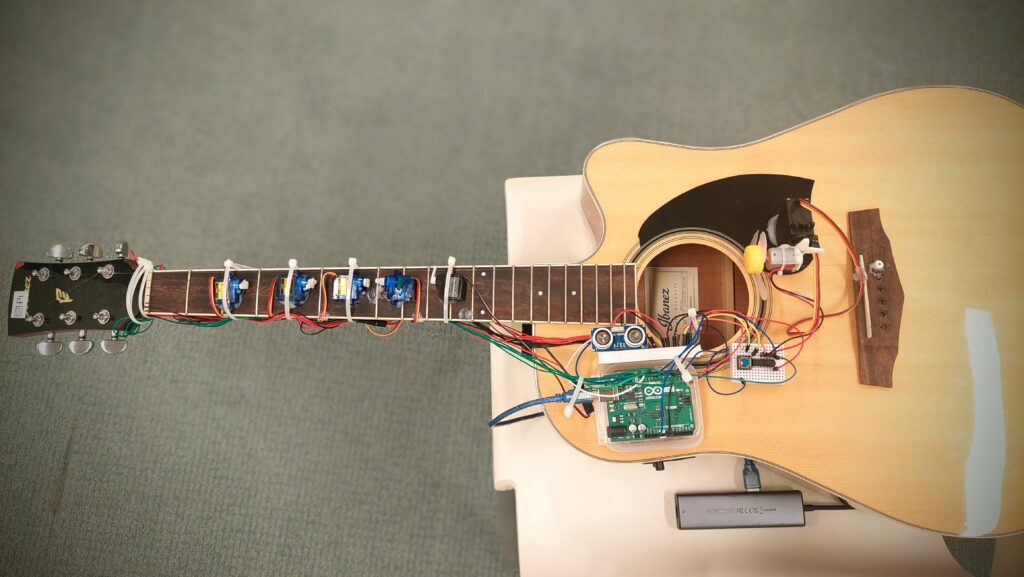
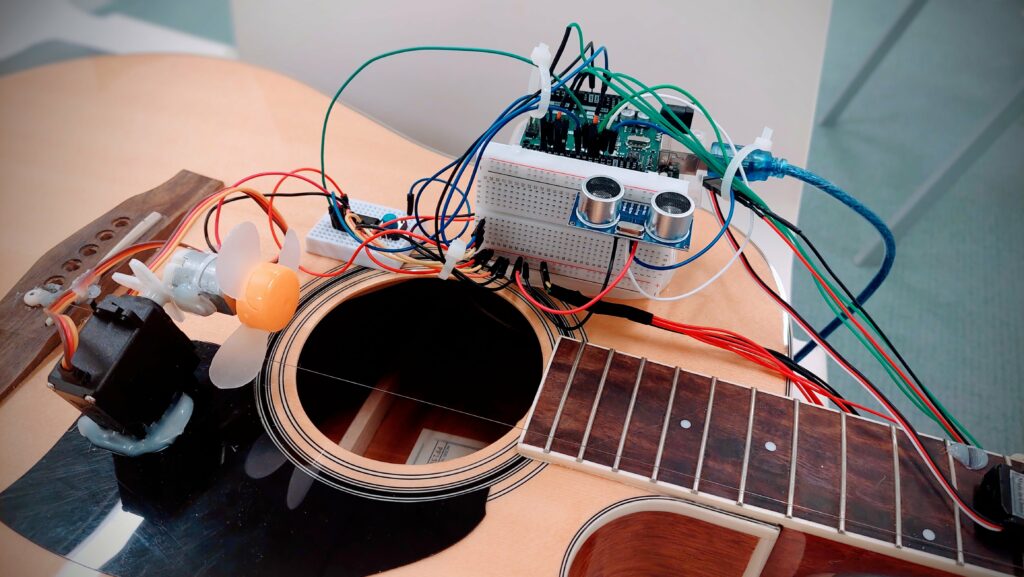
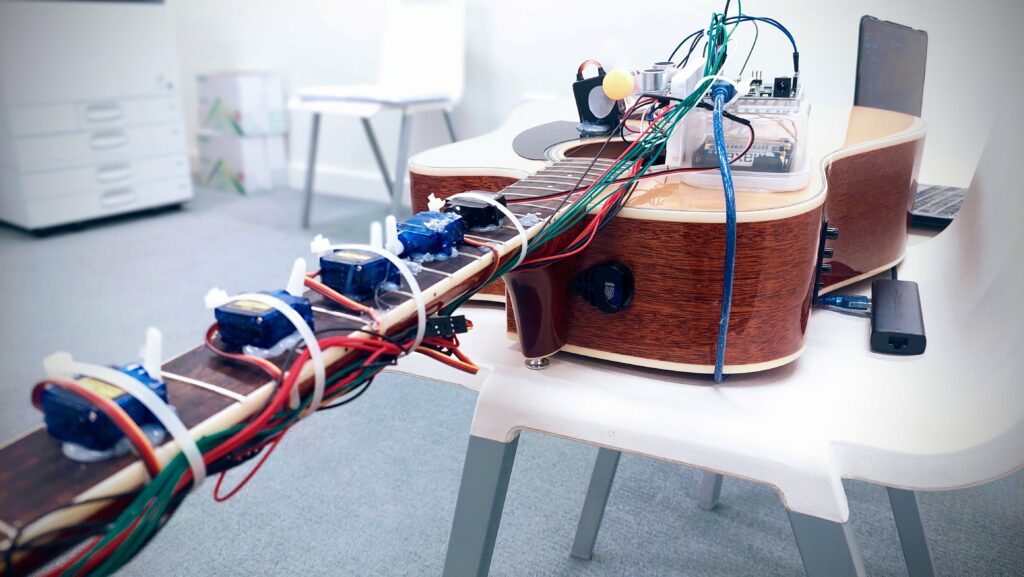
We massacred an acoustic guitar with a single string into an automated musical device that can be played akin to a theremin.

Concept – A Cringy Skit

Darko does not know how to play the Pirates of the Caribbean theme song on guitar, so he decided to turn to Arduino for help.

Demonstration and Media

The video demo of the instrument is shown below.

The sound sucks 😡. Moral of the story : Pi should play the guitar instead of the machine 🫵😠🎸.

Concept

In principle, the “Overengineered Guitar” is a one-stringed setup acoustic guitar for playing by using an array of sensors and servo motors. It has a push button digital sensor and an analog ultrasonic sensor. The main idea is to control the musical notes by hand over the ultrasonic sensor. Then a propeller does the mechanical plucking, controlled through a push button.

This provides the user the opportunity to play the predefined sequence from “He’s a Pirate” from Pirates of the Caribbean over and over again.

Components

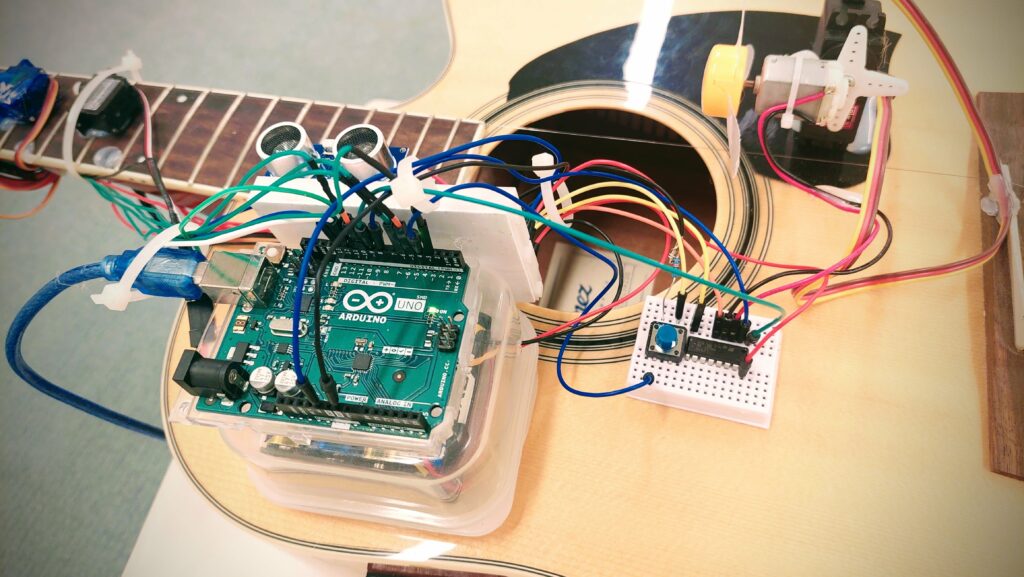
  • Arduino Uno: Serves as the main controlling box for all the sensors and actuators used.
  • Servo Motors (5x): Five servo motors are being attached all across the fretboard, pressing their respective frets according to the desired note.
  • Ultrasonic Sensor: Used to toggle the press on the fretboard by the motors.
  • Digital pushbutton: It is pressed down to start up the propeller, which plucks the string.
  • Propeller motor and DC Motor: It gives the mechanical pluck on the guitar string.
  • L293D motor driver IC: Takes care of the high current requirement for the propeller.
  • External Power Supply: This ensures that the system power is being properly distributed among the various components without having to necessarily overpower the Arduino.

(Arduino, ultrasonic sensor, switch and L293D IC)

(Propellor on DC Motor)

The motors are attached to the arduino as below.

Arduino Pin Motor/Music Note ID Open Servo Angle Press Servo Angle
11 5 180 0
10 4 0 180
6 3 180 0
5 2 180 0
3 1 180 0
N/A 0 (open string) N/A (no servo) N/A (no servo)

Challenges

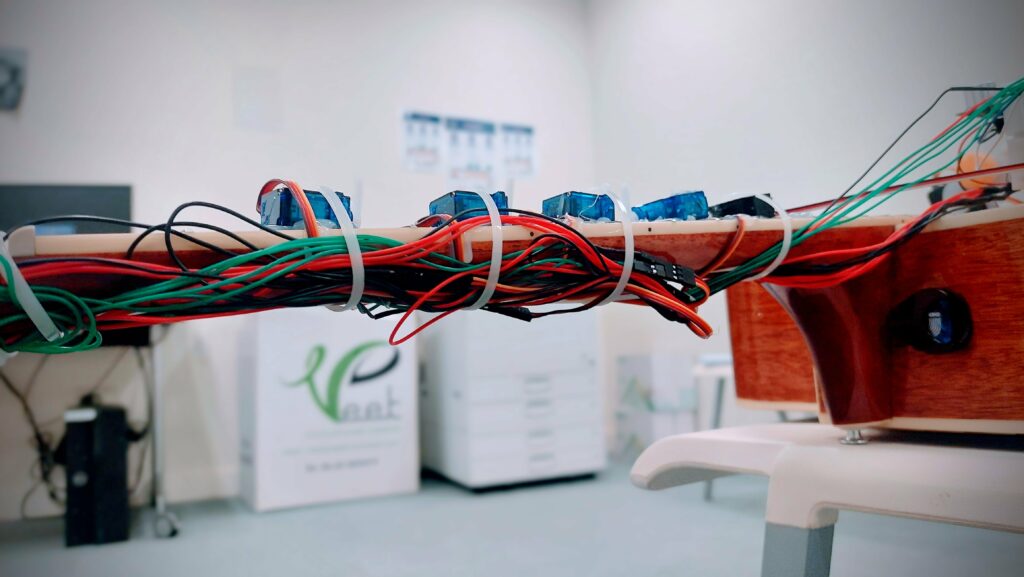
Our main challenge involved managing power to ensure that each component the required current. Also, the wiring was a challenge since there were a lot of wires.

(Wire management 😎)

Task Allocation

Darko took care of the wiring and code for the ultrasonic sensor and the switch using non-blocking code. The rest is filled by Pi.

Code

The code is below. It has debouncing to guarantee reliable operation of the switch.

#include <Servo.h>

// Define a struct to hold servo data
struct ServoData {
  int pin;
  int openAngle;
  int pressAngle;
  Servo servo;
};

// Create an array of servos for each note
ServoData servos[] = {
  {3, 180, 0}, // Note 1
  {5, 180, 0}, // Note 2
  {6, 180, 0}, // Note 3
  {10, 0, 180}, // Note 4
  {11, 180, 0} // Note 5
};
const int numServos = sizeof(servos) / sizeof(ServoData);

// Note durations in milliseconds
int noteDurations[] = {500, 500, 2000, 500, 2000, 500, 1000, 500, 500, 1000};
int noteSequence[] = {0, 1, 2, 3, 4, 5, 3, 2, 1, 2};
const int numNotes = sizeof(noteSequence) / sizeof(int);

unsigned long previousMillis = 0;  // Stores last update time
int currentNoteIndex = 0;          // Index of the current note being played

// Push Button and Propeller control
const int buttonPin = 4; // Pushbutton pin
const int ledPin = 13; // LED pin (for debugging)
int enA = 9; // Enable pin for motor
int in1 = 8; // Motor control pin
int buttonState = 0; // Current button state
// Define the pins for the ultrasonic sensor
const int trigPin = 13;
const int echoPin = 12;

// Define variables for the duration and the distance
long duration;
int distance;


void setup() {
  // Setup for servos
  for (int i = 0; i < numServos; i++) {
    servos[i].servo.attach(servos[i].pin);
    servos[i].servo.write(servos[i].openAngle);
  }

 // Define pin modes for ultrasonic
  pinMode(trigPin, OUTPUT); // Sets the trigPin as an Output
  pinMode(echoPin, INPUT); // Sets the echoPin as an Input
  // Setup for button and propeller
  pinMode(ledPin, OUTPUT);
  pinMode(buttonPin, INPUT);
  pinMode(enA, OUTPUT);
  pinMode(in1, OUTPUT);
  analogWrite(enA, 255); // Set propeller speed
  digitalWrite(in1, LOW); // Initially disable propeller
}

void loop() {
  unsigned long currentMillis = millis();
  // Darko - Switch
  // Improved button reading with debouncing
  int readButton = digitalRead(buttonPin);
  if (readButton != buttonState) {
    delay(50); // Debounce delay
    readButton = digitalRead(buttonPin);
    if (readButton == HIGH) {
      digitalWrite(ledPin, HIGH);
      digitalWrite(in1, HIGH); // Enable propeller
    } else {
      digitalWrite(ledPin, LOW);
      digitalWrite(in1, LOW); // Disable propeller
    }
    buttonState = readButton;
  }

  // Darko - Ultrasonic
  // Clear the trigPin condition
  digitalWrite(trigPin, LOW);
  delayMicroseconds(2);
  // Sets the trigPin HIGH (ACTIVE) for 10 microseconds
  digitalWrite(trigPin, HIGH);
  delayMicroseconds(10);
  digitalWrite(trigPin, LOW);
  
  // Reads the echoPin, returns the sound wave travel time in microseconds
  duration = pulseIn(echoPin, HIGH);
  
  // Calculating the distance
  distance = duration * 0.034 / 2; // Speed of sound wave divided by 2 (go and back)
  

  if(distance<=12){

  // Handling servo movements based on timing
  if (currentMillis - previousMillis >= noteDurations[currentNoteIndex]) {
    // Move to the next note
    if (noteSequence[currentNoteIndex] != 0) {
      // Release the previous servo, if any
      int prevNote = (currentNoteIndex == 0) ? -1 : noteSequence[currentNoteIndex - 1];
      if (prevNote != -1 && prevNote != 0) {
        servos[prevNote - 1].servo.write(servos[prevNote - 1].openAngle);
      }
      // Press the current servo
      int currentNote = noteSequence[currentNoteIndex];
      if (currentNote != 0) {
        servos[currentNote - 1].servo.write(servos[currentNote - 1].pressAngle);
      }
    } else {
      // Release all servos for open string
      for (int i = 0; i < numServos; i++) {
        servos[i].servo.write(servos[i].openAngle);
      }
    }

    previousMillis = currentMillis; // Update the last actuated time
    currentNoteIndex++;
    if (currentNoteIndex >= numNotes) {
      currentNoteIndex = 0; // Restart the sequence
    }
  }
  }
}


Pi : Week 11 Reading – The Feel Factor: Escaping the Flatland of Modern Interfaces

Whenever I do the Interactive Media reading assignments, I almost always disagree or criticize the author, or make fun of their claims. But this week will be different. Bret Victor is one of the only two people I idolized when I was a child and one day hope to be like. Whatever those two men (the childhood heroes) say, I will always agree with them 😉 .

I work in the field of haptics – the science of touch. My supervisor once explained that when a human uses a particular tool for long, he becomes too much accustomed to that tool. For example, think of the carpenters, painters, guitarists, etc.

This continues to the extent that the tool becomes a part of his body, and his means to sense the world.

But in order for that tool to become an extension of his body, the tool must give the user “good tangible feedback.” And that kind of feedback is something digital devices truly lack. Try using an actual ruler to measure the length of something… Now try measuring the same distance using the measurement app in the iPad, which is technically intricate, but very cumbersome to use. It just does not feel like a ruler.

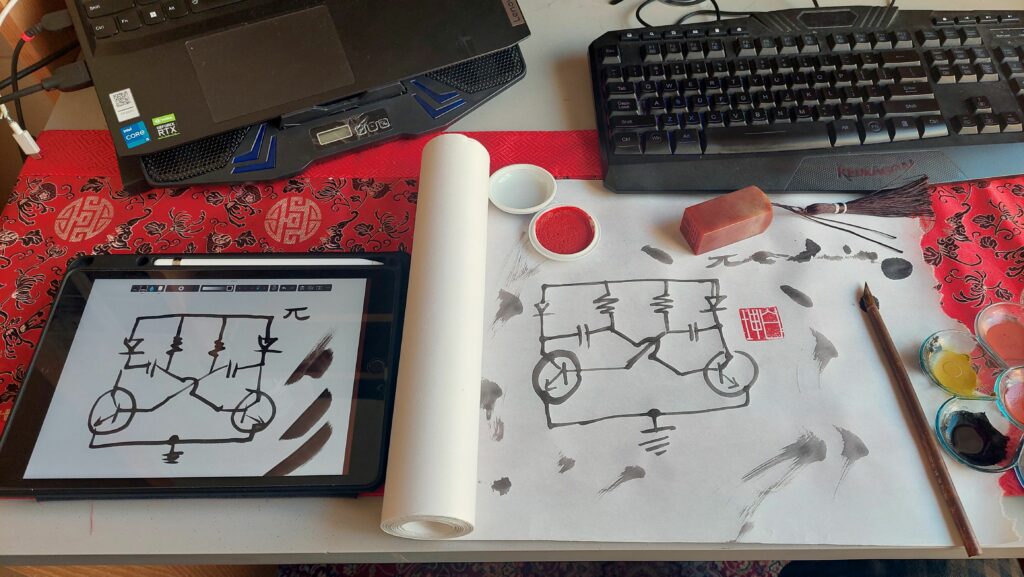
For one of my personal projects, I draw circuit diagrams with Chinese traditional ink on rice paper—to imagine an alternate universe, where electricity and the industrial revolution have started from the Orient.

In this project, I tried and evaluated two methods: the iPad method and the literal ink method. Somebody whose eyes are not trained will tell you that the results are nearly the same. Thu,  in reality, both methods work. However, for my artistic satisfaction, the iPad approach was a disaster. Though I am using a state of the art Chinese brush simulator, I could not feel the resistance of the paper, the ink was flowing, the brush was scratching the paper, and so on, ad infinitum.

The approach towards the iPad was simply soulless. Thus, Bret’s vision—or better said, his criticism on the lack of vision in the current design trends—had a deep echo with my experiences. “Our hands feel things and our hands manipulate things. Why shoot for anything less than a dynamic medium that we can see, feel, and manipulate?” This should be written on the wall of each tech company urging to birth the next iteration of soulless gadgets into existence.

No manner of me waving a stylus around is going to recreate the sensory feedback of ink travelling down to paper through my ink brush.

In short, the iPad stylus will never become an extension to my body, like the real paintbrush does.

“Hands feel things, and hands manipulate things,” Bret points out ; I couldn’t but smile to see that most modern designs spectacularly reject this in a fashion way over the top.

I really love Bret’s equivalent of the whole “Pictures Under Glass” idea to how utterly ridiculous it would have been if someone had once said, “black-and-white is the future of photography.”

In conclusion, Bret’s rant isn’t just a criticism; it’s a roadmap for future innovators.

Bret did not give us a solution, but a question to ponder. This question alone should challenge us to look for something beyond the conventional in thinking about how we make our interactions with technology as instinctive as moving our limbs, as natural as using your hands.

Week 10: Analog/Digital – Guess Who’s Murderer (Pi)

Let’s look at what I need to do…

(Post documentation on blog): Get information from at least one analog sensor and at least one digital sensor (switch), and use this information to control at least two LEDs, one in a digital fashion and the other in an analog fashion, in some creative way.

Hmm… so I can do something along the lines of

  • Ultrasonic Sensor (Analog)
  • Switch (is a requirement)
  • 4 LEDs (3 controlled by digitalWrite, and one fade In/Out through analog PWM)

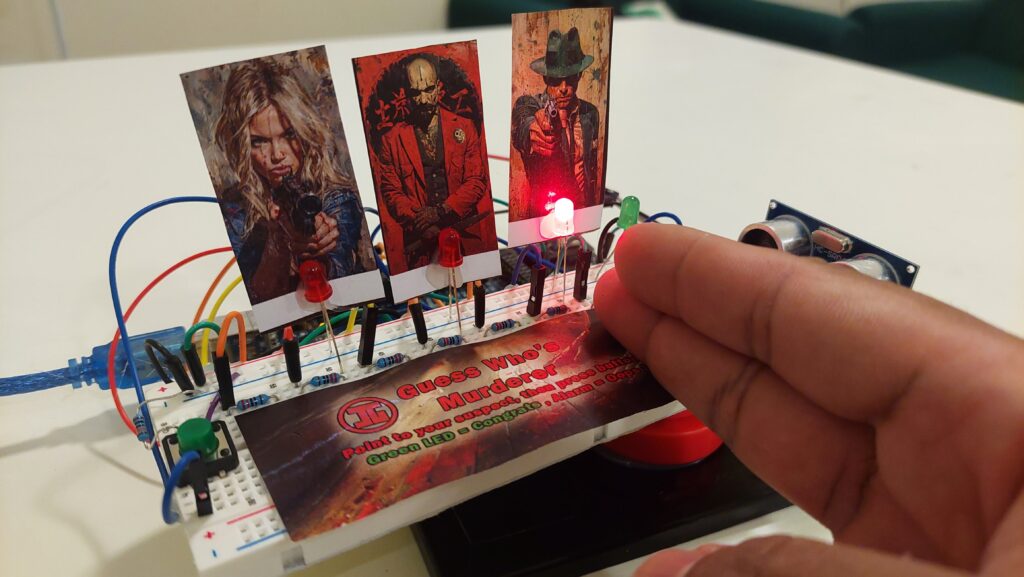
In some creative way?? Hmm, how about we turn the entire project into a detective game, where you have to guess the murderer by pointing at one of the 3 suspects, then Arduino will tell you whether you got it right or wrong.

Guess Who’s Murderer

Hence, my project…

The player step into the shoes of a cunning detective, whose aim is to unravel the identity of the true culprit among the Crimson Enigma, the Emerald Marksman, and the Honey Hitwoman.

Using their hand, the player must point to one of the suspects. An ultrasonic sensor, detects the location of the player’s hand, illuminating the corresponding LED to indicate their suspicion.

To make their guess official, the player presses a pushbutton. If the guess is correct, a green LED softly fades in and out. However, if the player points their accusatory finger at the wrong suspect, the game’s buzzer sounds.

The demo video is below.

Art

All artworks are generated with midjourney… and some photoshop thrown in.

CODE

The code is below. Note that I am implementing a entire thing as a state machine, where the game alternates between the

{ SELECT_MURDERER, GUESS, CORRECT_GUESS, WRONG_GUESS }

states. This makes the code clean. The microcontroller randomly selects the murderer using a random number generation algorithm, which is triggered at the start of each new game loop.

// Pin Definitions
const int buttonPin = 12;   // Pushbutton pin
const int buzzerPin = 7;    // Buzzer pin
const int greenLedPin = 44; // Green LED pin
const int redLedPins[] = {3, 6, 10}; // Red LEDs for murderer selection
const int trigPin = 2;      // Ultrasonic sensor trigger pin
const int echoPin = 4;      // Ultrasonic sensor echo pin

// Game state definitions
enum GameState { SELECT_MURDERER, GUESS, CORRECT_GUESS, WRONG_GUESS };
GameState currentState;

// Variables for game logic
int murderer = 0;
int guess = -1;
int buttonState = 0;
int lastButtonState = LOW;
unsigned long previousMillis = 0; // for non-blocking delays

void setup() {
  Serial.begin(9600);
  pinMode(buttonPin, INPUT);
  pinMode(buzzerPin, OUTPUT);
  pinMode(greenLedPin, OUTPUT);
  for (int i = 0; i < 3; i++) {
    pinMode(redLedPins[i], OUTPUT);
  }
  pinMode(trigPin, OUTPUT);
  pinMode(echoPin, INPUT);
  randomSeed(analogRead(0));
  currentState = SELECT_MURDERER;
}

void loop() {
  switch (currentState) {
    case SELECT_MURDERER:
      selectMurderer();
      break;
    case GUESS:
      manageGuess();
      break;
    case CORRECT_GUESS:
      handleCorrectGuess();
      break;
    case WRONG_GUESS:
      handleWrongGuess();
      break;
  }
}

void selectMurderer() {
  murderer = random(0, 3); // Randomly select a murderer among 3 LEDs
  Serial.print("Murderer is: LED ");
  Serial.println(murderer);
  currentState = GUESS;
}

void manageGuess() {
  lightRedLEDsBasedOnDistance();
  readButtonState();
  if (buttonState == HIGH && lastButtonState == LOW) {
    Serial.println("Button Pressed");
    checkGuess();
  } else if (buttonState == LOW && lastButtonState == HIGH) {
    Serial.println("Button Released");
  }
  lastButtonState = buttonState;
}

void lightRedLEDsBasedOnDistance() {
  long distance = measureDistance();
  Serial.print("Distance: ");
  Serial.print(distance);
  Serial.println(" cm");
  for (int i = 0; i < 3; i++) {
    digitalWrite(redLedPins[i], LOW);
  }
  if (distance >= 2 && distance < 6) {
    digitalWrite(redLedPins[0], HIGH);
    guess = 0;
  } else if (distance >= 6 && distance < 9) {
    digitalWrite(redLedPins[1], HIGH);
    guess = 1;
  } else if (distance >= 9 && distance <= 12) {
    digitalWrite(redLedPins[2], HIGH);
    guess = 2;
  }
}

void readButtonState() {
  buttonState = digitalRead(buttonPin);
}

void checkGuess() {
  if (guess == murderer) {
    currentState = CORRECT_GUESS;
  } else {
    currentState = WRONG_GUESS;
  }
}

void handleCorrectGuess() {
  fadeGreenLED();  // Handles the fading of the LED over 4 seconds
  currentState = SELECT_MURDERER;
}

void handleWrongGuess() {
  buzzBuzzer(3);   // Buzzes the buzzer 3 times
  currentState = SELECT_MURDERER;
}

void fadeGreenLED() {
  for (int i = 0; i <= 255; i += 5) {
    analogWrite(greenLedPin, i);
    delay(30);
  }
  for (int i = 255; i >= 0; i -= 5) {
    analogWrite(greenLedPin, i);
    delay(30);
  }
}

void buzzBuzzer(int count) {
  for (int i = 0; i < count; i++) {
    digitalWrite(buzzerPin, HIGH);
    delay(300);
    digitalWrite(buzzerPin, LOW);
    delay(300);
  }
}

long measureDistance() {
  digitalWrite(trigPin, LOW);
  delayMicroseconds(2);
  digitalWrite(trigPin, HIGH);
  delayMicroseconds(10);
  digitalWrite(trigPin, LOW);
  long duration = pulseIn(echoPin, HIGH);
  return duration * 0.034 / 2;  // Calculate distance in cm
}

Pi : Week 10 Reading – Aliens, Tom Igoe and converting Monologues to Dialogues

Aliens

I’ve always had this theory that if aliens ever visited Earth 👽, they’d mistake our art galleries for some silent, sacred worship spaces. I mean, where else will you find humans voluntarily hushed, tiptoeing about like they’re scared of disturbing the air itself?

Then I read the article by Tom Igoe, “Making Interactive Art: Set the Stage, Then Shut Up and Listen,” and it actually made me totally reconsider my previously formed opinion but from another point of view. Maybe our future cosmic friends would understand that in the quietude of an art space, there’s a loud, unspoken conversation between human and creation. And that’s precisely what Igoe is advocating for – an unscripted, raw dialogue where the artwork doesn’t just speak but listens too.

In “Making Interactive Art: Set the Stage, Then Shut Up and Listen,” Igoe takes a poke at would-be über-ambitious creators who helicopter-parent their creations. I can’t help smiling at his blunt advice not to interpret your own work.

It sounds very much as if one would tell a parent, “Yeah, you gave birth to it, but don’t you dare tell it what to be!” 😂

What an interesting notion, as I have to do the complete opposite more often than not in my professional life as a computer engineer: spoon-feeding users about what to do with my creation. I once preached in the IM class on exactly that, remember? “If an app needs a manual, you’ve done it wrong.” Yes. That point Tom made about the art being “a conversation,” not a monologue, is a beauty. You don’t dictate; you just help guide the process.

Now, moving on to “Physical Computing’s Greatest Hits (and misses),” it was really hard not to chuckle at the analogy Igoe is trying to make of evergreen themes of projects and how they could be recycled.

It’s like that old joke about there being only seven original plots  in all of literature 😂 (Yes, there are only seven types of stories in the world, according to some) . Sure, we’ve seen a hundred theremin-like instruments or video mirrors, but it’s the individual spin—that touch of personal madness—that makes them fresh and edgy. It’s like cooking; the same stuff can come up with many different flavors. And, as a computer engineer, I’ve seen too many cliché tech implementations. This idea is literally a breath of fresh air.

What really floats my boat, and tickles my pickles in this article is that Igoe gives a subtle nod toward the creative process.Even in the most clichéd themes, there’s a window for innovation. This is somewhat comforting, especially when one has to look at yet another “innovative” app idea that feels like déjà vu. This makes me think that maybe it’s not what you build but how you spin it.

In both articles, Igoe offers insightful perspectives on art and interactivity that echo many of my own beliefs. As creators, our job is not to impose but to propose. We set the stage, provide the tools, and in the most beautiful act of humility, we step back and let the symphony of interaction play. In that symphony is learning, growth—a perennial scope of innovation. Time to make more systems, in art and technology, that don’t just talk at us, but with us.

Because the best kind of conversation isn’t the one in which you’re the only one speaking.