Final Project: Whack-A-Note

Concept:

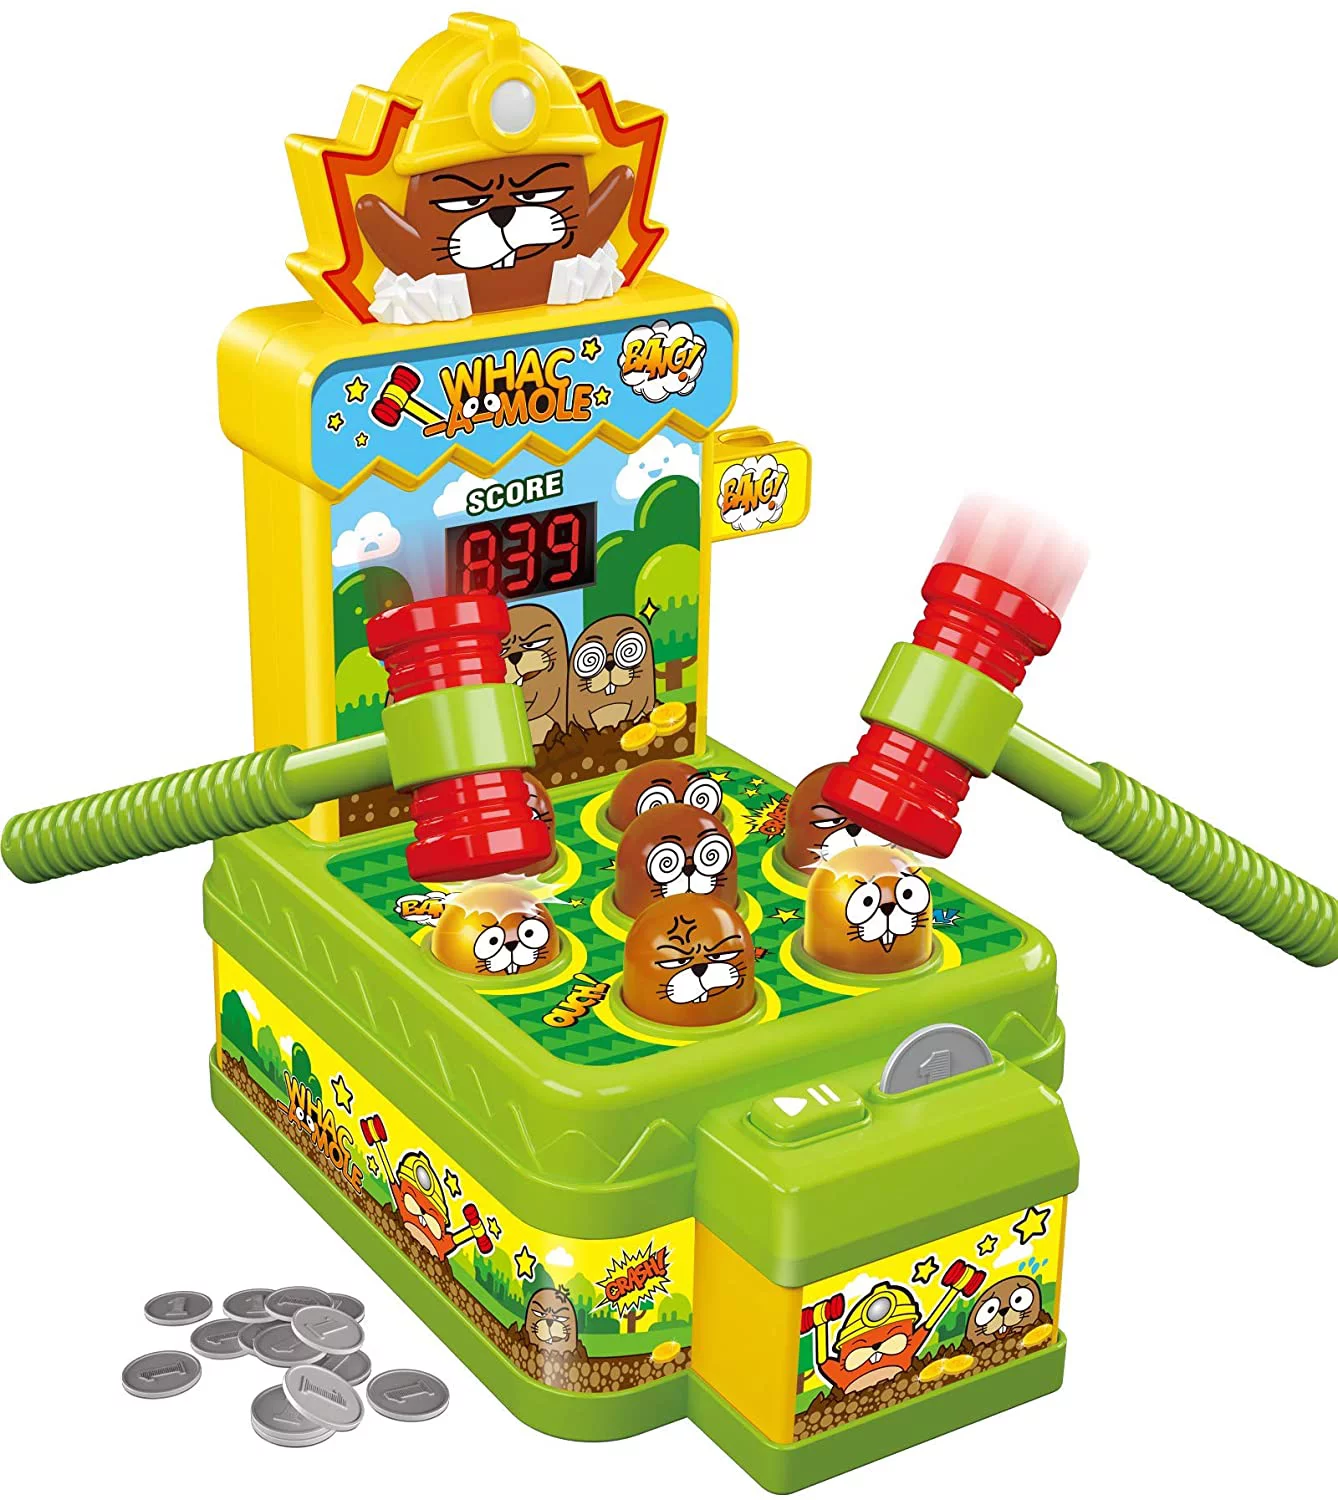
My project is a whack-a-mole game with a rhythm game element where users have to hit the mole at a specific time when a mole’s shadow(a node) aligns with the mole. Users, while the song is playing, must hit the mole whenever the shadow of it

Implementation:

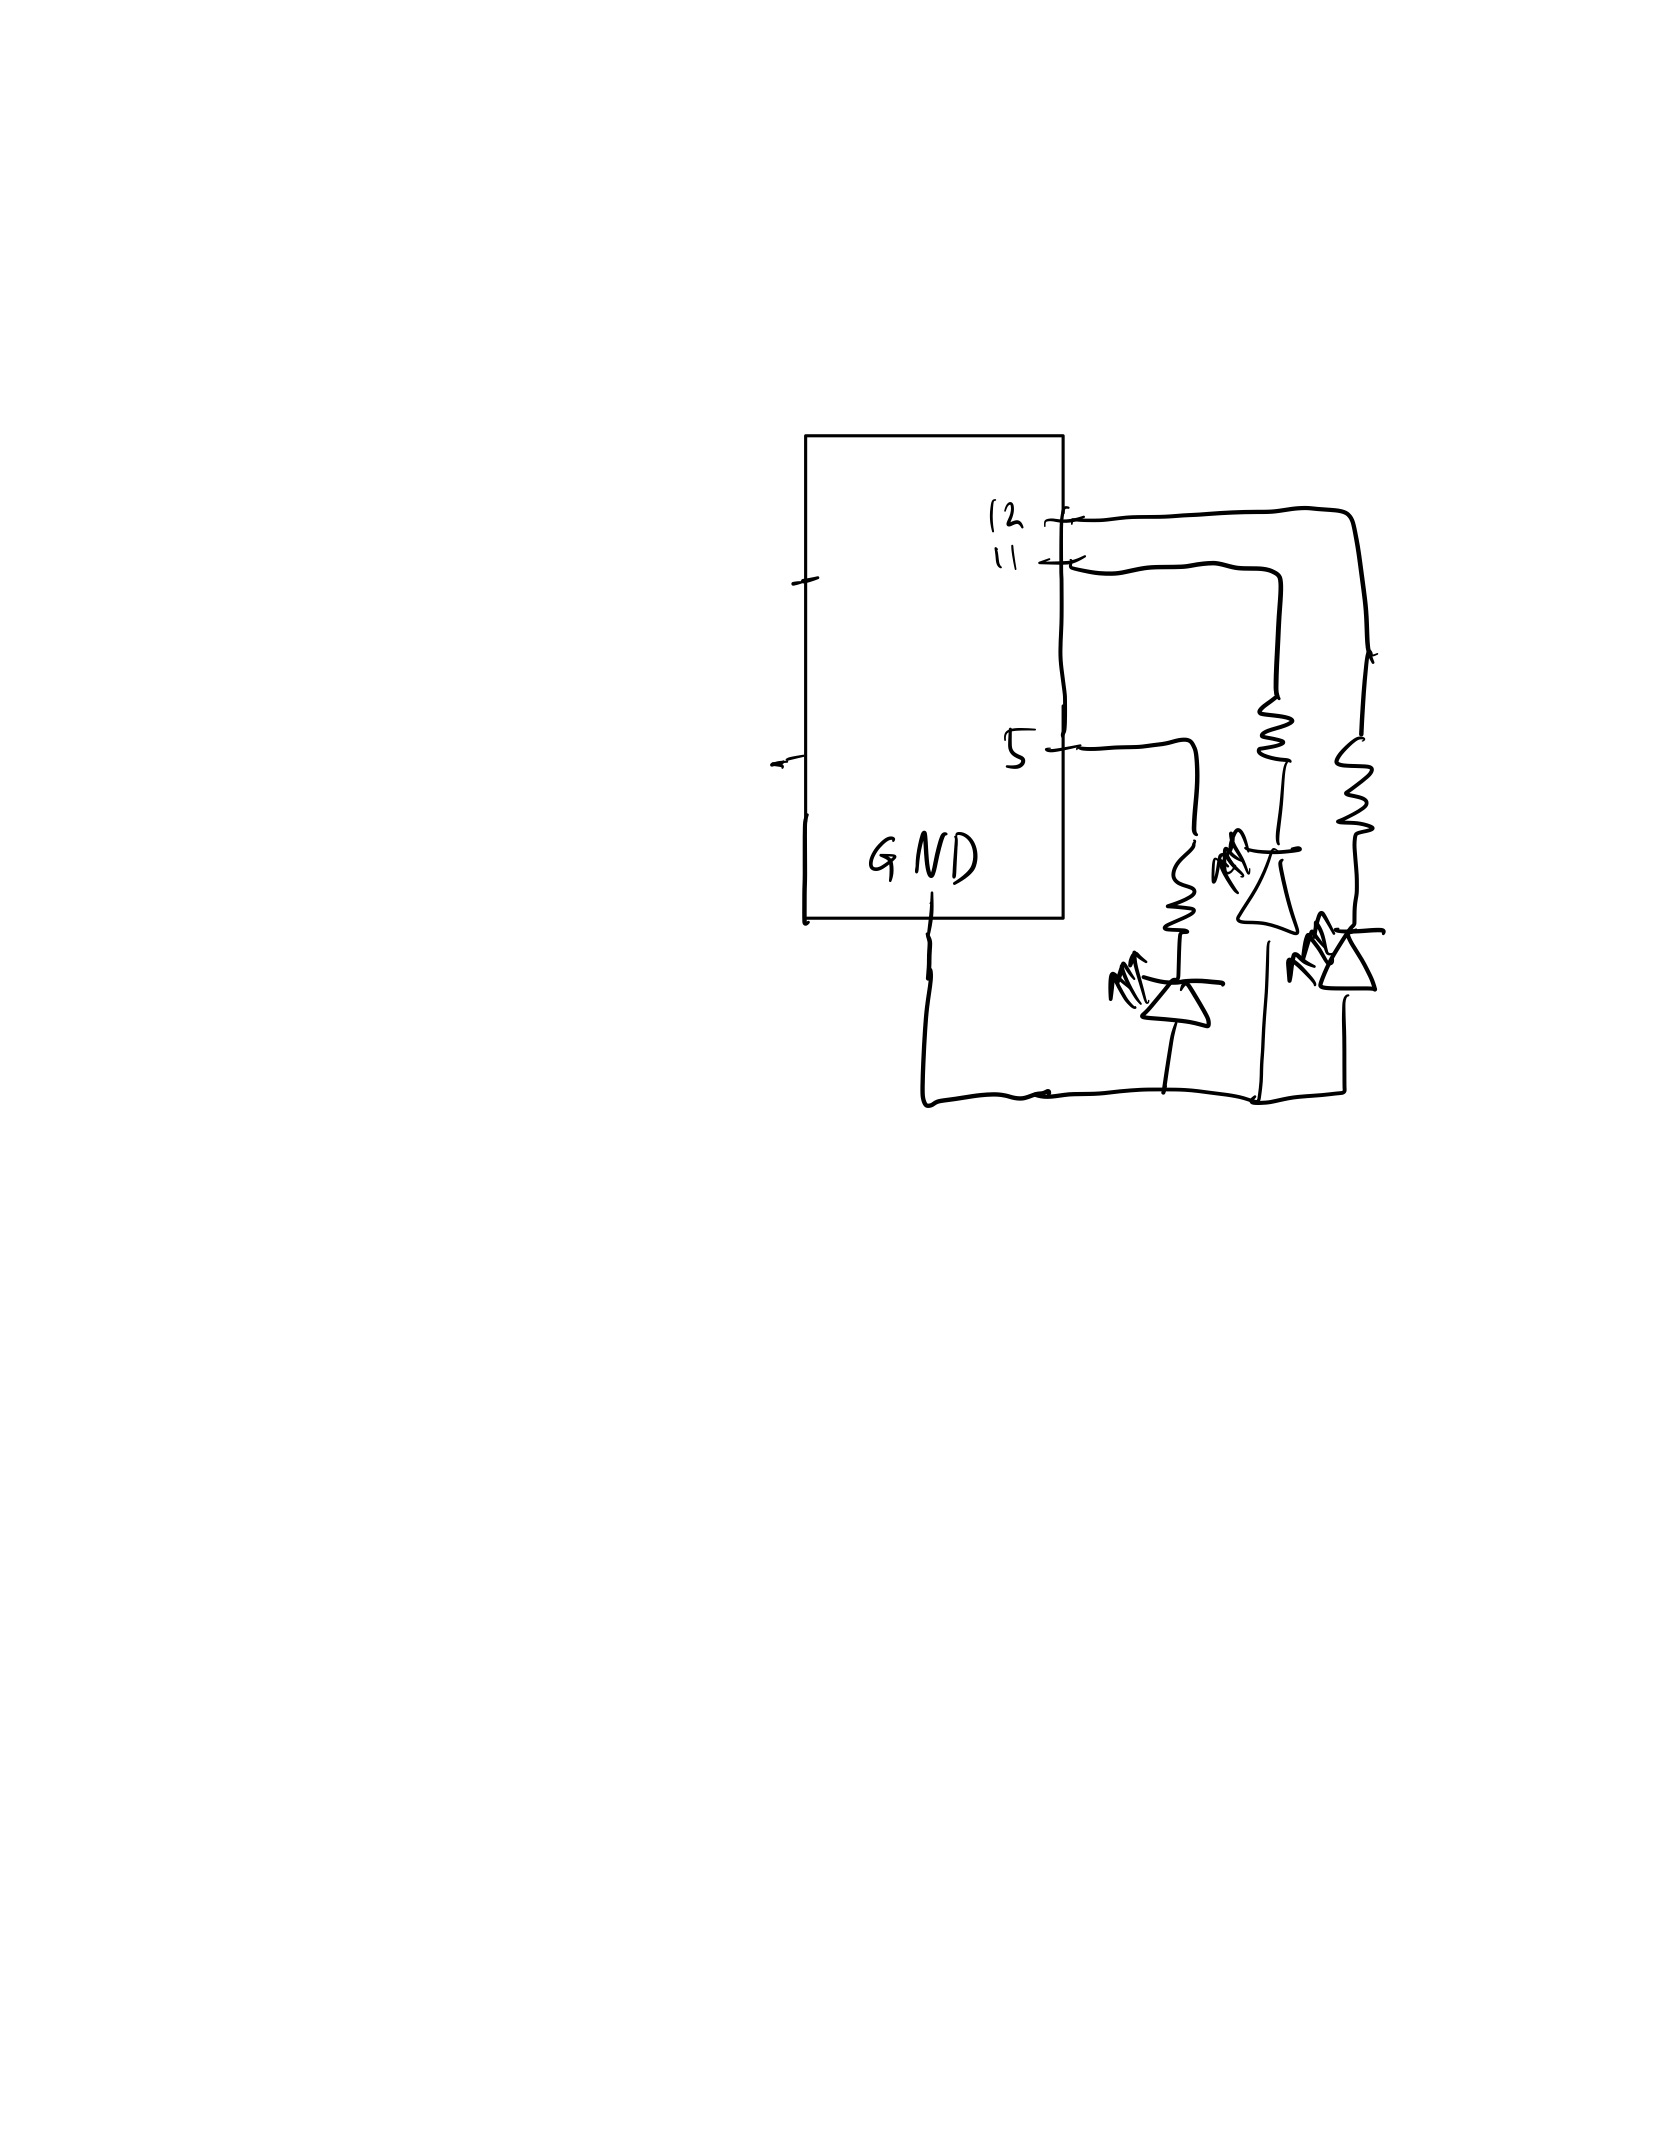
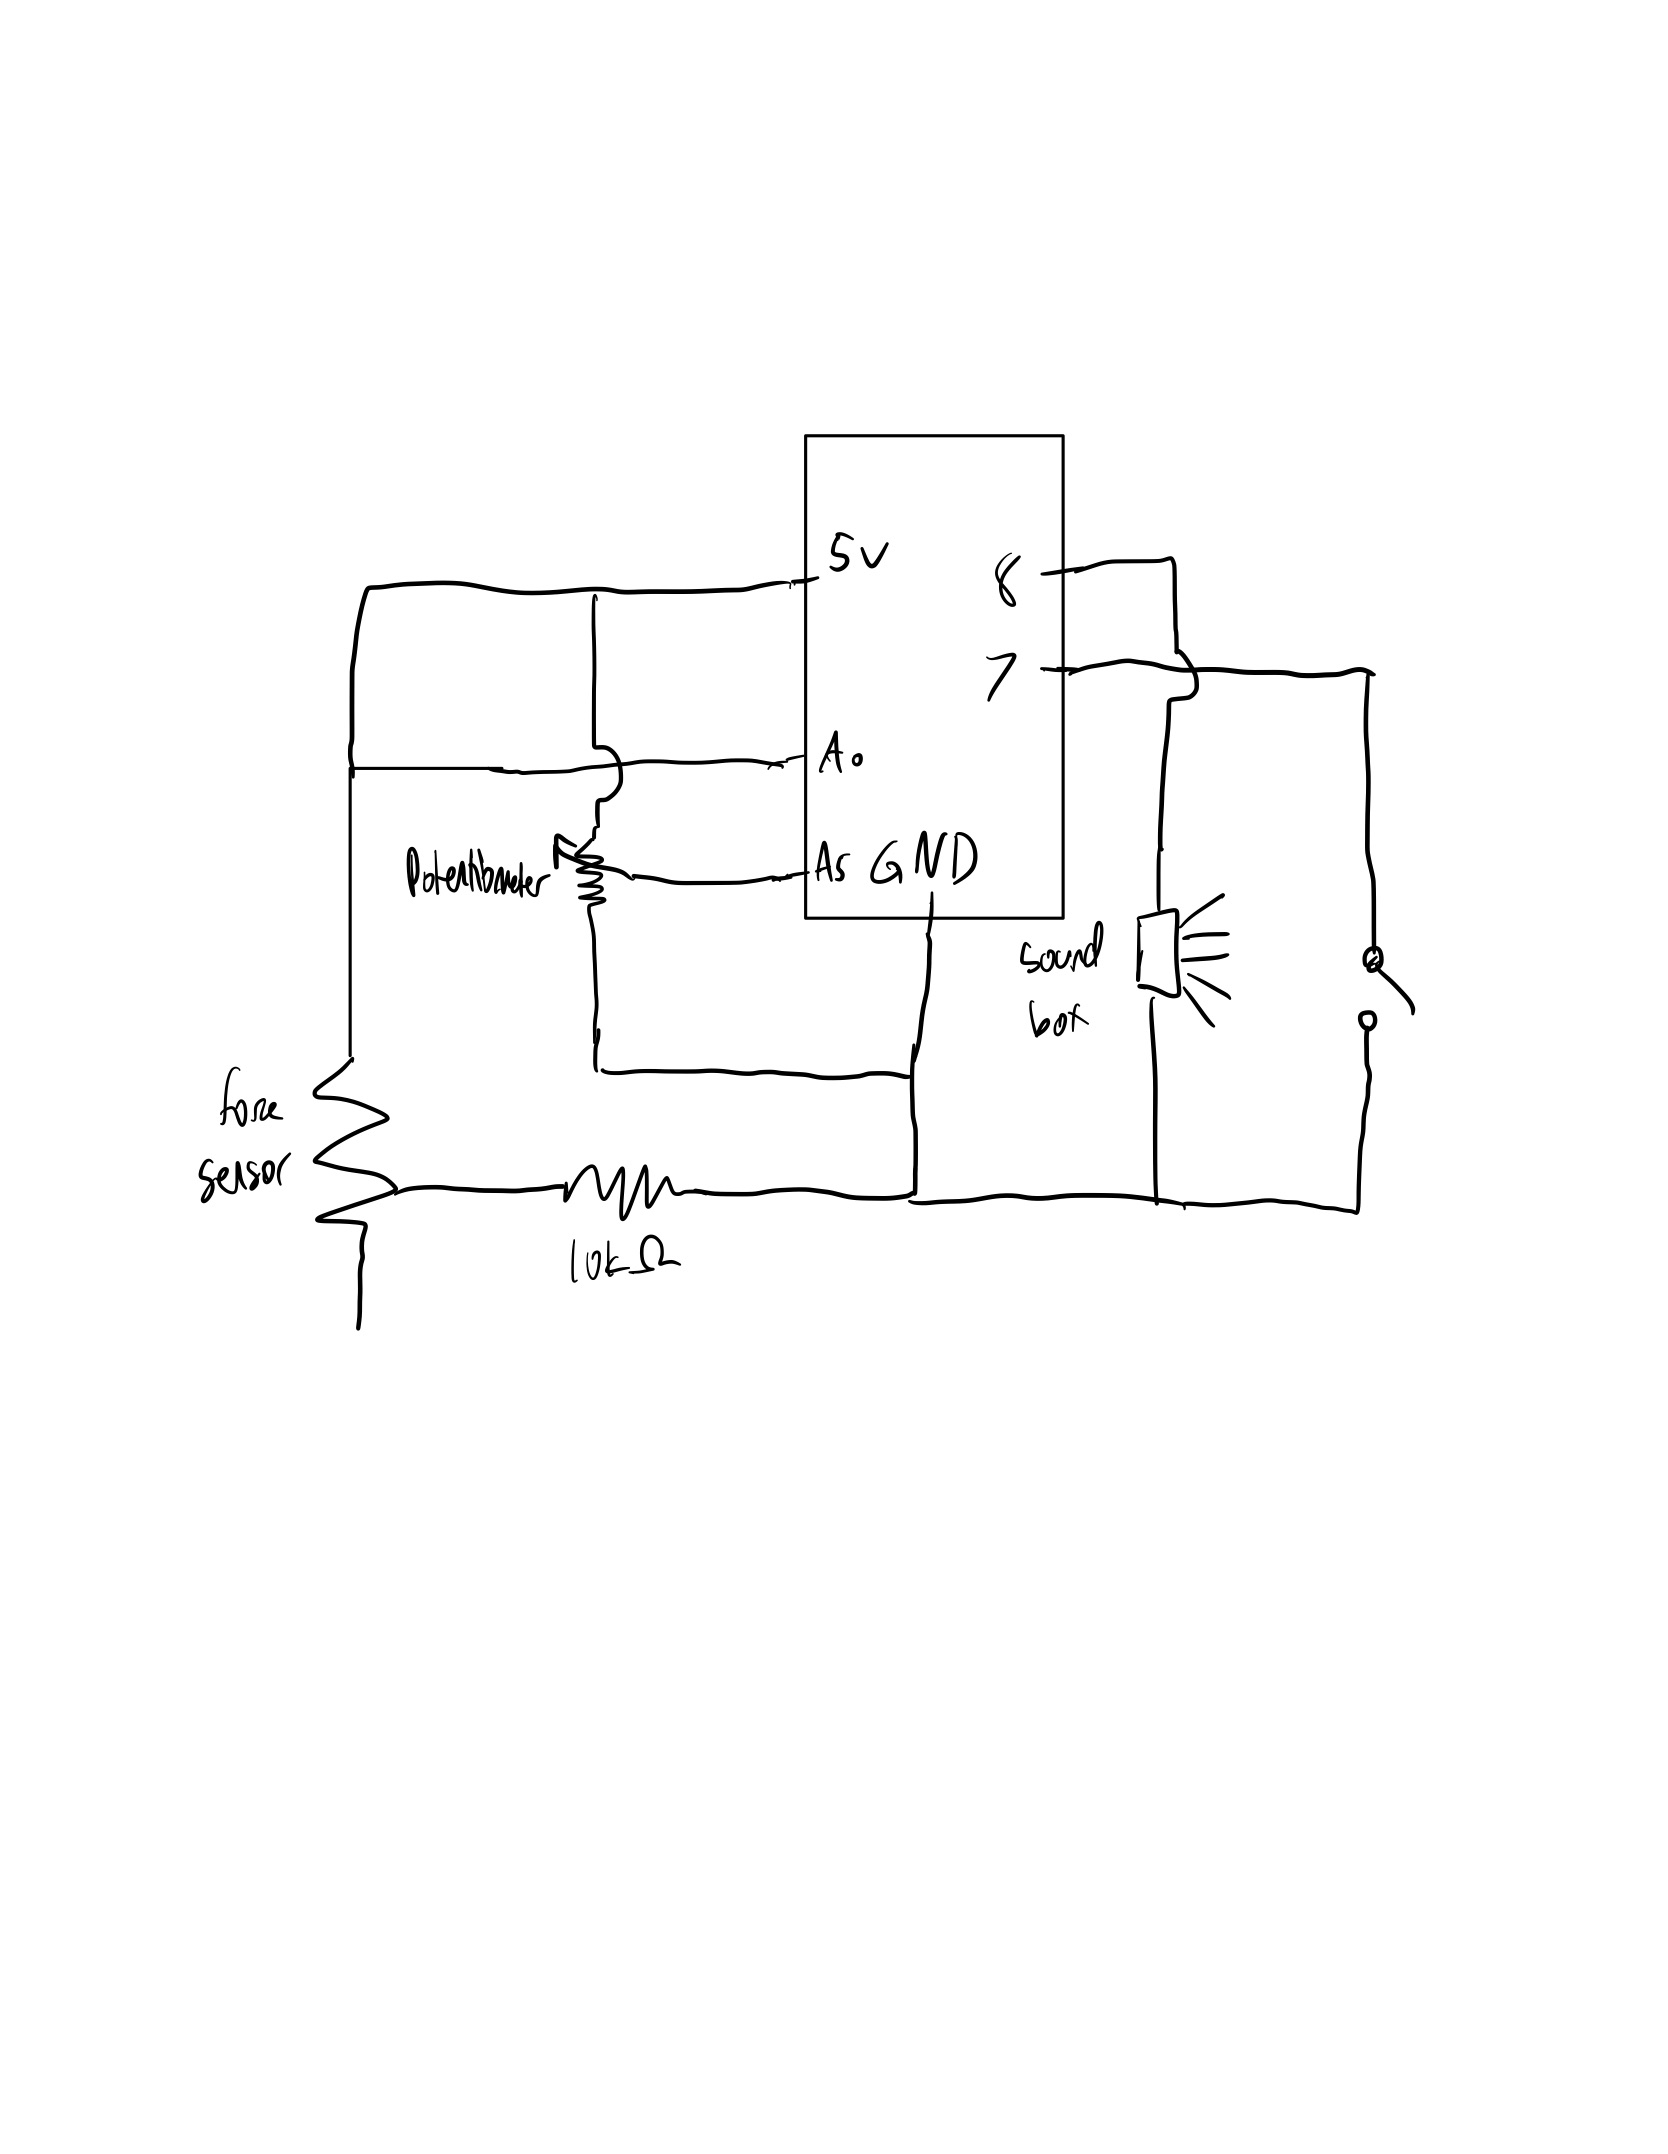
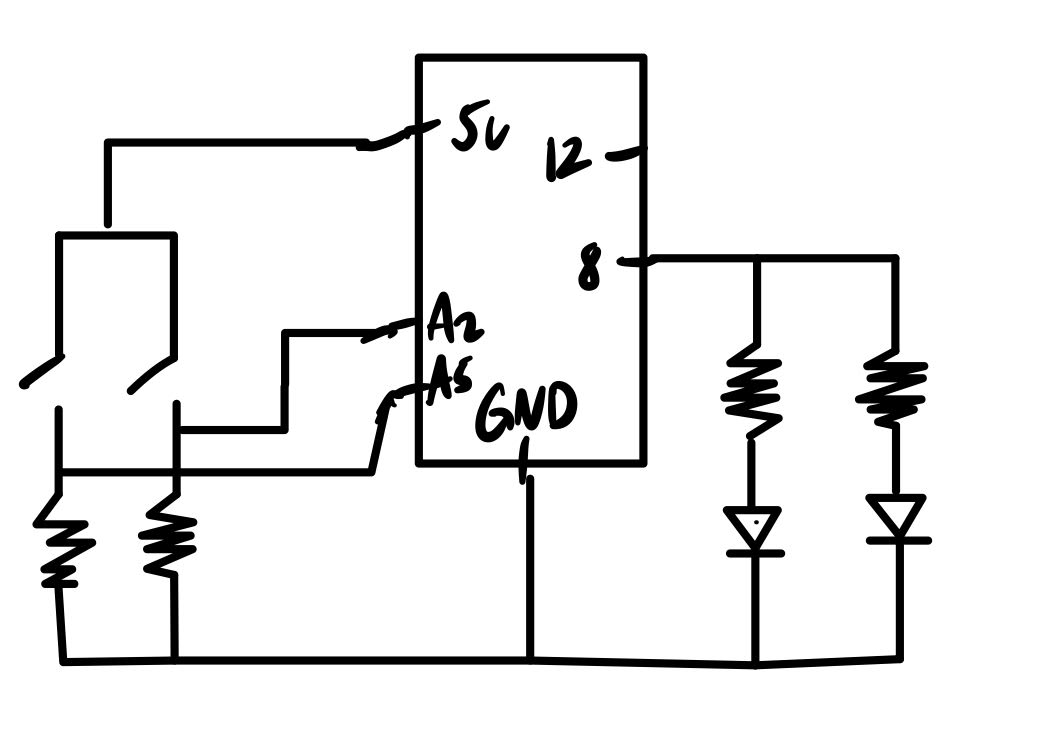
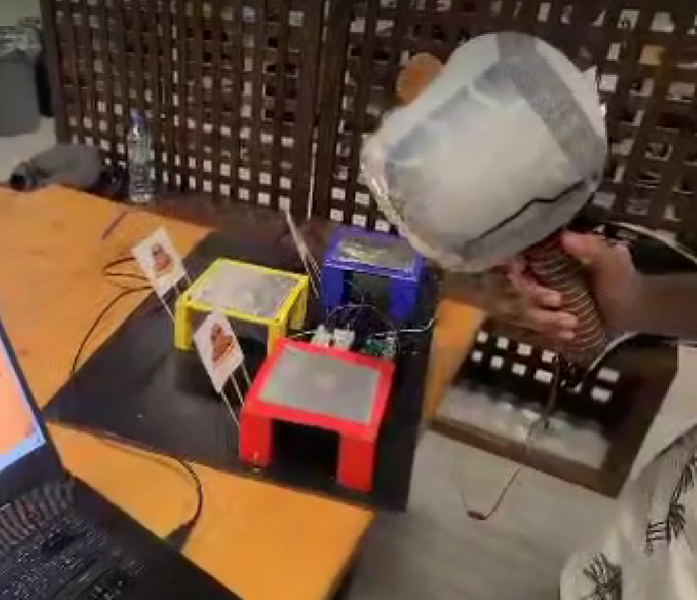
My hardware part of the project is basically a giant system of three switches. Each wire of the circuit connected to its respective digital inputs are attached to an tin foil and left as an uncompleted circuit. The circuit is only closed when the hammer, connected to power, hits the tin foil and completes the circuit, sending a HIGH signal through the digital input. In the UI, the p5 reads a music score and randomly generates nodes related to the notes and rhythm and creates an array. Each node in that array will move towards the designated hit zone, and if the node is aligned with the hit zone, then users can connect the physical circuit to send the signal that the mole was whacked. If the correct mole was whacked, then the user will win points, but if mole was not whacked or the incorrect mole was whacked, then users will lose points. Each song has its specific array of nodes, so the users can achieve a certain max score, and if the user loses more than -1000 points, then the game will be over.

Codes:

-p5js

let musicOne;
let musicTwo;
let musicThree;
let noteImg;
let bg;
let title;
let gameOverSign;
let moleSize = 100;
let shadowImg = [];
let moleImg;
let musicDelay = [4.8, 3.3, 5];
let gameOver = false;
let musicArr = [];
let mole = [];
let colorMole = ["red", "yellow","blue"];
let hit = false;
let score = 0;
let noteArr = [];
let shadowsArr = []
let hitArr = [0, 0, 0];
let firstrun = true;
let startGame = false;
let choice;


function preload(){
  bg = loadImage('bg.png');
  moleImg = loadImage("download.png");
  shadowImg[0] = loadImage("shadowRed.png");
  shadowImg[1] = loadImage("shadowYellow.png");
  shadowImg[2] = loadImage("shadowBlue.png"); 
  shadowImg[3] = loadImage("download.png");
  noteImg = loadImage("note.png");
  gameOverSign = loadImage("gameOver.png")
  title = loadImage("title.png")
  
  musicOne = loadSound("starWars.mp3");
  musicTwo = loadSound("zelda.mp3");
  musicThree = loadSound("canon.mp3");
  
  musicArr.push(musicOne);
  musicArr.push(musicTwo);
  musicArr.push(musicThree);
}

function setup() {
  createCanvas(windowWidth, windowHeight);
  textFont("Comic Sans MS");
  textSize(20);
}

function windowResized() {
  resizeCanvas(windowWidth, windowHeight);
}

function draw() {
  //background image of the game
  //choose a song to play
  background(bg);
  if(!startGame){
    image(title, (windowWidth/2) - windowWidth/16 * 7, (windowHeight/4) - windowHeight/8, windowWidth/8 * 7, windowHeight/3 * 2);
    let stringOne = "Star Wars Theme";
    let stringTwo = "Zelda Theme";
    let stringThree = "Canon";
    fill("white");
    text(stringOne, (windowWidth/4) - (textWidth(stringOne)/2), (windowHeight/18) * 11);
    text(stringTwo, (windowWidth/2) - (textWidth(stringTwo)/2), (windowHeight/18) * 11);
    text(stringThree, (windowWidth/4) * 3 - (textWidth(stringThree)/2), (windowHeight/18) * 11);
    
    image(noteImg, (windowWidth/4) - 55, (windowHeight/10) * 7, 100, 100)
    image(noteImg, (windowWidth/2) - 55, (windowHeight/10) * 7, 100, 100)
    image(noteImg, (windowWidth/4) * 3 - 55, (windowHeight/10) * 7, 100, 100)
  }
  else{
    displayGame();
  }
}

function displayGame(){
  if (!serialActive) {
    text("Press Z to select Serial Port", 20, 30);
  }
  else{
    if(!musicArr[choice].isPlaying() && firstRun){
      musicArr[choice].play(musicDelay[choice]);
      firstRun = false;
    }
    
    if(shadowsArr.length > 0 && score > -1000){
      if(gameOver){
        gameOver = false;
      }
      for(let i = 0; i < 3; i++){
        mole[i].display();
      }
      
      strokeWeight(5);
      
      //setLineDash([5, 10, 30, 10]);
      //line(100, 0, 100, windowHeight);
      text("Score: " + score, windowWidth/5 * 4, windowHeight/40 * 3);
      for(let i = 0; i < shadowsArr.length; i++){
        shadowsArr[i].display();
      }
      //console.log(shadowsArr.length)
    }
    else{
      fill("white");
      musicArr[choice].stop();
      firstRun = false;
      let scoreText = "Score: " + score;
      image(gameOverSign, windowWidth/2 - windowWidth/16 * 5, windowHeight/4 - windowWidth/16 * 2, windowWidth/8 * 5, windowWidth/8 * 3);
      let longText = "Press R to Play Again!";
      //text(shortText, 200 - textWidth(shortText)/2, 100);
      text(longText, windowWidth/2 - textWidth(longText)/2, windowHeight/8 * 7)
      text(scoreText, windowWidth/2 - textWidth(scoreText)/2, windowHeight/4 * 3);
      for(let i = 0; i < shadowsArr.length; i++){
        shadowsArr.splice(i,1);
      }
      gameOver = true;
    }
  }
  
  
  killShadow();

}

function keyPressed(){
  if (keyCode == 90) {
    setUpSerial();
  }
  if (keyCode == 82){
    if(gameOver == true){
      startGame = false;
      score = 0;
    }
  }
  if (keyCode == 70) {
    toggleFullscreen();
  }
}

function readSerial(data) {
  if (data != null) {
    let fromArduino = split(trim(data), ",");
    if (fromArduino.length == 3) {
      for(let i = 0; i < 3; i++){
        hitArr[i] = int(fromArduino[i]);
      }
    }
  }
}


function killShadow(){
  for(let i = 0; i < shadowsArr.length; i++){
    if(shadowsArr[i].x < 40){
      shadowsArr.splice(i, 1);
      score -= 100; 
    }
  }
}

class shadow{
  constructor(x, y){
    this.x = x;
    this.y = (windowHeight/4) * y;
    this.id = y;
    this.hitVal = false;
  }
  
  display(){
    fill("white");
    if(this.x > 50){
      image(shadowImg[this.id - 1], this.x - moleSize/2, this.y - moleSize/2, moleSize, moleSize);
      if(this.x <100){
        this.hitVal = true;
        image(shadowImg[3], this.x - moleSize/2, this.y - moleSize/2, moleSize, moleSize);
      }
      
    }
    this.x -= 2;
  }
}

class Mole{
  constructor(y){
    this.x = 50;
    this.y = (windowHeight/4) * y;
    this.id = y;
  }
  
  search(){
    if(shadowsArr[0].hitVal == true && shadowsArr[0].id == this.id)
      return true;
    else
      return false;
  }
  
  checkHit(){
    if(hitArr[this.id - 1] == 1){
      if(this.search()){
        score += 100;
        hitArr[this.id - 1] = 0;
        shadowsArr.splice(0, 1);
      }
      else{
        score -= 100;
        hitArr[this.id - 1] = 0;
      }
    }
  }
  
  display(){
    if(!gameOver){
      //image(moleImg, this.x - moleSize/2, this.y - moleSize/2, moleSize, moleSize);
      setLineDash[0];
      fill("black")
      ellipse(this.x, this.y + 20, 70, 40)
    }
    this.checkHit();
  }
}

function mouseClicked(){
  if(!startGame){
    for(let i = 1; i < 4; i++){
      mole.push(new Mole(i));
    }
    if(mouseY > (windowHeight/10) * 7 && mouseY < (windowHeight/10) * 7 + 100){
      if(mouseX > (windowWidth/4) - 55 && mouseX < (windowWidth/4) + 55){
        choice = 0;
        loadNotes(choice);
        startGame = true;
      }
      else if(mouseX > (windowWidth/2) - 55 && mouseX < (windowWidth/2) + 55){
        choice = 1;
        loadNotes(choice);
        startGame = true;
      }
      else if(mouseX > (windowWidth/4) * 3 - 55 && mouseX < (windowWidth/4) * 3 + 55){
        choice = 2;
        loadNotes(choice);
        startGame = true;
      }
    }
  }
}

function loadNotes(x){
  let xCo = windowWidth; 
  firstRun = true;
  let datas = [];
  let notes = [];
  let rhythm = [];
  if(x == 0){
    datas = data1;
  }
  if(x == 1){
    datas = data2;
  }
  if(x == 2){
    datas = data3;
  }
  for(let i = 0; i < datas.length; i++){
    if(i % 2 == 0){
      let temp = 0;
      for(let j = 0; j < datas[i].length; j++){
        temp += datas[i].charCodeAt(j);
      }
      temp = (temp % 3) + 1;
      notes.push(temp);
    }
    else{
      if(datas[i] > 0){
        rhythm.push(datas[i] * 20);
      }
      else{
        rhythm.push(datas[i] * 15);
      }
    }
  }
  
  for(let i = 0; i < notes.length; i++){
    shadowsArr.push(new shadow(xCo, notes[i]));
    xCo += rhythm[i];
  }
}

function toggleFullscreen() {
  let fs = fullscreen(); // Get the current state
  fullscreen(!fs); // Flip it!
}

function setLineDash(list) {
  drawingContext.setLineDash(list);
}


-arduino

int lastButton1State = LOW;
int lastButton2State = LOW;
int lastButton3State = LOW;

int buttonState1;
int buttonState2;
int buttonState3;

unsigned long lastDebounceTime1 = 0;
unsigned long lastDebounceTime2 = 0;
unsigned long lastDebounceTime3 = 0;
unsigned long debounceDelay = 20;


void setup() {
  Serial.begin(57600);
  pinMode(10, INPUT);
  pinMode(9, INPUT);
  pinMode(8, INPUT);
}

void loop() {

  int readingOne = digitalRead(10);
  int readingTwo = digitalRead(9);
  int readingThree = digitalRead(8);

  // check to see if you just pressed the button
  // (i.e. the input went from LOW to HIGH), and you've waited long enough
  // since the last press to ignore any noise:

  // If the switch changed, due to noise or pressing:
  if (readingOne != lastButton1State) {
    // reset the debouncing timer
    lastDebounceTime1 = millis();
  }
  if (readingTwo != lastButton2State) {
    // reset the debouncing timer
    lastDebounceTime2 = millis();
  }
  if (readingThree != lastButton3State) {
    // reset the debouncing timer
    lastDebounceTime3 = millis();
  }

  if ((millis() - lastDebounceTime1) > debounceDelay) {
    // whatever the reading is at, it's been there for longer than the debounce
    // delay, so take it as the actual current state:

    // if the button state has changed:
    if (readingOne != buttonState1) {
      buttonState1 = readingOne;

      // only toggle the LED if the new button state is HIGH
      if (buttonState1 == HIGH) {
        Serial.print(readingOne);
        Serial.print(",");
        Serial.print(readingTwo);
        Serial.print(",");
        Serial.println(readingThree);
      }
    }
    
  }

  if ((millis() - lastDebounceTime2) > debounceDelay) {
    // whatever the reading is at, it's been there for longer than the debounce
    // delay, so take it as the actual current state:

    // if the button state has changed:
    if (readingTwo != buttonState2) {
      buttonState2 = readingTwo;

      // only toggle the LED if the new button state is HIGH
      if (buttonState2 == HIGH) {
        Serial.print(readingOne);
        Serial.print(",");
        Serial.print(readingTwo);
        Serial.print(",");
        Serial.println(readingThree);
      }
    }
    
  }

  if ((millis() - lastDebounceTime3) > debounceDelay) {
    // whatever the reading is at, it's been there for longer than the debounce
    // delay, so take it as the actual current state:

    // if the button state has changed:
    if (readingThree != buttonState3) {
      buttonState3 = readingThree;

      // only toggle the LED if the new button state is HIGH
      if (buttonState3 == HIGH) {
        Serial.print(readingOne);
        Serial.print(",");
        Serial.print(readingTwo);
        Serial.print(",");
        Serial.println(readingThree);
      }
    }
    
  }
  lastButton1State = readingOne;
  lastButton2State = readingTwo;
  lastButton3State = readingThree;
}


Communication:

Whenever the user whacks a mole, the arduino, through serial communication, sends an array with three elements. In that array, the element with the array position that correlates to the mole number that was hit will be 1 and the rest that wasn’t hit will be 0. P5, constantly reading for this data, will take the data and update the targetHit array which will contain exactly that same data from arduino. When a shadow note reaches the designated hit zone, the mole instance will automatically check for the targetHit array and if the targetHit array matches the the id of the shadow mole, then the user will score a point. If the targetHit array does not match the id, then the user will lose a point. If the targetHit array was not updated at all, then p5 will recognize that the user didn’t hit any moles and user will lose a point. The communication from p5 to arduino was not necessary for my project, so there is none.

Aspects I am proud of:

Overall, I generally like the idea that physically completing a circuit with a non-traditional switch to make a serial communication since this was an activity we started the arduino chapter with. Also for some unexplainable reason, I really like the idea of whacking something to make something work. I am also very proud of my object orienting programming of the shadow node instance and mole instance interacting with each other to check whether the shadow node is within the designated hit zone and confirming whether the arduino’s sent information matches with the shadow id. That part took some time coming up with the mechanism that worked, but once I did, throughout the project, the mechanism worked like a charm. Lastly, I really like the arrangement of the nodes correlating to the music since I specifically used an algorithm that took the music score and translated the notes to either 1, 2, or 3 by changing the note to its ASCII code and remainder dividing it by 4. Then, I used the length of that note to decide the distance between it and its next node to match the rhythm of the node and the music, and last but not least, I manually tweaked some of the nodes and rhythms so that it specifically matched to some parts of the song. To be honest, this manual peaking took a huge portion of my time spent in this project.
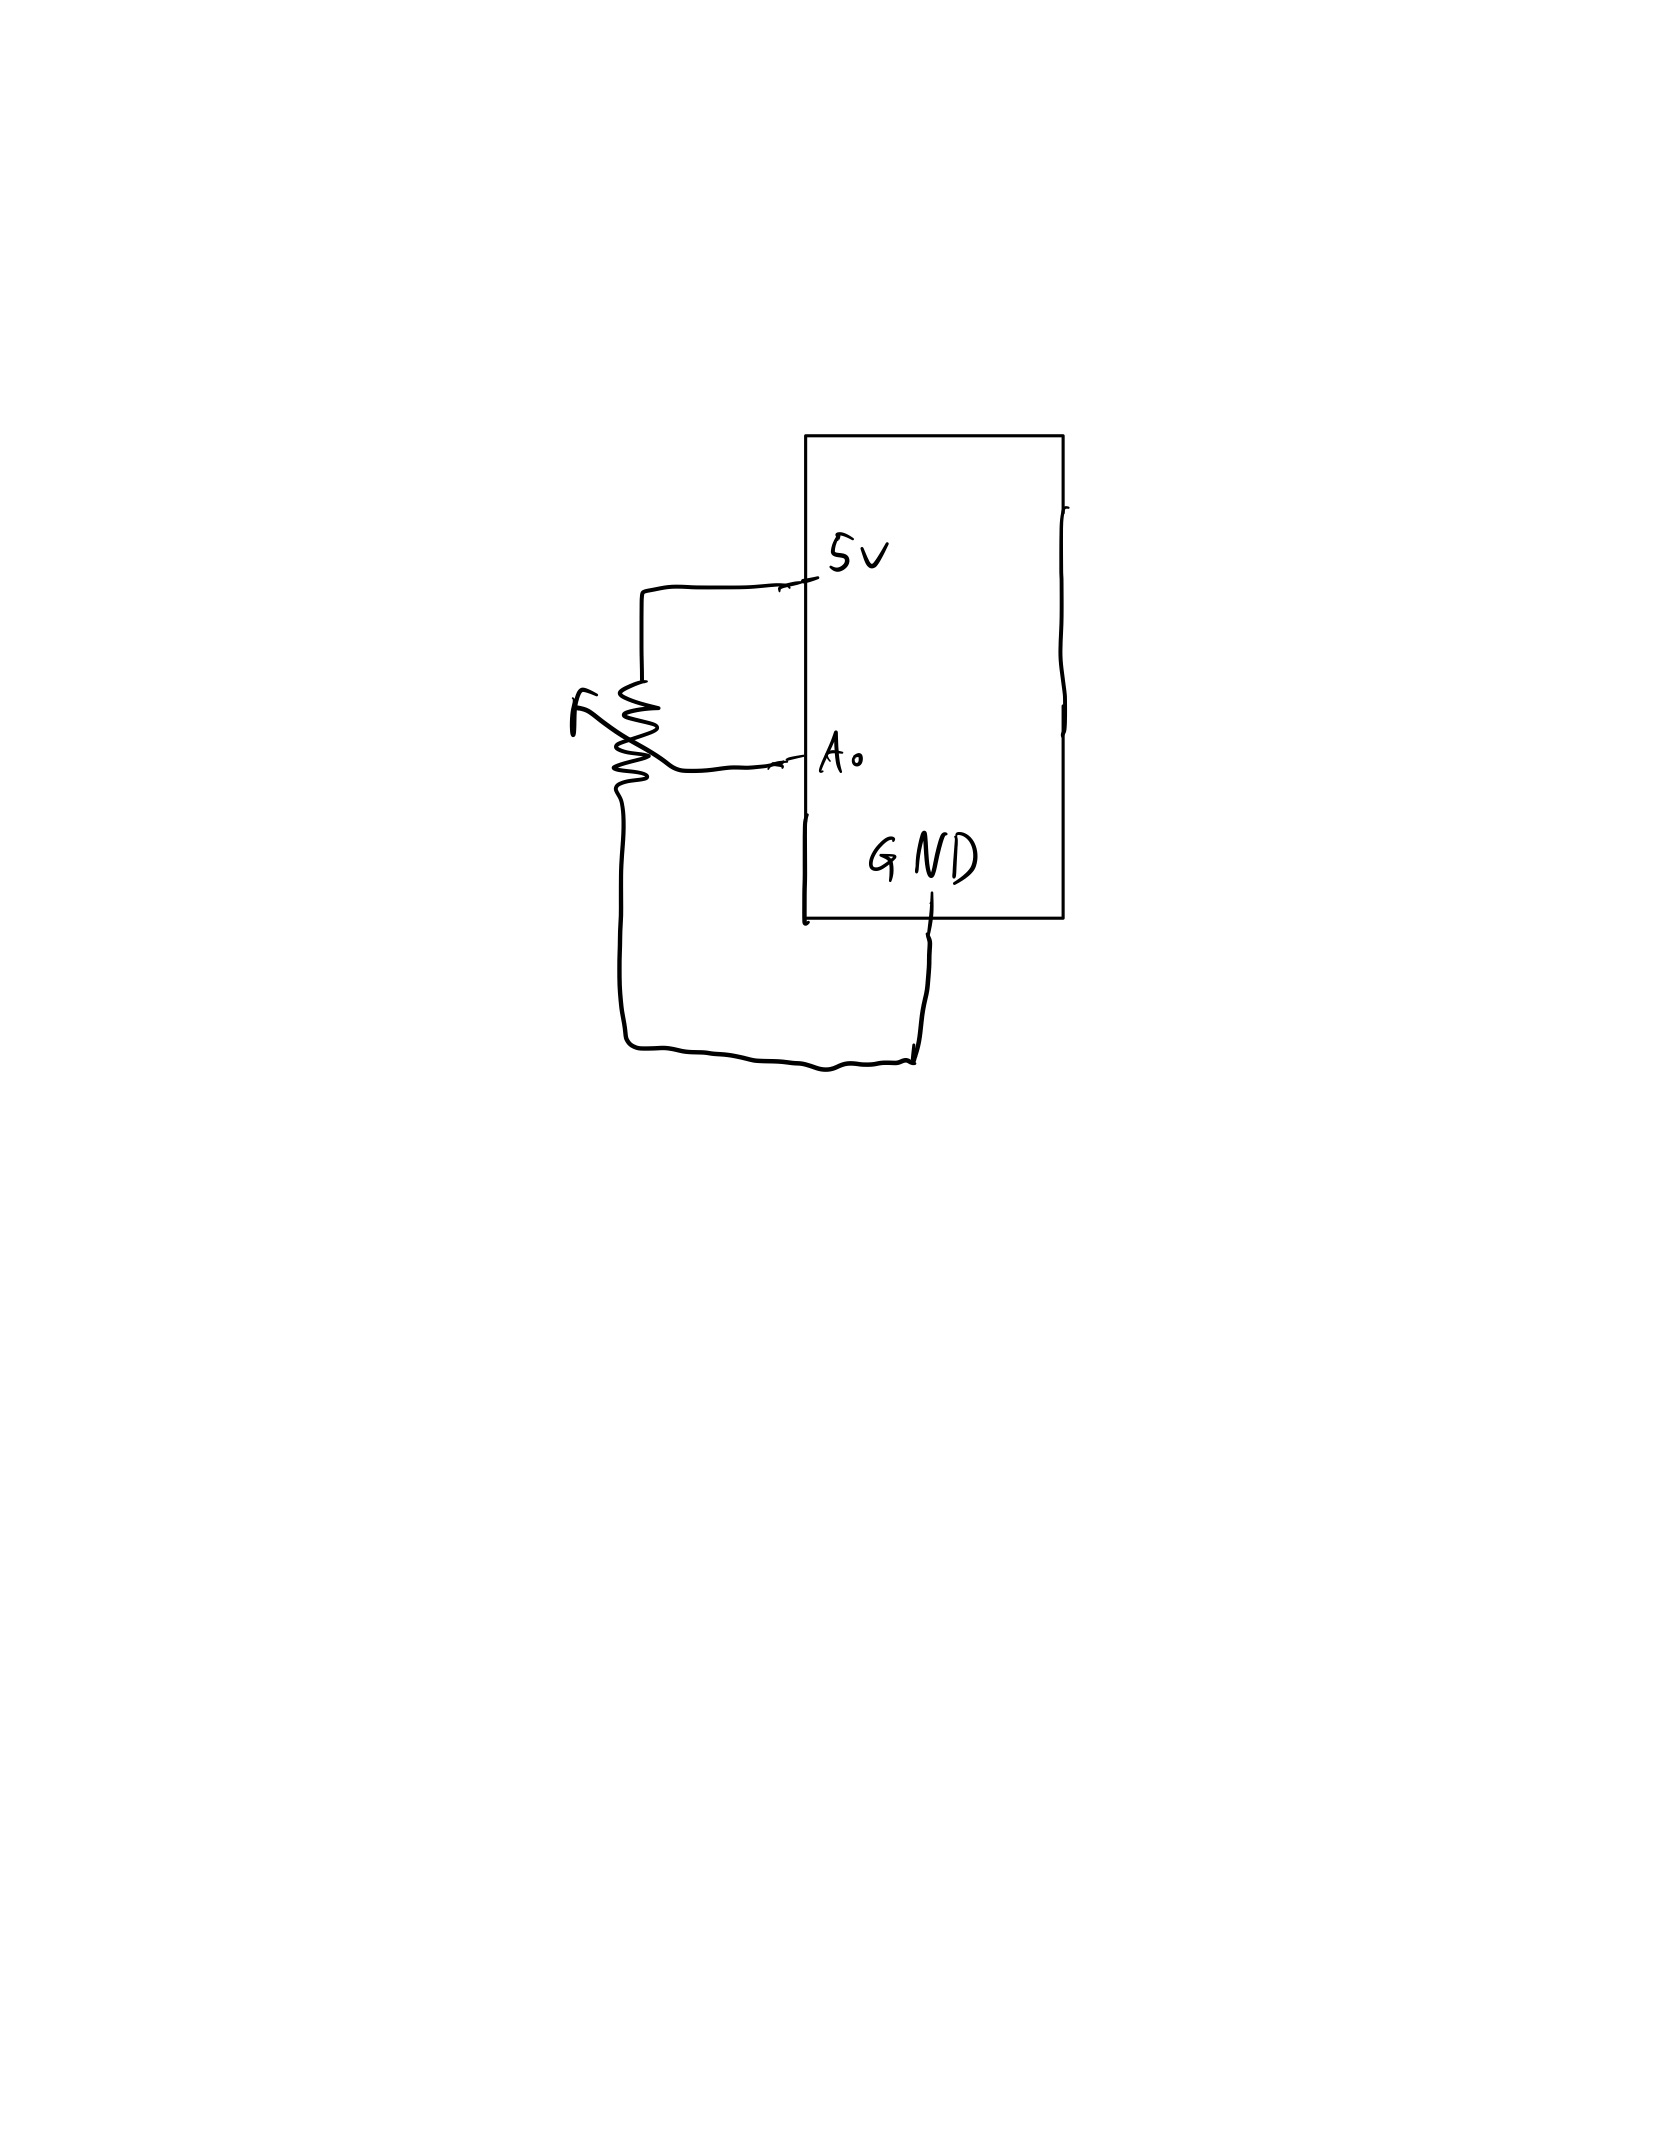
Improvements:

Originally, I wanted to add more to this project by having more hittable nodes, adding another hitting element to use gloves instead of hammers to make the  game more dynamic and interesting, but unfortunately, the technical difficulties of having two hitting objects made it almost impossible to implement, and adding more hittable objects required too much time and resources. The technical difficulty was that the methodology of adding another hitting object was to add another power connected circuit differentiated by different level of resistance, which would then require analog reading instead of digital reading, and this didn’t work out with my existing switch debouncing mechanism and therefore I had to give up on this improvement. However, given more time and information, I would like to add this improvement which would add a whole new spectrum of dynamicness of the game.

Week 14: User Testing: Whack A Note

Adi was my tester for my prototype before finalizing the whole project. My project is very straightforward, so minimal explanation was necessary and he got used to playing the game very quick. He liked that the nodes matched the music that was playing in rhythm and enjoyed the experience in both easier song and the harder song. Although he didn’t get to finish throughout the harder song, “Canon”, but since that is part of the purpose of that song, it worked out as I expected. Again, I felt the need to explain the connection between my two different elements of rhythm game and the whack-a-mole game, so after the user testing, I made a slight change in the UI where the mole picture was changed to a hole, and the shadow node would change to a mole picture when it was apt to hit it for score.

Final Project: User Testing

I managed to build a prototype with focus on confirming whether my initial ideas worked or not. Unfortunately, I couldn’t build a completed physical hardware for my project just yet, so I had tin foils as my moles, but the circuit closing with hammer worked so all I need to do is build the physical hardware and polish the UI for the p5 side.

  • Sarthak was able to figure out the connection between the physical moles (tin foils) and the moles on the screen (the red, green, blue circles in UI) intuitively through the color assignment of the moles and the ordering/location of the moles. He also quickly figured that he had to time the hitting of the mole right correlating to the moving music notes on the UI where it coincides with the respective mole.
  • Since hardware was very lacking of physical shape, sometimes the wires coincided, causing a bug where another future note was recognized as hit while hitting only one note, causing confusion and error to the game play. This error will be fixed when I make a concrete hardware which will prevent such errors. Another improvement I really need to look into is correlation between node patterns and the musical notes/rhythms of the music to make the game play more interesting, challenging, and immersive.
  • While having an actual hardware with shapes of moles and hammer might make the game more intuitive, I feel like I should explain the connection between hitting the moles and the musical side of the game since it doesn’t have a clear apparent connection between the two elements of this project.

special thanks to Sarthak for being my guinea pig

Week 12 – Final Project: Whac-A-Note

Concept:

With the original foundation of the whac-a-mole system of arduino circuit being completed by a hammer whacking the mole, I added an extra element of music notes to make this a rhythm game. Users must hit the several moles (I am currently thinking of six) which will be spread in three different directions: left, right, and center. The interface will show a series of notes, each correlated to a specific mole and the user must hit the mole at a correct timing and order in order to score points. Missing the mole or hitting the incorrect mole will deduct points and if too many notes are missed, the user will lose the game.

Implementation:

-Arduino:

The arduino board will have an incomplete series of circuits that can be connected only when the hammer contacts the mole which will be made with some conductors and attached to wires. When the circuit is connected, an LED bulb will be lit and will send a signal to p5js some data that the mole was hit. It will also connect the buzzer which will then play a specific note correlated to the mole.

-P5js:

The p5js will show the interface of starting the game and the in-game node sequences. The node will be going across from one part of the screen to the other side, and when the node reaches a certain point in the screen, users must hit the correlating mole at that time in order to score points. I still haven’t figured the exact method of p5js loading this sequence of node. My current two possible ideas are either it is generated using some random function, or it would load a preloaded existing tune. During the actual implementation stage, I plan to try out both and see which is better to decide this.

Potential issues / Future work:

Like I mentioned before, I need to decide on the methodology of the loading of the sequence of nodes and part of this problem is feasibility. Since the core factor of a rhythm game is the music of it, I need to make sure that this is executed well during implementation. I also need to confirm that the serial communication between p5js and arduino can be done by completing a circuit via connecting wires. Other than that, I’m a bit worried about the physical layout of the whole project with long wires and several objects big and strong enough to withstand some whacking… But I am very excited to work on this project since I really love rhythm games and I also love some whacking.

Week11 Assignment

A)

Video:

scheme:

p5js:

let ardVarMove = 200;

function setup() {
  createCanvas(400, 400);
}

function draw() {
  background(220);
  
  ellipse(ardVarMove, 200, 50, 25);
}

function keyPressed() {
  if (key == " ") {
    setUpSerial();
  }
}

function readSerial(data) {
  if (data != null) {
    let fromArduino = split(trim(data), ",");
    if (fromArduino.length == 1) {
      ardVarMove = int(fromArduino[0]);
    }
  }
}


arduino:

void setup() {
  Serial.begin(9600);

  while (Serial.available() <= 0) {
    int sensor = analogRead(A0);
    Serial.println(sensor);
  }
}


B)

Video:

Scheme:

P5js:

let redButton;
let yellowButton;
let blueButton;

function setup() {
  createCanvas(400, 400);
  redButton = new button(100, "red");
  yellowButton = new button(300, "yellow");
  blueButton = new button(200, "blue");
}

function draw() {
  background(220);
  redButton.display();
  yellowButton.display();
  blueButton.display();
}

function keyPressed() {
  if (key == " ") {
    setUpSerial();
  }
}

class button {
  constructor(x, col) {
    this.x = x;
    this.y = 200;
    this.size = 80;
    this.light = 0;
    this.col = col;
  }

  display() {
    fill(this.col);
    ellipse(this.x, this.y, this.size);
  }

  clicked() {
    
    if (dist(mouseX, mouseY, this.x, this.y) < this.size) {
      if(this.light == 0){
        this.light = 1;
      }
      else{
        this.light = 0;
      }
    }
  }
}


function readSerial(data) {
  let sendToArduino = redButton.light + "," + blueButton.light + "," + yellowButton.light + "\n";
  //let sendToArduino = left + "," + right + "\n";
  writeSerial(sendToArduino);
}

function mousePressed(){
  redButton.clicked();
  yellowButton.clicked();
  blueButton.clicked();
}


arduino:

int RedLedPin = 2;
int BlueLedPin = 12;
int YellowLedPin = 11;

void setup() {
  Serial.begin(9600);

  pinMode(LED_BUILTIN, OUTPUT);

  pinMode(RedLedPin, OUTPUT);
  pinMode(BlueLedPin, OUTPUT);
  pinMode(YellowLedPin, OUTPUT);

  while (Serial.available() <= 0) {
    digitalWrite(LED_BUILTIN, HIGH); 
    Serial.println("0,0"); 
    delay(300);           
    digitalWrite(LED_BUILTIN, LOW);
    delay(50);
  }
}

void loop() {
  while (Serial.available()) {
    digitalWrite(LED_BUILTIN, HIGH);

    int lightR = Serial.parseInt();
    int lightY = Serial.parseInt();
    int lightB = Serial.parseInt();

    if (Serial.read() == '\n') {
      digitalWrite(RedLedPin, lightR);
      digitalWrite(BlueLedPin, lightY);
      digitalWrite(YellowLedPin, lightB);
      Serial.println();
    }
  }
  digitalWrite(LED_BUILTIN, LOW);
}


C)

Video:

scheme:

p5js:

let velocity;
let gravity;
let position;
let acceleration;
let wind;
let drag = 0.99;
let mass = 50;
let light = 0;

function setup() {
  createCanvas(640, 360);
  noFill();
  position = createVector(width/2, 0);
  velocity = createVector(0,0);
  acceleration = createVector(0,0);
  gravity = createVector(0, 0.5*mass);
  wind = createVector(0,0);
}

function draw() {
  background(255);
  applyForce(wind);
  applyForce(gravity);
  velocity.add(acceleration);
  velocity.mult(drag);
  position.add(velocity);
  acceleration.mult(0);
  ellipse(position.x,position.y,mass,mass);
  if (position.y > height-mass/2) {
    velocity.y *= -0.9;  // A little dampening when hitting the bottom
    position.y = height-mass/2;
  }
  turnLight(velocity.y);
}

function turnLight(vel){
  if(vel < 0){
    light = 1;
  }
  else{
    light = 0;
  }
}

function applyForce(force){
  // Newton's 2nd law: F = M * A
  // or A = F / M
  let f = p5.Vector.div(force, mass);
  acceleration.add(f);
}

function keyPressed(){
  if (key==' '){
    mass=random(15,80);
    position.y=-mass;
    velocity.mult(0);
  }
  if (keyCode == 90) {
    setUpSerial();
  }
}

function readSerial(data) {
  if (data != null) {
    let fromArduino = split(trim(data), ",");
    if (fromArduino.length == 1) {
      wind.x = (fromArduino[0] - 512) / 1000;
    }
    let sendToArduino = light + "\n";
    writeSerial(sendToArduino);
  }
}


arduino:

int LedPin = 2;

void setup() {
  Serial.begin(9600);

  pinMode(LED_BUILTIN, OUTPUT);
  pinMode(LedPin, OUTPUT);

  while (Serial.available() <= 0) {
    digitalWrite(LED_BUILTIN, HIGH); 
    Serial.println("0,0"); 
    delay(300);           
    digitalWrite(LED_BUILTIN, LOW);
    delay(50);
  }
}

void loop() {
  while (Serial.available()) {
    digitalWrite(LED_BUILTIN, HIGH); 

    int light = Serial.parseInt();
    if (Serial.read() == '\n') {
      digitalWrite(LedPin, light);
      int sensor = analogRead(A0);
      delay(5);
      Serial.println(sensor);
    }
  }
  digitalWrite(LED_BUILTIN, LOW);
}


Final Project Proposal

WHAC-A-MOLE

Concept:

For my final project I’m thinking of making a whac a mole video game stand where users can hit a mole that is showed in the screen but connected to the arduino board so that users can hit the physical mole that pops up on the screen. For the moment, I’m still thinking of my own creative twist for this project, but I really like the idea of physically hitting something that will connect a circuit through the board to make the system complete and score a point on p5js.

Implementation:

The user will see a couple of holes in the screen where a mole will pop up every now and then, and the user will have to hit the correlating sensor with a special hammer I will design that will finish the circuit, which will send a signal to the arduino board and will interpret as a “hit” of the mole and score a point. So basically the hammer is a big switch that the user must turn on precisely when the mole peaks its head out.

Make your own instrument

Concept:

For my instrument, I used three different sensors. The force meter, potentiometer, and a switch. Originally, I wanted to read different inputs using a motor, but since I couldn’t, I used the potentiometer as the main dial that read the input to translate into pitches. The input from force meter would then decide on whether to play the notes and in which octave. The switch would change the mode of the instrument from playing designated musical notes to free range pitch.

Video:


Code:

int pitch;
int force = 0;
int note = 0;
int switchInstrument;

#include <ezButton.h>;

ezButton toggleSwitch(7);

#include "pitches.h";

int melody[] = {
  NOTE_C2, NOTE_D2, NOTE_E2, NOTE_F2, NOTE_G2, NOTE_A2, NOTE_B2,
  NOTE_C3, NOTE_D3, NOTE_E3, NOTE_F3, NOTE_G3, NOTE_A3, NOTE_B3,
  NOTE_C4, NOTE_D4, NOTE_E4, NOTE_F4, NOTE_G4, NOTE_A4, NOTE_B4,
  NOTE_C5, NOTE_D5, NOTE_E5, NOTE_F5, NOTE_G5, NOTE_A5, NOTE_B5
};

void setup() {
  // put your setup code here, to run once:
  Serial.begin(9600);
  toggleSwitch.setDebounceTime(50);
  pinMode(8, OUTPUT);
}

void loop() {
  toggleSwitch.loop();
  readPitch();
  readForce();

  int state = toggleSwitch.getState();

  if(state == HIGH){
    Serial.println("The switch: OFF");
    if(force < 10)
      noTone(8);
    else if(force < 200){
      tone(8, melody[note]);
    }
    else if(force < 500){
      tone(8, melody[note + 7]);
    }
    else if(force < 800){
      tone(8, melody[note + 14]);
    }
    else{
      tone(8, melody[note + 21]);
    }
  }
  else{
    if(force > 10)
      tone(8, pitch + force);
  }
}


void readPitch(){
  pitch = analogRead(A5); 
  if(pitch < 150)
    note = 0;
  else if(pitch < 300)
    note = 1;
  else if(pitch < 450)
    note = 2;  
  else if(pitch < 600)
    note = 3;  
  else if(pitch < 750)
    note = 4;  
  else if(pitch < 900)
    note = 5;  
  else
    note = 6;
}

void readForce(){
  force = analogRead(A0);
}

How it works:

When the switch is off, the potentiometer takes care of the main pitch from the range of notes of C to B. By turning the dial of the potentiometer from low to high, the instruments will play the notes from C to B. Then, the force meter, depending on how strong the force input is, decides on the octave of the note. For example, in my code, if force input is lower than 500 but higher than 200, it will play notes in the range of C3 to B3. All the notes are preloaded in the notes array before setup, and in this mode of the instrument, it only plays those designated musical notes. When the switch in on, the instrument will be put on a different mode where the pitch is not limited to a designated note but will be a number combined by the current potentiometer input and the force meter input. Therefore, the pitch made from this mode can be freely chosen by how strong you press the force meter and what the dial of the potentiometer is pointing at.

Circuit Diagram

Future Improvements:

In the future, I would like to use some other dial format analog sensor like the motor I initially planned. I would also think of some other creative ways to use other sensors like the bend sensor or etc.. While I used the alligator clips to incorporate the switch to my circuit, later in the future I would also like to learn soldering so I can stably add more sensors to my circuit.

Week 9 Assignment

Concept

Since we didn’t have enough time in class to go over the analog sensor, I kept my in class activity project using two digital sensors, the buttons, to have different outputs per button and a completely different output for pressing both buttons.

Project

For my circuit, I had two buttons each connected to a resistor and a input slot A2 and A5 where if one of the buttons are pressed, the correlating LED light will blink in an 500 delay interval. If the button is released, then the light will stop blinking. If both of the buttons are pressed, then both lights will blink at 100 delay interval.

Code

void setup() {
  pinMode(8, OUTPUT);
  pinMode(12, OUTPUT);
  pinMode(A2, INPUT);
  pinMode(A5, INPUT);
}

void loop() {

  int switchPosition = digitalRead(A2);
  int falsePosition = digitalRead(A5);

  if(switchPosition == LOW && falsePosition == LOW){
    digitalWrite(8, LOW);
    digitalWrite(12, LOW);
  }
  else if(switchPosition == HIGH && falsePosition == HIGH){
    bothBlink();
  }
  else if (switchPosition == HIGH) {
    yellowBlink();
  }
  else if(falsePosition == HIGH){
    greenBlink();
  }
  
}

void greenBlink(){
  digitalWrite(12, HIGH);
  delay(blinkDelay);
  digitalWrite(12, LOW);
  delay(blinkDelay);
}

void yellowBlink(){
  digitalWrite(8, HIGH);
  delay(blinkDelay);
  digitalWrite(8, LOW);
  delay(blinkDelay);
}

void bothBlink(){
  digitalWrite(8, HIGH);
  digitalWrite(12, HIGH);
  delay(100);
  digitalWrite(8, LOW);
  digitalWrite(12, LOW);
  delay(100);
}


Video

Future Improvements

Initially I was trying to have the buttons as a trigger to a function that will continue in a loop so that the lights will keep blinking if I pressed the button once and will stop blinking if I pressed it again. However, since I was not so proficient with arduino yet, I failed to achieve the effect. I think this could be an improvement I could work on for future practices.

Week 8 unusual switch

Concept

For my unusual switch, I had a pretty difficult time trying to come up with a creative method without using hands to make a switch. Initially I thought of some switch using a plastic water bottle and its cap, but then it struck me that water is also a conductor. So I came up with the idea to use water to turn the switch on.

Methodology

It’s is very very simple. I attached two ends of wire that is connected to a system inside a cup. All I have to do to turn the light on, is to pour water on the cup. If enough water is filled so that the surface of the water touches the wire ends, then electricity will flow through the water and complete the system. While doing this process I also found out the light produced from the bulb was a bit dimmer than using just the arduino board which meant some electricity flow of the system was lost due to the water’s resistance, which meant that water is not a good conductor. While I based this project on my vague memory of common sense that water is an electric conductor, apparently through a quick google search, apparently pure water is actually an insulator since it doesn’t contain any ions, but tap water is still a conductor because it contains some impurities.

Video

Future Improvements

As simple as this switch is, the downside of this switch is that it’s a bit bothersome to pour the water out to turn the light back off since there are wires attached to the cup and the arduino board. A simple fix to that is to put a straw in the cup and drink the water to turn the light off, but unfortunately I didn’t have any straws in my room nor I couldn’t think of this easy fix before I disassembled the entire switch… But I did learn something new about water today which is a bonus I didn’t think of.

Midterm Assignment – Wordlaga!

Concept

As soon as I heard our midterm assignment was to make a game, I had a galaga in mind because I knew that would be challenging to make yet so fun to both make and play it. Plus I love galaga, it’s one my favorite classic games. However, for the purpose of this assignment, I came up with my own variation of the galaga game, the wordlaga.

Wordlaga is a game where instead of the galaga’s bug enemies, I had a set of alphabets that form a word as the enemies. Players, as galaga, must shoot down the letterin the correct order that forms the target word. If the enemy collides with player or if player shoots the wrong letter, game will be over. Player can move the galaga left and right using arrow keys and shoot using the up arrow key to shoot down the enemy. The goal of the game is shoot down as many words as you can and achieve the highest score possible, or finish the game by emptying the preloaded word bank… if you can.

I came up with this idea while having a conversation with a friend about educational games and I remembered that I mostly played/enjoyed galaga when I was young. Since galaga is such a simple game, why not recreate it for a somewhat educational purpose where young children can learn words by shooting down the letter that form the word in correct order? Thus, wordlaga was created.

Code

This 400 lines worth of coding took hours of debugging and consists of many parts that I am proud of. The two particular parts I would like to mention where one is a mechanism that I am proud for and one that caused me a mind-splitting headache trying to make it work. The proud part of my code is the enemy-bullet collision detection.

for(let i = 0; i < enemyArr.length; i++){
    enemyArr[i].display();
    enemyArr[i].updateVel(player);
    for(let j = 0; j < galagaBulletFired.length; j++){
      if(enemyArr[i].checkHit(galagaBulletFired[j])){
        //if player didn't hit the right word, game is over
        if(enemyArr[i].ascii + 97 != correctAnswer[count]){
          wrongChoiceSound.play();
          gameOver = true;
        }
        else{
          //for each enemy killed correctly, player gets 100 score
          destroyedEnemyArr.push(i);
          score += 100;
          enemyKillSound.play();
          usedBulletArr.push(j);
          count++;
        }
      }
      
      //if the bullets leave the screen, elliminate them
      if(galagaBulletFired[j].position.y < -20)
        galagaBulletFired.splice(usedBulletArr[j],1)
    }
    //if player collides with enemy game is over
    if(enemyArr[i].collisionDetection(player)){
      explosionSound.play();
      gameOver = true;
    }
  }

In this code, I have a nested for loop where one iterates through the array that contains the enemy instances and the the nested loop iterates through the array of bullets fired. For each each enemy, if the enemy instance returns true for a simple collision detection, then the index of this instance will be recorded in a separate array. The enemy instance array will be iterated again after the check for the collision, where it will be checked if the index stored earlier matches an instance. If it does, then that element will be spliced. This collision also checks the content of the enemy instance and if the wrong letter is shot down, the player will lose the game. I’m particularly proud of this piece of code because while it was a bit challenging to figure out how to destroy enemies when they are shot down, I came up with this solution relatively quickly and it worked right away in few attempts.

Now for the code that caused me anger equivalent to the consumption of mint chocolate,

if(frameCount % (310 - 10 * stageLvl) == 0){
  moveEnemy(enemyArr, int(random(0, enemyArr.length)))
}

...

function moveEnemy(enemyArr, enemyNum){
  enemyArr[enemyNum].movement(player); 
}

...

//helper function for enemy movement. 
  updateVel(player){
    //if this enemy is chosen to move, it will start moving towards the player by the player position passed
    //the speed of the enemy moving will be based on the stage level
    if(this.isMoving){
      if(this.position.y < 400){
        let distanceBetween = player.position.x - this.position.x;
        this.velX = distanceBetween * 0.01;
        this.velY = enemySpeed;
      }
      //if the enemy went passed the player and is off the screen, make it return to the top of the screen
      else{
        this.position.y = -150;
      }
    }
  }

...

movement(player){
  this.isMoving = true;
  this.updateVel(player);
}

...

  //if the enemy instance is not called to move, its velocity is fixed 0, but if it is, display will update the enemy's position
  display(){
    if(!this.isMoving && this.position.y == 75){
      this.velY = 0;
    }
    this.position.x += this.velX;
    this.position.y += this.velY;
    image(sprite[this.ascii], this.position.x - enemySize/2, this.position.y - enemySize/2, enemySize, enemySize);
  }
}

This code deals with the movement mechanism of the enemy. In wordlaga, the enemy alphabet, after some time, will move towards the player and try to collide with them. This particular function makes that happen where after some pass in framecount, a random enemy from the array of instances will specifically move towards the player, and return to the top of the screen after it misses the player and goes out of the screen. Each step of making this was so troublesome because satisfying a condition for one of the said functions became the cause for a bug for another. For example, in order for the enemy to track the player position, the movement function must be kept called in the draw function since the player position will be constantly updated. However, if the movement function is kept called in the draw function, all the enemies continuously started to move instead of one by one. This problem was fixed by separating the function that called for movement and actually updating the enemy position. The time restriction in calling this function periodically was done by using the frameCount and modulo division. After a total full day worth of time of debugging, I have reached this stage of this code where it works. Honestly I at this point I am not even proud of this code I am just thankful that it works.

Areas for Improvements

While I am satisfied with my finished product, I can definitely see some potential improvements for this game. First of all, there could be a different stage design where the number of letters could increase as the stage level progresses or having a multiple life system where the player gets three lives instead of just one. I could also add the mechanism of enemy shooting bullets at the player to make the game more interesting or add explosion animation to make the game more visually appealing. I could think of couple other minor improvements to perfect this game, but frankly I need more time to be able to make these improvements since I was sick the past week and took a toll in preparation time. Also, while it might sound easy to make these improvements, we never know what kind of headache causing bugs could occur. This is actually the lesson I learned from this project while dealing with the enemy movement function bugs: what I might consider to be simple implementation could be very difficult for the computer to understand. Overall I had fun making this whole project and hopefully one day I’ll come back to improve it.

Midterm Assignment Progress

Concept:

For the midterm project I decided to make a galaga game. While my version of galaga would be a little different from the original galaga game, I will try my best to keep the essence of the galaga game while adding something more from what we learned in class.

Code:

Unfortunately I was sick over the weekend and I couldn’t do much with the project so so far my progress is the basic game mechanism where you can start the game by pressing the space bar and move the galaga ship using left and right arrow keys and shoot bullets using the up arrow key. For each enemy killed you get 100 scores and if you eliminate all the enemies, you advance a level. So far the mechanism is not yet completely finished and I hope to add enemy movement manipulation and enemy shooting bullets as well with a more concrete stage level progression mechanism and showing of it.

I also need to get better polished images and add music but again I couldn’t because I was/am sick… I hope to do the polishing as soon as I get better.

Chellange:

The challenege in this project so far was the enemy movement maniulation and the the stage progression which I am still working on it now. Another difficulty I found was reseting the game after the end of the game which I have encountered bugs that I’m not sure why its happening. I plan to tackle all this as soon as I get better.