The journey through the final project has been quite a hurdle. In the initial stages, I wanted to simulate music concerts that required a dark room and little to no noise which would have been an issue given my observations today. As I was experimenting with music visualizations, I developed the idea to build a music box with cool LEDs dancing and screen visualization. One issue that was pointed out in class was the isolation of the components. I needed to think of a way to make my project holistic. That’s when I started thinking of Bob the Bot, the humanoid bot with a box head, and hands, and a screen as a body. This also came with its challenges but led to my discovery of two ball-like foamy materials for the final project. After spending a lot of time switching ideas, building and disabling different circuits, and trying to create a story with bob the bot, I decided to think about ways of achieving the expectations of the final projects in the time constraints. I was ready to work with what I had and understood for class.
For the final project which was demonstrated at the showcase, I extended the grab the food game I built earlier in the semester. I incorporated the two ball-like materials found earlier as controllers for the game and a button for restart. The two balls had in the force sensors to detect the force to which a user is squeezing the ball to translate into movement on processing. My main goal was to ensure that the interaction was clear to the user so the ball located on the left-hand side was to control left movements, the right-hand ball was to control right-hand movements. I had some texts on the screen to signify users if they don’t have an idea of how to approach it. Even though the addition was small, it really improved the user experience, and almost all the users who tried the game enjoyed interacting with the softballs to control objects on the screen.
Below are some of the videos of users interacting with the project at the showcase.
The code can be found on https://github.com/eric-asare/IM-Final
REFLECTIONS
I really enjoyed my time in class and working on all the assignments and projects. I am grateful for the discussions, and lessons that deepened my understanding of interactivity. Have a great winter break.😊
For my project, I am building a mini-Tesla car that will feature both autopilot mode and manual mode. When the autopilot mode is enabled, the car will be able to move around and avoid all obstacles. Whereas for the manual mode, the user will be able to control the car through processing using the arrows/buttons.
Components:
I am using the Adafruit motor shield to control the wheels and add movement to the car. To use it correctly, I had to download a new library called “Adafruit Motor Shield V2 Library”, and a couple of other sub-libraries that come with it.
At first, I am setting my servo to look ahead, then using an ultrasonic I am measuring the distance to the next obstacle (basically to check if there are objects ahead).
If the car is close enough to the obstacle, the wheels are stopped, the servo checks both the right and left directions, and using the ultrasonic, we get both distances.
If both directions are blocked (distance is below the minimum stopping distance), the car does a U-turn. To do it, the car keeps turning to the right until it reaches 180 degrees (using Delay).
// if both directions are blocked, do a u-turn
if (rdist<= min_dist && ldist<= min_dist) {
  rb->setSpeed(255);
  lb->setSpeed(255);
  rf->setSpeed(255);
  lf->setSpeed(255);
  rb->run(BACKWARD);
  lb->run(FORWARD);
  rf->run(BACKWARD);
  lf->run(FORWARD);
  delay(1400);
  rb->setSpeed(60);
  lb->setSpeed(60);
  rf->setSpeed(60);
  lf->setSpeed(60);
  rb->run(RELEASE);
  lb->run(RELEASE);
  rf->run(RELEASE);
  lf->run(RELEASE);
}
2nd scenario:
If both directions are free (distance is much higher than the minimum stopping distance), the car chooses the right direction. 🙂
// if both directions are free, choose right
else if (rdist>=20 && ldist>=20){
  rb->setSpeed(255);
  lb->setSpeed(255);
  rf->setSpeed(255);
  lf->setSpeed(255);
  rb->run(BACKWARD);
  lb->run(FORWARD);
  rf->run(BACKWARD);
  lf->run(FORWARD);
  delay(700);
  rb->setSpeed(60);
  lb->setSpeed(60);
  rf->setSpeed(60);
  lf->setSpeed(60);
  rb->run(RELEASE);
  lb->run(RELEASE);
  rf->run(RELEASE);
  lf->run(RELEASE);
}
3rd scenario:
If the right direction is free, but the left is blocked, choose the right direction.
// if right way is free, choose right
else if (rdist>=ldist){
  rb->setSpeed(255);
  lb->setSpeed(255);
  rf->setSpeed(255);
  lf->setSpeed(255);
  rb->run(BACKWARD);
  lb->run(FORWARD);
  rf->run(BACKWARD);
  lf->run(FORWARD);
  delay(700);
  rb->setSpeed(60);
  lb->setSpeed(60);
  rf->setSpeed(60);
  lf->setSpeed(60);
  rb->run(RELEASE);
  lb->run(RELEASE);
  rf->run(RELEASE);
  lf->run(RELEASE);
}
4th scenario:
If the left direction is free, but the right is blocked, choose the left direction.
// if left way is free, choose left
else if (rdist<ldist){
  rb->setSpeed(255);
  lb->setSpeed(255);
  rf->setSpeed(255);
  lf->setSpeed(255);
  rb->run(FORWARD);
  lb->run(BACKWARD);
  rf->run(FORWARD);
  lf->run(BACKWARD);
  delay(700);
  rb->setSpeed(60);
  lb->setSpeed(60);
  rf->setSpeed(60);
  lf->setSpeed(60);
  rb->run(RELEASE);
  lb->run(RELEASE);
  rf->run(RELEASE);
  lf->run(RELEASE);
}
When enabled, the user can control the car through Processing using either the arrows or the screen buttons. When an action is specified, Processing sends the data to Arduino.
To receive data from Processing, I am doing the following:
while (Serial.available()) {
  if (Serial.read() == '\n') {
    state = Serial.parseInt();
    direc = Serial.parseInt();
  }
}
import processing.serial.*;
Serial myPort;
PImage img;

void setup() {
  size(960,720);
  printArray(Serial.list());
  String portname=Serial.list()[1];
  println(portname);
  myPort = new Serial(this,portname,9600);
  myPort.clear();
  myPort.bufferUntil('\n');
  img = loadImage("bg.png");
}

void draw() {
  background(#e9eaea);
  image(img, width*1/2-135, height/2-125,270,250);
  fill(#555555);
  textSize(30);
  text("Use the arrows to control the car.", width*1/2-200, height/2+ 145);
  text("Click on S to switch to stop the car.", width*1/2-210, height/2+ 195);
  text("Click on A to switch to autopilot mode.", width*1/2-225, height/2+ 245);
  if(keyPressed) {
    //if a key is pressed, do the following
    if (key == 'm'){
      myPort.write(0+","+9+"\n");
    }
    else if (keyCode == UP){
      myPort.write(0+","+0+"\n");
    }
    else if (keyCode == DOWN){
      myPort.write(0+","+2+"\n");
    }
    else if (keyCode == RIGHT){
      myPort.write(0+","+1+"\n");
    }
    else if (keyCode == LEFT){
      myPort.write(0+","+3+"\n");
    }
    else if (key == 's'){
      myPort.write(0+","+4+"\n");
    }
    else if (key == 'a'){
      myPort.write(1+","+0+"\n");
    }
    else {
      myPort.write(4+","+9+"\n");
    }
  }
  else {
    myPort.write(4+","+9+"\n");
  }
}
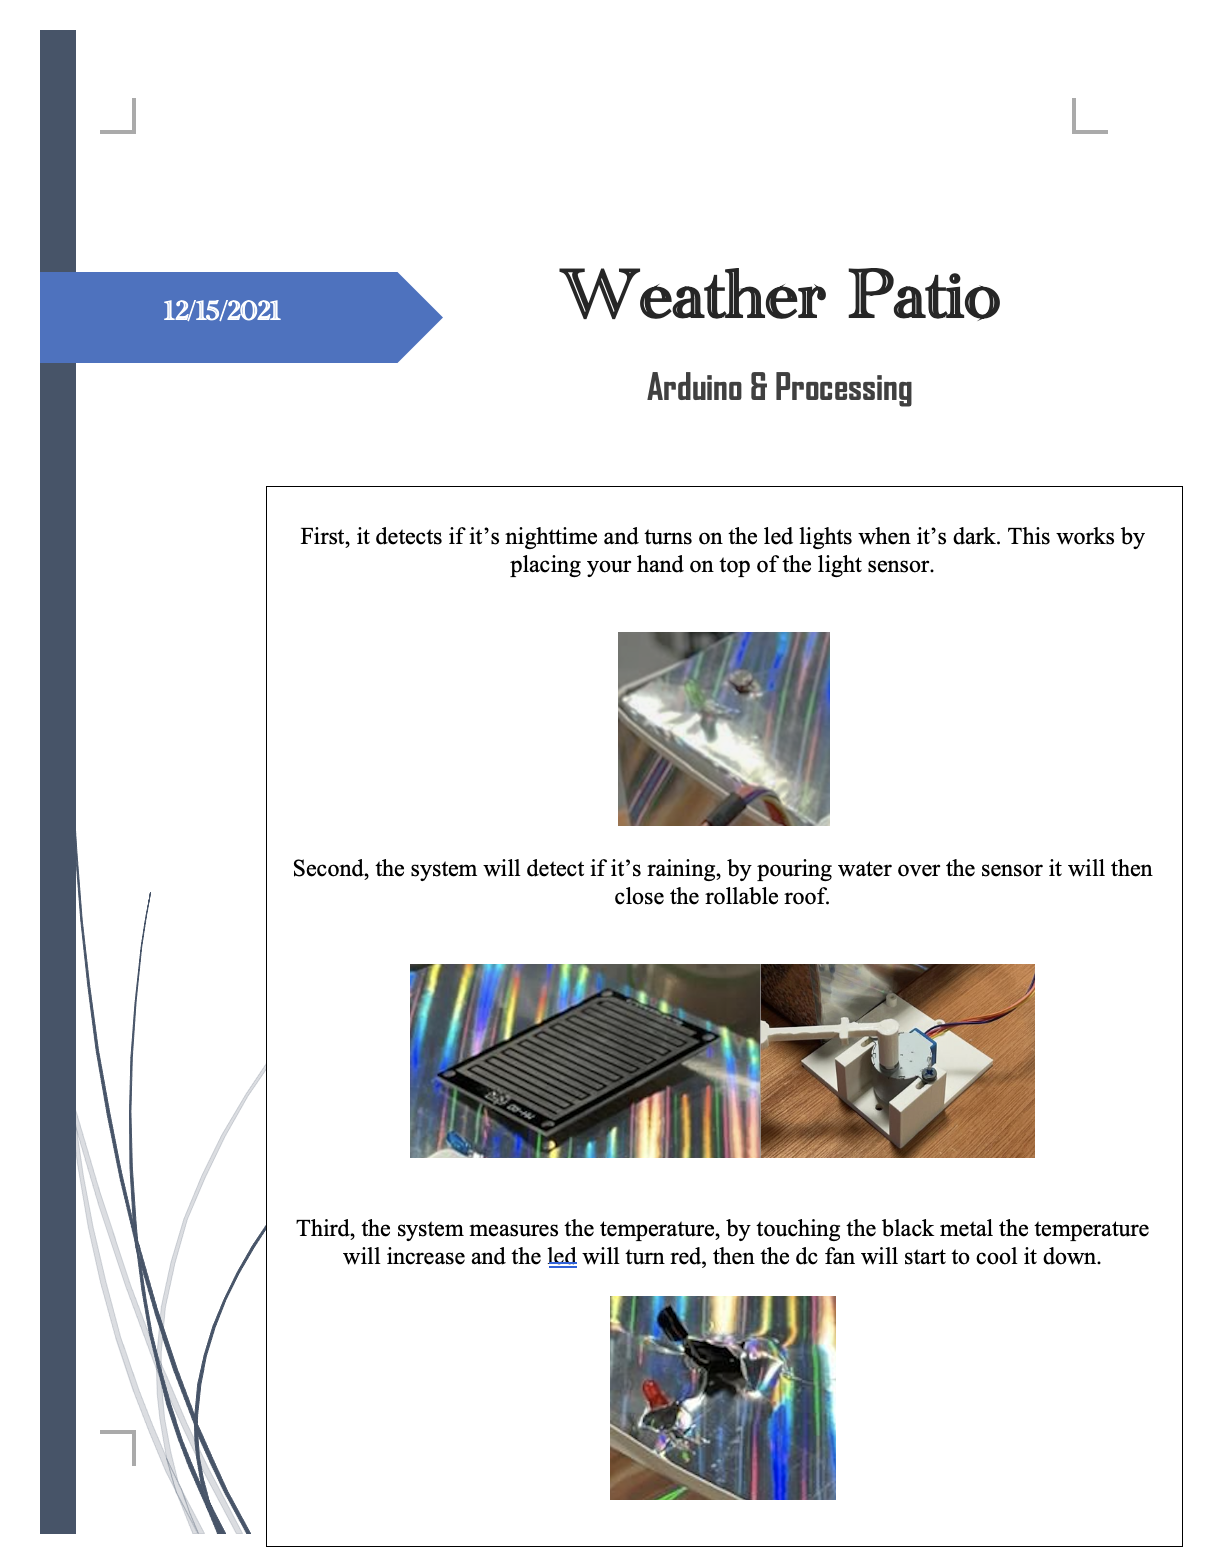
In the UAE, the weather is constantly sunny and we do not spend much time outdoors. Now that it's winter time, it is the norm to hang out in the desert or spend family time and gatherings out in the backyard.This project is a miniature of what could be used as a shade from the rain during rainy days while still being able to enjoy the sun on sunny days. When the temperature rises, like it does on most days in the UAE, the fan turns on to cool down the temperature. In the absence of light, at night for instance which is when most gatherings happen, the light will turn on to provide a more heart-warming ambience.
PROJECT SUMMARY:
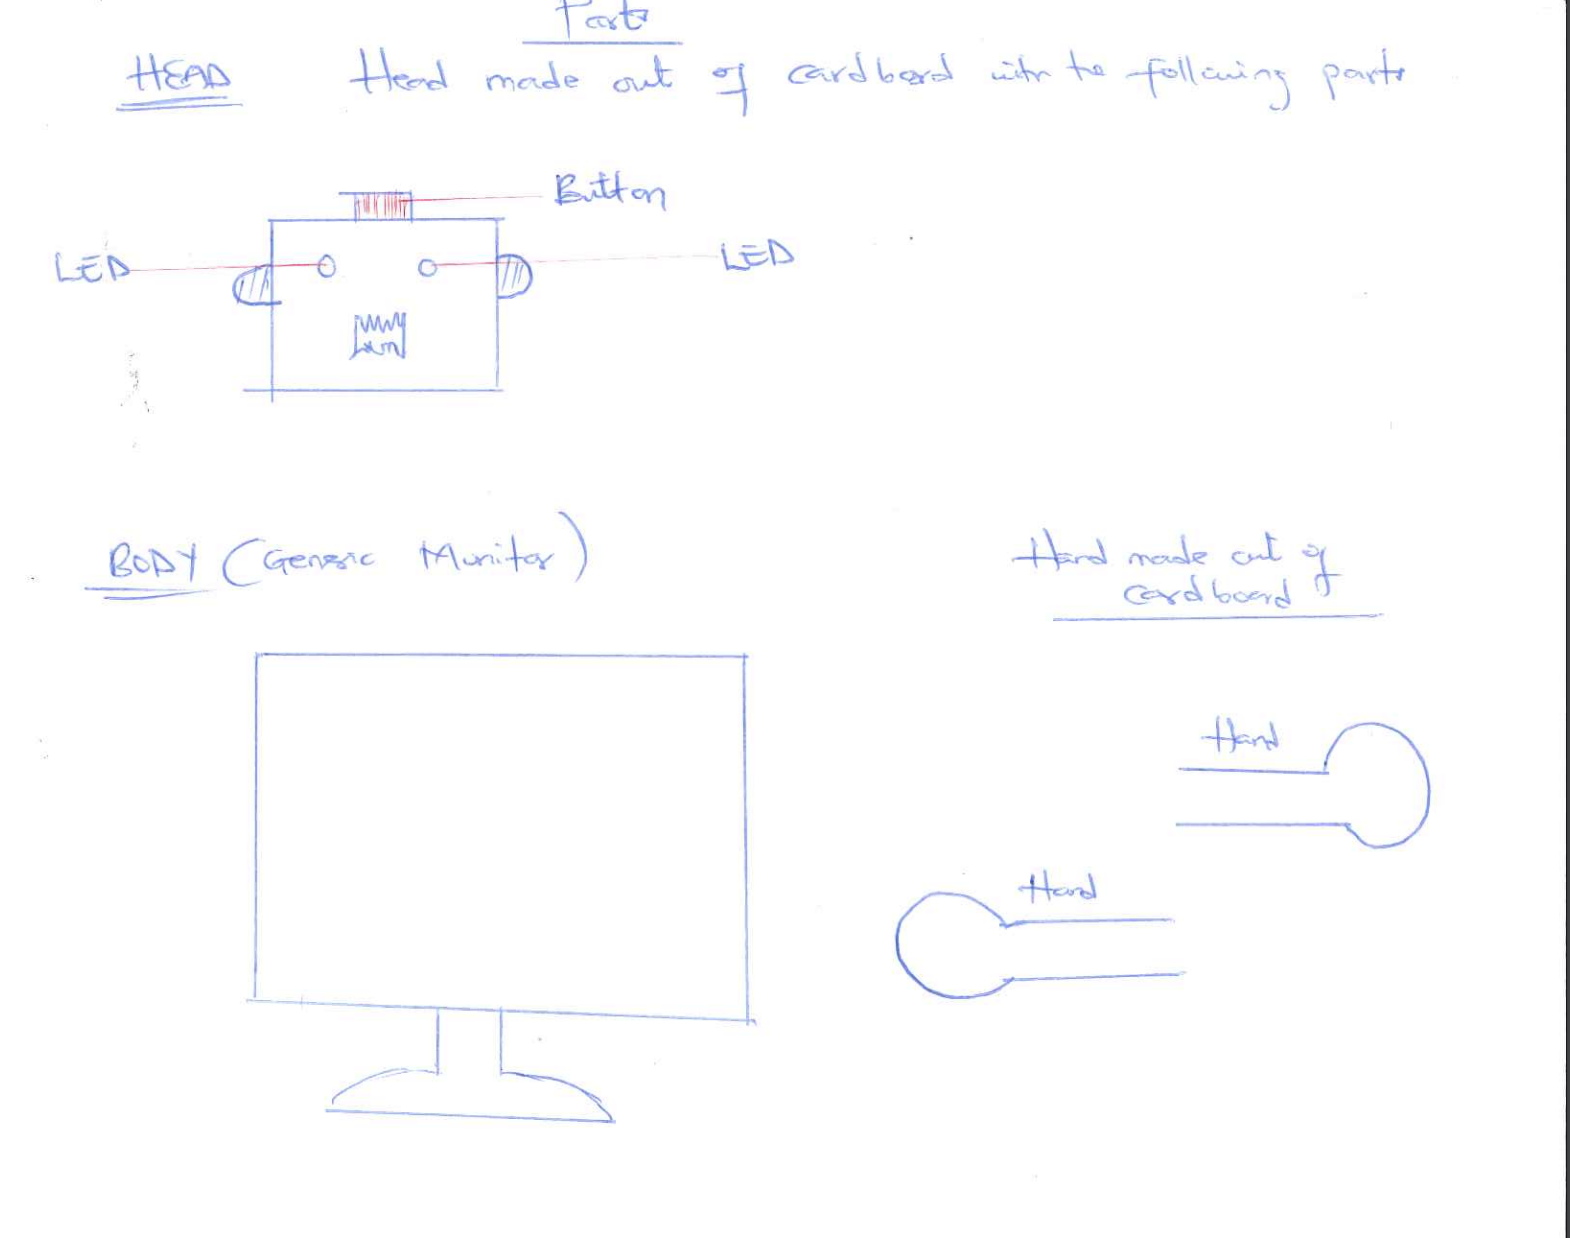
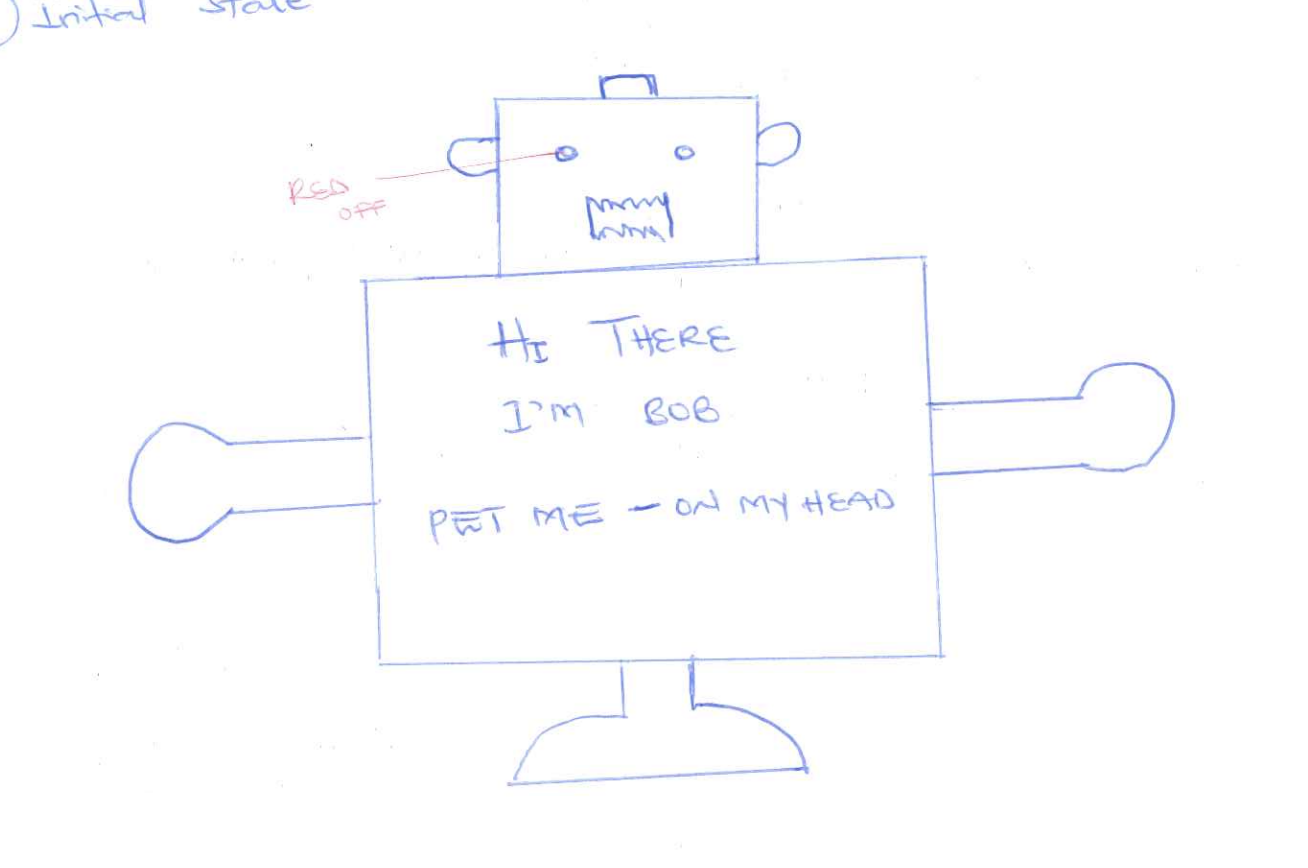
The project is a smart outdoor cover that we called the weather patio . It has the following different features. First, the system will detect if it’s raining, and if it is then it will close the rollable roof. Second, the system measures the temperature and if the temperature is very high, it will turn on a fan. Last, but not least, it detects if it’s night time and turns on the lights when it’s dark.
SYSTEM I/O:
Input:

- Rain Sensor

- Temperature Sensor

- Light Sensor
Output:

-Servo or DC Motor

-Fan DC

-LED Strip with relay
DESCRIPTION OF EACH INPUT/OUTPUT ON ARDUINO & WHAT IT WILL SEND/RECEIVE FROM PROCESSING :
Input Arduino:
Rain sensor to detect if it’s raining
Temperature sensor to detect the ambient temperature.
Light sensor to detect the light in the area.
Output Arduino:
Motor (servo or DC) to close and open the roof top
Fan to cool down the temperature
LED strip or bulb to add light during the night
Basically, all the inputs will send the data to the processing in order to be visualized on the processing screen. That allows monitoring of the temperature, rain existence and light in the area. Thus, all the outputs of the Arduino will receive control from the processing , as the system we are building is automatic using the Arduino code with processing code integrated.
DESCRIPTION OF PROCESSING & WHAT IT WILL SEND/RECEIVE TO ARDUINO:
Processing is used for one main reasons:
- Monitor the values given by the temperature sensor and other sensors. Provides interactive visualizations of the output in order to capture the essence of the experience.
PROCEDURE:
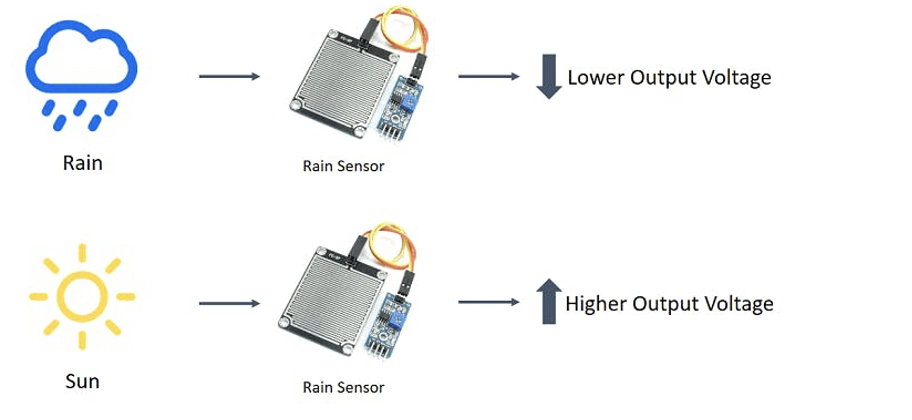
RAIN FALL SENSOR:
The rain sensor detects water that comes short circuiting the tape of the printed circuits.

The sensor acts as a variable resistance that will change status : the resistance increases when the sensor is wet and the resistance is lower when the sensor is dry.
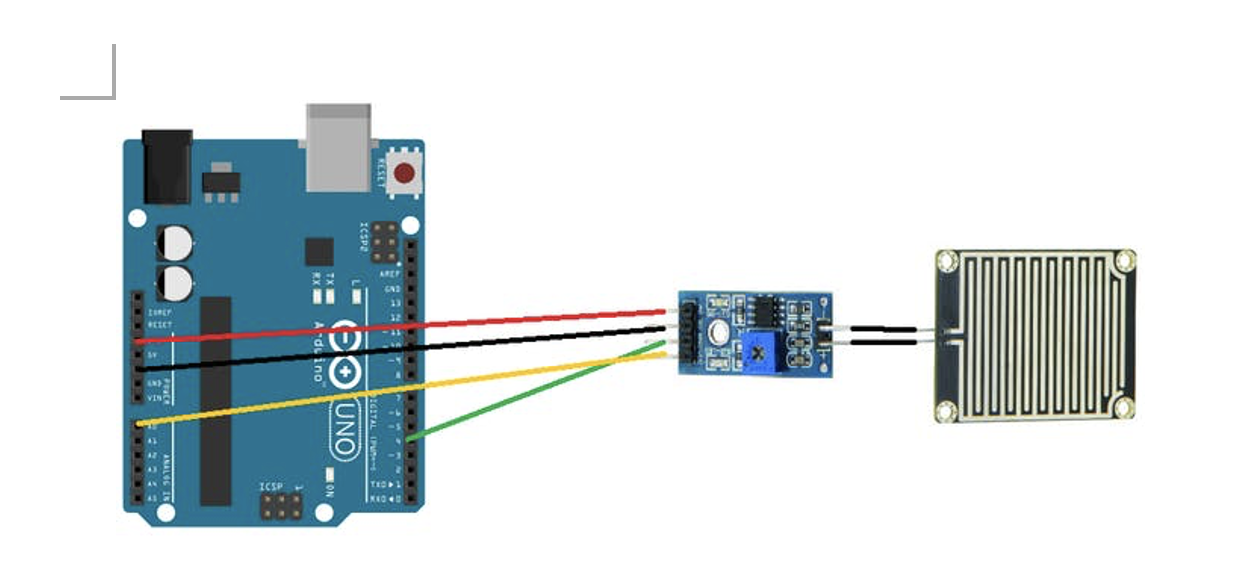
Connection:
Arduino –> Comparator
5V –> VCC
GND –> GND
DO –> D4
AO –> A0
Blueled ->pin 3
A blue LED is connected to show the presence of rain. If it’s raining, the blue LED will turn on, if it’s not raining the blue LED is off.
Code of Rain Sensor :
//RAINFALL SENSOR CODE
const int capteur_D = 4;
const int capteur_A = A0;
int blueled=2;
int val_analogique;
void setup()
{
pinMode(capteur_D, INPUT);
pinMode(capteur_A, INPUT);
pinMode(blueled, OUTPUT);
Serial.begin(9600);
}
void loop()
{
if(digitalRead(capteur_D) == LOW)
{
Serial.println("Digital value : wet");
delay(10);
digitalWrite(blueled,HIGH);
}
else
{
Serial.println("Digital value : dry");
delay(10);
digitalWrite(blueled,LOW);
}
val_analogique=analogRead(capteur_A);
Serial.print("Analog value : ");
Serial.println(val_analogique);
Serial.println("");
delay(1000);
}
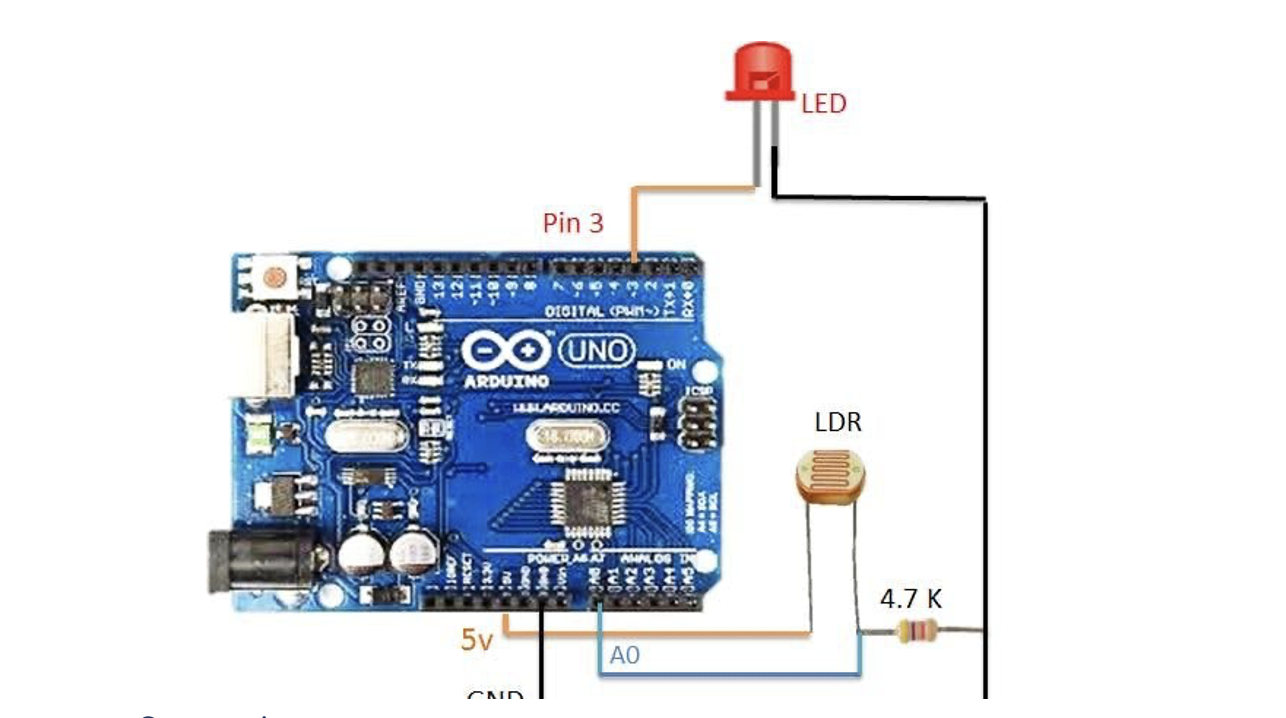
LIGHT SENSOR:
LDR light dependent resistor to have an automatic light turn on when it’s dark.
Connection
LDR: one side to 5V, other pin to analog pin A1 and to a 4.7K resistor connected to GND.

Output: LED on pin 3
Code with LDR:
const int capteur_D = 4;
const int capteur_A = A0;
int blueled=2;//for rain
int val_analogique;
int LDRsensorPin=A1;
int LDRsensorValue = 0;
int greenled = 3;//green light for ldr
void setup()
{
pinMode(capteur_D, INPUT);
pinMode(capteur_A, INPUT);
pinMode(blueled, OUTPUT);
pinMode(greenled, OUTPUT);
Serial.begin(9600);
}

void loop()
{
if(digitalRead(capteur_D) == LOW)
{
Serial.println("Digital value : wet");
delay(10);
digitalWrite(blueled,HIGH);
}
else
{
Serial.println("Digital value : dry");
delay(10);
digitalWrite(blueled,LOW);
}
val_analogique=analogRead(capteur_A);
Serial.print("Analog value : ");
Serial.println(val_analogique);
Serial.println("");
LDRsensorValue = analogRead(LDRsensorPin);
if(LDRsensorValue < 600)
{
Serial.println("LED light on");
digitalWrite(greenled,HIGH);Serial.println(LDRsensorValue);
//delay(1000);
}
else {digitalWrite(greenled,LOW);Serial.println(LDRsensorValue);}
delay(1000);
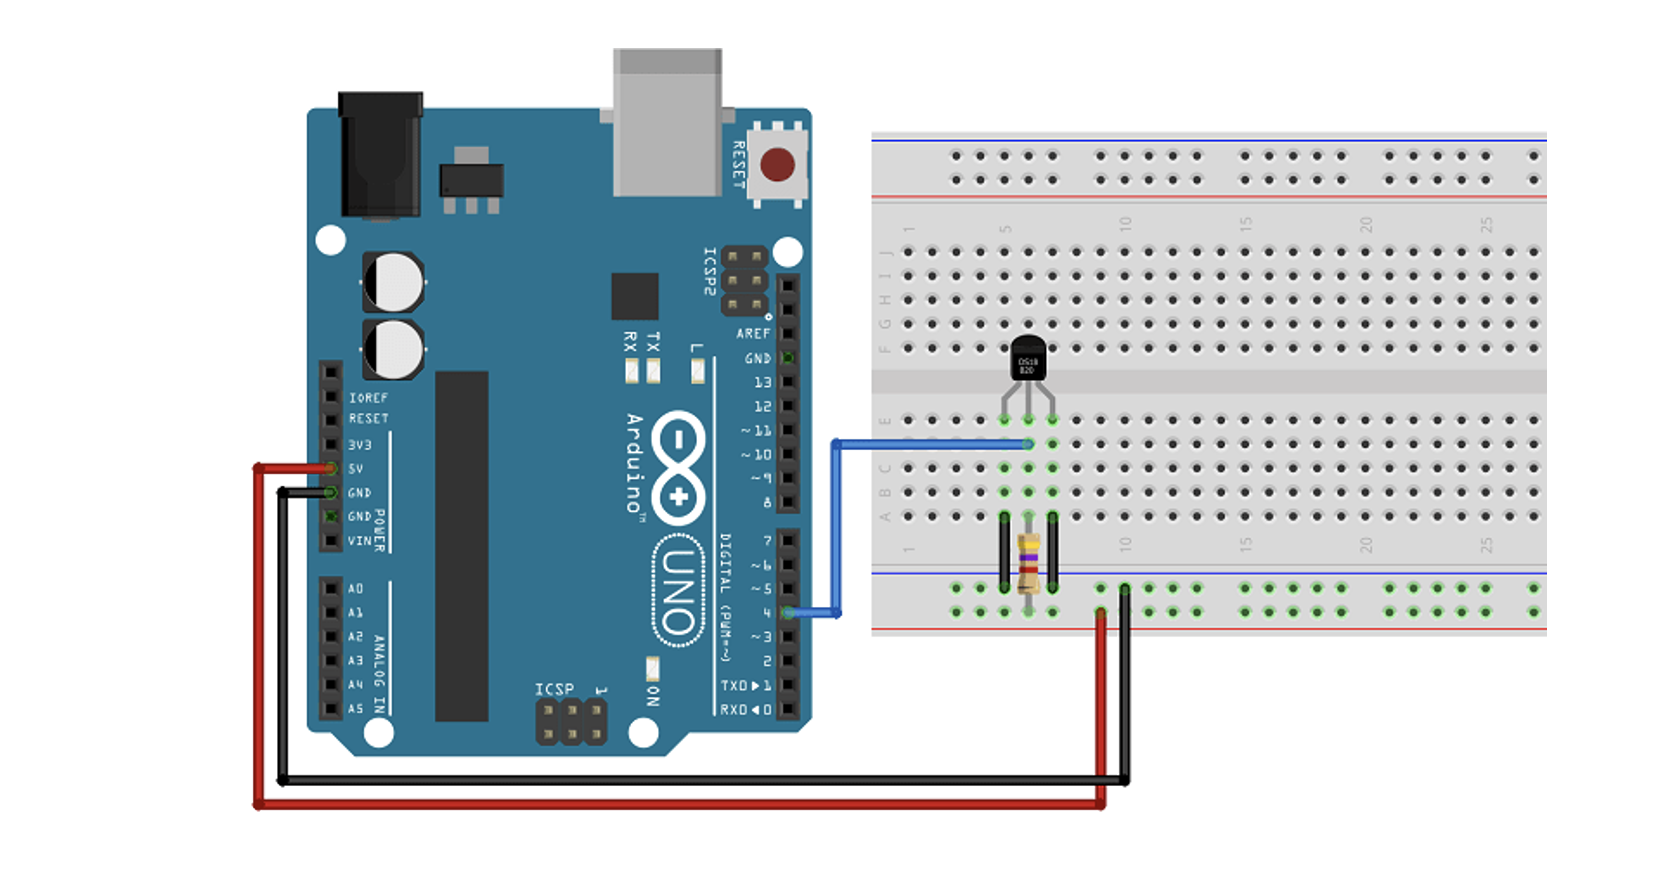
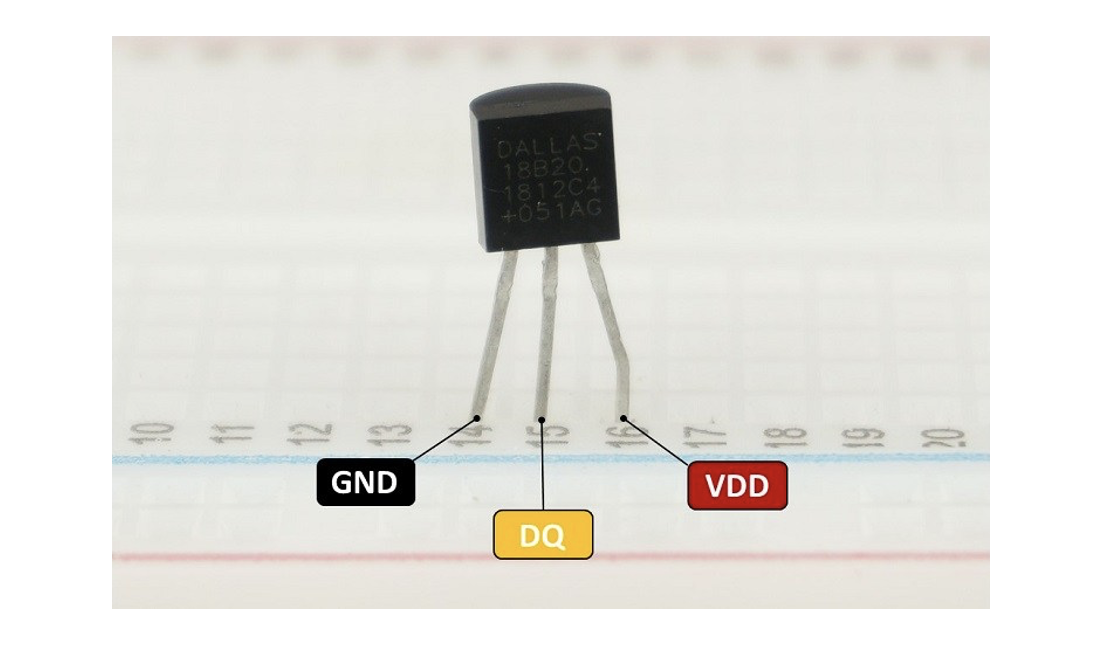
TEMPERATURE SENSOR & FAN:
We need a temperature sensor DS18B20 with a 4.7kohm resistor for input, as output we have a dc fan.

           If the temperature is high the fan will turn on.

           If the temperature is low the fan is off.
           Digital pin used is pin 5 for the temperature sensor

           Red led is to show if the temp above the limit.

           Redled is on pin 6
Code :
//code for temperature sensor
#include <OneWire.h>
#include <DallasTemperature.h>
#define ONE_WIRE_BUS temppin //pin in 4
OneWire oneWire(ONE_WIRE_BUS);
DallasTemperature sensors(&oneWire);
void setup()
{
pinMode(redled, OUTPUT);
Serial.begin(9600);
//code for tempqrature
sensors.begin();
}
void loop()
{
/********************************************************************/
//temperature sensor
sensors.requestTemperatures(); // Send the command to get temperature readings
Serial.println("Temperature is: ");
celsius = sensors.getTempCByIndex(0);
Serial.print(celsius);
if(celsius>baselinetemp)digitalWrite(redled,HIGH);
else digitalWrite(redled,LOW);
}
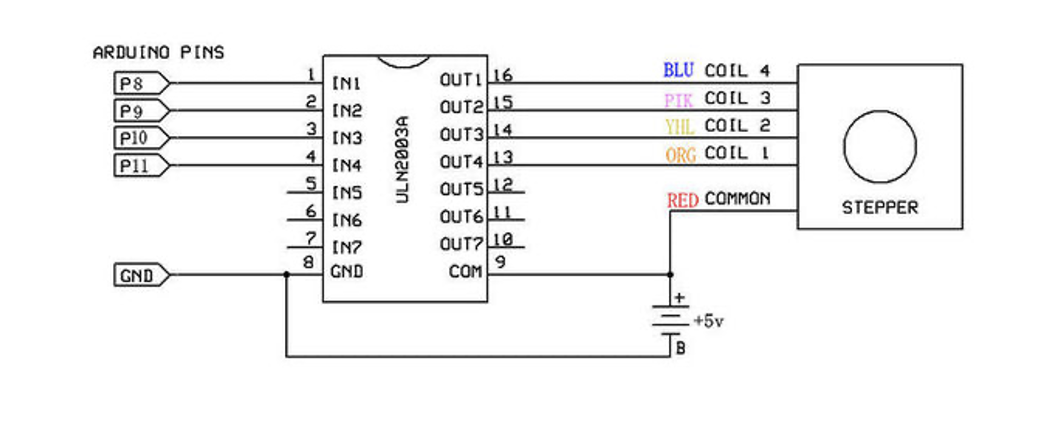
STEPPER MOTOR :
The stepper motor used is a 5 V motor with a Stepper Motor with Driver (28BYJ-48 5V DC).
A stepper motor, much like a DC motor has a rotating permanent magnet propelled by stationary electrical magnets, however the motion is divided into a number of steps around the rotation of the rotating magnet. It does so by having several teeth on the rotating magnet that line up with specific locations around the stationary charged magnets. When voltage is supplied to a specific magnet or specific sequence of magnets the motor will rotate, or step to that position and hold.

Stepper motors can spin like a regular DC motor, however they can also stop on a position like a servo motor.
Code is using the library Stepper.h :
#include <Stepper.h>
// Define number of steps per rotation:
const int stepsPerRevolution = 2048;
// Wiring:
// Pin 8 to IN1 on the ULN2003 driver
// Pin 9 to IN2 on the ULN2003 driver
// Pin 10 to IN3 on the ULN2003 driver
// Pin 11 to IN4 on the ULN2003 driver
// Create stepper object called 'myStepper', note the pin order:
Stepper myStepper = Stepper(stepsPerRevolution, 8, 10, 9, 11);
void setup() {
// Set the speed to 5 rpm:
myStepper.setSpeed(5);
// Begin Serial communication at a baud rate of 9600:
Serial.begin(9600);
}
void loop() {
// Step one revolution in one direction:
Serial.println("clockwise");
myStepper.step(stepsPerRevolution);
delay(500);
// Step one revolution in the other direction:
Serial.println("counterclockwise");
myStepper.step(-stepsPerRevolution);
delay(500);
}
Code Explanation:
The Stepper.h Arduino library is included in the first step of the project. On the website, you may learn more about this library.
// Include the Arduino Stepper.h library:
#include <Stepper.h>
Then we estimated how many steps it takes the motor to complete one rotation. We'll use the motor in full-step mode in this example. This translates to 2048 steps to complete a 360-degree rotation (see motor specifications above).
// Define number of steps per rotation:
const int stepsPerRevolution = 2048;
The next step is to build a new instance of the Stepper class, which represents a specific stepper motor that is attached to the Arduino. The function Stepper(steps, pin1, pin2, pin3, pin4) is used for this, where steps is the number of steps per revolution and pin1 through pin4 are the motor's pins. Set the pins in the following order to acquire the right step sequence: 8, 10,9,11.
// Create stepper object called 'myStepper', note the pin order:
Stepper myStepper = Stepper(stepsPerRevolution, 8, 10, 9, 11);
We labeled the stepper motor 'myStepper' in this example, but you could call it 'z motor' or 'liftmotor' instead. For example ,
Multiple stepper motor objects with distinct names and pins can be created. This makes it simple to control two or more stepper motors at once.

With the function, you may specify the speed in rpm in the setup by having
setSpeed(rpm).
At 5 V, a 28byj-48 stepper motor's maximum speed is around 10-15 rpm.
void setup() {
// Set the speed to 5 rpm:
myStepper.setSpeed(5);
// Begin Serial communication at a baud rate of 9600:
Serial.begin(9600);
}
We just call the step(steps) function in the loop part of code, which rotates the motor a certain number of steps at a speed defined by the function below
setSpeed(rpm)
Passing a negative value to this function causes the motor to spin in the opposite direction.
void loop() {
// Step one revolution in one direction:
Serial.println("clockwise");
myStepper.step(stepsPerRevolution);
delay(500);
// Step one revolution in the other direction:
Serial.println("counterclockwise");
myStepper.step(-stepsPerRevolution);
delay(500);
}
After having each sensor as input and component as outputs, we put everything together to assemble the project. For the processing code we based our code on the professors code :
In order to send multiple values from the Arduino to processing, we kept the handshake and we read the values.
CONNECTION:
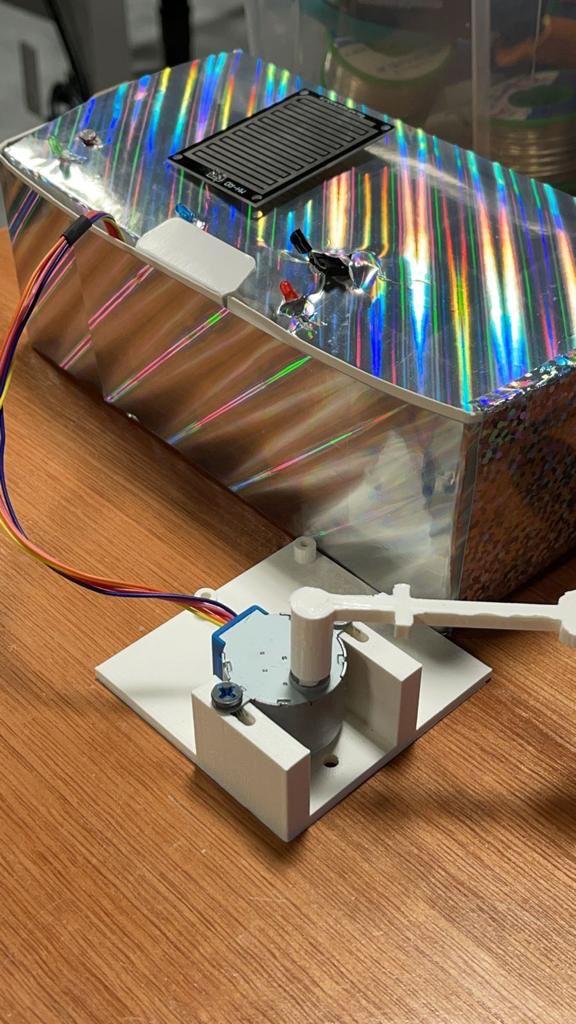
The stepper Motor is connected to the cover that should close when it rains. In order to have the motor control the cover we assumed the cover has a roller controller like the one found in normal curtains. So, we designed the controller that could be fitted into the stepper motor and to the cable of the roller curtain. Once the stepper motor turns clockwise, it will close the cover and if it turns anti clockwise it will open the cover
The reference to have the piece for the roller curtain is on this tutorial found below ...
After getting feedback from the professor, we changed the processing code entirely to have a more interactive animation. The code changed the display from a value display to an interactive animation display. In order to do the new code we used snippets of code from the open processing website.
The 4 screen parts are:

- Sun

- Moon

- Rain

- Thermometer
The challenges faced are mostly the changes that we had to do for the processing code. As we first wrote a code that displays the values of the sensors, then after the feedback, we changed the code into animation which is interactive with the sensor output. So glad we did that as it made our project come all together. The project was a learning curve as we spent a lot of time working on the mechanism of the moveable roof, and on the processing code to display the interactive animation.
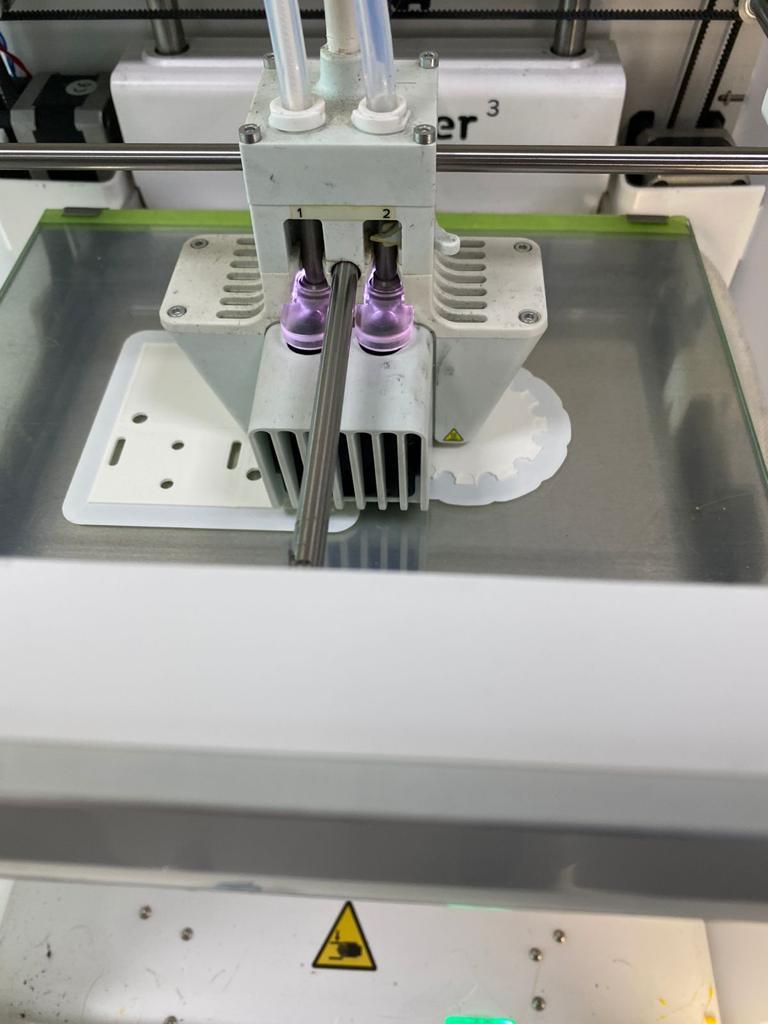
IMAGES OF OUR PROCEDURE :
The 3D printer that we used to print the pieces we made
The journey of making our brainstorming session come into reality by putting the hardware of Arduino to processing connection.
In the above image, we only 3D printed a different piece that would be for our roof just cause we though it would look more aesthetic and is more practical when putting it together.
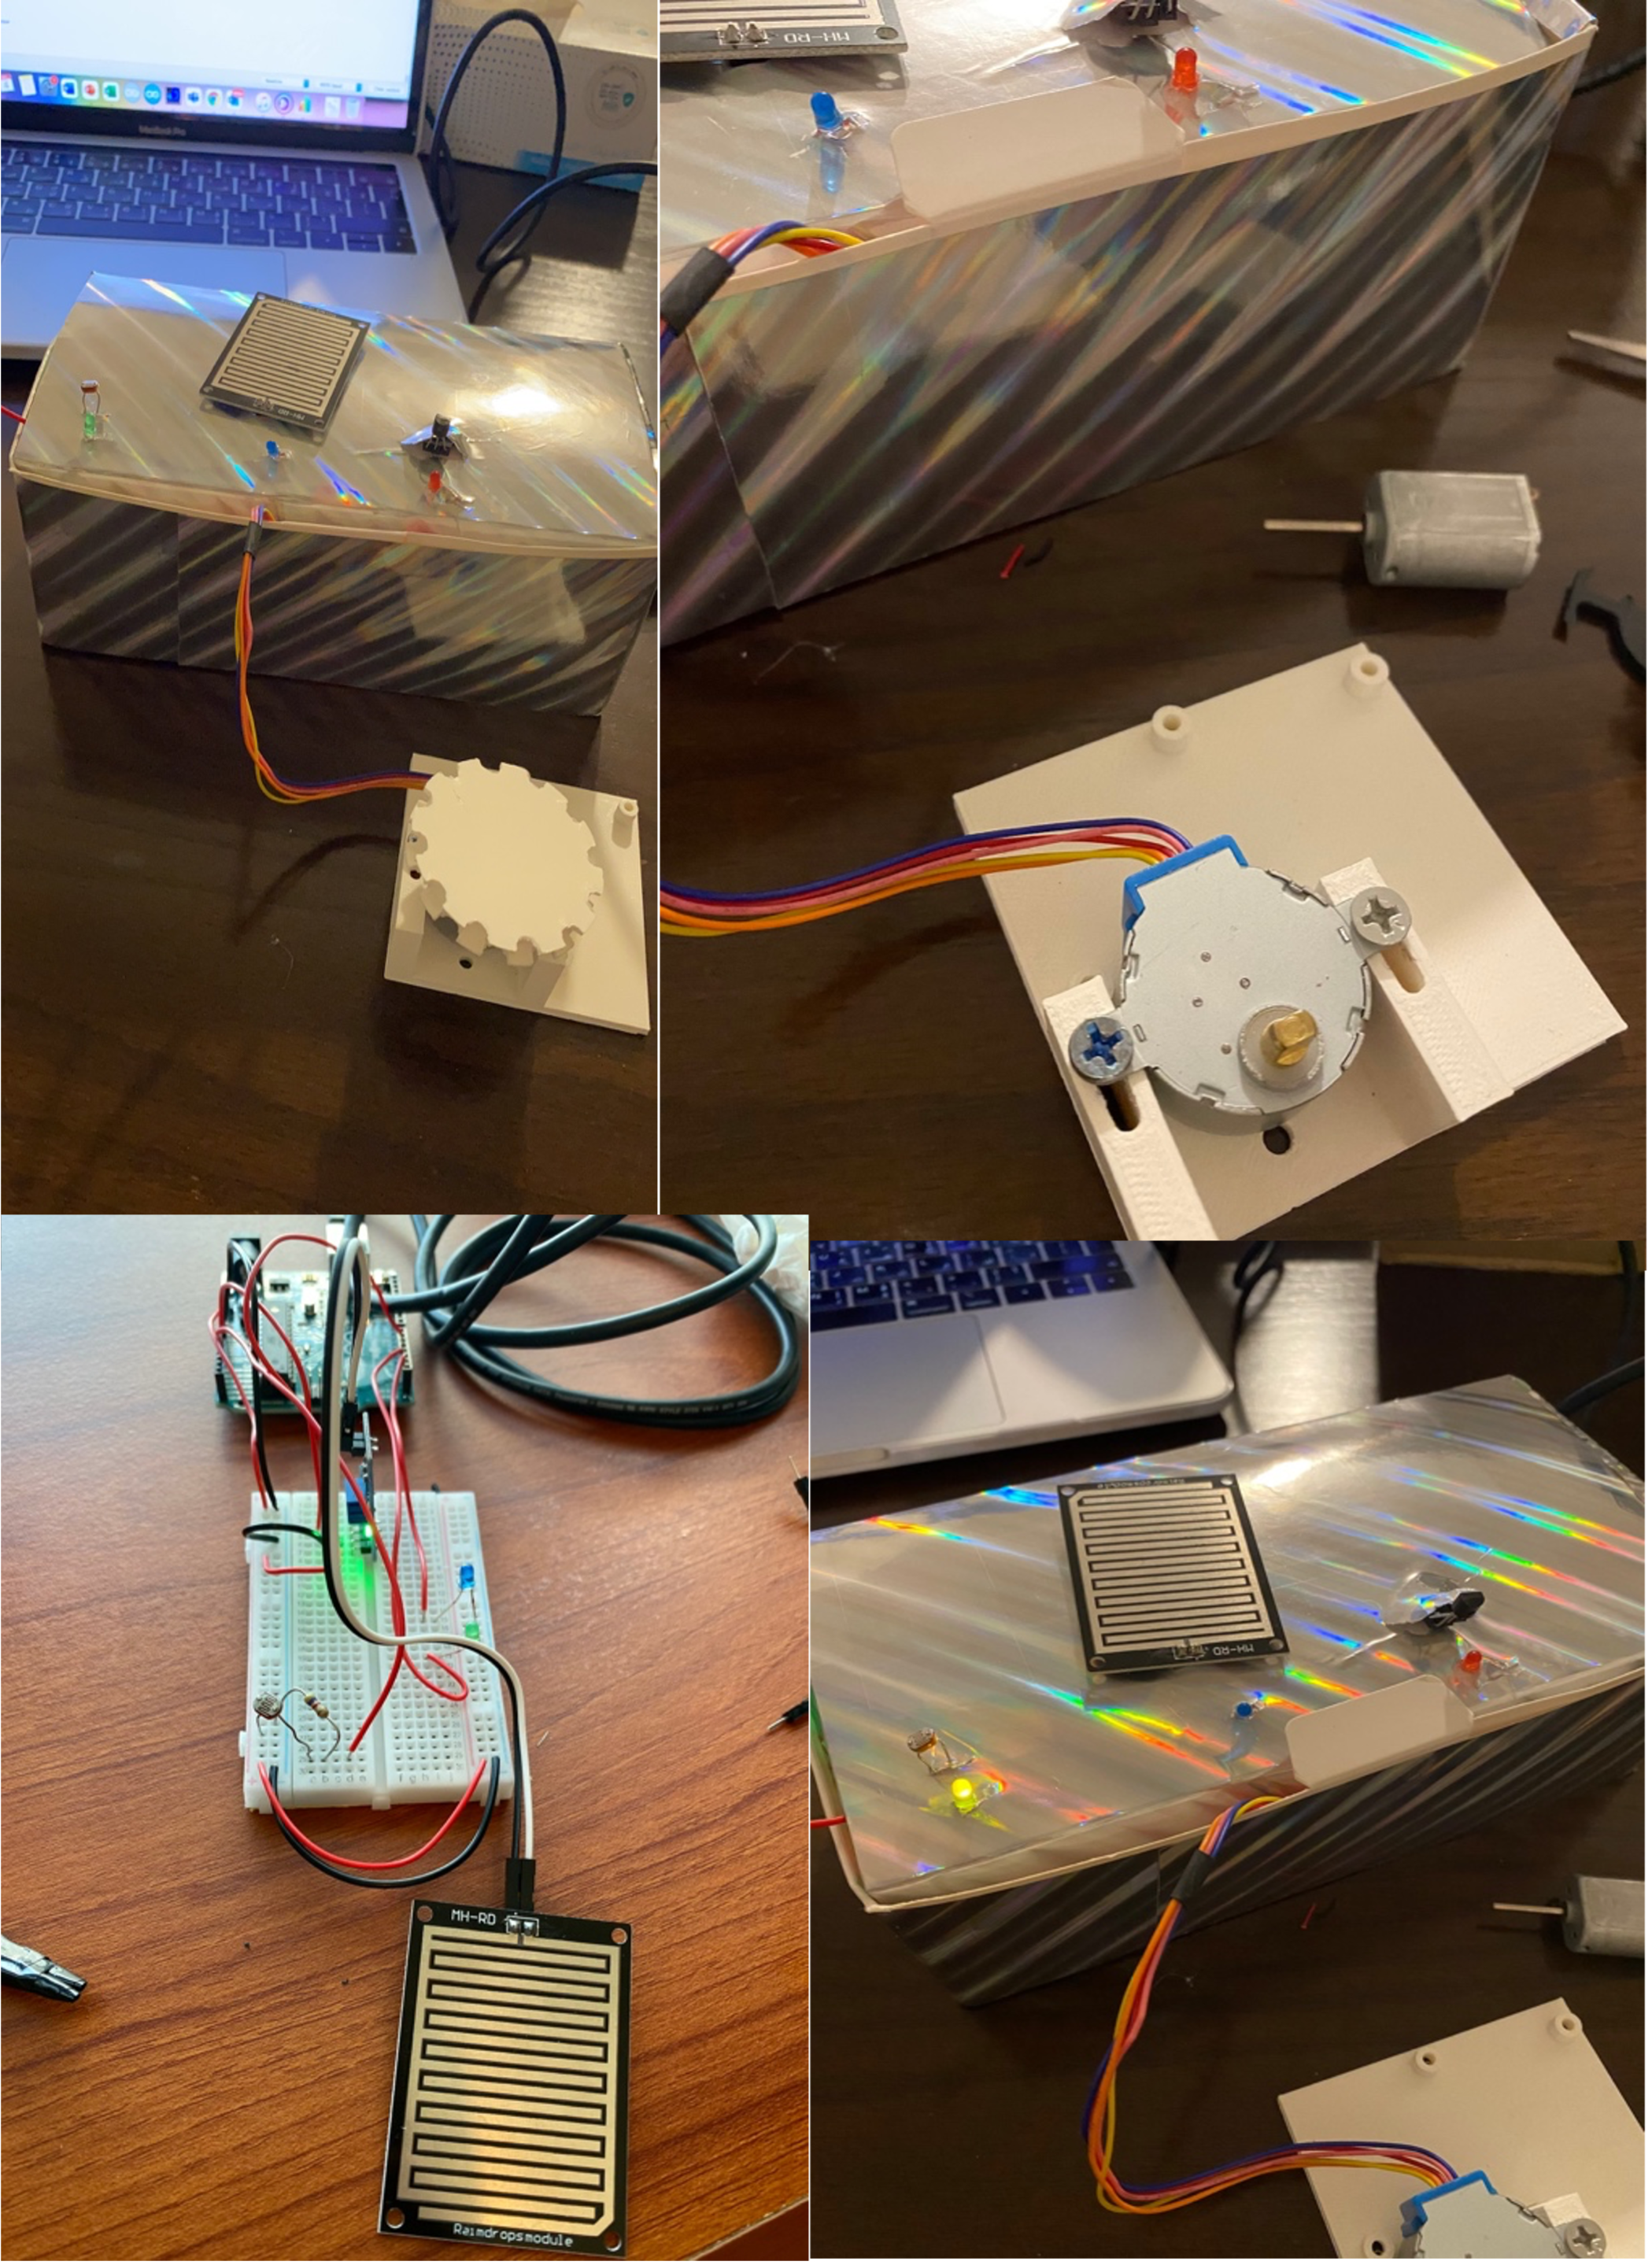
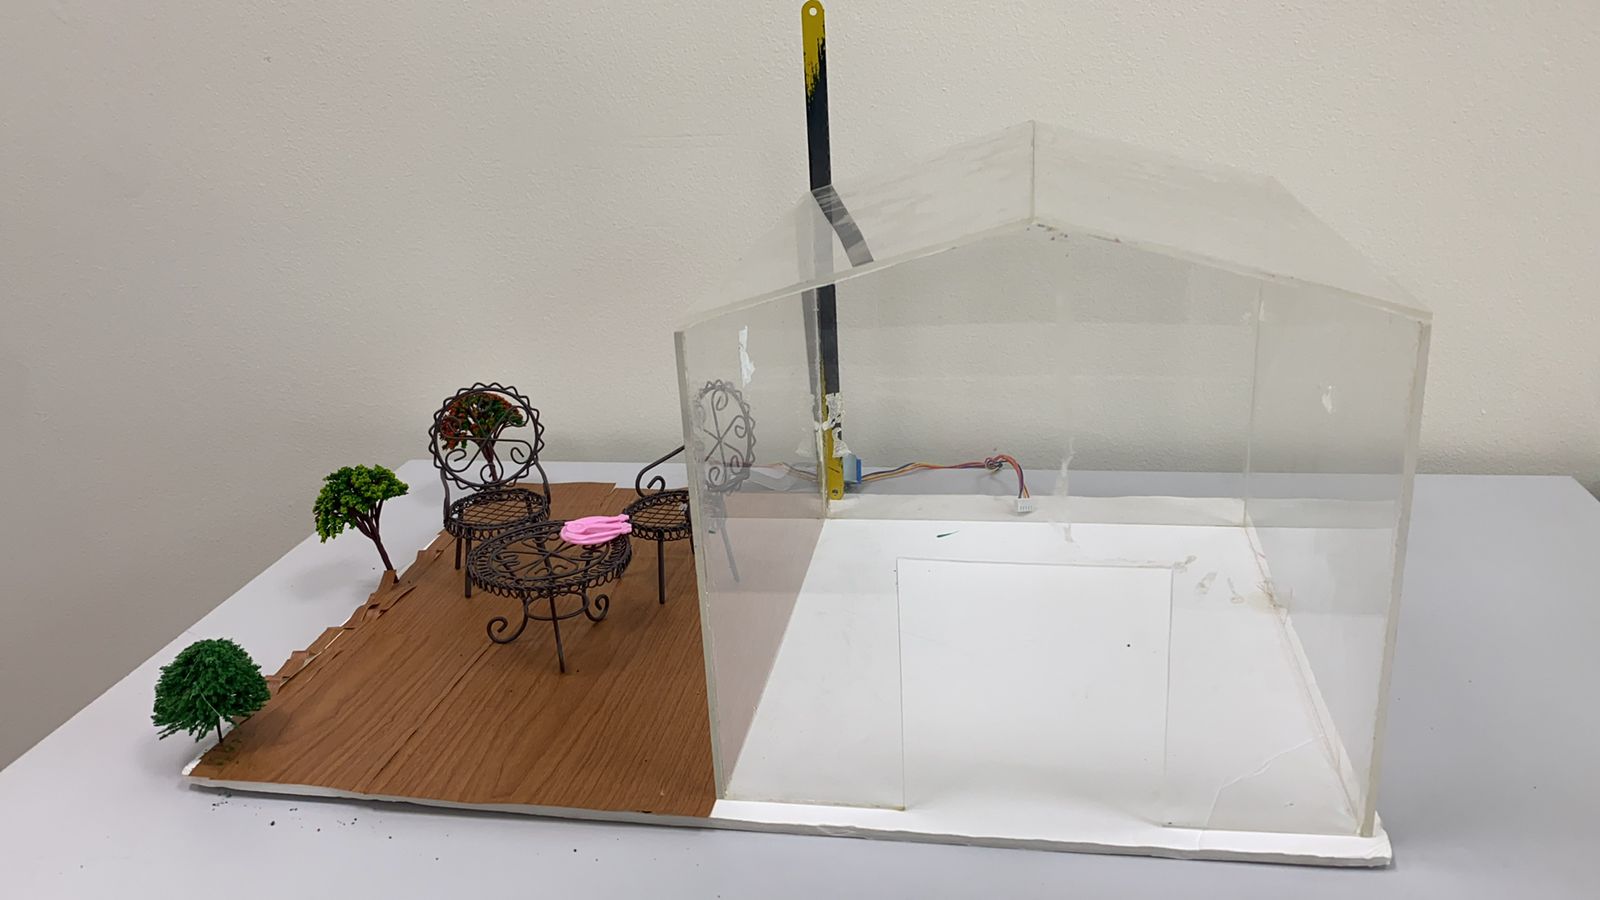
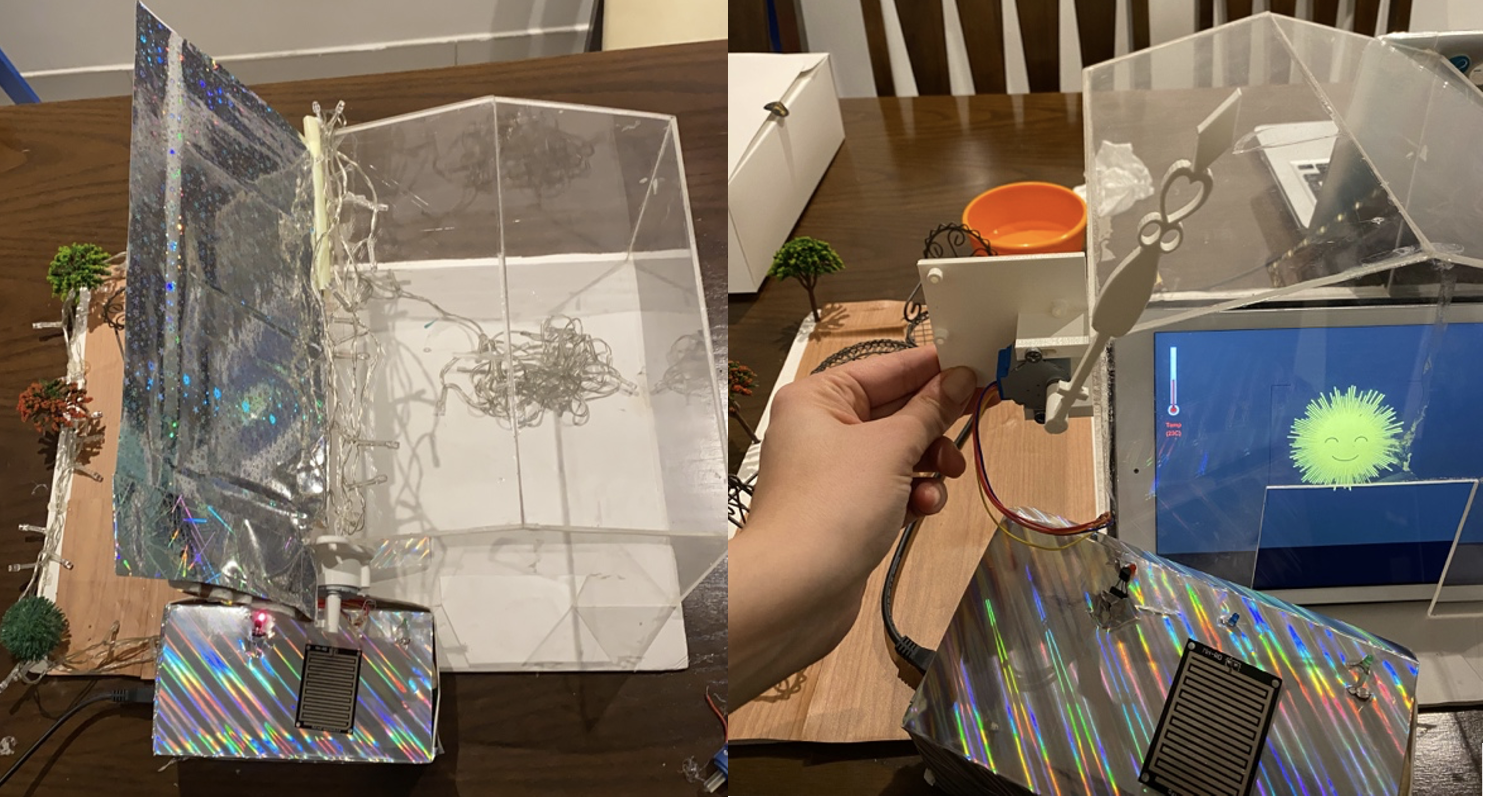
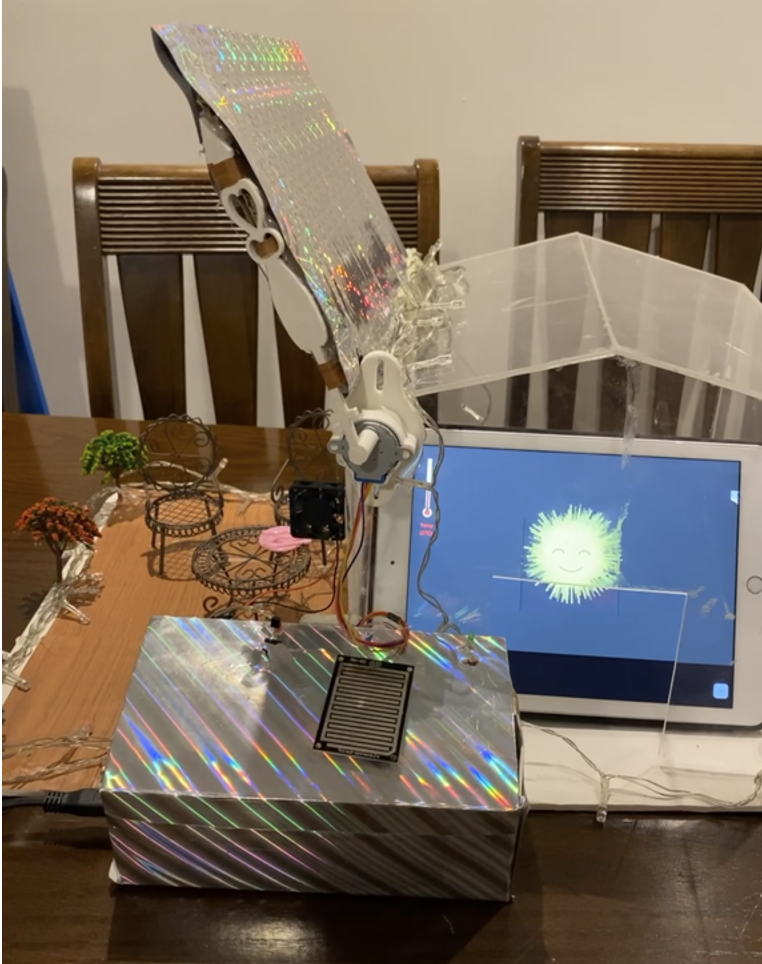
Later, we designed the house out of plexi, on which we attached a motor. Then we connected the motor to a lever which is the white part and that lifts the roof. Through coding in Arduino, we can rotate the roof in terms if lifting and lowering. Another thing is that we attached a fan to the house to be used with the temperature sensor. The control box found is where we kept all the sensors. In addition, we added a double relay connected to the led strip and the fan to control them, as these components require a higher voltage power. The final prototype looks like a house with a moveable roof, a fan, a light, and sensors to control them. The animation part is reflected on an iPad that we placed inside the house, and the way it is being displayed is by using the application: TeamViewer which basically mirrors the laptop screen while having our processing code running in full screen on the laptop.
Enjoy the doll sized house we built which allows you a full experience.
We created a manual that we will attach in our project table to aid with the user friendly experience
We used iMovie app to edit the video and got the bar video from YouTube. The first background picture wasfrom google images and the rest of the footage was taken by me and Theyab. We also added a free audio from YouTube (took the audio only from the video) for the background music and added to that my own voiceover after recording it on a voice note app using the add audio feature. Then, adding all the texts was easy since there is an option for text on iMovie and I have set the duration for every clip as we saw appropriate. Later, for the video within the picture (when speaking about the input sensors), we used the picture within picture option on the iMovie app. At last, we just wanna say that we are grateful and proud of what we were able to accomplish and present to our upcoming community in the IM End of Semester Show !
Final VIDEO FOR WEATHER PATIO :
PROCESSING FULL CODE:
//import Serial communication library
import processing.serial.*;
//init variables
Serial myPort;
int tempC;
int tempF;
int yDist;
int rainstatus;
int[] tempHistory = new int[100];
int ldrvalue;

//code for rain
int nb=750; // number of drops
int maxDrops =1000;
int minDrops=500;
int h,h1;
Drop[] drops=new Drop[maxDrops];
//moon code
float phaseNum=2;
int index = 0;
PFont f;


void setup()
{
//set the size of the window
fullScreen();
// size(1000,800,P3D);
 printArray(Serial.list());
 String portname=Serial.list()[3];
 println(portname);

//init serial communication port
 myPort = new Serial(this, portname, 9600);
 myPort.clear();
 myPort.bufferUntil('\n');
//fill tempHistory with default temps
 for(int index = 0; index<100; index++)
 tempHistory[index] = 0;

 //rain code
 smooth();
  frameRate(30);
  h = abs(height/3);
  h1=h*2;
  for (int i = 0; i < maxDrops; i++){
    drops[i] = new Drop(int(random(width)),-int(random(height*2)),(int)map((h+int(random(h1))),height*.35,height,0,height),1280);
  }
  f = createFont("Arial",20);
}

void draw()
{thermometer();
 //dark

 if(ldrvalue<400){
 //moon code
 background(0);
  noStroke();
 fill(255,255,255);
 //rect(475,120,220,150);
 fill(0,random(170,200));
  rect(0,0,width,height);
  drawMoon();
  {drawShadow((width/2)-(phaseNum*35),height/2);}
  thermometer();
 }
 //sun
 else{sun();thermometer();}

 if(rainstatus==1){
   //rain code
  gradient();
  for (int i=0;i<nb;i++){ drops[i].fall();}
 }
 //else sun();


}

void serialEvent(Serial myPort){

  String s=myPort.readStringUntil('\n');

  s=trim(s);

  if (s!=null){

    int values[]=int(split(s,','));

    if (values.length==3){

     // tempC=(int)map(values[0],0,1023,0, width);
tempC=values[0];
ldrvalue=values[1];
      rainstatus=values[2];

    }
      println(tempC,ldrvalue,rainstatus);

  myPort.write('0');

}

  }

  //code for rain screen

void gradient(){
  noStroke();
  beginShape(QUADS);
  fill(188,190,192);
  vertex(0,0);
  vertex(width,0);
  fill(0,5,10);
  vertex(width,height);
  vertex(0,height);
  endShape();
}

class Drop{
  int x,y,d,z,onde,d1,oldY;
  float acc;
  boolean s;

  Drop(int x,int y, int z, int d){
    this.x=x;
    this.y=y;
    this.d=d;
    this.z=z;
    onde=0;
    d1=d;
    acc=0;
    oldY=y;
  }

  void fall(){
    if(y>0)acc+=0.2;
    stroke(200,200,200,map(z,0,height,0,255));
    strokeWeight(2);
    if (y<z){
      y=int(y+4+acc);
      line(x,oldY,x,y);
      oldY=y;
    }
    else{
      noFill();
      stroke(175,175,175,175-map(onde,0,d,0,255));
      strokeWeight(map(onde,0,d,0,4));
      d=d1+(y-height)*4;
      ellipse(x,y,onde/5,onde/20);
      onde=onde+7;
      if(onde>d){
        onde=0;
        acc=0;
        x=int(random(width));
        y=-int(random(height*2));
        oldY=y;
        d=d1;
      }
    }
  }
}

//sun
void sun() {

    background( 51 ); //resents background color to dark gray
    int rbound = 200; //default

    fill( 255, 246, 64 ); //yellow
    stroke( 255, 246, 64 ); //yellow
    strokeWeight( 5 );
    int twinkle = 80; //distance change in ray length
    //float radius=200; //radius of rays
    float radius;
    int numPoints=130; //number of rays
    float angle=TWO_PI/(float)numPoints;

    //create rays
    for(int i=0;i<numPoints;i++)
    {
        radius = rbound - (int)random( 0, twinkle );
        line(width/2, height/2,radius*sin(angle*i)+width/2,radius*cos(angle*i)+height/2);
    }

    //ellipse( 300, 300, 200, 200 ); //sun

    //face
    stroke( 51 ); //dark gray
    strokeWeight( 4 );

        arc( (width/2)-50, height/2, 40, 30, PI, TWO_PI ); //left eye
        arc( (width/2)+50, height/2, 40, 30, PI, TWO_PI ); //right eye
    arc( (width/2), height/2+35, 100, 70, PI/6, 5*PI/6 ); //mouth

}
//code moon

void drawMoon(){
    for(int i=1; i<50; i++) {
      fill(245,10);
      ellipse(width/2, height/2,200-i*5,200-i*5);
     ellipse(width/2, height/2,150,150);
    }
}

void drawShadow(float x, float y) {
    for(int i=1; i<50; i++) {
      fill(0,80);
      ellipse(x, y,180-i*5,180-i*5);
    }
}

void thermometer(){
//fill background in gray
 //background(211,211,211);

 fill (227,227,227);
 //smooth();

 //build thermostat
 rectMode(CORNER);
 rect (50, 50, 20, 200);
 ellipse (60, 270, 40, 40);

 //build quicksilver reservoir
 fill(255, 0, 0);
 ellipse (60, 270, 20, 20);

 //quicksilver
 float thermometer_value = map(tempC,0,50,200,0);
 rect(57, 57 + thermometer_value, 6, (200 - thermometer_value));

 //define stroke
 stroke (255,0,0);
 strokeWeight(2);

 //draw font
 textFont(f,20);
 text ( "Temp", 35, 330);
 text ( "(" + tempC + "C)", 35, 360);
}
ARDUINO FULL CODE :
const int capteur_D = 4;

const int capteur_A = A0;

int blueled=2;//for rain

int val_analogique;

int LDRsensorPin=A1;

int LDRsensorValue = 0;

int greenled = 3;//green light for ldr

int redled=6;

int temppin=5;

int baselinetemp=25;

int ldrvaluelimit=400;

int celsius=0;

bool closed=false;
int raining=0;
//code for stepper motor

#include <Stepper.h>

const int stepsPerRevolution = 500;//2048;

Stepper myStepper(stepsPerRevolution, 8, 10,9, 11);


//code for temperature sensor

#include <OneWire.h>

#include <DallasTemperature.h>

#define ONE_WIRE_BUS temppin //pin in 4

OneWire oneWire(ONE_WIRE_BUS);

DallasTemperature sensors(&oneWire);


void setup()

{

  pinMode(capteur_D, INPUT);

  pinMode(capteur_A, INPUT);

  pinMode(blueled, OUTPUT);

  pinMode(greenled, OUTPUT);

  pinMode(redled, OUTPUT);


myStepper.setSpeed(10);


  Serial.begin(9600);

  //code for tempqrature

  sensors.begin();

//handshake

  Serial.println("0,0");

}


void loop()

{

  /********************************************************************/

  //rain sensor

if(digitalRead(capteur_D) == LOW)

  {

   // Serial.println("Digital value : wet");
   raining=1;
    delay(10);

    digitalWrite(blueled,HIGH);

    if(!closed){//Serial.println("close: turn counterclockwise");

    myStepper.step(stepsPerRevolution);

    delay(1000);

    closed=true;  }

  }

else

  {raining=0;
    //Serial.println("Digital value : dry");

    delay(10);

    digitalWrite(blueled,LOW);

   if(closed){

    //Serial.println("open: turn clockwise");

    myStepper.step(- stepsPerRevolution);

    delay(1000);

    closed=false;}

  }

val_analogique=analogRead(capteur_A);
 //Serial.println("Analog value for rain sensor : ");

//Serial.print(val_analogique);

// Serial.println("");

delay(500);

/********************************************************************/

//ldr sendor


 LDRsensorValue = analogRead(LDRsensorPin);

if(LDRsensorValue < ldrvaluelimit)

{

  /// Serial.println("LED light on");

   digitalWrite(greenled,HIGH);//Serial.print(LDRsensorValue);

   //delay(1000);

}

else {digitalWrite(greenled,LOW);//Serial.println("LED light off,LDR value:");Serial.print(LDRsensorValue);
}


/********************************************************************/

//temperature sensor

sensors.requestTemperatures(); // Send the command to get temperature readings

//Serial.println("Temperature is: ");

 celsius = sensors.getTempCByIndex(0);

if(celsius>baselinetemp)digitalWrite(redled,HIGH);

else digitalWrite(redled,LOW);


  delay(1000);

//processing code

Serial.print(celsius);
Serial.print(',');
Serial.print(LDRsensorValue);
Serial.print(',');
Serial.println(raining);
/*/
if(Serial.available()>0){
char state = Serial.read ( );    // Reading the data received and saving in the state variable

if(state == '1')             // If received data is '1', then turn on LED

{

digitalWrite (greenled, HIGH);

}

if (state == '0') {     // If received data is '0', then turn off led

digitalWrite (greenled, LOW);

}

}

delay(50);

 */

  }
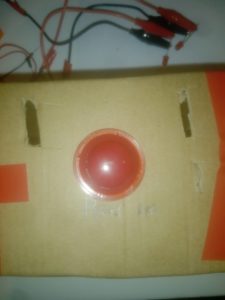
My core idea for the final project was to integrate lights, music, and a screen.
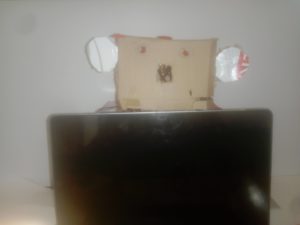
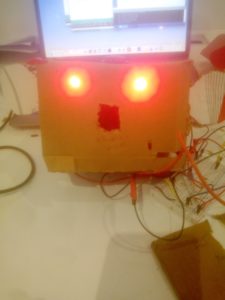
I was initially going to do a music concert simulation but was challenged to be more creative. That’s was the beginning of Bob the Bot. Bob the Bot is a humanoid bot. Its head is a box and its body is a screen. For more details about the project plan, the sketches, and interactivity, check the BobTheBot document.
Refer to BobTheBot document for the role of Arduino and Processing.
I love music and light work so being able to work the music, screen visualization, and lig ht simulation into the story for my final project made the building process more enjoyable and worth it in the end.
import processing.serial.*;
Serial myPort;
int xPos=0;
int yPos=0;
int currentStateOfPet = 1;
int prevStateOfPet = 0;
int petCount = 0;

PGraphics intro;
PGraphics second;
PFont f;

boolean onOff=false;


void setup(){
  //size(960,720);
  fullScreen();
  printArray(Serial.list());
  String portname=Serial.list()[4];
  println(portname);
  myPort = new Serial(this,portname,9600);
  myPort.clear();
  myPort.bufferUntil('\n');

  intro = createGraphics(width, height);
  smooth(8);

  f = createFont("Arial", 48, true);

  //create an image made of text
  intro.beginDraw();
  intro.background(0);
  intro.fill(255);
  intro.textSize(80); // change text size
  intro.textAlign(CENTER);
  intro.textFont(f,80); // change font size
  intro.text("HI THERE", intro.width/2, intro.height/2 -100);
  intro.text("I'M BOB", intro.width/2, intro.height/2);
   intro.text("PET ME - ON MY HEAD", intro.width/2, intro.height/2+100);
  intro.endDraw();

  //second stage
  //create an image made of text
  //second.beginDraw();
  //second.background(0);
  //second.fill(255);
  //second.textSize(80); // change text size
  //second.textAlign(CENTER);
  ////second.textFont(f,100); // change font size
  //second.text("ONE MORE !!!!", intro.width/2, intro.height/2);
  //second.endDraw();

}

void draw(){
  background(0);

  if (onOff){

    textSize(80);
    textAlign(CENTER);
    text("ONE MORE!!!", width/2, height/2);
  }
  else{
      image(intro,0,0);
  }


  // 0 is HIGH (not pressed) , 1 is LOW ( Pressed)
  if (currentStateOfPet == 0 && prevStateOfPet == 1){
      onOff= !onOff;
    }

    prevStateOfPet = currentStateOfPet;
}

void serialEvent(Serial myPort){
  String s=myPort.readStringUntil('\n');
  s=trim(s);
  if (s!=null){
    println(s);
    int values[]=int(split(s,','));
    if (values.length==3){
      currentStateOfPet = values[0];
      xPos=(int)map(values[1],0,1023,0, width);
      yPos=(int)map(values[2],0,1023,0, height);

    }
  }
  println(onOff);
  myPort.write(int(onOff)+"\n");
}
User Testing
Testing the first and second phases of Bob The Bot
Feedback / Next steps
Be more creative with the visualization on-screen and music box head
Ensure consistency of Interaction
Make Interaction clear
Use signifiers and cognitive mapping, etc.)
Attribution Sleep Like A Child by MusicLFiles Link: https://filmmusic.io/song/7828-sleep-like-a-child License: https://filmmusic.io/standard-license http://responsivedesign.de/wp-content/uploads/2016/05/tutorial-06_processing-soundmapping2.pdf
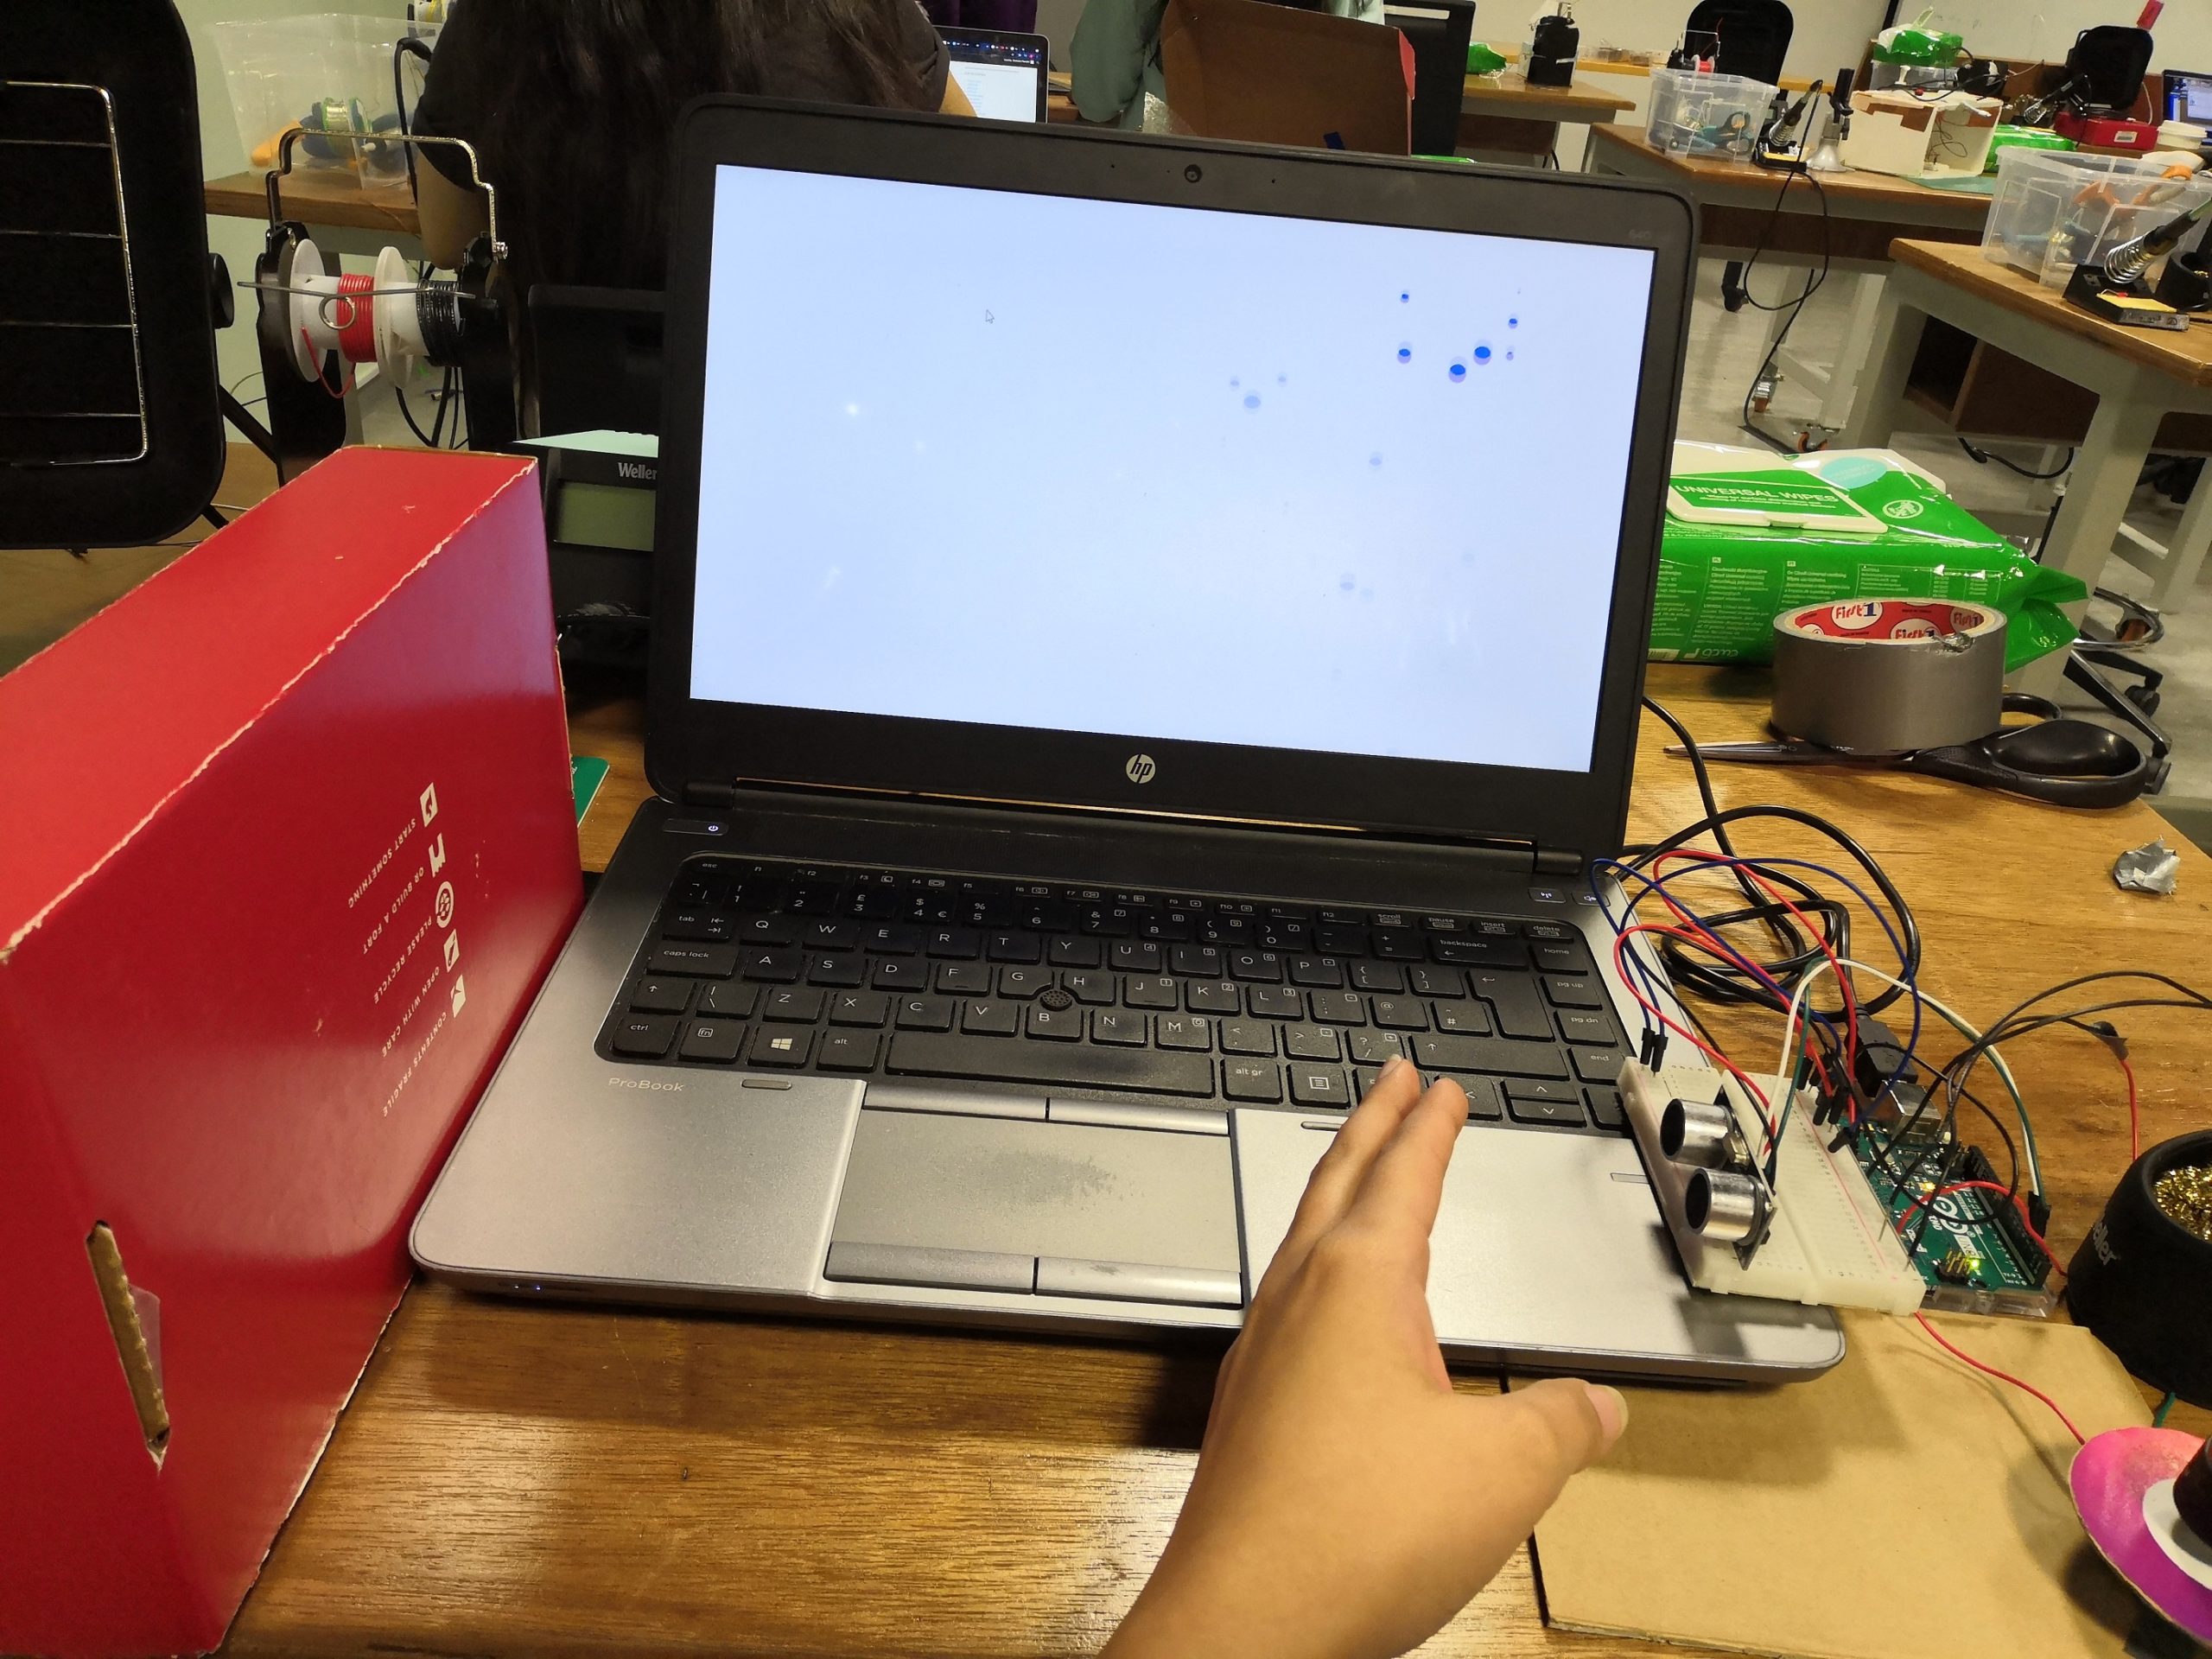
As you have read previously, I planned on creating a generative interactive art piece. However, with frequent feedback and suggestions, the idea is now more of a piano with art on screen. The distance sensor on Arduino helps to identify from where to drop balls from the top and bounce on screen and the potentiometer allows the user to select the color of the balls. As soon as the user moves hands away from the setup, the art form stops with the new production of balls. The sound to be played is dependent on where exactly on the bottom the balls hit.
To stick with a theme, the color palette is defined to be following:
One concern is that the colors on the screen are different from what was printed on the knob. I’m not sure how I can fix this but I hope it is not a big issue.
The tunes were collected as samples but still require some more work to have a better general music sound. The overall interaction design (that includes a bigger circuit wiring and piano theme cardboard layout) is still under process.
User Testing
Feedback
add different shapes (will try and depending on better aesthetic will finalize)
allow for faster response
better positioning of distance sensor
fun to play
Code
//Main Project Processing File
//Serial connection and sound
import processing.serial.*;
import processing.sound.*;
Serial myPort;

//variables for color mapping
int count = 400;
float radToDeg = 180.0 / PI;
float countToRad = TWO_PI / float(count);
float currentcolor;
float Xslider;

boolean playing = false;
boolean fade = false;

//array list for balls
ArrayList<Ball> balls;

//sounds
SoundFile[] files;
int numsounds = 10;


void setup() {
  fullScreen();
  //size(800,600);
  noStroke();
  frameRate(25);

  //port communication
  String portname=Serial.list()[0];
  myPort = new Serial(this,portname,9600);

  // Create an empty ArrayList (will store Ball objects)
  balls = new ArrayList<Ball>();

  //sounds
  files = new SoundFile[numsounds];
  for (int i = 0; i < numsounds; i++) {
    files[i] = new SoundFile(this, (i) + ".wav");
  };
  colorMode(HSB,360,99,99);

}

void draw() {
  background(0,0,99);
  if(frameCount%30==0 && fade == false){
    addBalls(7);
  }

  for (int i = balls.size()-1; i >= 0; i--) {
    Ball ball = balls.get(i);
    ball.move();
    ball.display();
    if(ball.x <= Xslider-width/5 || ball.x >= Xslider+width/5 || fade==true){
      if(ball.life > 200){
        ball.life = 150;

      }
    }
    if(ball.y >= height){
      int numsound = int(map(ball.x,0,width,0,9));
      playSounds(numsound);
    }
    if (ball.finished()) {
      balls.remove(i);
    }
  }
}

void playSounds(int numsound){
  if(numsound>=0 && numsound<=9 && !files[numsound].isPlaying() ){
    files[numsound].play();
  }
  for(int i=0;i<10;i++){
    if(files[i].isPlaying() && i!=numsound){
      if(frameCount%20==0){
        files[i].stop();
      }
    }
  }
}

void addBalls(int count) {
  // A new set of x ball objects are added to the ArrayList
  for(int i=0; i<count; i++){
    float randomS = random(3,10);
    float ballWidth = random(4,30);
    float xPos = random(Xslider-width/10, Xslider+width/10);
    float yPos = random(-100,0);
    float angle = currentcolor * countToRad;
    int hue = int(angle * radToDeg);
    balls.add(new Ball(xPos, yPos, ballWidth,randomS,hue));
  }
}

//Serial Communication
void serialEvent(Serial myPort){
  String s=myPort.readStringUntil('\n');
  s=trim(s);
  if (s!=null){

    int values[]=int(split(s,','));
    if (values.length==2){
      currentcolor = map(values[0],0,1023,290,380);
      if(values[1]>150 && values[1]<1700){
        fade= false;
        Xslider= map(values[1],150,1700,width, 0);
      }
      else{
        fade = true;
      }
    }
  }
}
// Simple bouncing ball class

float noiseScale = 700;


class Ball {

  float x;
  float y;
  float speed;
  float gravity;
  float w;
  float life = 370;
  int colorhue;
  boolean bounced= false;

  Ball(float tempX, float tempY, float tempW, float tempS, int hue) {
    x = tempX;
    y = tempY;
    w = tempW;
    speed = tempS;
    colorhue = hue;
    gravity = 0.1;
  }

    void move() {
    // Add gravity to speed
    speed = speed + gravity;
    // Add speed to y location
    y = y + speed;
    float noiseVal = noise(x*noiseScale);
    int sign;
    if(Xslider<width/2){
      sign = -1;
    }
    else{
      sign = 1;
    }
    noiseVal = sign * noiseVal;

    // If ball reaches the bottom
    // Reverse speed
    if (y > height) {
      // Dampening
      speed = speed * -0.9;
      y = height;
      bounced = true;
    }

    if(bounced==true){
      x = (noiseVal+x);
    }
    if(bounced==true && y<=10){
      // Dampening
      speed = speed * -0.9;
      y = 10;
      bounced = false;
    }
  }

  boolean finished() {
    // Balls fade out
    life--;
    if (life < 0) {
      return true;
    } else {
      return false;
    }
  }

  void display() {
    // Display the circle
    fill(color(colorhue,99,99),life);
    ellipse(x,y,w,w);
  }
}
The time has come to choose the murderer…We have a murder mystery game with supernatural elements now!
Since the last post, the game has come a long way in terms of implementation as well as the storyline! After a very long meeting, we created the plot for the murder storyline with supernatural elements of Indian origin.
Here’s a (kinda long) elevator pitch for the game “Eyes of Enakshi”:
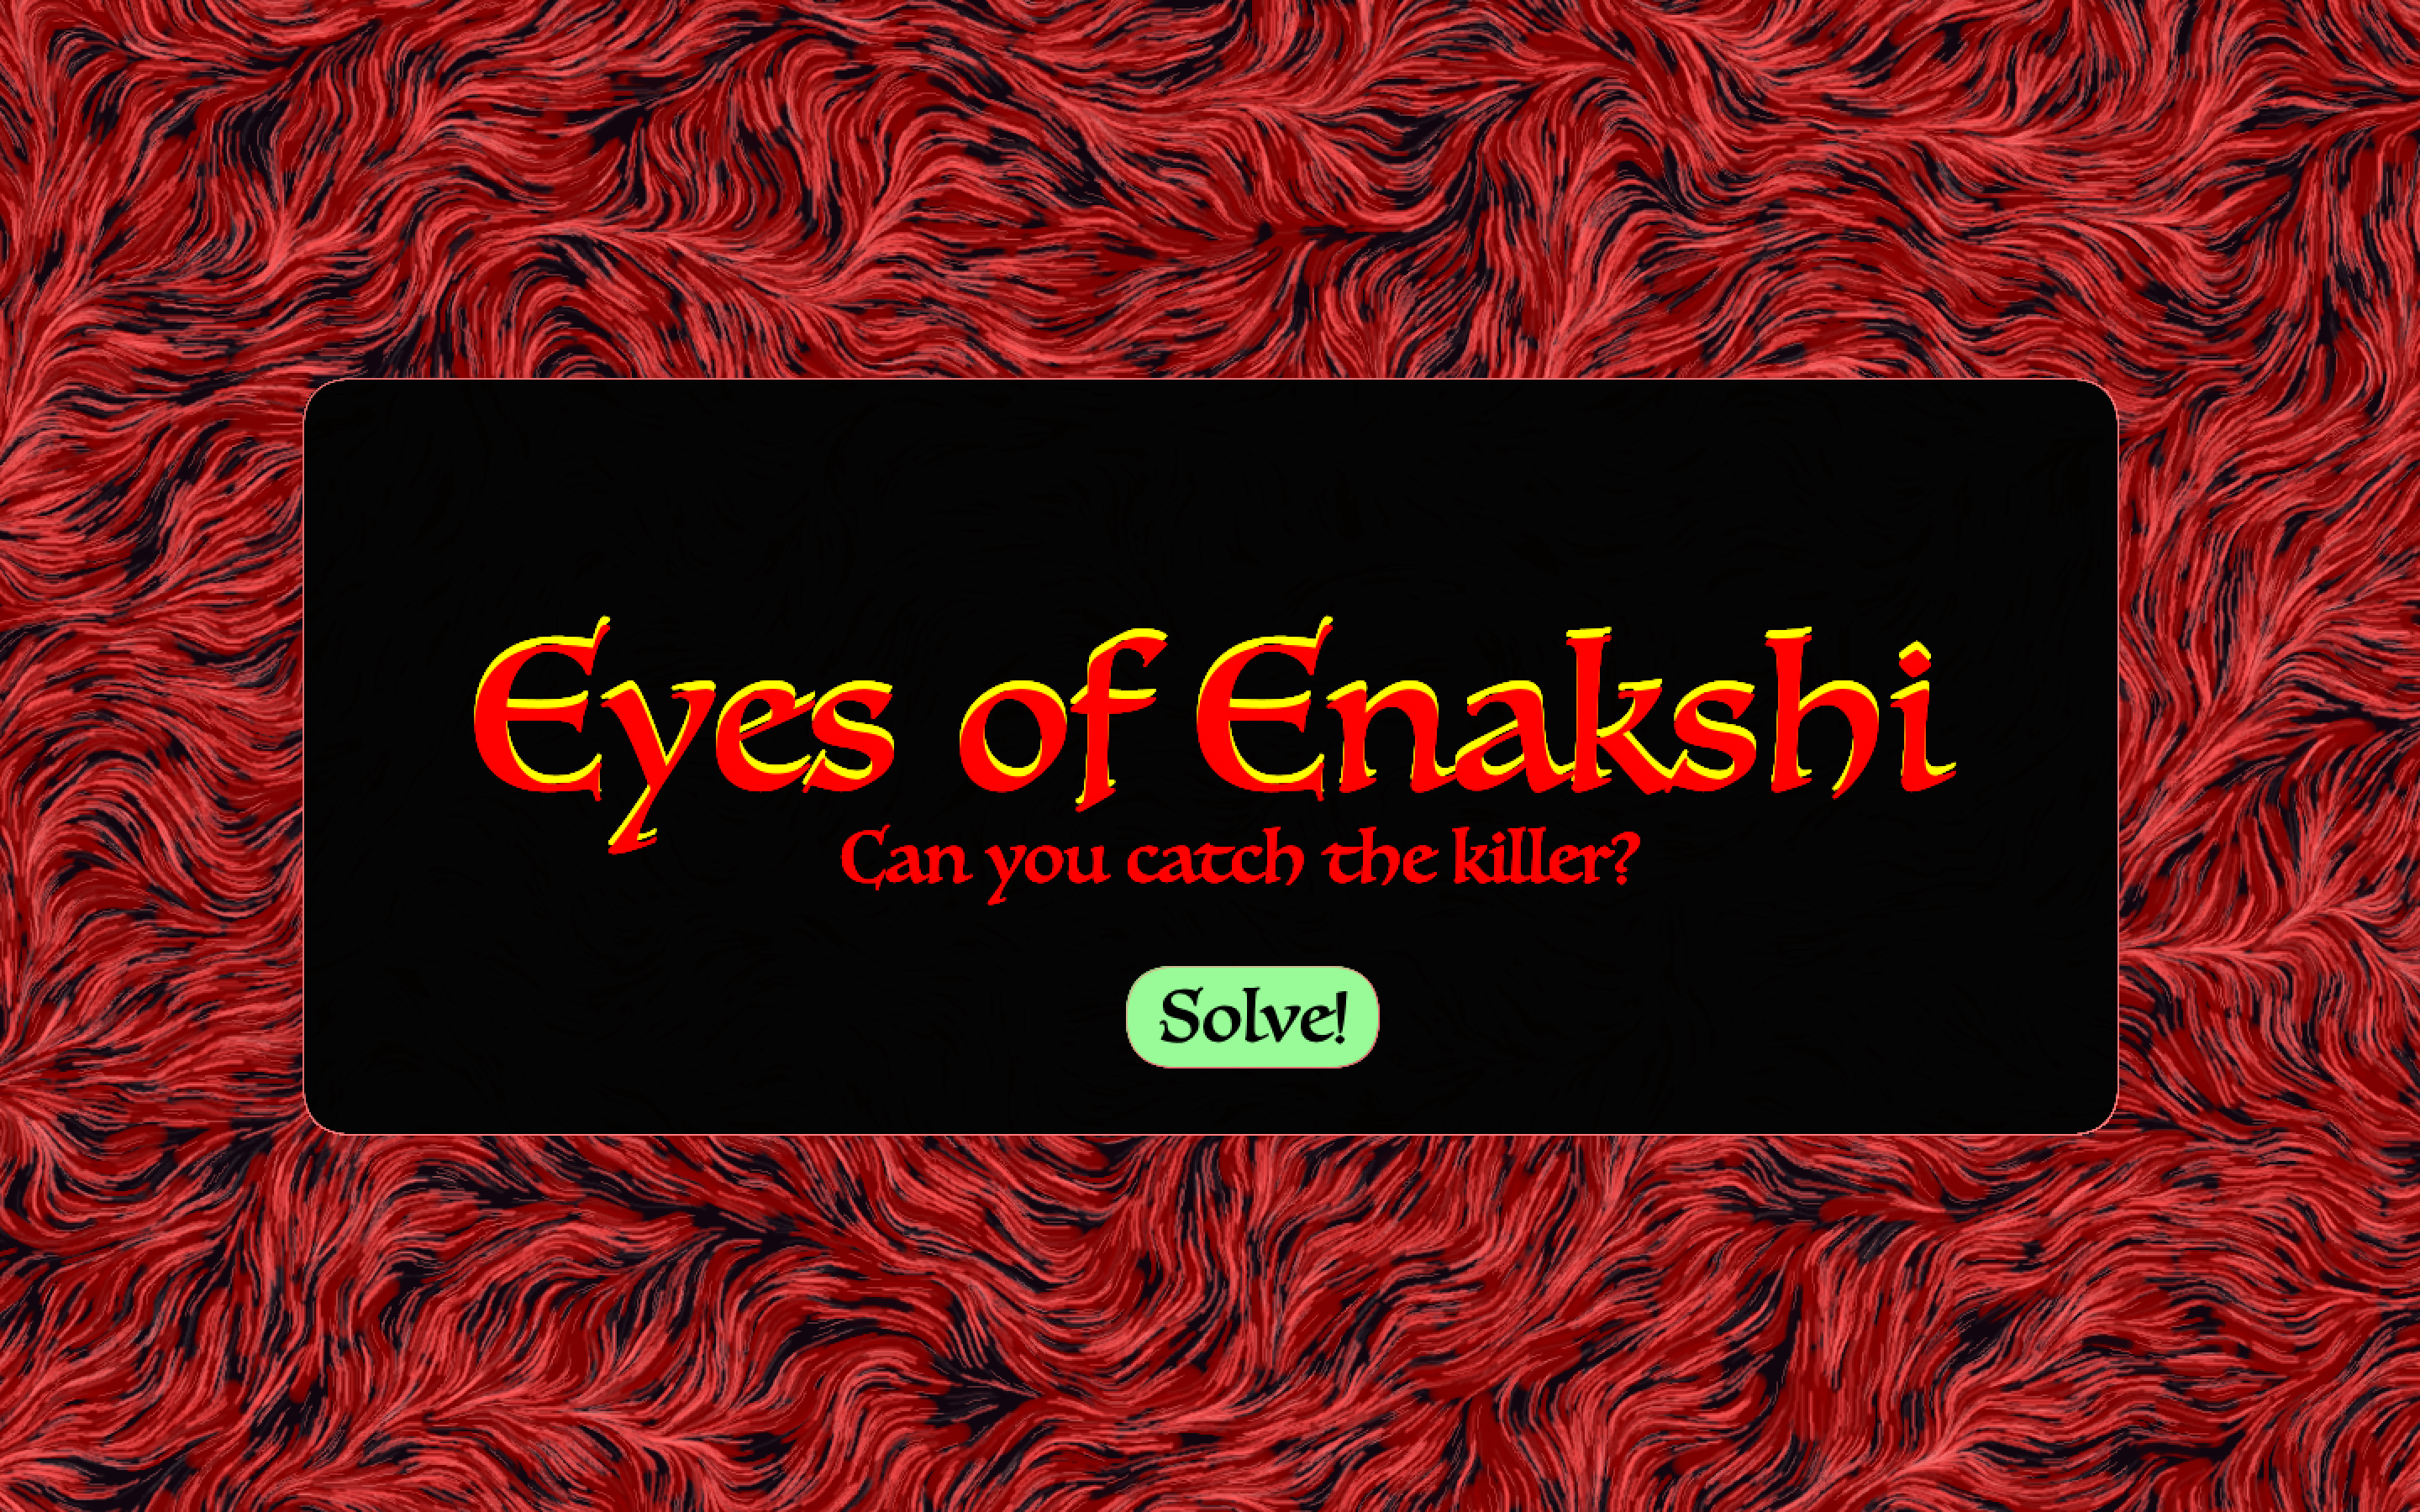
Eyes of Enakshi
The game follows the murder of Gayathri Devi, a successful businesswoman who came to the town of Medikeru (hometown of her young husband) to celebrate her mother-in-law’s 80th birthday. She was found dead the day after her arrival, choked to death. The town is abuzz with rumors guessing the cause of her death – but there’s one guess that’s the most popular – it’s the work of Enakshi! Enakshis are spirits that wander on the earth and are known to kill with their doe-shaped red-eyed gaze. They kill when they are furious and there’s a legend in the town about a man who was killed by Enakshi when he refused to donate to the town temple. Gayathri Devi had done the same, no wonder she’s dead, right?
Well, in this game, Enakshi guides you – she knows it’s not her and she thinks the family is too suspicious- and you, the detective can figure it out, otherwise – well, the Enakshi will be after you!
The Game – Implementation
The starting screen of the game uses Perlin noise with a palette of reds to invoke an ominous feeling. The name of the game is there on-screen throughout the animation and the “Solve” button and the tagline appear when the animation is over. The font we use throughout is “Luminari” to maintain a specific aesthetic to the game. Here’s the starting screen –
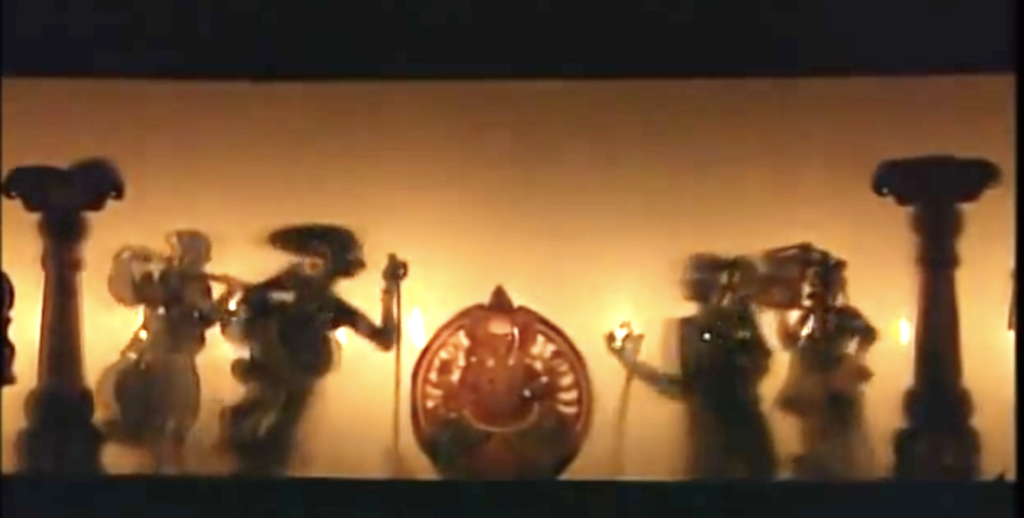
For the legend, we used visuals from the famous “Tholppavakkoothu” art form from Kerala – it’s a form of shadow puppet art. We used it because it went along with the aesthetic of legends – because the stories told by the artform are usually legends. The different type of visual on the screen allows the user to understand that this is an old legend narrative – and not a present-day story – we wanted to create something akin to the “dreamy-like” editing in flashback scenes in movies.
Push buttons are used throughout the game to navigate screens and for the final part – where they choose the murderer – they use a slider to choose. The buttons are color-coded similarly to the pushbutton on the breadboard, to make it easier for the player to understand while being subtle.
The character of Enakshi was heavily inspired by “Yakshis” who are believed to be spirits that wander the earth (trying to seek revenge) in my home state, Kerala. The images used in the game of Enakshi are artist interpretations of Yakshi –
We found stock images of people that looked like the characters we had in mind for the story – and used Canva to apply similar paint effects to create graphics. Here they are:
For the clues, we have five clues in the game:
The Morse Code
Enakshi communicates to the detective a secret code using morse code. The code is communicated using LEDs and the replay is signified using a buzz sound.
The Diary
The number that is communicated by the Enakshi is the clue for unlocking this clue. The detective has to flip to the page number that is communicated by the Enakshi and this triggers a new screen – it says that you have to write on the paper to get old imprints. If the detective rubs onto the paper several times – a diary page will appear.
The Newspaper Scrap
There will be a newspaper scrap on the table and if the detective picks it up, a connection will be disrupted, and this digital input is used as a trigger to show the clue.
The Child
There will be a toy on the table as well and when the detective picks it up. The working is similar to the newspaper clue
The Police Department Communication
SImilar to the newspaper clue, you pick something up to trigger the beginning of uncovering the clue. But then they have to press the button a certain number of times to see the final clue.
Once all the clues have been discovered, the detective gets to choose themurderer finally. Depending on whether they chose right or wrong, different screens get triggered. If they are wrong, the Enakshi will be out to get the detective. So, beware!
Here’e the user testing video:
From this here’s the feedback we got and how we want to work on them:
-morse code : The game works beginning with the. morse code, if they don’t figure it out, there’s no going back and our player couldn’t figure out what to do. Morse code itself is a bit hard to work with. So, we want to work on making sure they can figure out the morse code any time during the game with no order. -diary clue: diary clue was hard to figure out for the user, because of a lack of feedback from the game in the beginning – they didn’t know where to rub on the paper. And the user has the tendency to pick up the diary which would mess up the system. -the clues were moved too easily: the way the clues were placed were too easy to be moved – making the clues trigger without intentional movement from the user. So, we need to work on making sure they stay put until intentionally moved by the user. -add clue log and character log: Putting in a summary of all the clues so far before choosing the murderer would help the detective choose better
Overall, we want to work on making sure that 1) there’s clarity in our instructions and 2) the clues are properly placed when presented (in a way that they would be moved only when the detective intentionally picks it up).
The plotline itself seems to be a good mix of ease and hard, so the murder mystery is not too easy to solve but at the same time, not too hard, which is what we wanted. We got to implement the clues as we desired and the visuals and the storyline came out as we had envisioned, which is really encouraging to think about (that realization came when I was writing down this documentation!). But yeah, with some more improvements, our detective should have all the tools needed to catch the murderer!
So, I changed my mind about which idea to pursue for my final project. I decided to use the instrument Gopika and I made a few weeks ago, and have users mimic a snippet of a song that was played by using the instrument.
Unfortunately I wasn’t able to complete user testing yet, however I have someone lined up after class, and I will update this post with their feedback.
The professor suggested that I use Sforzando and Processing to play the songs, so that they sound better than the buzzer on an Arduino board, and so that is what I will be doing this class.
However, I have a working version that uses the Piezo buzzer on the Arduino, which plays a section of Ode to Joy, which the user than then mimic by playing the instrument themselves.
#define echoPinC 12
#define trigPinC 11
# include "pitches.h"

String notes6[7] = {"C4", "D4", "E4", "F4", "G4", "A4", "B4"};

int notesLow[7] = {NOTE_C4, NOTE_D4, NOTE_E4, NOTE_F4, NOTE_G4, NOTE_A4, NOTE_B4};

const int buttonPin = 2;
const int buzzer = 4;
int songLength = 17;
char notes[] = "eefggfedccdeedd ";
int beats[] = {1,1,1,1,1,1,1,1,1,1,1,1,1,1,2};
int tempo = 288;

long durationC;
int distanceC;

void setup() {

  pinMode(trigPinC, OUTPUT);
  pinMode(echoPinC, INPUT);
  pinMode(buttonPin, INPUT);
  pinMode(buzzer, OUTPUT);

  digitalWrite(buttonPin, LOW);

  Serial.begin(9600);
}

void loop() {
  // put your main code here, to run repeatedly:
  digitalWrite(trigPinC, LOW);
  delayMicroseconds(2);
  digitalWrite(trigPinC, HIGH);
  delayMicroseconds(10);
  digitalWrite(trigPinC, LOW);
  durationC = pulseIn(echoPinC, HIGH);
  distanceC = durationC * 0.034 / 2;

  Serial.print("DistanceC: ");
  Serial.print(distanceC);
  Serial.print(" cm");
  Serial.print("mapped: ");


  digitalRead(buttonPin);
  if(buttonPin == LOW){
    Serial.println("Button Not Pushed");
  }


  int constrainedInput=constrain(distanceC, 0, 70);
  int mappedNoteC = map(constrainedInput, 1, 70, 0, 7);

  if(distanceC > 70){
  noTone(4);
  }else{
    tone(4, notesLow[mappedNoteC]);
 }

  Serial.println(notes6[mappedNoteC]);

  int i, duration;

  if (digitalRead(buttonPin) == HIGH){
    for (i = 0; i < songLength; i++){
      duration = beats[i]*tempo;

      if (notes[i] == ' '){
        delay(duration);
      }else{
        tone(buzzer, frequency(notes[i]), duration);
        delay(duration);
      }
      delay(tempo/10);
    }
  }
}

int frequency(char note){

  int i;

  const int numNotes = 8;

  char names[] = { 'c', 'd', 'e', 'f', 'g', 'a', 'b', 'C' };
  int frequencies[] = {262, 294, 330, 349, 392, 440, 494, 523};

  for (i = 0; i < numNotes; i++){
    if (names[i] == note){
      return(frequencies[i]);
    }
  }
  return(0);
}
For the final project, I have been working on creating a “personal diary simulator”. I chose the fictional horror short story “The Horla” to build my project around. I used a text and audio reading of the story that I found online.
When the user runs the file, the sketch will run on full screen. The background is a yellow-ish color. The date of the current diary entry will be displayed on the upper part of the screen, and the text of the entry will start appearing on the middle of the screen. The audio reading of the entry will also start playing.
I have been working on three types of interactions in the project:
Camera-based interaction:
I used frame differencing for this interaction. The camera will be set up downwards, facing a table. The interaction will be triggered when the user places their hands over the table and/or move it. When that happens, a red strip (rectangle) will appear on the left side and start expanding in height as long as the user has their hand on top of the table. If the user removes their hands, the strip will start shrinking. If the strip grows all the way to the bottom of the screen, the background’s color will turn red. When the user removes their hand, the screen will slowly transition from the red color to the original yellow color.
To implement: When the red screen is triggered, the audio reading of the entry will change to a deeper/demonic voice and will start transitioning back to the normal voice as the screen’s color turns yellow.
Selecting Diary entry:
In this interaction, the user will be able to move through the different entries of the diary. I’m still thinking of the best way to implement this interaction. I don’t want this interaction to unintentionally trigger the camera-based, so I want to make it separate from the table.
To implement: I have implemented the transition between texts of different entries, but I’m having trouble implementing the audio transition. For some reason, the function for playing the audio does not work. I still have to fix this.
Vibration Interaction (maybe?):
For this interaction, I want to play an audio file of a gasp or heavy breathing whenever there is some vibration detected on the table. The text/sketch screen would also shake for a brief moment.
To implement: I have not started working on this interaction. I have thought of using the camera captured video to implement this interaction, but I think it would interfere too much with the other camera-based interaction. I’m not sure if there is a type of sensor that can help with implementing this interaction. I will think of different ways to do it.
User Testing:
Code (Mid-debugging Sorry!):
import processing.sound.*;
import processing.video.*;

Capture video;
int vidX, vidY;
PImage prevFrame;
float motion_threshold=38;

SoundFile s_bg, s_clock, s_breathing, s_drinkwater;
SoundFile[] entries_audio;
PImage paper;
PFont font;
String[] entries;
int entries_cnt = 39;
int paper_offset_y = 0;
int page_start_i = 0;

int letter_i = 0;

int red_level = 0;

int vid_width = 640;
int vid_height = 480;

color bg_yellow = color(229, 229, 144);
color bg_red = color(183, 0, 0);
color bg_color = bg_yellow;
color text_color = color(0);
color bar_color = bg_red;
float bg_phase = 0;
float bar_phase = 0;
float text_phase = 0;

int entry_switch_offset = 0;
int entry_switch_threshold = 10;

int prev_entry = 0;
int curr_entry = 0;

void setup() {
  //size(1000,600);
  fullScreen();
  background(bg_color);

  String[] cameras = Capture.list();
  video = new Capture(this, cameras[1]);
  video.start();
  prevFrame=createImage(width, height, RGB);

  paper = loadImage("paper.jpg");

  font = createFont("SyneMono-Regular.ttf", 25);
  textFont(font);

  entries_audio = new SoundFile[18];
  for (int i=0; i<18; i++) {
    entries_audio[i] = new SoundFile(this, "entries_audio/"+i+".mp3");
  }
  s_bg = new SoundFile(this, "sound/Ambience/night-crickets-ambience-on-rural-property.wav");
  s_clock = new SoundFile(this, "sound/Ambience/loopable-ticking-clock.wav");
  s_breathing = new SoundFile(this, "sound/Human/breath-male.wav");
  s_drinkwater = new SoundFile(this, "sound/Human/drink-sip-and-swallow.wav");
  entries_audio[curr_entry].play();
  //s_bg.loop(1, 0.5);
  //s_clock.loop(1, 0.1);
  //s_breathing.loop();
  //s_drinkwater.loop(0.7);

  entries = new String[entries_cnt];
  for (int i=0; i<entries_cnt; i++) {
    entries[i] = readFile("entries/"+i+".txt");
  }
}

void draw() {
  background(bg_color);
  entry_switch_offset++;
  drawPaper();
  detectMotion();
  updateEntry();
  //playEntry(entries_audio[prev_entry], entries_audio[curr_entry]);
  //if (entries_audio[prev_entry].isPlaying()) {
  //  entries_audio[prev_entry].stop();
  //}
  //if (entry_switch_offset == entry_switch_threshold) {
  //  //entry_switch_offset = 0;
  //  entries_audio[curr_entry].play();
  //  println("in if");
  //}
  //entries_audio[curr_entry].play();
  //println("offset" + " " + entry_switch_offset);
  //println("threshold" + " " + entry_switch_threshold);
}

void drawPaper() {
  imageMode(CENTER);
  //image(paper, width/2, height/2, paper.width/3, paper.height/3);
  writeText(entries[curr_entry]);
}

void writeText(String text) {
  int x = (width/2) - (paper.width/6) + 70;
  int y = (height/2) - (paper.height/6) + 70;
  int char_width = 0;
  int char_row = 0;
  String date = "";
  int c = 0;
  while (text.charAt(c) != '.') {
    date = date + text.charAt(c);
    c++;
  }
  if (page_start_i == 0) {
    page_start_i = c+2;
  }

  pushMatrix();
  textSize(40);
  text(date, x, 80);
  popMatrix();

  pushMatrix();
  textSize(25);
  translate(x, y + paper_offset_y);
  fill(text_color);

  if (entry_switch_offset > entry_switch_threshold) {
    if (frameCount%2 == 0 && letter_i < text.length()) {
      letter_i++;
    }
    for (int i=page_start_i; i < letter_i; i++) {
      char_width += textWidth(text.charAt(i));
      text(text.charAt(i), char_width, char_row*30);

      if (x + char_width >= (width/2) + (paper.width/6) - 160 && text.charAt(i) == ' ') {
        char_row++;
        char_width = 0;
      }
      if (text.charAt(i) == '\n') {
        char_row++;
        char_width = 0;
      }
    }

    if (char_row > 10) {
      page_start_i = letter_i;
    }
  }
  popMatrix();
}

String readFile(String path) {
  String s = "";
  String[] arr = loadStrings(path);
  for (int i=0; i<arr.length; i++) {
    s = s + '\n' + arr[i];
  }
  return s;
}

void detectMotion() {
  if (video.available()) {
    prevFrame.copy(video, 0, 0, width, height, 0, 0, width, height);
    prevFrame.updatePixels();
    video.read();
  }
  video.loadPixels();
  prevFrame.loadPixels();
  loadPixels();
  float totalMotion=0;
  for (int y=0; y<vid_height; y++) {
    for (int x=0; x<vid_width; x++) {
      int loc = (video.width-x-1)+(y*vid_width);
      //println(video.width);
      color pix=video.pixels[loc];
      color prevPix=prevFrame.pixels[loc];
      float r1=red(pix);
      float g1=green(pix);
      float b1=blue(pix);
      float r2=red(prevPix);
      float g2=green(prevPix);
      float b2=blue(prevPix);
      float diff=dist(r1, g1, b1, r2, g2, b2);
      totalMotion+=diff;
    }
  }
  float avgMotion=totalMotion/(vid_width*vid_height);
  if (avgMotion>motion_threshold && frameCount%2 == 0 && red_level <= height+10) {
    red_level += 8;
  } else if (frameCount%2 == 0 && red_level >= -5) {
    red_level -= 3;
  }
  //println(avgMotion);
  video.updatePixels();
  prevFrame.updatePixels();
  updatePixels();
  pushMatrix();
  barSwitch();
  fill(bar_color);
  noStroke();
  rect(300, 0, 15, red_level);
  //text(avgMotion, 200, 200);
  popMatrix();
  bgSwitch();
}

void bgSwitch() {
  if (red_level >= height) {
    bg_color = bg_red;
    text_color = color(255);
  } else if (bg_color != bg_yellow && bg_phase<1) {
    bg_color = colorFade(bg_color, bg_red, bg_yellow, bg_phase);
    text_color = colorFade(text_color, color(255), color(0), text_phase);
    bg_phase = phaseFade(bg_phase);
    text_phase = phaseFade(text_phase);
  } else {
    bg_color = bg_yellow;
    text_color = color(0);
    bg_phase = 0;
    text_phase = 0;
  }
}

void barSwitch() {
  if (red_level >= height) {
    bar_color = bg_yellow;
  } else if (bar_color != bg_red && bar_phase<1) {
    bar_color = colorFade(bar_color, bg_yellow, bg_red, bar_phase);
    bar_phase = phaseFade(bar_phase);
  } else {
    bar_color = bg_red;
    bar_phase = 0;
  }
}

color colorFade(color curr, color from, color to, float phase) {
  if (frameCount%10 == 0) {
    return lerpColor(from, to, phase);
  }
  return curr;
}

float phaseFade(float phase) {
  if (frameCount%10 == 0) {
    return phase + 0.01;
  }
  return phase;
}

void updateEntry() {
  if (keyPressed && keyCode == LEFT && curr_entry > 0) {
    prev_entry = curr_entry;
    curr_entry--;
    //println(curr_entry);
    page_start_i = 0;
    letter_i = 0;
  }
  if (keyPressed && keyCode == RIGHT && curr_entry < 18) {
    prev_entry = curr_entry;
    curr_entry++;
    //println(curr_entry);
    page_start_i = 0;
    letter_i = 0;
  }
}

void playEntry(SoundFile preventry, SoundFile currentry) {
  if (preventry.isPlaying()) {
    preventry.stop();
  }
  if (entry_switch_offset == entry_switch_threshold) {
    currentry.play();
  }
}
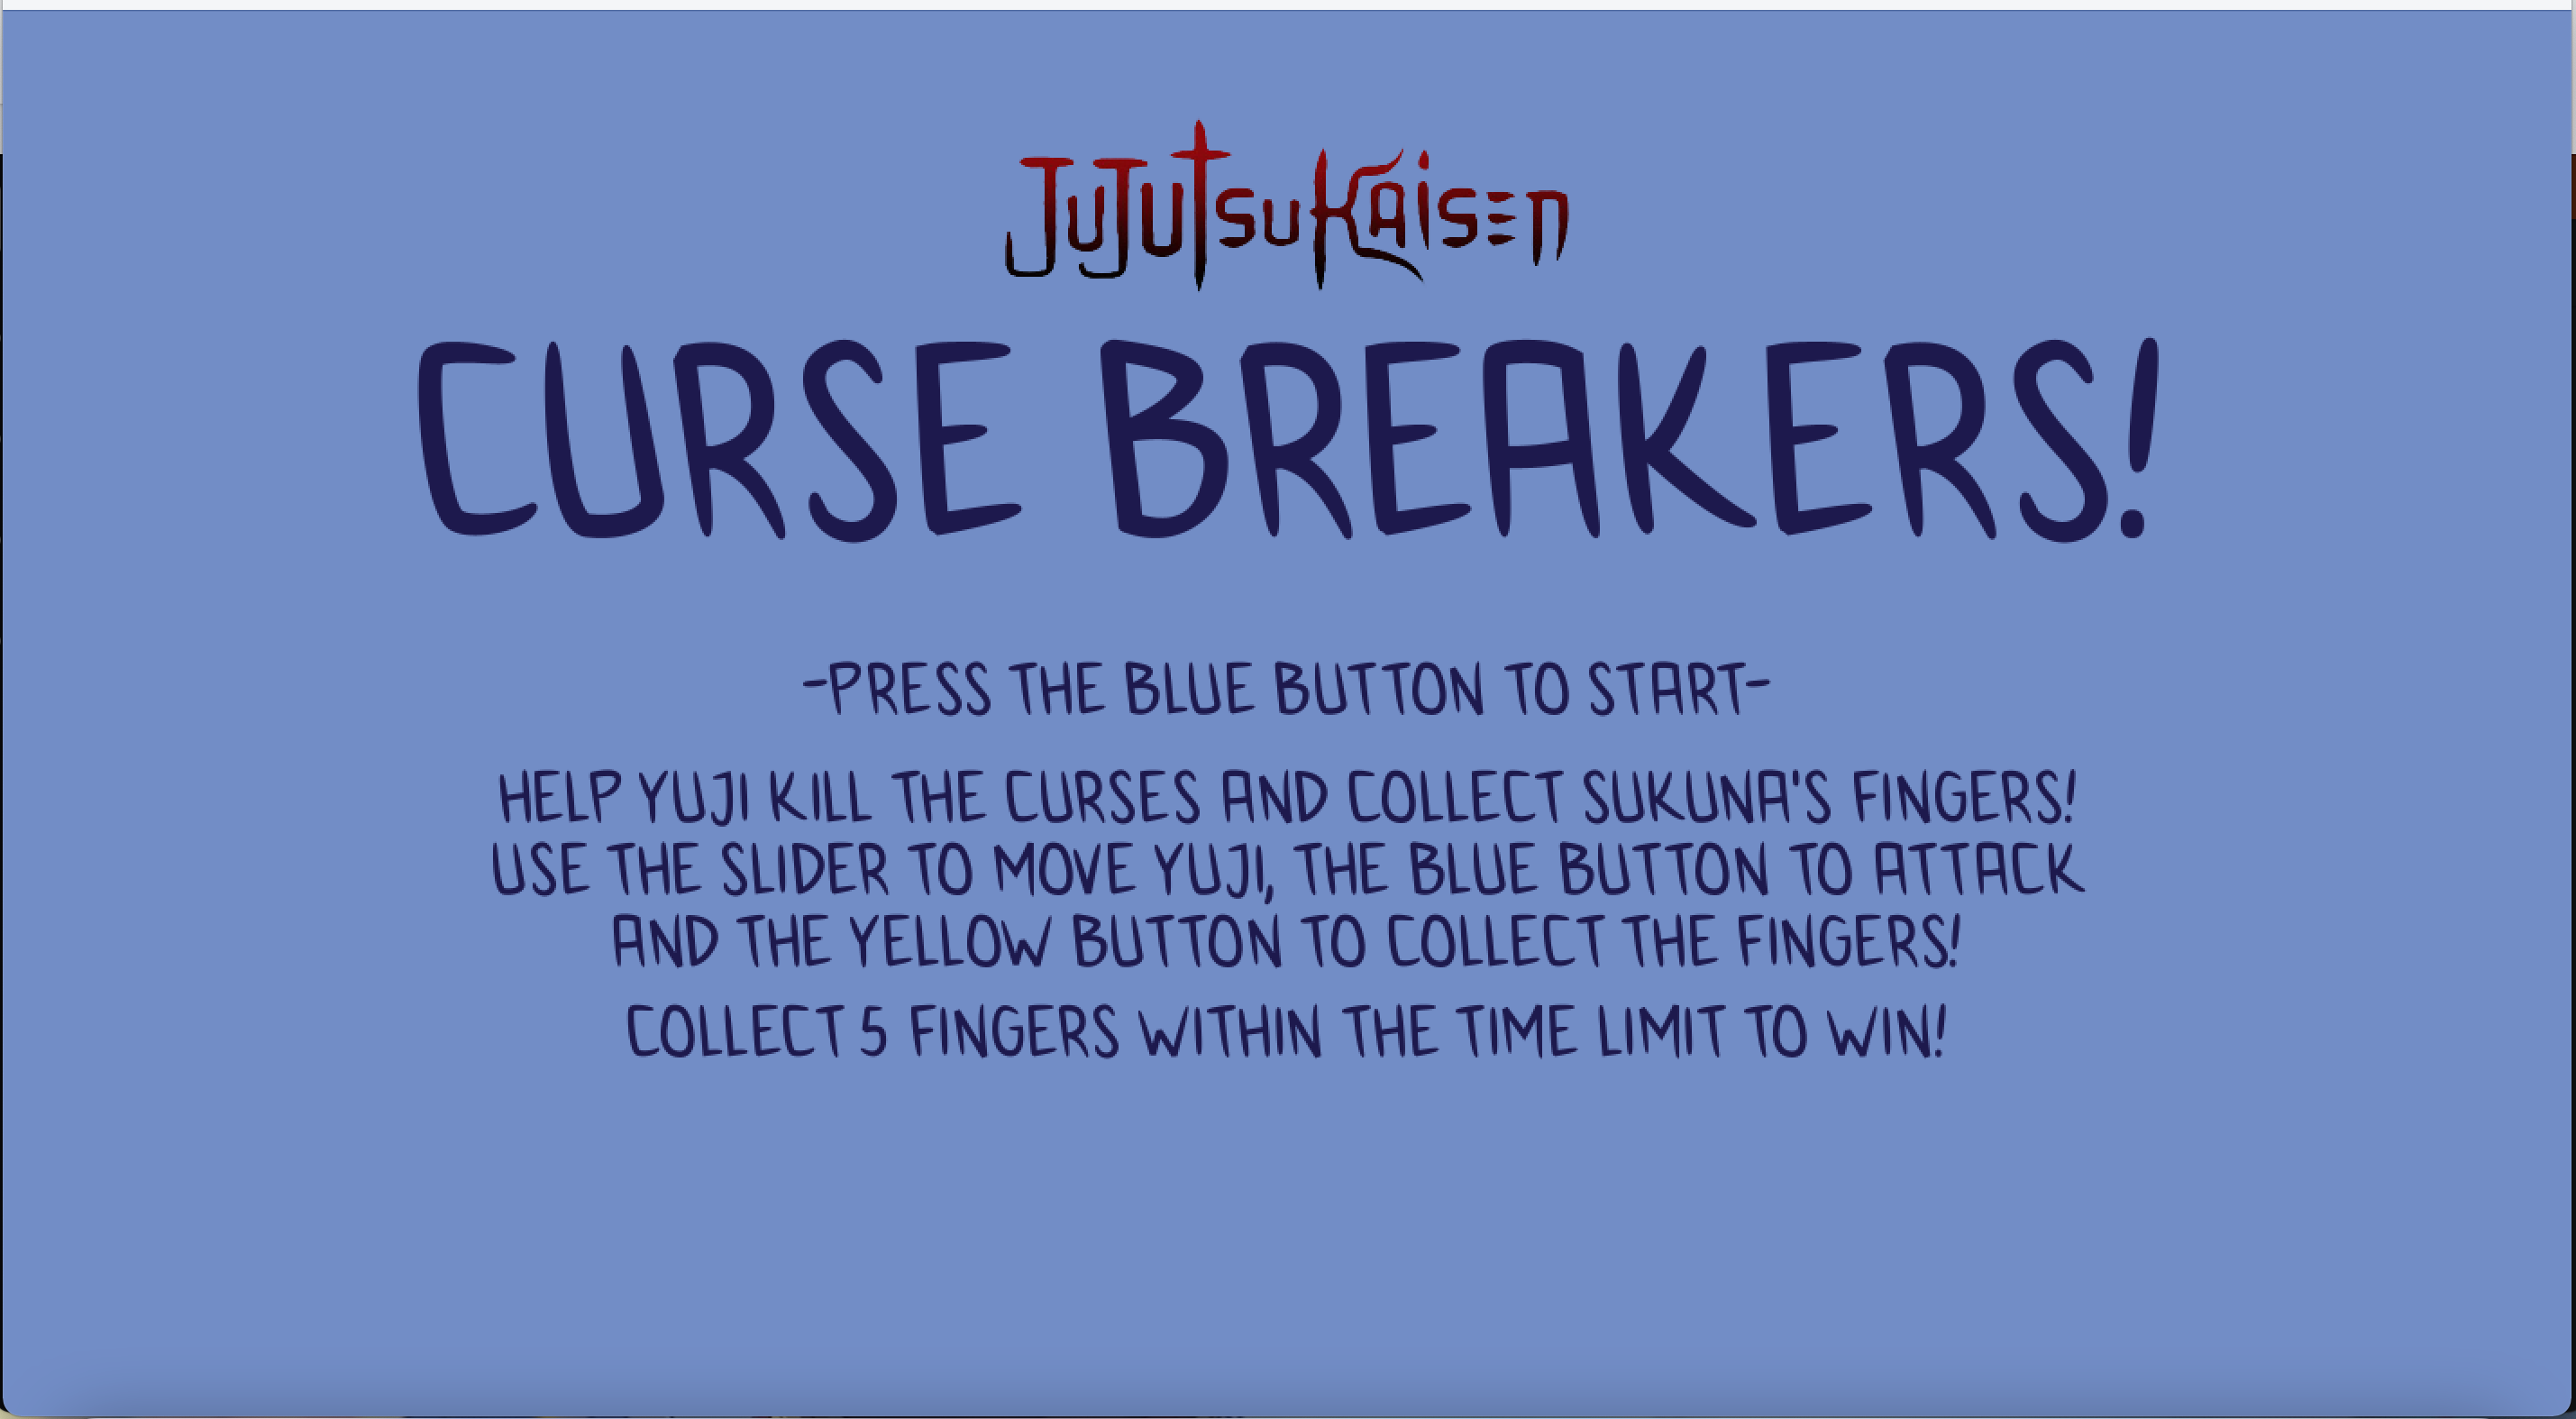
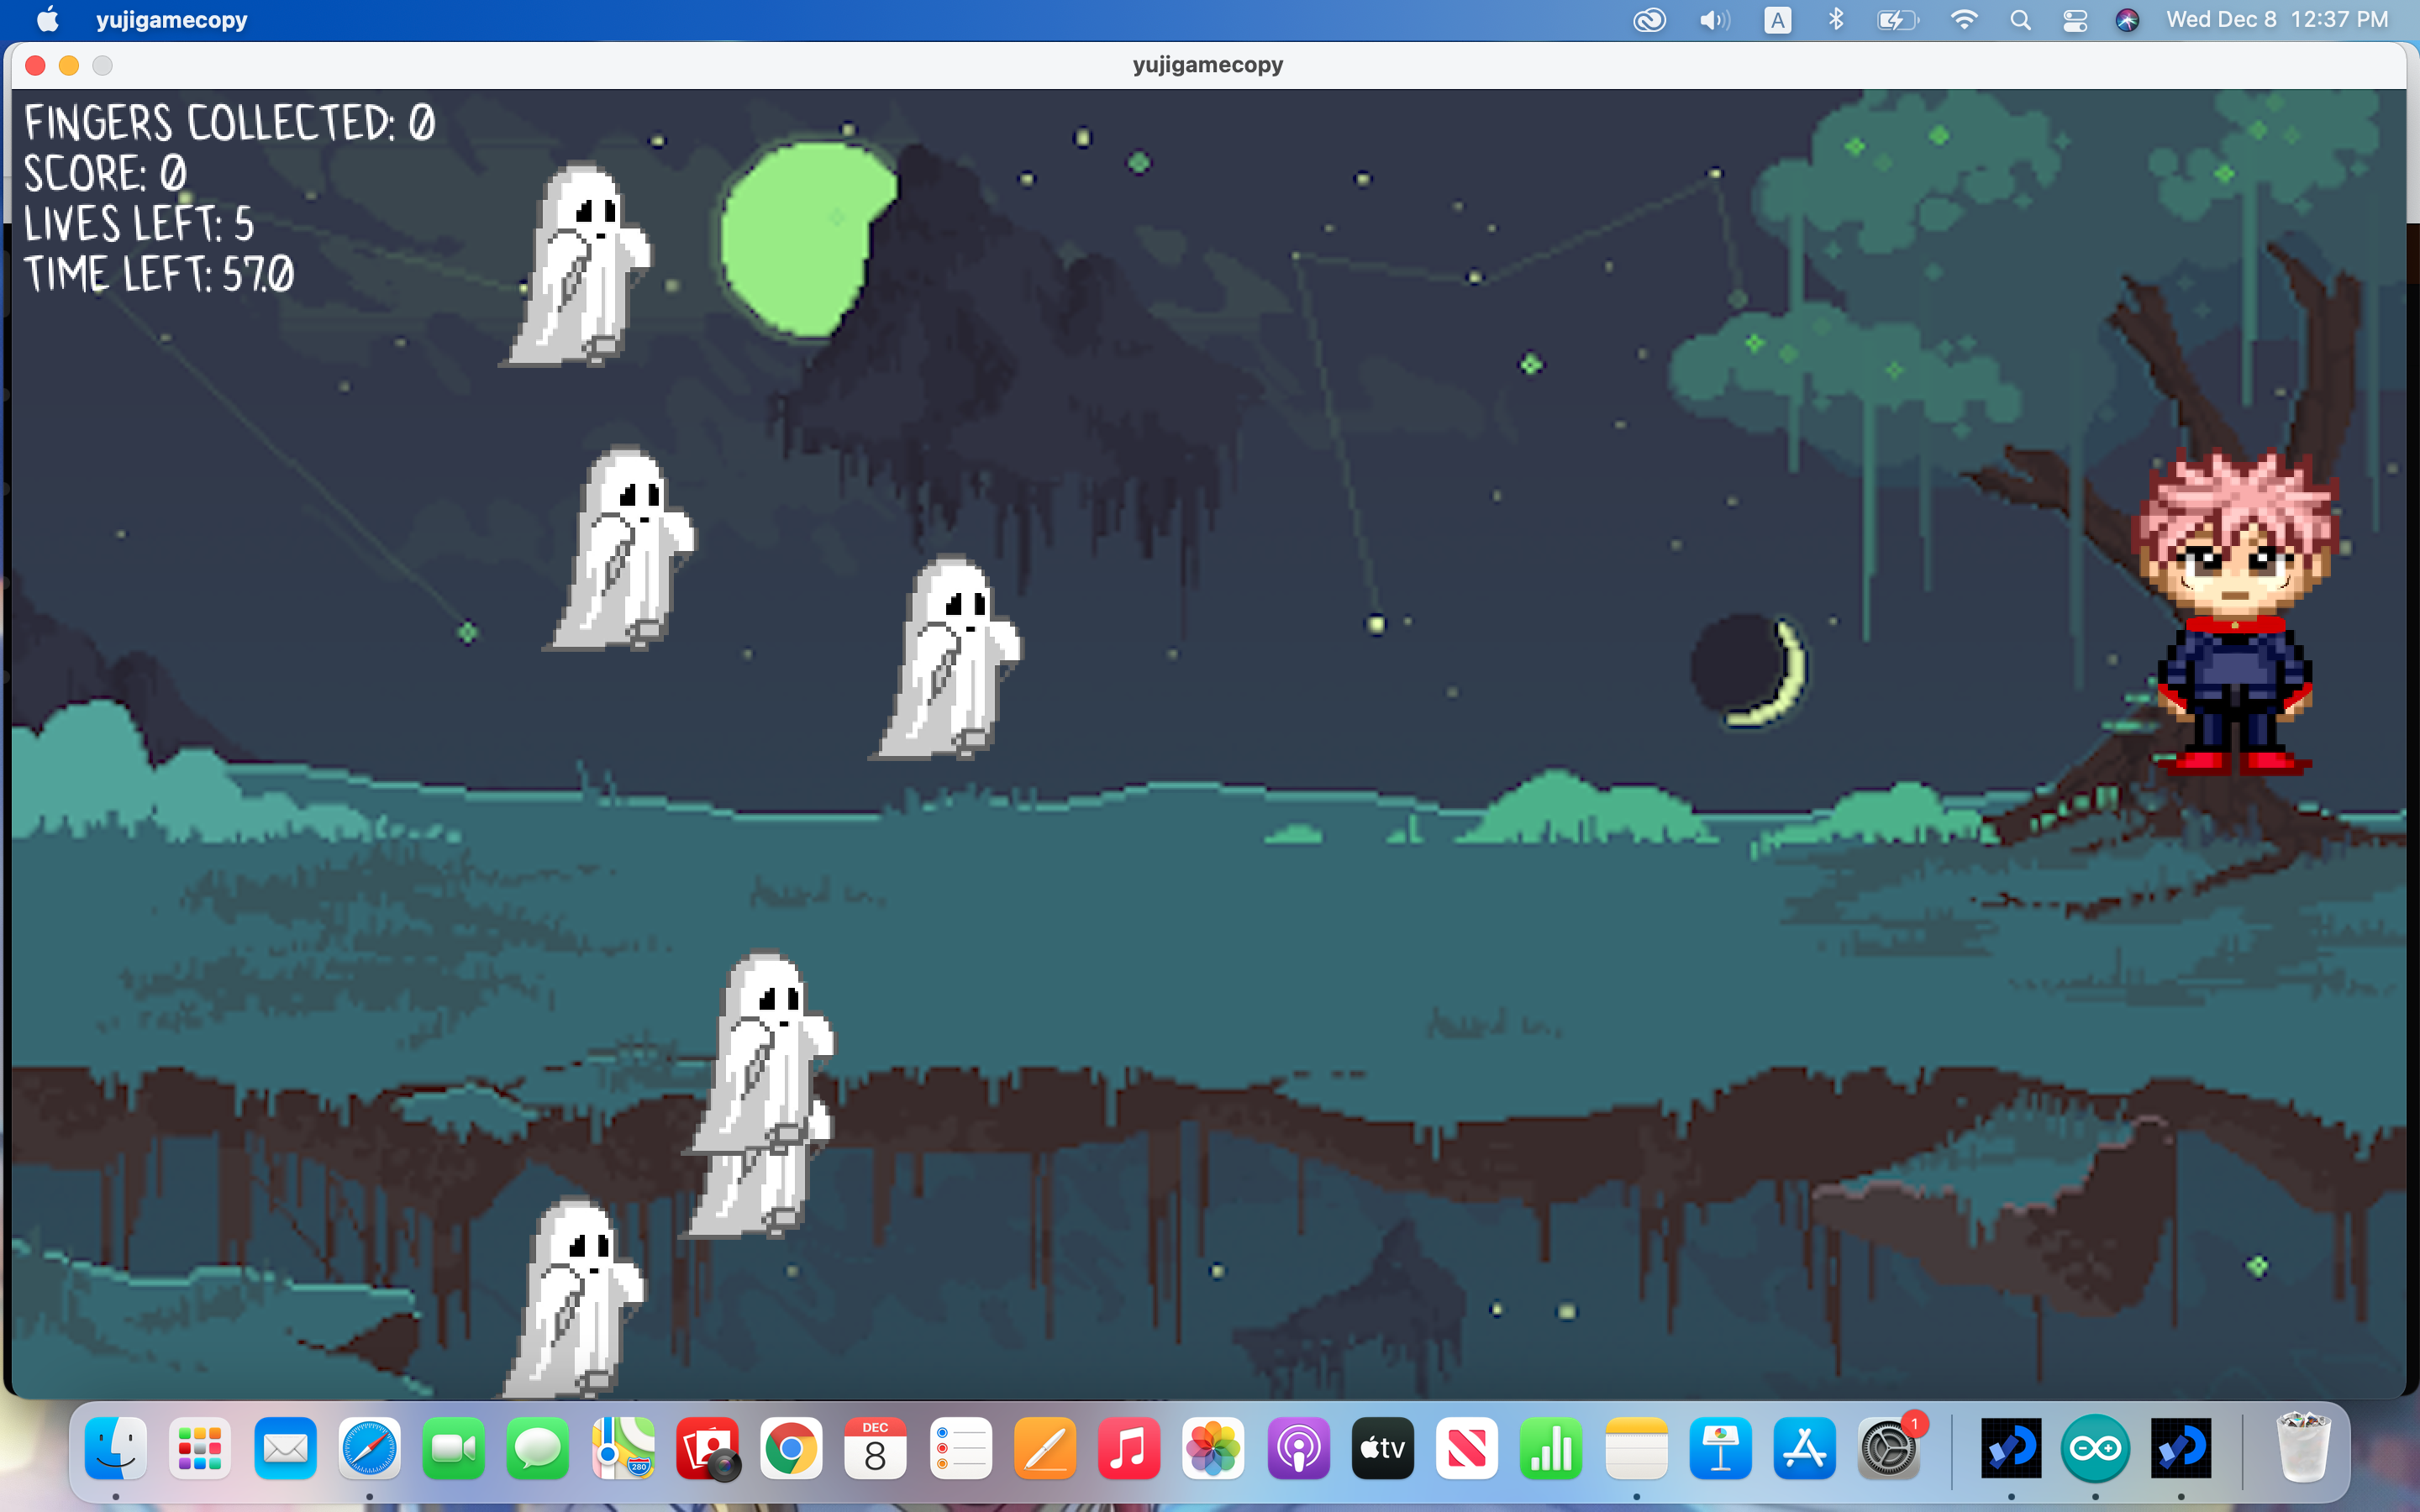
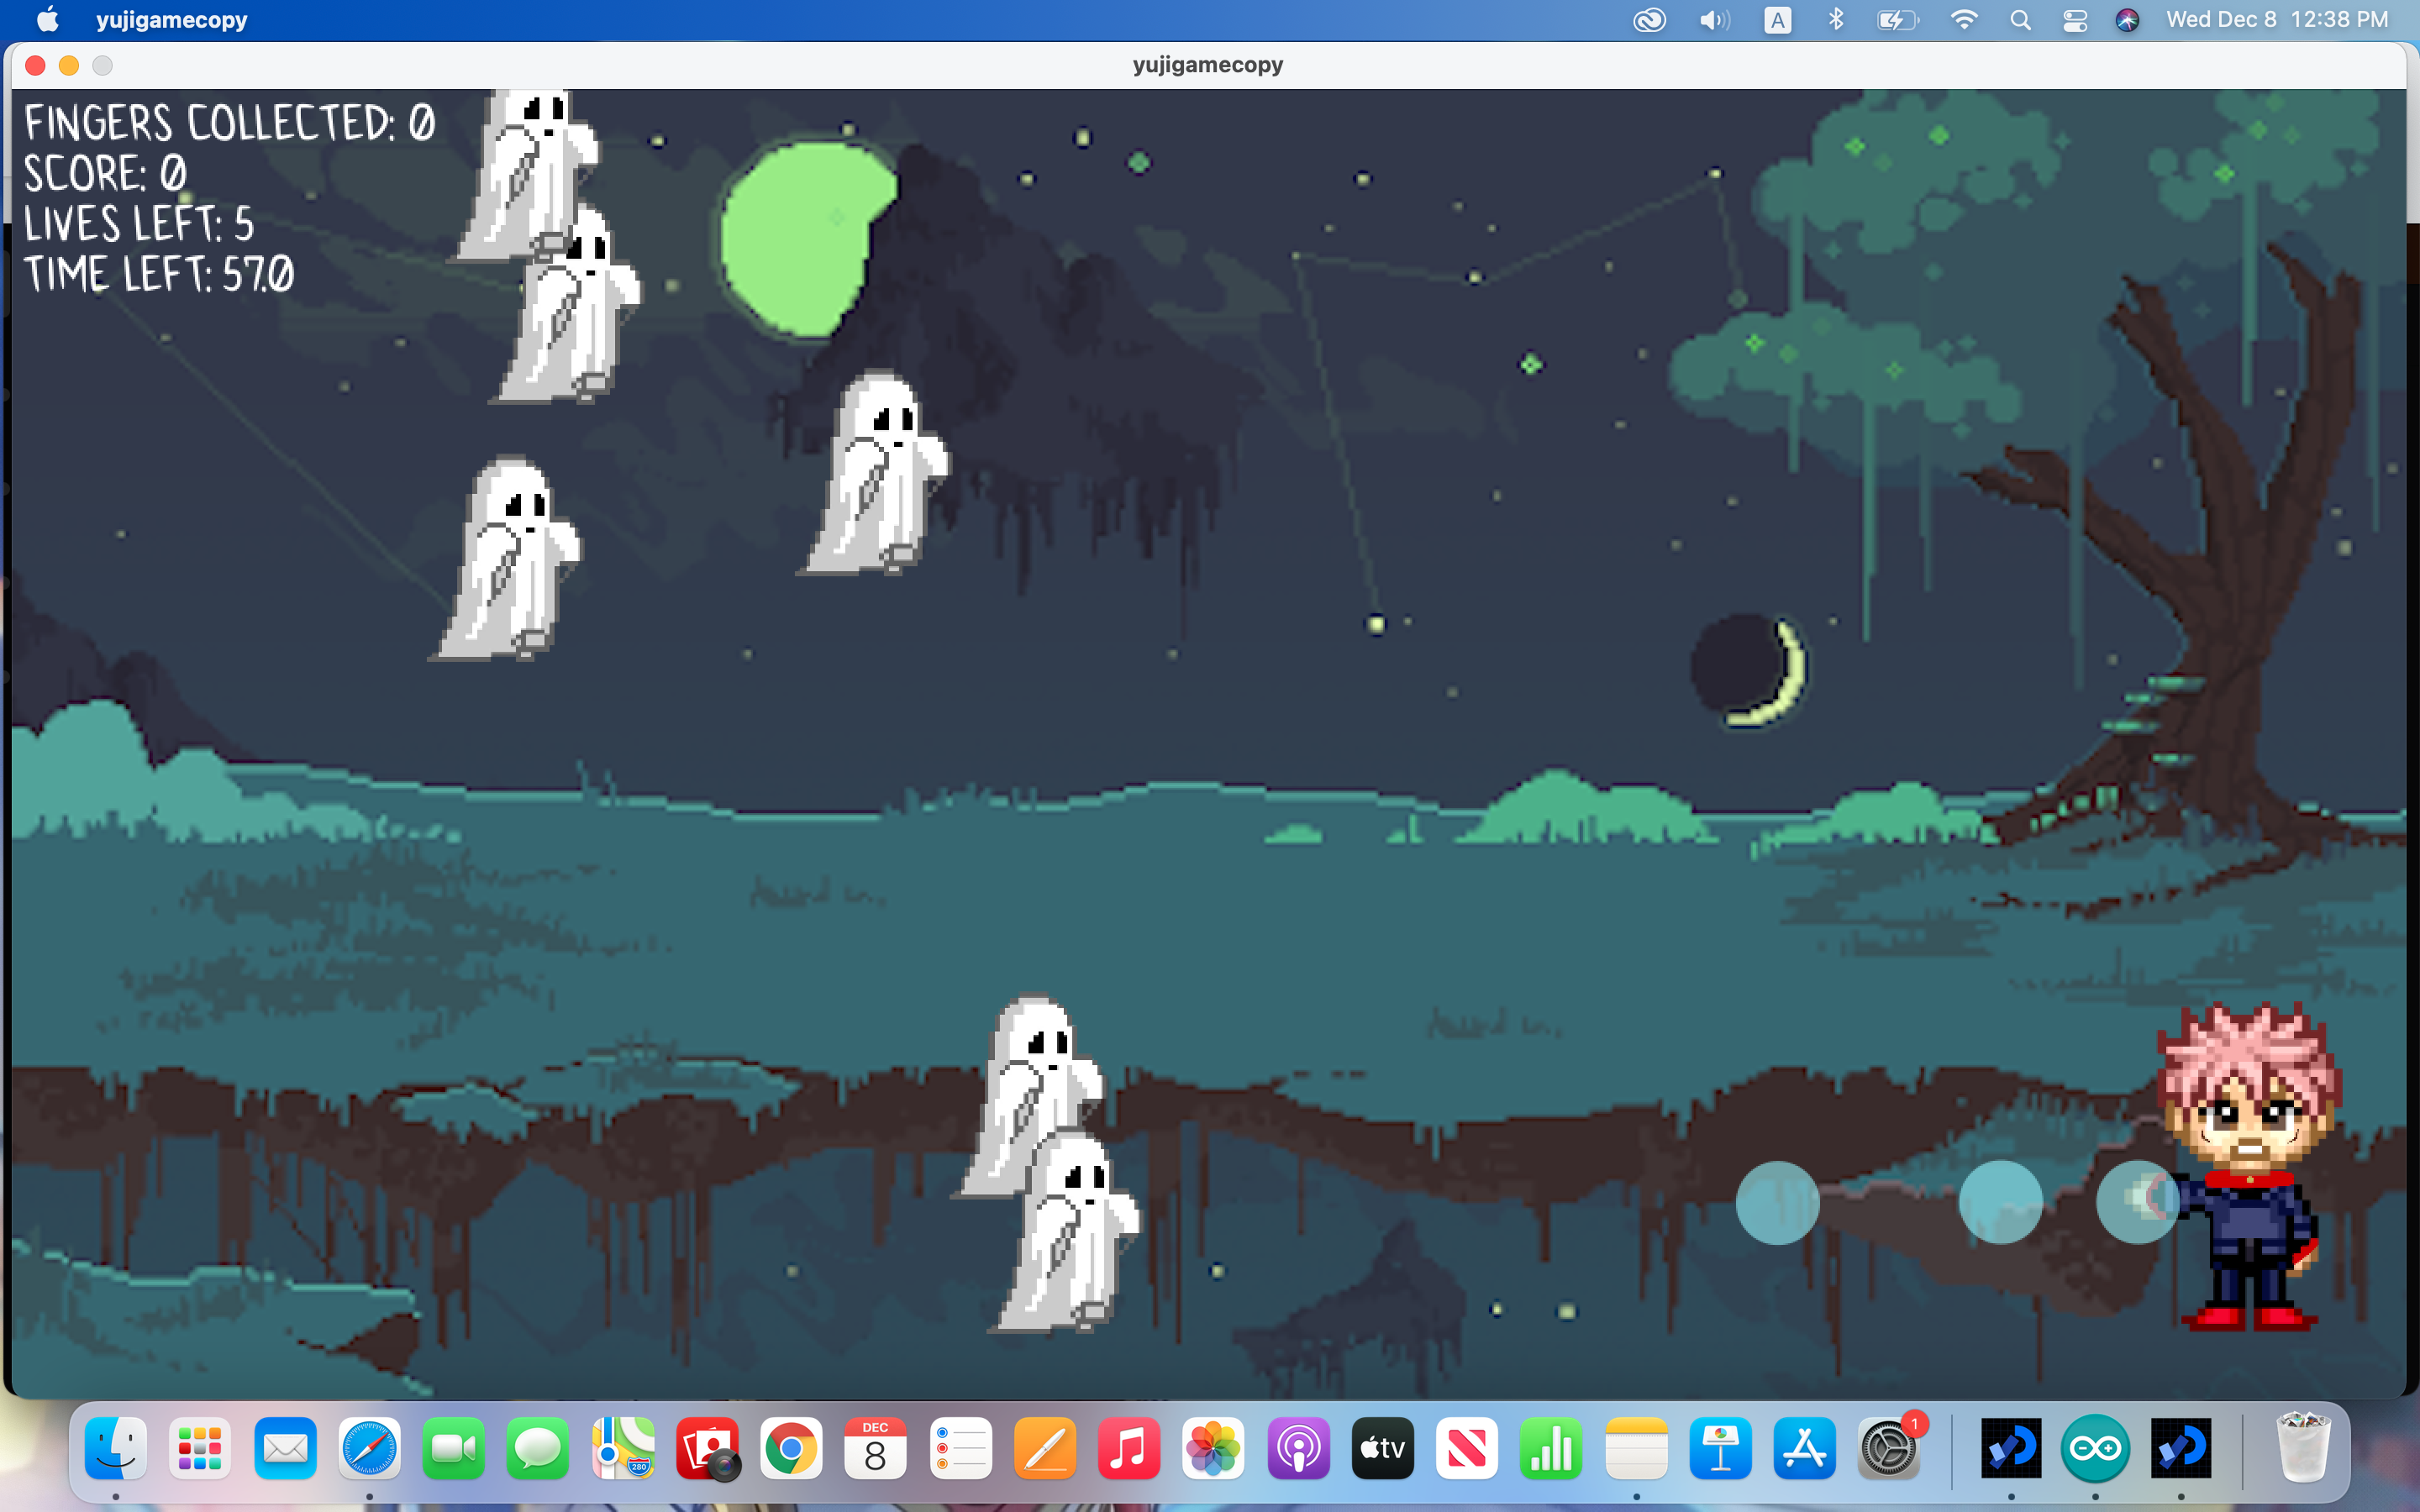
As you might have seen in my previous posts, I am working on making a Jujutsu Kaisen- inspired video game for my final project! The object of the game is to shoot curses (ghosts) and collect Sukuna’s fingers. Collect 5 fingers without losing lives to win! (You lose lives by colliding with the ghosts).
Progress so far:
I’ve completely finished the Arduino code, and the processing code is almost done. The controller is functional, but it’s not stable yet, I’m planning on soldering the controller wires very soon! The user testing demo shows what it currently looks like.. The only thing left in the processing code is making the ghosts disappear when they’re shot, and making the fingers appear in intervals after you hit certain scores.
The first thing I worked on in processing was making the character move with the slider and preparing the code for the different game screens. After that, I worked on the serial communication code for the buttons, and made sure everything was communicating smoothly between processing and Arduino.
Here’s the Arduino code:
int bluepin = 5;
int yellowpin = 3;
int sliderpin = A1;

void setup() {
  pinMode(bluepin , INPUT);
  pinMode(yellowpin , INPUT);
  pinMode(sliderpin , INPUT);
  Serial.begin(9600);
  Serial.println("0,0,0");
}

void loop() {
  int bluebutton = digitalRead(bluepin);
  int yellowbutton = digitalRead(yellowpin);
  int slider = analogRead(sliderpin);

  while (Serial.available()) {
    int fromP = Serial.parseInt();

    if (Serial.read() == '\n') {
    Serial.print(slider);
    Serial.print(",");
    Serial.print(yellowbutton);
    Serial.print(",");
    Serial.println(bluebutton);
  }

  }

}
After that, I made an Arraylist for the “bullets” that the character shoots and modified the code to shoot the bullets (circles) at fixed intervals.
As for the avatar, instead of using a sprite sheet since I only have 2 images to switch between, I decided to make an if statement to switch between the two images when the attack button is pressed. These are the two images Im using for the sprite:
idle and attack sprites
I made these using https://www.avatarsinpixels.com and added more details to the avatar with procreate to make it look more like the actual character from the anime.
Also, the curses disappear on contact with either a bullet or Yuji, the former adds points to the score while the latter subtracts 1 life from Yuji.
As for the game, it currently looks like this:
Main Screen:(there are no instructions for the slider so ill add that in soon)
game screen: (first pic is idle Yuji and the second is him while shooting)
Create a physically interactive system of your choice that relies on a multimedia computer for some sort of processing or data analysis. The Final should use BOTH Processing AND Arduino. Your focus should be on careful and timely sensing of the relevant actions of the person or people that you’re designing this for, and on clear, prompt, and effective responses. Any interactive system is going to involve systems of listening, thinking, and speaking from both parties. Whether it involves one cycle or many, the exchange should be engaging. You may work alone or in pairs.
Description of the game
So, I used a pulse sensor to make a heartbeat monitor which can be used for different purposes. Maybe in the health care industry or sports industry.
I used two LEDs that turn on and off according to the pulse rate. I added a scaling component in the code to adjust the size of the rate. I also checked the timings between heartbeat by subtracting the last-current. I also made the heart pump by increasing the stroke weight. You can also use “S” or “s” to save the heartbeat in the folder where the code. it saved and later you can compare the heartbeat.
I did the user testing as well after that. The test person came back from a run, thus his heart was beating faster.
He gave some feedback. Thank you.
Certain challenges:-
It took me some time to figure out how the sensor worked because I have never worked with a pulse sensor before.
it was hard to display the pulse wave first, then I found some resources to make me understand the concept.
it was hard to add further things to the project to make it more useful.
The code is following:-
Arduino
//  Variables
int pulsePin = 0;                 // Pulse Sensor purple wire connected to analog pin 0
int blinkPin = 13;                // pin to blink led at each beat
int fadePin = 5;                  // pin to do fancy classy fading blink at each beat
int fadeRate = 0;                 // used to fade LED on with PWM on fadePin

// Volatile Variables, used in the interrupt service routine!
volatile int BPM;                   // int that holds raw Analog in 0. updated every 2mS
volatile int Signal;                // holds the incoming raw data
volatile int TBH = 600;             // int that holds the time interval between beats! Must be seeded!
volatile boolean Pulse = false;     // "True" when User's live heartbeat is detected. "False" when not a "live beat".
volatile boolean QS = false;        // becomes true when Arduoino finds a beat.

// Regards Serial OutPut  -- Set This Up to your needs
static boolean serialVisual = false;   // Set to 'false' by Default.  Re-set to 'true' to see Arduino Serial Monitor ASCII Visual Pulse

void setup(){
  pinMode(blinkPin,OUTPUT);         // pin that will blink to your heartbeat!
  pinMode(fadePin,OUTPUT);          // pin that will fade to your heartbeat!
  Serial.begin(115200);             // we agree to talk fast!
  interruptSetup();                 // sets up to read Pulse Sensor signal every 2mS
   // IF YOU ARE POWERING The Pulse Sensor AT VOLTAGE LESS THAN THE BOARD VOLTAGE,
   // UN-COMMENT THE NEXT LINE AND APPLY THAT VOLTAGE TO THE A-REF PIN
//   analogReference(EXTERNAL);
}

//  Where the Magic Happens
void loop(){

    serialOutput() ;

  if (QS == true){     // A Heartbeat Was Found
                       // BPM and TBH have been Determined
                       // Quantified Self "QS" true when arduino finds a heartbeat
        fadeRate = 255;         // Makes the LED Fade Effect Happen
                                // Set 'fadeRate' Variable to 255 to fade LED with pulse
        serialOutputWhenBeatHappens();   // A Beat Happened, Output that to serial.
        QS = false;                      // reset the Quantified Self flag for next time
  }

  ledFadeToBeat();                      // Makes the LED Fade Effect Happen
  delay(20);                             //  take a break
}

void ledFadeToBeat(){
    fadeRate -= 15;                         //  set LED fade value
    fadeRate = constrain(fadeRate,0,255);   //  keep LED fade value from going into negative numbers!
    analogWrite(fadePin,fadeRate);          //  fade LED
  }


void serialOutput(){   // Decide How To Output Serial.
 if (serialVisual == true){
     arduinoSerialMonitorVisual('-', Signal);   // goes to function that makes Serial Monitor Visualizer
 } else{
      sendDataToSerial('S', Signal);     // goes to sendDataToSerial function
 }
}


//  Decides How To OutPut BPM and TBH Data
void serialOutputWhenBeatHappens(){
 if (serialVisual == true){            //  Code to Make the Serial Monitor Visualizer Work
    Serial.print("*** Heart-Beat Happened *** ");  //ASCII Art Madness
    Serial.print("BPM: ");
    Serial.print(BPM);
    Serial.print("  ");
 } else{
        sendDataToSerial('B',BPM);   // send heart rate with a 'B' prefix
        sendDataToSerial('Q',TBH);   // send time between beats with a 'Q' prefix
 }
}


//  Sends Data to Pulse Sensor Processing App, Native Mac App, or Third-party Serial Readers.
void sendDataToSerial(char symbol, int data ){
    Serial.print(symbol);

    Serial.println(data);
  }


//  Code to Make the Serial Monitor Visualizer Work
void arduinoSerialMonitorVisual(char symbol, int data ){
  const int sensorMin = 0;      // sensor minimum, discovered through experiment
const int sensorMax = 1024;    // sensor maximum, discovered through experiment

  int sensorReading = data;
  // map the sensor range to a range of 12 options:
  int range = map(sensorReading, sensorMin, sensorMax, 0, 11);

  // do something different depending on the
  // range value:
  switch (range) {
  case 0:
    Serial.println("");     /////ASCII Art Madness
    break;
  case 1:
    Serial.println("---");
    break;
  case 2:
    Serial.println("------");
    break;
  case 3:
    Serial.println("---------");
    break;
  case 4:
    Serial.println("------------");
    break;
  case 5:
    Serial.println("--------------|-");
    break;
  case 6:
    Serial.println("--------------|---");
    break;
  case 7:
    Serial.println("--------------|-------");
    break;
  case 8:
    Serial.println("--------------|----------");
    break;
  case 9:
    Serial.println("--------------|----------------");
    break;
  case 10:
    Serial.println("--------------|-------------------");
    break;
  case 11:
    Serial.println("--------------|-----------------------");
    break;

  }
}


volatile int rate[10];                    // array to hold last ten TBH values
volatile unsigned long sampleCounter = 0;          // used to determine pulse timing
volatile unsigned long lastBeatTime = 0;           // used to find TBH
volatile int P =512;                      // used to find peak in pulse wave, seeded
volatile int T = 512;                     // used to find trough in pulse wave, seeded
volatile int thresh = 525;                // used to find instant moment of heart beat, seeded
volatile int amp = 100;                   // used to hold amplitude of pulse waveform, seeded
volatile boolean firstBeat = true;        // used to seed rate array so we startup with reasonable BPM
volatile boolean secondBeat = false;      // used to seed rate array so we startup with reasonable BPM


void interruptSetup(){
  // Initializes Timer2 to throw an interrupt every 2mS.
  TCCR2A = 0x02;     // DISABLE PWM ON DIGITAL PINS 3 AND 11, AND GO INTO CTC MODE
  TCCR2B = 0x06;     // DON'T FORCE COMPARE, 256 PRESCALER
  OCR2A = 0X7C;      // SET THE TOP OF THE COUNT TO 124 FOR 500Hz SAMPLE RATE
  TIMSK2 = 0x02;     // ENABLE INTERRUPT ON MATCH BETWEEN TIMER2 AND OCR2A
  sei();             // MAKE SURE GLOBAL INTERRUPTS ARE ENABLED
}


// THIS IS THE TIMER 2 INTERRUPT SERVICE ROUTINE.
// Timer 2 makes sure that we take a reading every 2 miliseconds
ISR(TIMER2_COMPA_vect){                         // triggered when Timer2 counts to 124
  cli();                                      // disable interrupts while we do this
  Signal = analogRead(pulsePin);              // read the Pulse Sensor
  sampleCounter += 2;                         // keep track of the time in mS with this variable
  int N = sampleCounter - lastBeatTime;       // monitor the time since the last beat to avoid noise

    //  find the peak and trough of the pulse wave
  if(Signal < thresh && N > (TBH/5)*3){       // avoid dichrotic noise by waiting 3/5 of last TBH
    if (Signal < T){                        // T is the trough
      T = Signal;                         // keep track of lowest point in pulse wave
    }
  }

  if(Signal > thresh && Signal > P){          // thresh condition helps avoid noise
    P = Signal;                             // P is the peak
  }                                        // keep track of highest point in pulse wave

  //  NOW IT'S TIME TO LOOK FOR THE HEART BEAT
  // signal surges up in value every time there is a pulse
  if (N > 250){                                   // avoid high frequency noise
    if ( (Signal > thresh) && (Pulse == false) && (N > (TBH/5)*3) ){
      Pulse = true;                               // set the Pulse flag when we think there is a pulse
      digitalWrite(blinkPin,HIGH);                // turn on pin 13 LED
      TBH = sampleCounter - lastBeatTime;         // measure time between beats in mS
      lastBeatTime = sampleCounter;               // keep track of time for next pulse

      if(secondBeat){                        // if this is the second beat, if secondBeat == TRUE
        secondBeat = false;                  // clear secondBeat flag
        for(int i=0; i<=9; i++){             // seed the running total to get a realisitic BPM at startup
          rate[i] = TBH;
        }
      }

      if(firstBeat){                         // if it's the first time we found a beat, if firstBeat == TRUE
        firstBeat = false;                   // clear firstBeat flag
        secondBeat = true;                   // set the second beat flag
        sei();                               // enable interrupts again
        return;                              // TBH value is unreliable so discard it
      }


      // keep a running total of the last 10 TBH values
      word runningTotal = 0;                  // clear the runningTotal variable

      for(int i=0; i<=8; i++){                // shift data in the rate array
        rate[i] = rate[i+1];                  // and drop the oldest TBH value
        runningTotal += rate[i];              // add up the 9 oldest TBH values
      }

      rate[9] = TBH;                          // add the latest TBH to the rate array
      runningTotal += rate[9];                // add the latest TBH to runningTotal
      runningTotal /= 10;                     // average the last 10 TBH values
      BPM = 60000/runningTotal;               // how many beats can fit into a minute? that's BPM!
      QS = true;                              // set Quantified Self flag
      // QS FLAG IS NOT CLEARED INSIDE THIS ISR
    }
  }

  if (Signal < thresh && Pulse == true){   // when the values are going down, the beat is over
    digitalWrite(blinkPin,LOW);            // turn off pin 13 LED
    Pulse = false;                         // reset the Pulse flag so we can do it again
    amp = P - T;                           // get amplitude of the pulse wave
    thresh = amp/2 + T;                    // set thresh at 50% of the amplitude
    P = thresh;                            // reset these for next time
    T = thresh;
  }

  if (N > 2500){                           // if 2.5 seconds go by without a beat
    thresh = 512;                          // set thresh default
    P = 512;                               // set P default
    T = 512;                               // set T default
    lastBeatTime = sampleCounter;          // bring the lastBeatTime up to date
    firstBeat = true;                      // set these to avoid noise
    secondBeat = false;                    // when we get the heartbeat back
  }

  sei();                                   // enable interrupts when youre done!
}// end isr
Processing:-
import processing.sound.*;
SoundFile file;
import processing.serial.*;
PFont font;
PFont portsFont;
Scrollbar scaleBar;

Serial port;

int Sensor;      // holds pusle sensor data from the arduino
int TBH;         // HOLDS TIME BETWEN HEARTBEATS FROM ARDUINO
int BPM;         // HOLDS HEART RATE VALUE FROM ARDUINO
int[] RawY;      // HOLDS HEARTBEAT WAVEFORM DATA BEFORE SCALING
int[] ScaledY;   // USED TO POSITION SCALED HEARTBEAT WAVEFORM
int[] rate;      // USED TO POSITION BPM DATA WAVEFORM
float zoom;      // USED WHEN SCALING PULSE WAVEFORM TO PULSE WINDOW
float offset;    // USED WHEN SCALING PULSE WAVEFORM TO PULSE WINDOW
color eggshell = color(171,219,227);
int heart = 0;   // This variable times the heart image 'pulse' on screen
//  THESE VARIABLES DETERMINE THE SIZE OF THE DATA WINDOWS
int PulseWindowWidth = 490;
int PulseWindowHeight = 512;
int BPMWindowWidth = 180;
int BPMWindowHeight = 340;
boolean beat = false;    // set when a heart beat is detected, then cleared when the BPM graph is advanced

// SERIAL PORT STUFF TO HELP YOU FIND THE CORRECT SERIAL PORT
String serialPort;
String[] serialPorts = new String[Serial.list().length];
boolean serialPortFound = false;
Radio[] button = new Radio[Serial.list().length];


void setup() {
  size(700, 600);  // Stage size
  file = new SoundFile(this, "heart.mp3");
  frameRate(100);
  font = loadFont("Arial-BoldMT-24.vlw");
  textFont(font);
  textAlign(CENTER);
  rectMode(CENTER);
  ellipseMode(CENTER);
// Scrollbar constructor inputs: x,y,width,height,minVal,maxVal
  scaleBar = new Scrollbar (400, 575, 180, 12, 0.5, 1.0);  // set parameters for the scale bar
  RawY = new int[PulseWindowWidth];          // initialize raw pulse waveform array
  ScaledY = new int[PulseWindowWidth];       // initialize scaled pulse waveform array
  rate = new int [BPMWindowWidth];           // initialize BPM waveform array
  zoom = 0.75;                               // initialize scale of heartbeat window

// set the visualizer lines to 0
 for (int i=0; i<rate.length; i++){
    rate[i] = 555;      // Place BPM graph line at bottom of BPM Window
   }
 for (int i=0; i<RawY.length; i++){
    RawY[i] = height/2; // initialize the pulse window data line to V/2
 }

 background(0);
 noStroke();
 // DRAW OUT THE PULSE WINDOW AND BPM WINDOW RECTANGLES
 drawDataWindows();
 drawHeart();

// GO FIND THE ARDUINO
  fill(eggshell);
  text("Select Your Serial Port",245,30);
  listAvailablePorts();

}

void draw() {
if(serialPortFound){
  // ONLY RUN THE VISUALIZER AFTER THE PORT IS CONNECTED
  background(0);
  noStroke();
  drawDataWindows();
  drawPulseWaveform();
  drawBPMwaveform();
  drawHeart();
// PRINT THE DATA AND VARIABLE VALUES
  fill(eggshell);                                       // get ready to print text
  text("Check your Heart Beat and Pulse",245,30);     // tell them what you are
  text("TBH " + TBH + "mS",600,585);                    // print the time between heartbeats in mS
  text(BPM + "BPM",600,200);                           // print the Beats Per Minute
  text("Scale the Pulse Rate " + nf(zoom,1,2), 150, 585); // show the current scale of Pulse Window

//  DO THE SCROLLBAR THINGS
  scaleBar.update (mouseX, mouseY);
  scaleBar.display();

} else { // SCAN BUTTONS TO FIND THE SERIAL PORT

  for(int i=0; i<button.length; i++){
    button[i].overRadio(mouseX,mouseY);
    button[i].displayRadio();
  }

}

}  //end of draw loop


void drawDataWindows(){
    // DRAW OUT THE PULSE WINDOW AND BPM WINDOW RECTANGLES
    fill(eggshell);  // color for the window background
    rect(255,height/2,PulseWindowWidth,PulseWindowHeight);
    rect(600,385,BPMWindowWidth,BPMWindowHeight);
}

void drawPulseWaveform(){
  // DRAW THE PULSE WAVEFORM
  // prepare pulse data points
  RawY[RawY.length-1] = (1023 - Sensor) - 212;   // place the new raw datapoint at the end of the array
  zoom = scaleBar.getPos();                      // get current waveform scale value
  offset = map(zoom,0.5,1,150,0);                // calculate the offset needed at this scale
  for (int i = 0; i < RawY.length-1; i++) {      // move the pulse waveform by
    RawY[i] = RawY[i+1];                         // shifting all raw datapoints one pixel left
    float dummy = RawY[i] * zoom + offset;       // adjust the raw data to the selected scale
    ScaledY[i] = constrain(int(dummy),44,556);   // transfer the raw data array to the scaled array
  }
  stroke(250,0,0);                               // red is a good color for the pulse waveform
  noFill();
  beginShape();                                  // using beginShape() renders fast
  for (int x = 1; x < ScaledY.length-1; x++) {
    vertex(x+10, ScaledY[x]);                    //draw a line connecting the data points
  }
  endShape();
}

void drawBPMwaveform(){
// DRAW THE BPM WAVE FORM
// first, shift the BPM waveform over to fit then next data point only when a beat is found
 if (beat == true){   // move the heart rate line over one pixel every time the heart beats
   file.play();
   beat = false;      // clear beat flag (beat flag waset in serialEvent tab)
   for (int i=0; i<rate.length-1; i++){
     rate[i] = rate[i+1];                  // shift the bpm Y coordinates over one pixel to the left
   }
// then limit and scale the BPM value
   BPM = min(BPM,200);                     // limit the highest BPM value to 200
   float dummy = map(BPM,0,200,555,215);   // map it to the heart rate window Y
   rate[rate.length-1] = int(dummy);       // set the rightmost pixel to the new data point value
 }
 // GRAPH THE HEART RATE WAVEFORM
 stroke(250,0,0);                          // color of heart rate graph
 strokeWeight(2);                          // thicker line is easier to read
 noFill();
 beginShape();
 for (int i=0; i < rate.length-1; i++){    // variable 'i' will take the place of pixel x position
   vertex(i+510, rate[i]);                 // display history of heart rate datapoints
 }
 endShape();
}

void drawHeart(){
  // DRAW THE HEART AND MAYBE MAKE IT BEAT
    fill(250,0,0);
    stroke(250,0,0);
    // the 'heart' variable is set in serialEvent when arduino sees a beat happen
    heart--;                    // heart is used to time how long the heart graphic swells when your heart beats
    heart = max(heart,0);       // don't let the heart variable go into negative numbers
    if (heart > 0){             // if a beat happened recently,
      strokeWeight(8);          // make the heart big
    }
    smooth();   // draw the heart with two bezier curves
    bezier(width-100,50, width-20,-20, width,140, width-100,150);
    bezier(width-100,50, width-190,-20, width-200,140, width-100,150);
    strokeWeight(1);          // reset the strokeWeight for next time
}

void listAvailablePorts(){
  serialPorts = Serial.list();
  fill(0);
  textFont(font,16);
  textAlign(LEFT);
  // set a counter to list the ports backwards
  int yPos = 0;
  for(int i=serialPorts.length-1; i>=0; i--){
    button[i] = new Radio(35, 95+(yPos*20),12,color(180),color(80),color(255),i,button);
    text(serialPorts[i],50, 100+(yPos*20));
    yPos++;
  }
  textFont(font);
  textAlign(CENTER);
}
void mousePressed(){
  scaleBar.press(mouseX, mouseY);
  if(!serialPortFound){
    for(int i=0; i<button.length; i++){
      if(button[i].pressRadio(mouseX,mouseY)){
        try{
          port = new Serial(this, Serial.list()[i], 115200);  // make sure Arduino is talking serial at this baud rate
          delay(1000);
          println(port.read());
          port.clear();            // flush buffer
          port.bufferUntil('\n');  // set buffer full flag on receipt of carriage return
          serialPortFound = true;
        }
        catch(Exception e){
          println("Couldn't open port " + Serial.list()[i]);
        }
      }
    }
  }
}

void mouseReleased(){
  scaleBar.release();
}

void keyPressed(){

 switch(key){
   case 's':    // pressing 's' or 'S' will take a jpg of the processing window
   case 'S':
     saveFrame("heartLight-####.jpg");    // take a shot of that!
     break;

   default:
     break;
 }
}
class Radio {
  int _x,_y;
  int size, dotSize;
  color baseColor, overColor, pressedColor;
  boolean over, pressed;
  int me;
  Radio[] radios;

  Radio(int xp, int yp, int s, color b, color o, color p, int m, Radio[] r) {
    _x = xp;
    _y = yp;
    size = s;
    dotSize = size - size/3;
    baseColor = b;
    overColor = o;
    pressedColor = p;
    radios = r;
    me = m;
  }

  boolean pressRadio(float mx, float my){
    if (dist(_x, _y, mx, my) < size/2){
      pressed = true;
      for(int i=0; i<radios.length; i++){
        if(i != me){ radios[i].pressed = false; }
      }
      return true;
    } else {
      return false;
    }
  }

  boolean overRadio(float mx, float my){
    if (dist(_x, _y, mx, my) < size/2){
      over = true;
      for(int i=0; i<radios.length; i++){
        if(i != me){ radios[i].over = false; }
      }
      return true;
    } else {
      return false;
    }
  }

  void displayRadio(){
    noStroke();
    fill(baseColor);
    ellipse(_x,_y,size,size);
    if(over){
      fill(overColor);
      ellipse(_x,_y,dotSize,dotSize);
    }
    if(pressed){
      fill(pressedColor);
      ellipse(_x,_y,dotSize,dotSize);
    }
  }
}
/*
    from the book "Processing" by Reas and Fry
*/

class Scrollbar{
 int x,y;               // the x and y coordinates
 float sw, sh;          // width and height of scrollbar
 float pos;             // position of thumb
 float posMin, posMax;  // max and min values of thumb
 boolean rollover;      // true when the mouse is over
 boolean locked;        // true when it's the active scrollbar
 float minVal, maxVal;  // min and max values for the thumb

 Scrollbar (int xp, int yp, int w, int h, float miv, float mav){ // values passed from the constructor
  x = xp;
  y = yp;
  sw = w;
  sh = h;
  minVal = miv;
  maxVal = mav;
  pos = x - sh/2;
  posMin = x-sw/2;
  posMax = x + sw/2;  // - sh;
 }

 // updates the 'over' boolean and position of thumb
 void update(int mx, int my) {
   if (over(mx, my) == true){
     rollover = true;            // when the mouse is over the scrollbar, rollover is true
   } else {
     rollover = false;
   }
   if (locked == true){
    pos = constrain (mx, posMin, posMax);
   }
 }

 // locks the thumb so the mouse can move off and still update
 void press(int mx, int my){
   if (rollover == true){
    locked = true;            // when rollover is true, pressing the mouse button will lock the scrollbar on
   }else{
    locked = false;
   }
 }

 // resets the scrollbar to neutral
 void release(){
  locked = false;
 }

 // returns true if the cursor is over the scrollbar
 boolean over(int mx, int my){
  if ((mx > x-sw/2) && (mx < x+sw/2) && (my > y-sh/2) && (my < y+sh/2)){
   return true;
  }else{
   return false;
  }
 }

 // draws the scrollbar on the screen
 void display (){

  noStroke();
  fill(255);
  rect(x, y, sw, sh);      // create the scrollbar
  fill (250,0,0);
  if ((rollover == true) || (locked == true)){
   stroke(250,0,0);
   strokeWeight(8);           // make the scale dot bigger if you're on it
  }
  ellipse(pos, y, sh, sh);     // create the scaling dot
  strokeWeight(1);            // reset strokeWeight
 }

 // returns the current value of the thumb
 float getPos() {
  float scalar = sw / sw;  // (sw - sh/2);
  float ratio = (pos-(x-sw/2)) * scalar;
  float p = minVal + (ratio/sw * (maxVal - minVal));
  return p;
 }
 }
void serialEvent(Serial port){
try{
   String inData = port.readStringUntil('\n');
   inData = trim(inData);                 // cut off white space (carriage return)

   if (inData.charAt(0) == 'S'){          // leading 'S' for sensor data
     inData = inData.substring(1);        // cut off the leading 'S'
     Sensor = int(inData);                // convert the string to usable int
   }
   if (inData.charAt(0) == 'B'){          // leading 'B' for BPM data
     inData = inData.substring(1);        // cut off the leading 'B'
     BPM = int(inData);                   // convert the string to usable int
     beat = true;                         // set beat flag to advance heart rate graph
     heart = 20;                          // begin heart image 'swell' timer
   }
 if (inData.charAt(0) == 'Q'){            // leading 'Q' means IBI data
     inData = inData.substring(1);        // cut off the leading 'Q'
     TBH = int(inData);                   // convert the string to usable int
   }
} catch(Exception e) {
  // println(e.toString());
}

}