Become a Captain for a Day! (Final Project) – Darko Skulikj

And here it is, the last project of the semester. Before saying anything about the project, I just want to express my gratefulness to all the students, instructors, professors and especially Professor Aaron for having an amazing, fun and challenging time during this class.

Concept

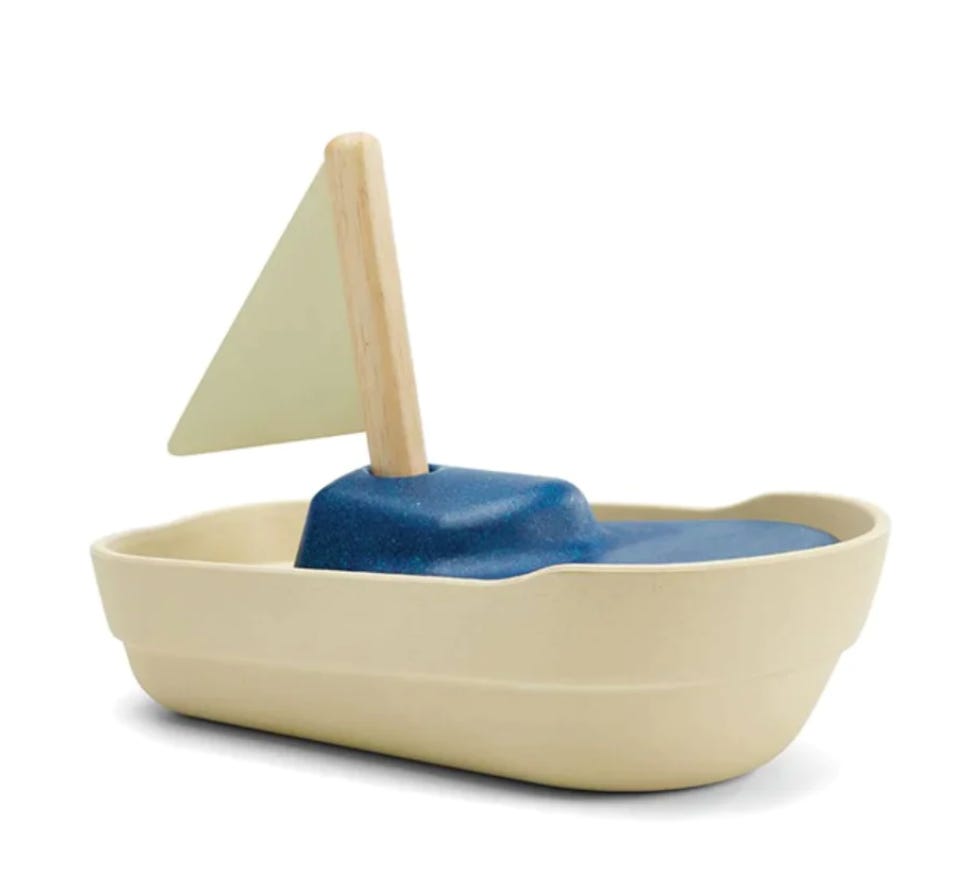
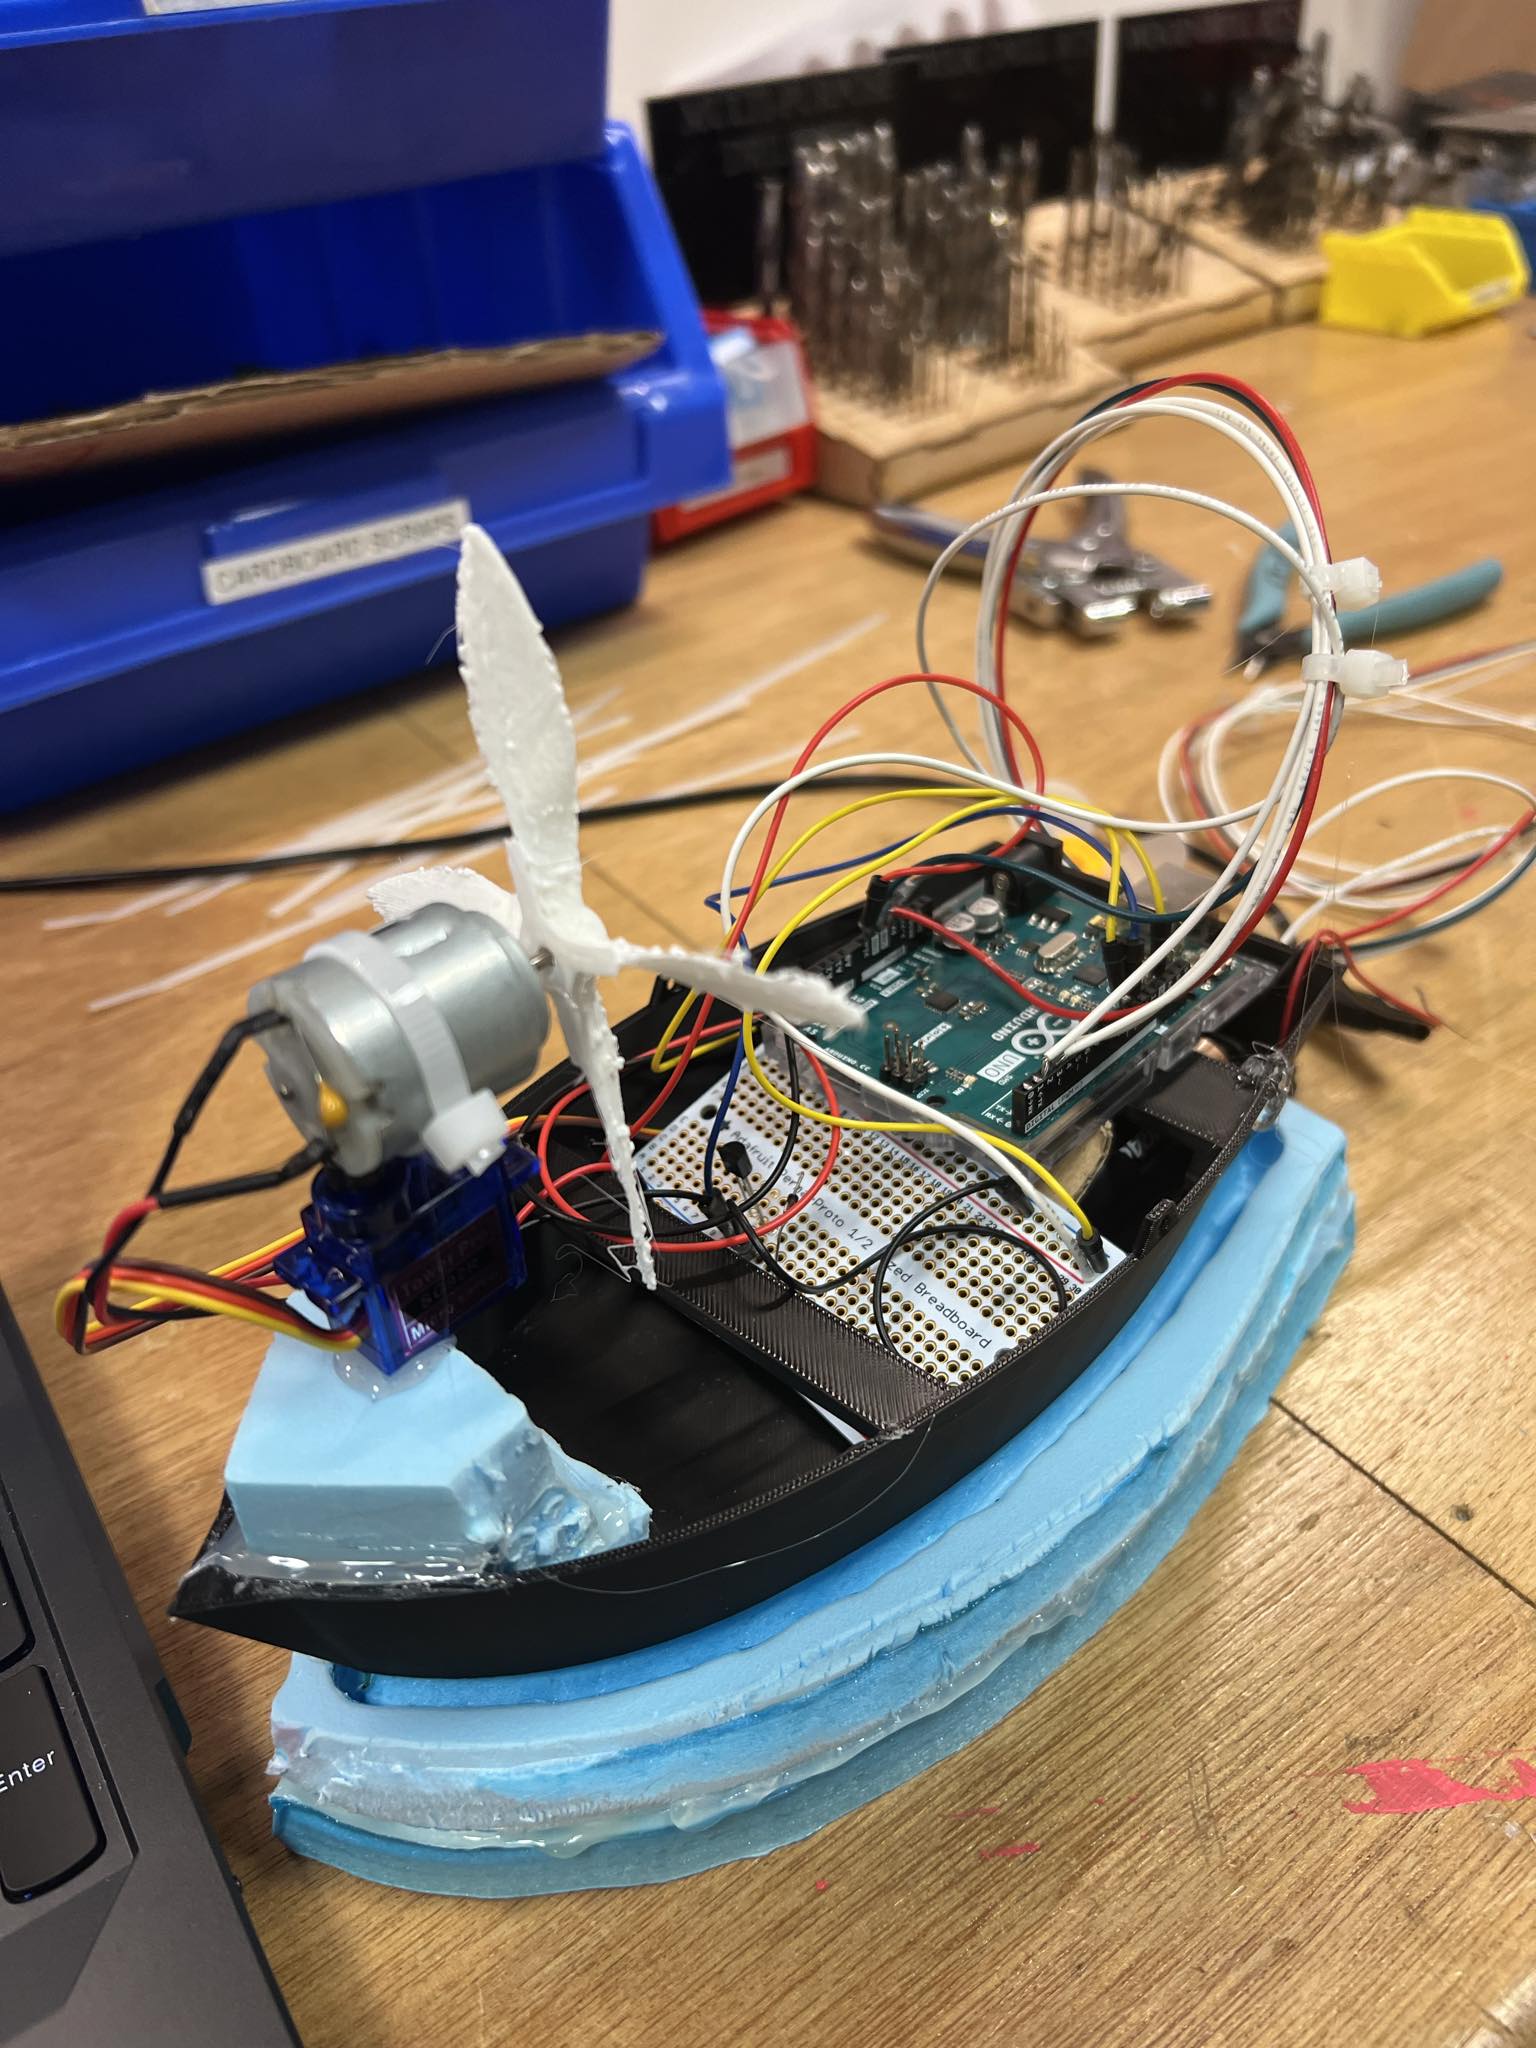
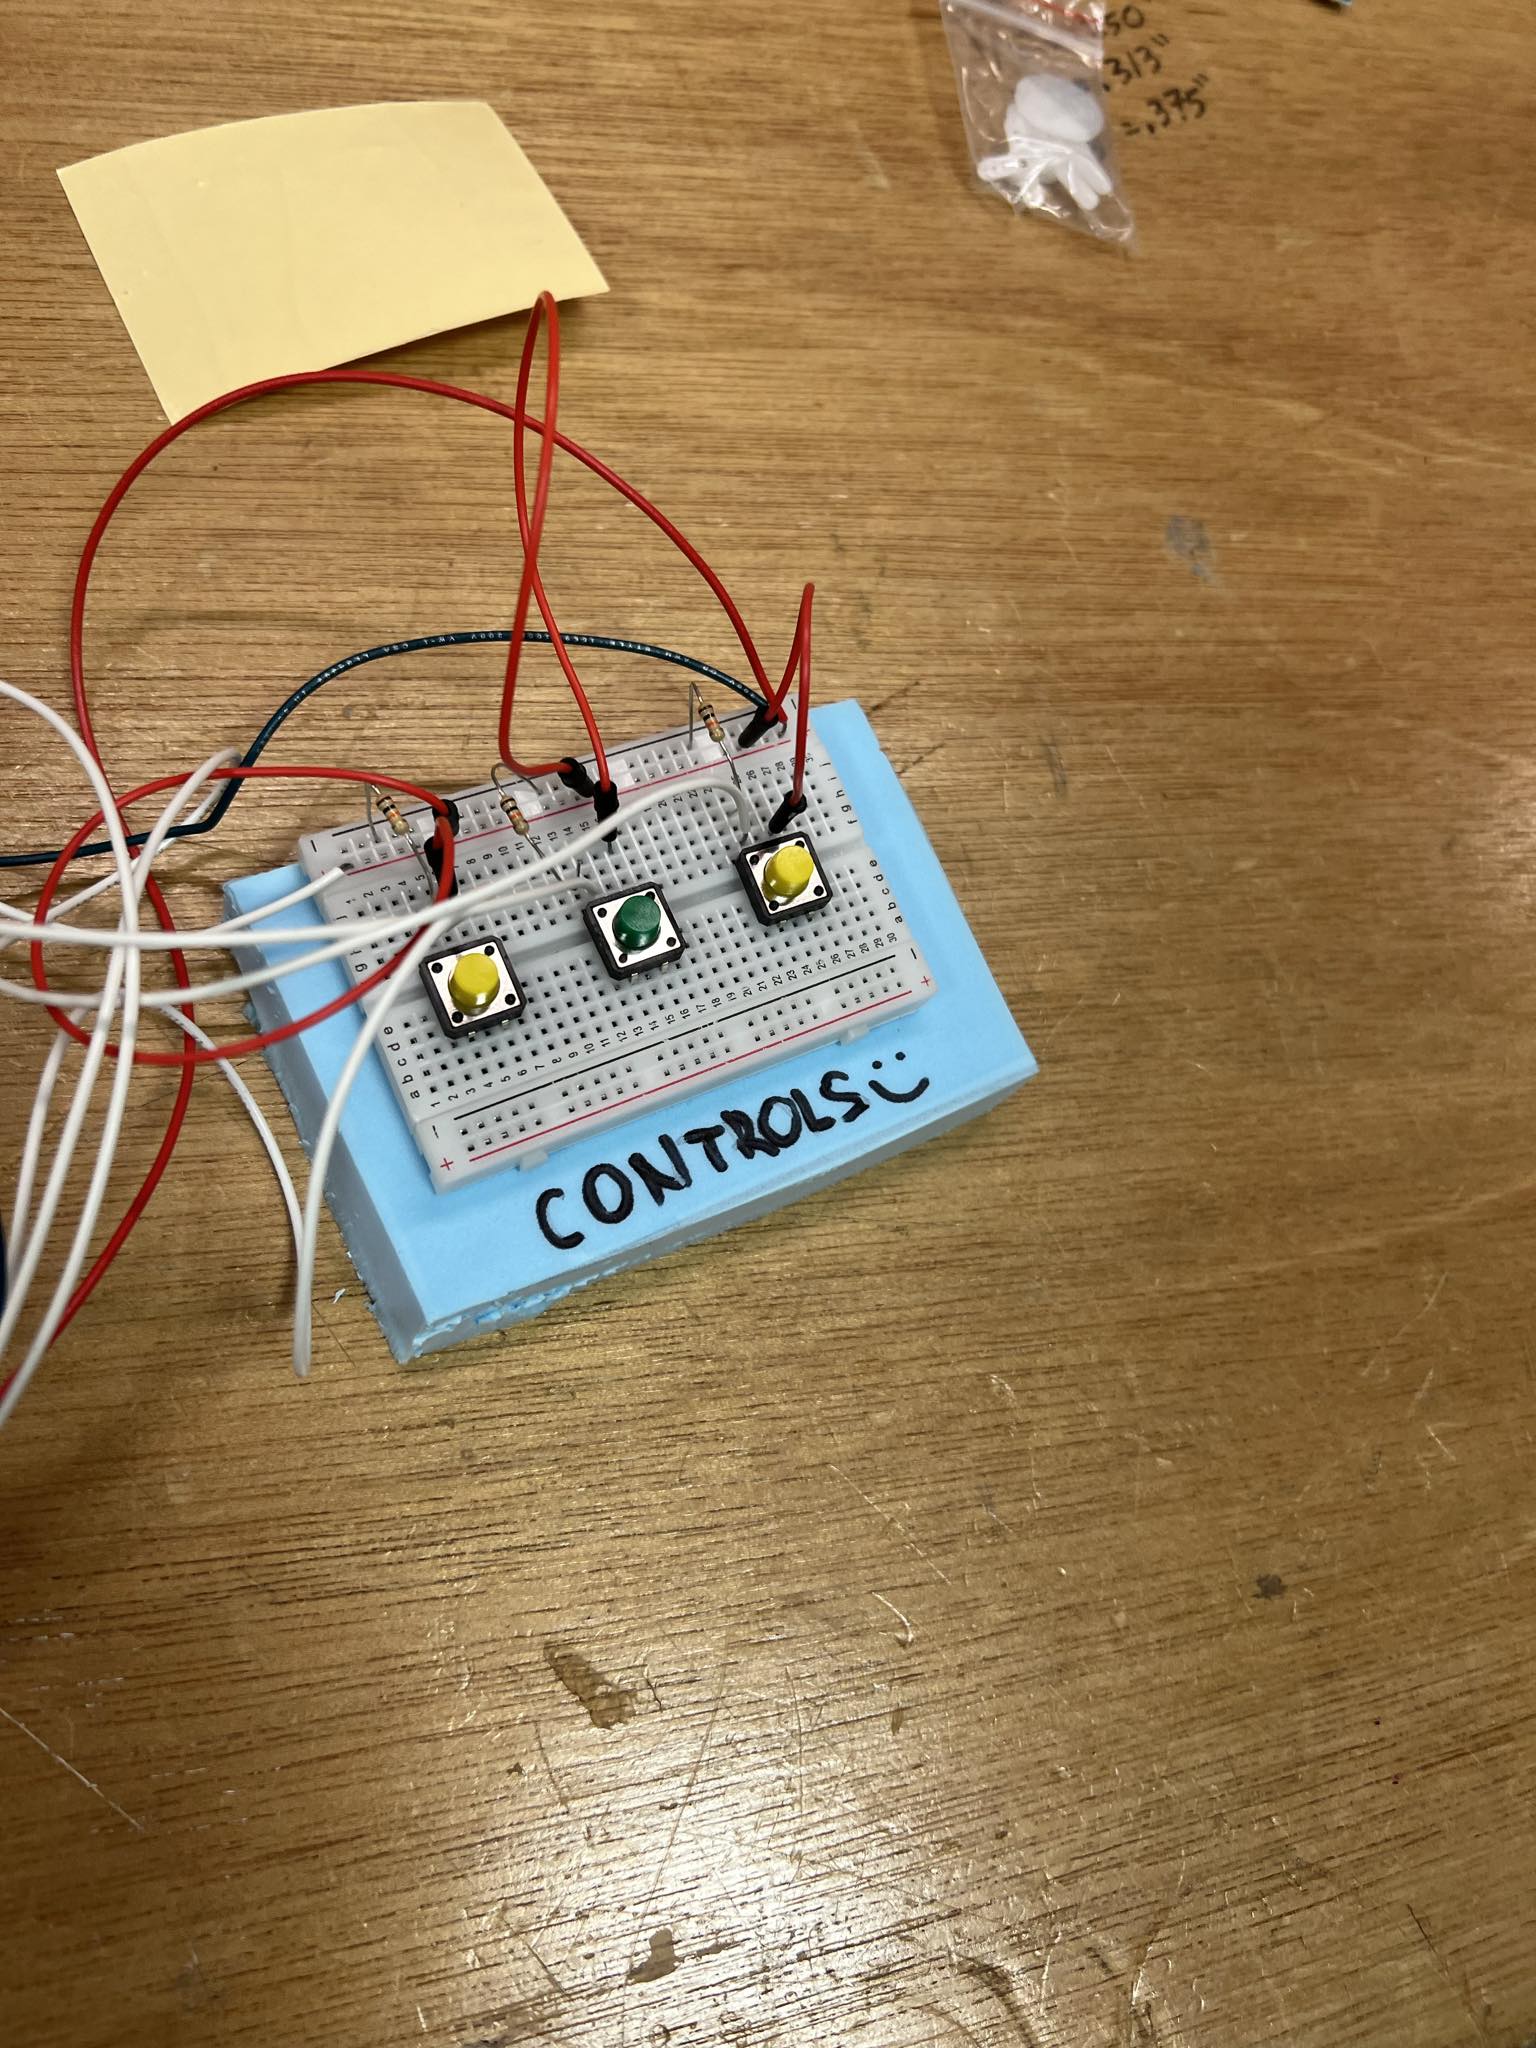
The concept of this project is pretty simple. I’m going to make you a captain of a boat for a day. SPOILER ALERT: You don’t need a license! To make this dream come true, I decided to conceptualize for the controls to be very simple, you just click to go left, right and to turn the motor boat on and off. This really takes us into intuitive design, and I believe that users would adapt very simply to this. Other that that I would need to think about the bed of the boat, the DC Motor, the Propeller, the Physics behind it and the whole placement of the Arduino. The rough sketch looked something like this:


Production:

For the boat model, I found this boat bed on Thingy Verse and adjusted the dimensions so that it can find the Arduino and the breadboard, as well as the batteries. Here is how the model looked before printing:

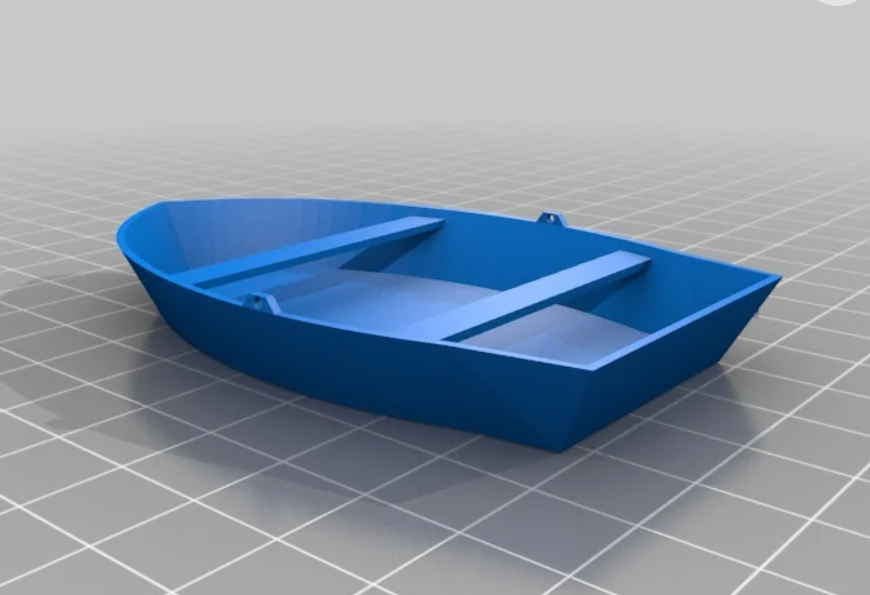
After printing it out, I looked into 3d printing a propeller which would actually be strong enough to pull the boat so I found this 3d model:

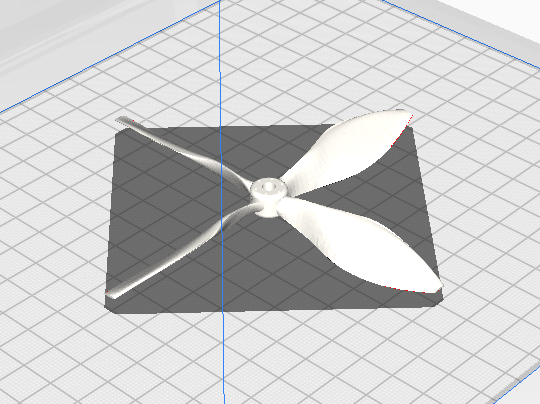
After that I placed all the parts and coded my logic for the user interaction. The code can be seen below:

#include <Servo.h>

int serialVal0 = 0;
int serialVal1 = 1;
int previousButton2State = LOW;

// Define pins for buttons, servo, and DC motor
const int button1Pin = 2; // Pin for the first button
const int button2Pin = 3; // Pin for the second button
const int button3Pin = 4; // Pin for the third button
const int servoPin = 10;  // Pin for the servo motor
const int motorPin = 11;  // Pin for the DC motor

// Define variables to store the state of buttons and motor
int button1State = 0;
int button2State = 0;
int button3State = 0;
bool motorState = false; // Motor state flag

// Create a servo object
Servo myServo;

void setup() {
  // Initialize serial communication
  Serial.begin(9600);

  // Attach servo to its pin
  myServo.attach(servoPin);

  // Set motor pin as output
  pinMode(motorPin, OUTPUT);

  // Set button pins as inputs
  pinMode(button1Pin, INPUT);
  pinMode(button2Pin, INPUT);
  pinMode(button3Pin, INPUT);

  // Start the handshake
  while (Serial.available() <= 0) {
    Serial.println("0,0"); // Send a starting message
    delay(50);
  }
}

void loop() {
  // Read the state of buttons
  button1State = digitalRead(button1Pin);
  button2State = digitalRead(button2Pin);
  button3State = digitalRead(button3Pin);

  // If button 1 is pressed, turn servo left
  if (button1State == HIGH) {
    myServo.write(120);
    serialVal0 = 80;
    delay(100); // Add a delay to avoid sending data too fast
  }

  // Toggle motor based on button 2 state
  if (button2State == HIGH) {
    if (previousButton2State == LOW) {
      motorState = !motorState; // Toggle motor state only once when the button is released
      digitalWrite(motorPin, motorState); // Set motor state
    }
  } 

  // Update serialVal1 based on motor state
  serialVal1 = motorState ? 1 : 0;

  // Update previous button state
  previousButton2State = button2State;

  // If button 3 is pressed, turn servo right
  if (button3State == HIGH) {
    myServo.write(80);
    serialVal0 = 140;
    delay(100); // Add a delay to avoid sending data too fast
  }

  // Return servo to neutral position if no buttons are pressed
  if (button1State == LOW && button3State == LOW) {
    myServo.write(100); // Neutral position
    serialVal0 = 115;
    delay(100); // Add a delay to avoid sending data too fast
  }

  // Send the values of serialVal0 and serialVal1
  Serial.print(serialVal0);
  Serial.print(',');
  Serial.println(serialVal1);
}

Of course this had to be connected to p5.js so I made a sketch which would provide a nice interface showing the speed and direction of where the boat is headed, it looks like this:

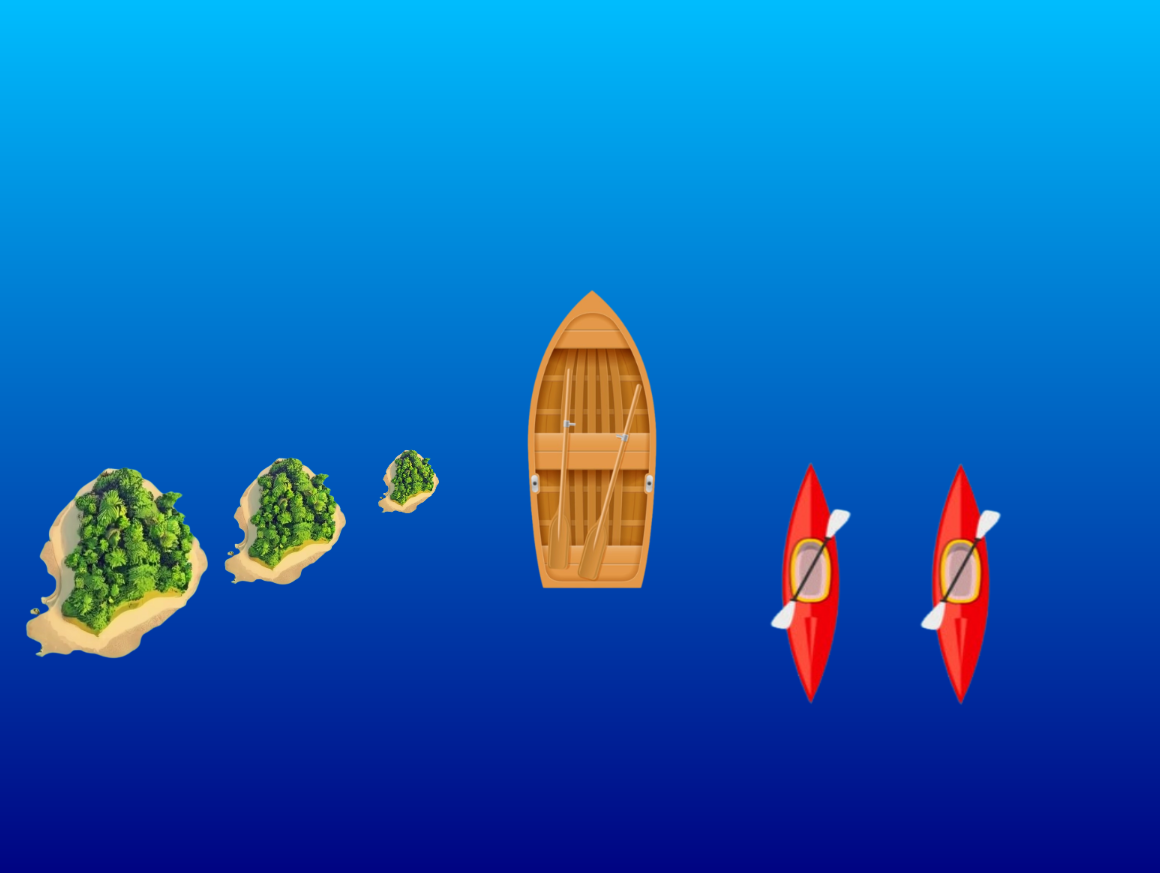
The p5.js code looks like this:

let servoPos; // Variable to store servo position
let motorSpeed; // Variable to store motor speed
let boatImage; // Variable to store boat image
let islandsImage1, islandsImage2, islandsImage3; // Variables to store islands images
let otherBoatsImage; // Variable to store other boats image
let serialSetUp = false; // Variable to track if serial setup is done

// Variables to store positions of objects
let islands1Y, islands2Y, islands3Y, otherBoats1Y, otherBoats2Y;

function preload() {
  // Load boat, islands, and other boats images
  boatImage = loadImage('boat.png');
  islandsImage1 = loadImage('islands.png');
  islandsImage2 = loadImage('islands.png');
  islandsImage3 = loadImage('islands.png');
  otherBoatsImage = loadImage('otherboats.png');
}

function setup() {
  createCanvas(800, 600); // Larger canvas size
  textSize(24); // Bigger font size
  // Display initial message centered on the canvas
  textAlign(CENTER, CENTER);
  setGradient(0, 0, width, height, color(0, 191, 255), color(0, 0, 128)); // Background gradient
  fill(255); // White text color
  text("Press spacebar to turn the boat motor on", width / 2, height / 2);

  // Initialize positions of objects
  islands1Y = height / 2;
  islands2Y = height / 2;
  islands3Y = height / 2;
  otherBoats1Y = height / 2;
  otherBoats2Y = height / 2;
}

function readSerial(data) {
  if (data != null) {
    // Split the incoming data by comma
    let dataArray = split(trim(data), ",");
    // If the right length, then proceed
    if (dataArray.length == 2) {
      // Parse the values as integers and store them in servoPos and motorSpeed
      servoPos = int(dataArray[0]);
      motorSpeed = int(dataArray[1]);
      console.log("Servo position: " + servoPos + ", Motor speed: " + motorSpeed);
    }
  }
  
  //////////////////////////////////
    //SEND TO ARDUINO HERE (handshake)
    //////////////////////////////////
    let sendToArduino = 0 + "\n";
    writeSerial(sendToArduino);
}

function draw() {
  // If serial setup is not done, return
  if (!serialSetUp) return;

  // Background gradient resembling water
  setGradient(0, 0, width, height, color(0, 191, 255), color(0, 0, 128));

  // Display boat heading status centered above boat
 

  // Move and draw islands images
  islands1Y += 1; // Speed of islands movement
  if (islands1Y > height) {
    islands1Y = 0; // Reset when islands moves off the screen
  }
  image(islandsImage1, 140, islands1Y, 100, 100); // Islands image on the left side

  islands2Y += 1.5; // Speed of islands movement
  if (islands2Y > height) {
    islands2Y = 0; // Reset when islands moves off the screen
  }
  image(islandsImage2, 250, islands2Y, 50, 50); // Islands image on the left side

  islands3Y += 2; // Speed of islands movement
  if (islands3Y > height) {
    islands3Y = 0; // Reset when islands moves off the screen
  }
  image(islandsImage3, 0, islands3Y, 150, 150); // Islands image on the left side

  // Move and draw other boats images
  otherBoats1Y += 1.2; // Speed of other boats movement
  if (otherBoats1Y > height) {
    otherBoats1Y = 0; // Reset when other boats moves off the screen
  }
  image(otherBoatsImage, 500, otherBoats1Y, 90, 180); // Other boats image on the right side

  otherBoats2Y += 1.8; // Speed of other boats movement
  if (otherBoats2Y > height) {
    otherBoats2Y = 0; // Reset when other boats moves off the screen
  }
  image(otherBoatsImage, 600, otherBoats2Y, 90, 180); // Other boats image on the right side
  
   fill(255); // White text color
  textAlign(CENTER);
  if (servoPos == 115)
    text("The boat is heading Straight!", width / 2, boatImage.height / 2 - 20); // Adjusted position
  else if (servoPos == 80)
    text("The boat is heading to the Right!", width / 2, boatImage.height / 2 - 20); // Adjusted position
  else if (servoPos == 140)
    text("The boat is heading to the Left!", width / 2, boatImage.height / 2 - 20); // Adjusted position

  // Draw boat image with rotation based on servo position
  push();
  translate(width / 2, height / 2); // Center of the screen
  rotate(radians(-90)); // Rotate to point upwards
  if (servoPos == 80) {
    rotate(radians(20)); // Rotate slightly to the right
  } else if (servoPos == 140) {
    rotate(radians(-20)); // Rotate slightly to the left
  }
  imageMode(CENTER);
  image(boatImage, 0, 0, 250, 150); // Draw boat image
  pop();

  // Display motor speed centered below boat with larger font size
  textSize(24); // Larger font size
  textAlign(CENTER);
  if(motorSpeed ==0)
    text("Motor Speed: HIGH ", width / 2, height - 20);
  else if(motorSpeed == 1)
    text("Motor Speed: LOW ", width / 2, height - 20);
}

// Function to draw a gradient background
function setGradient(x, y, w, h, c1, c2) {
  noFill();
  for (let i = y; i <= y + h; i++) {
    let inter = map(i, y, y + h, 0, 1);
    let c = lerpColor(c1, c2, inter);
    stroke(c);
    line(x, i, x + w, i);
  }
}

function keyPressed() {
  if (key == " ") {
    if (!serialSetUp) {
      setUpSerial();
      serialSetUp = true;
    }
  }
}

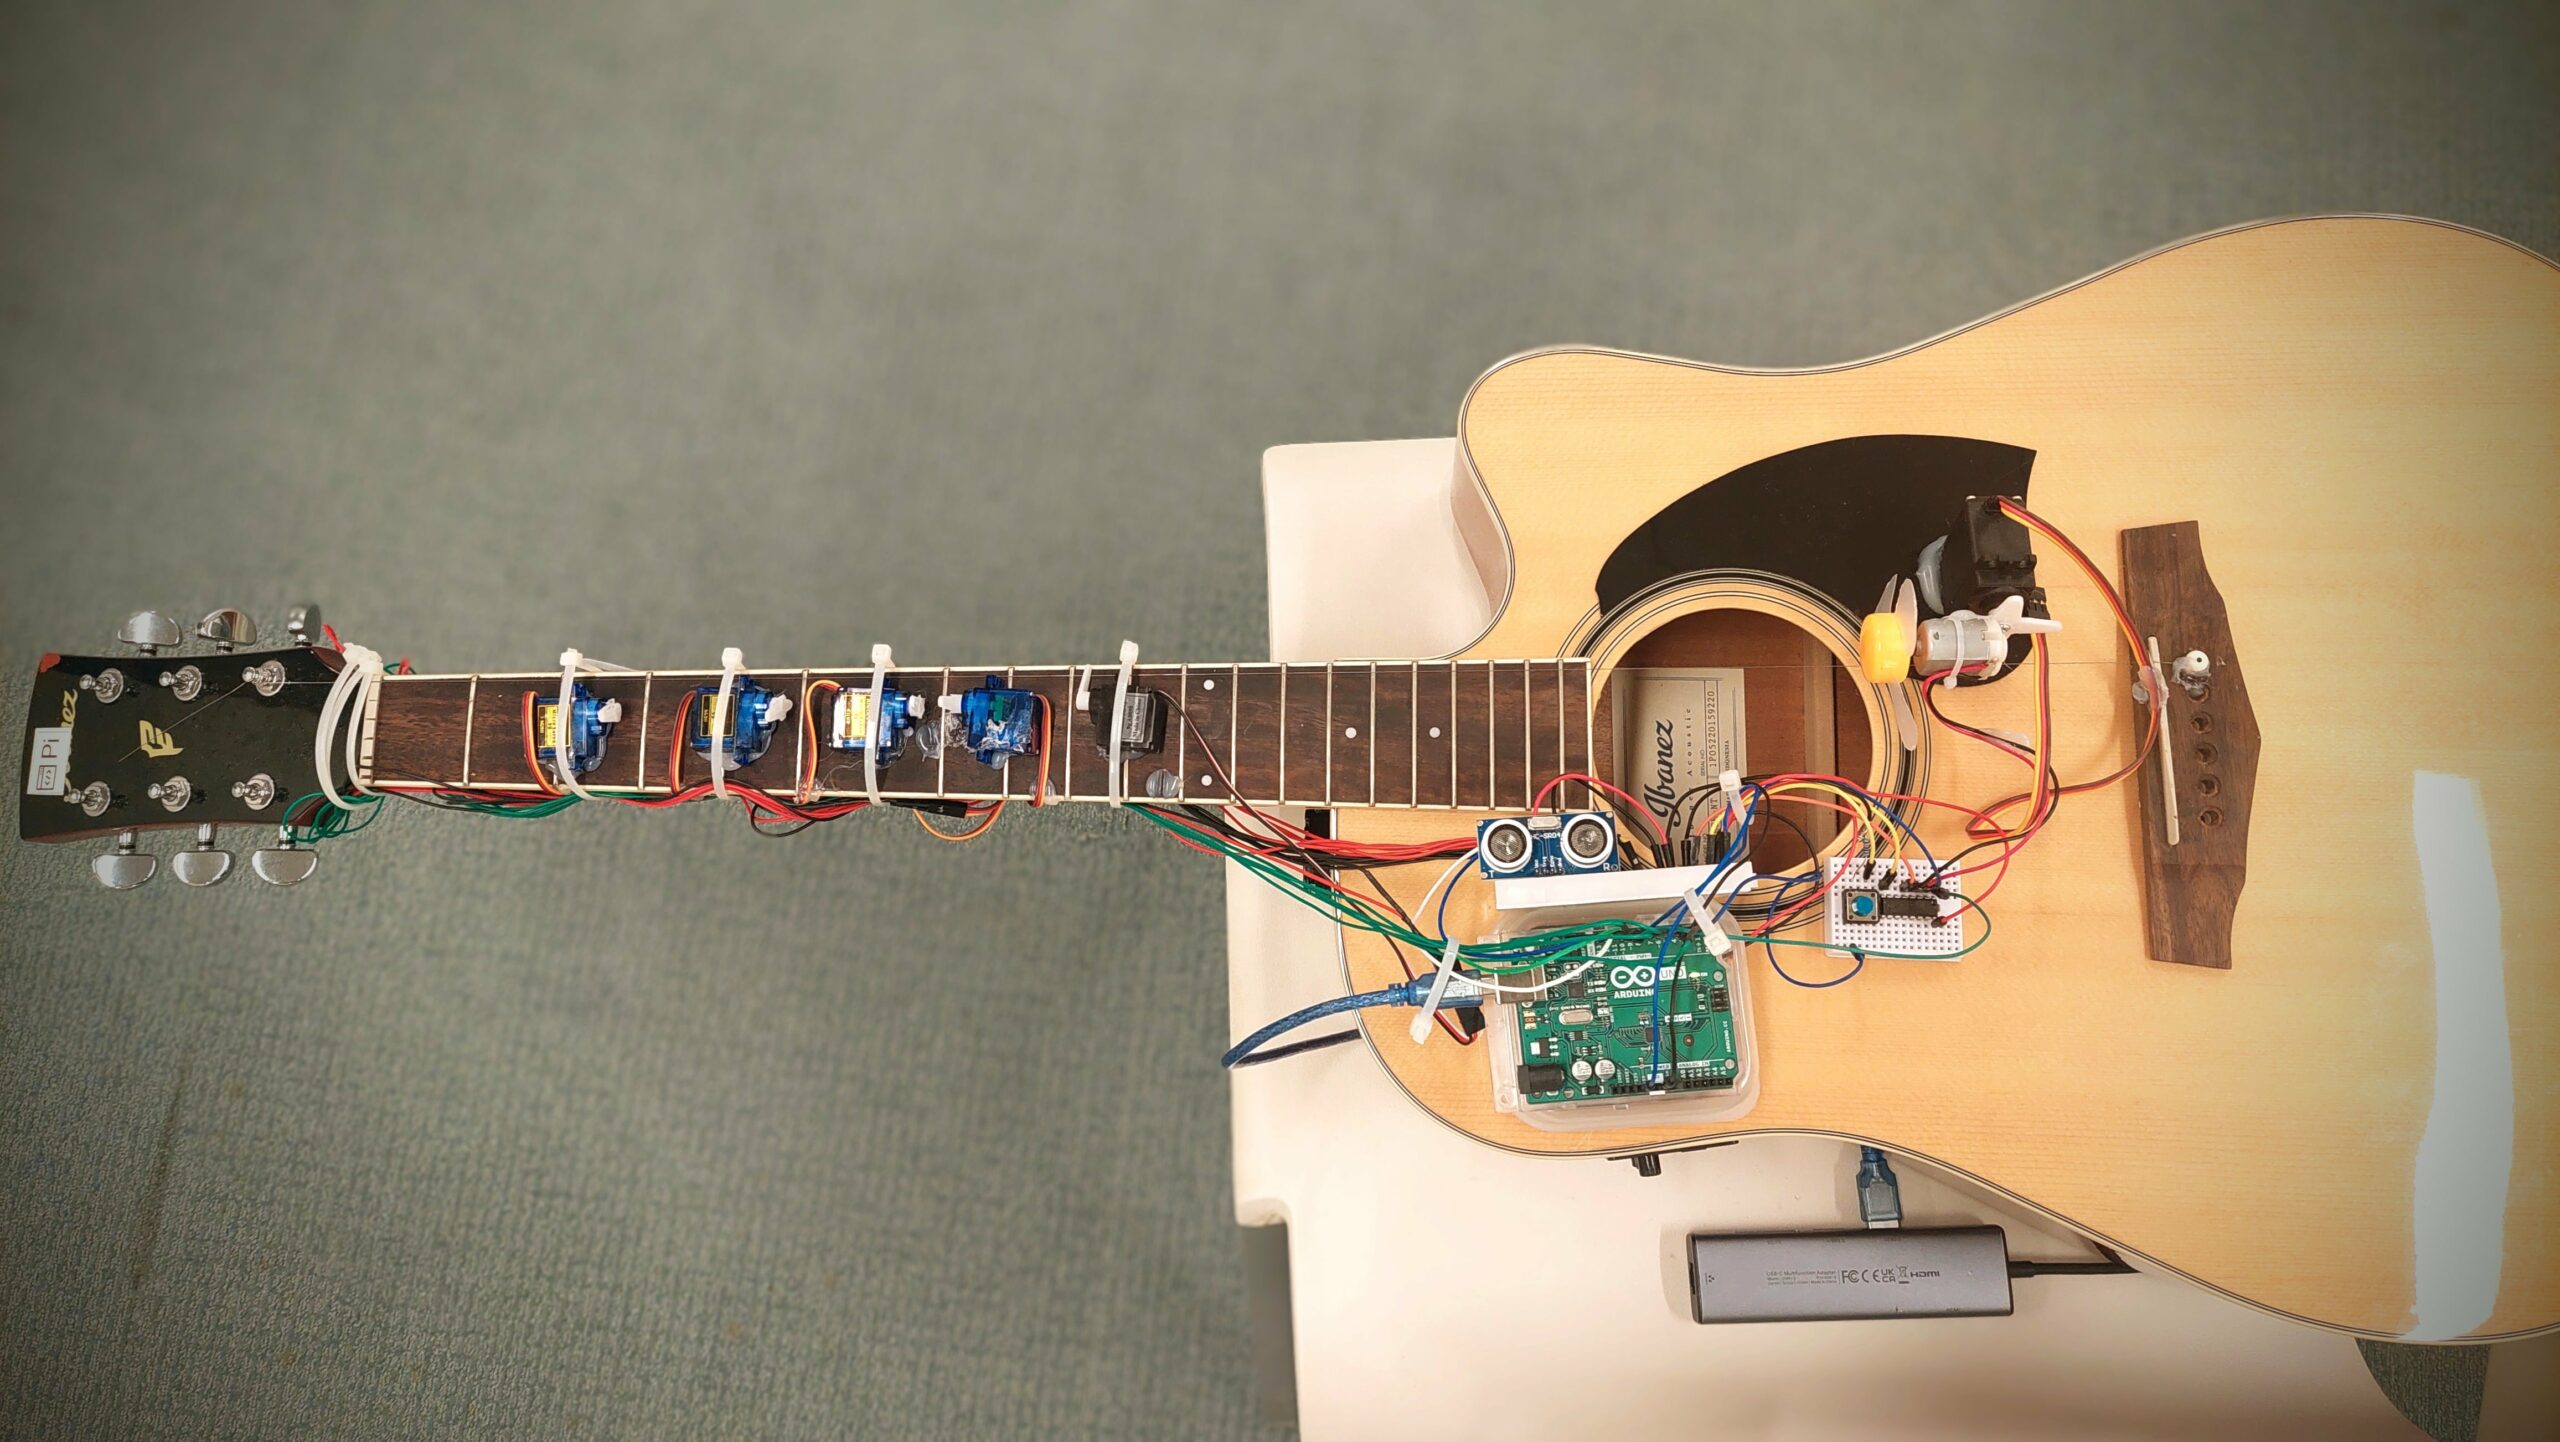
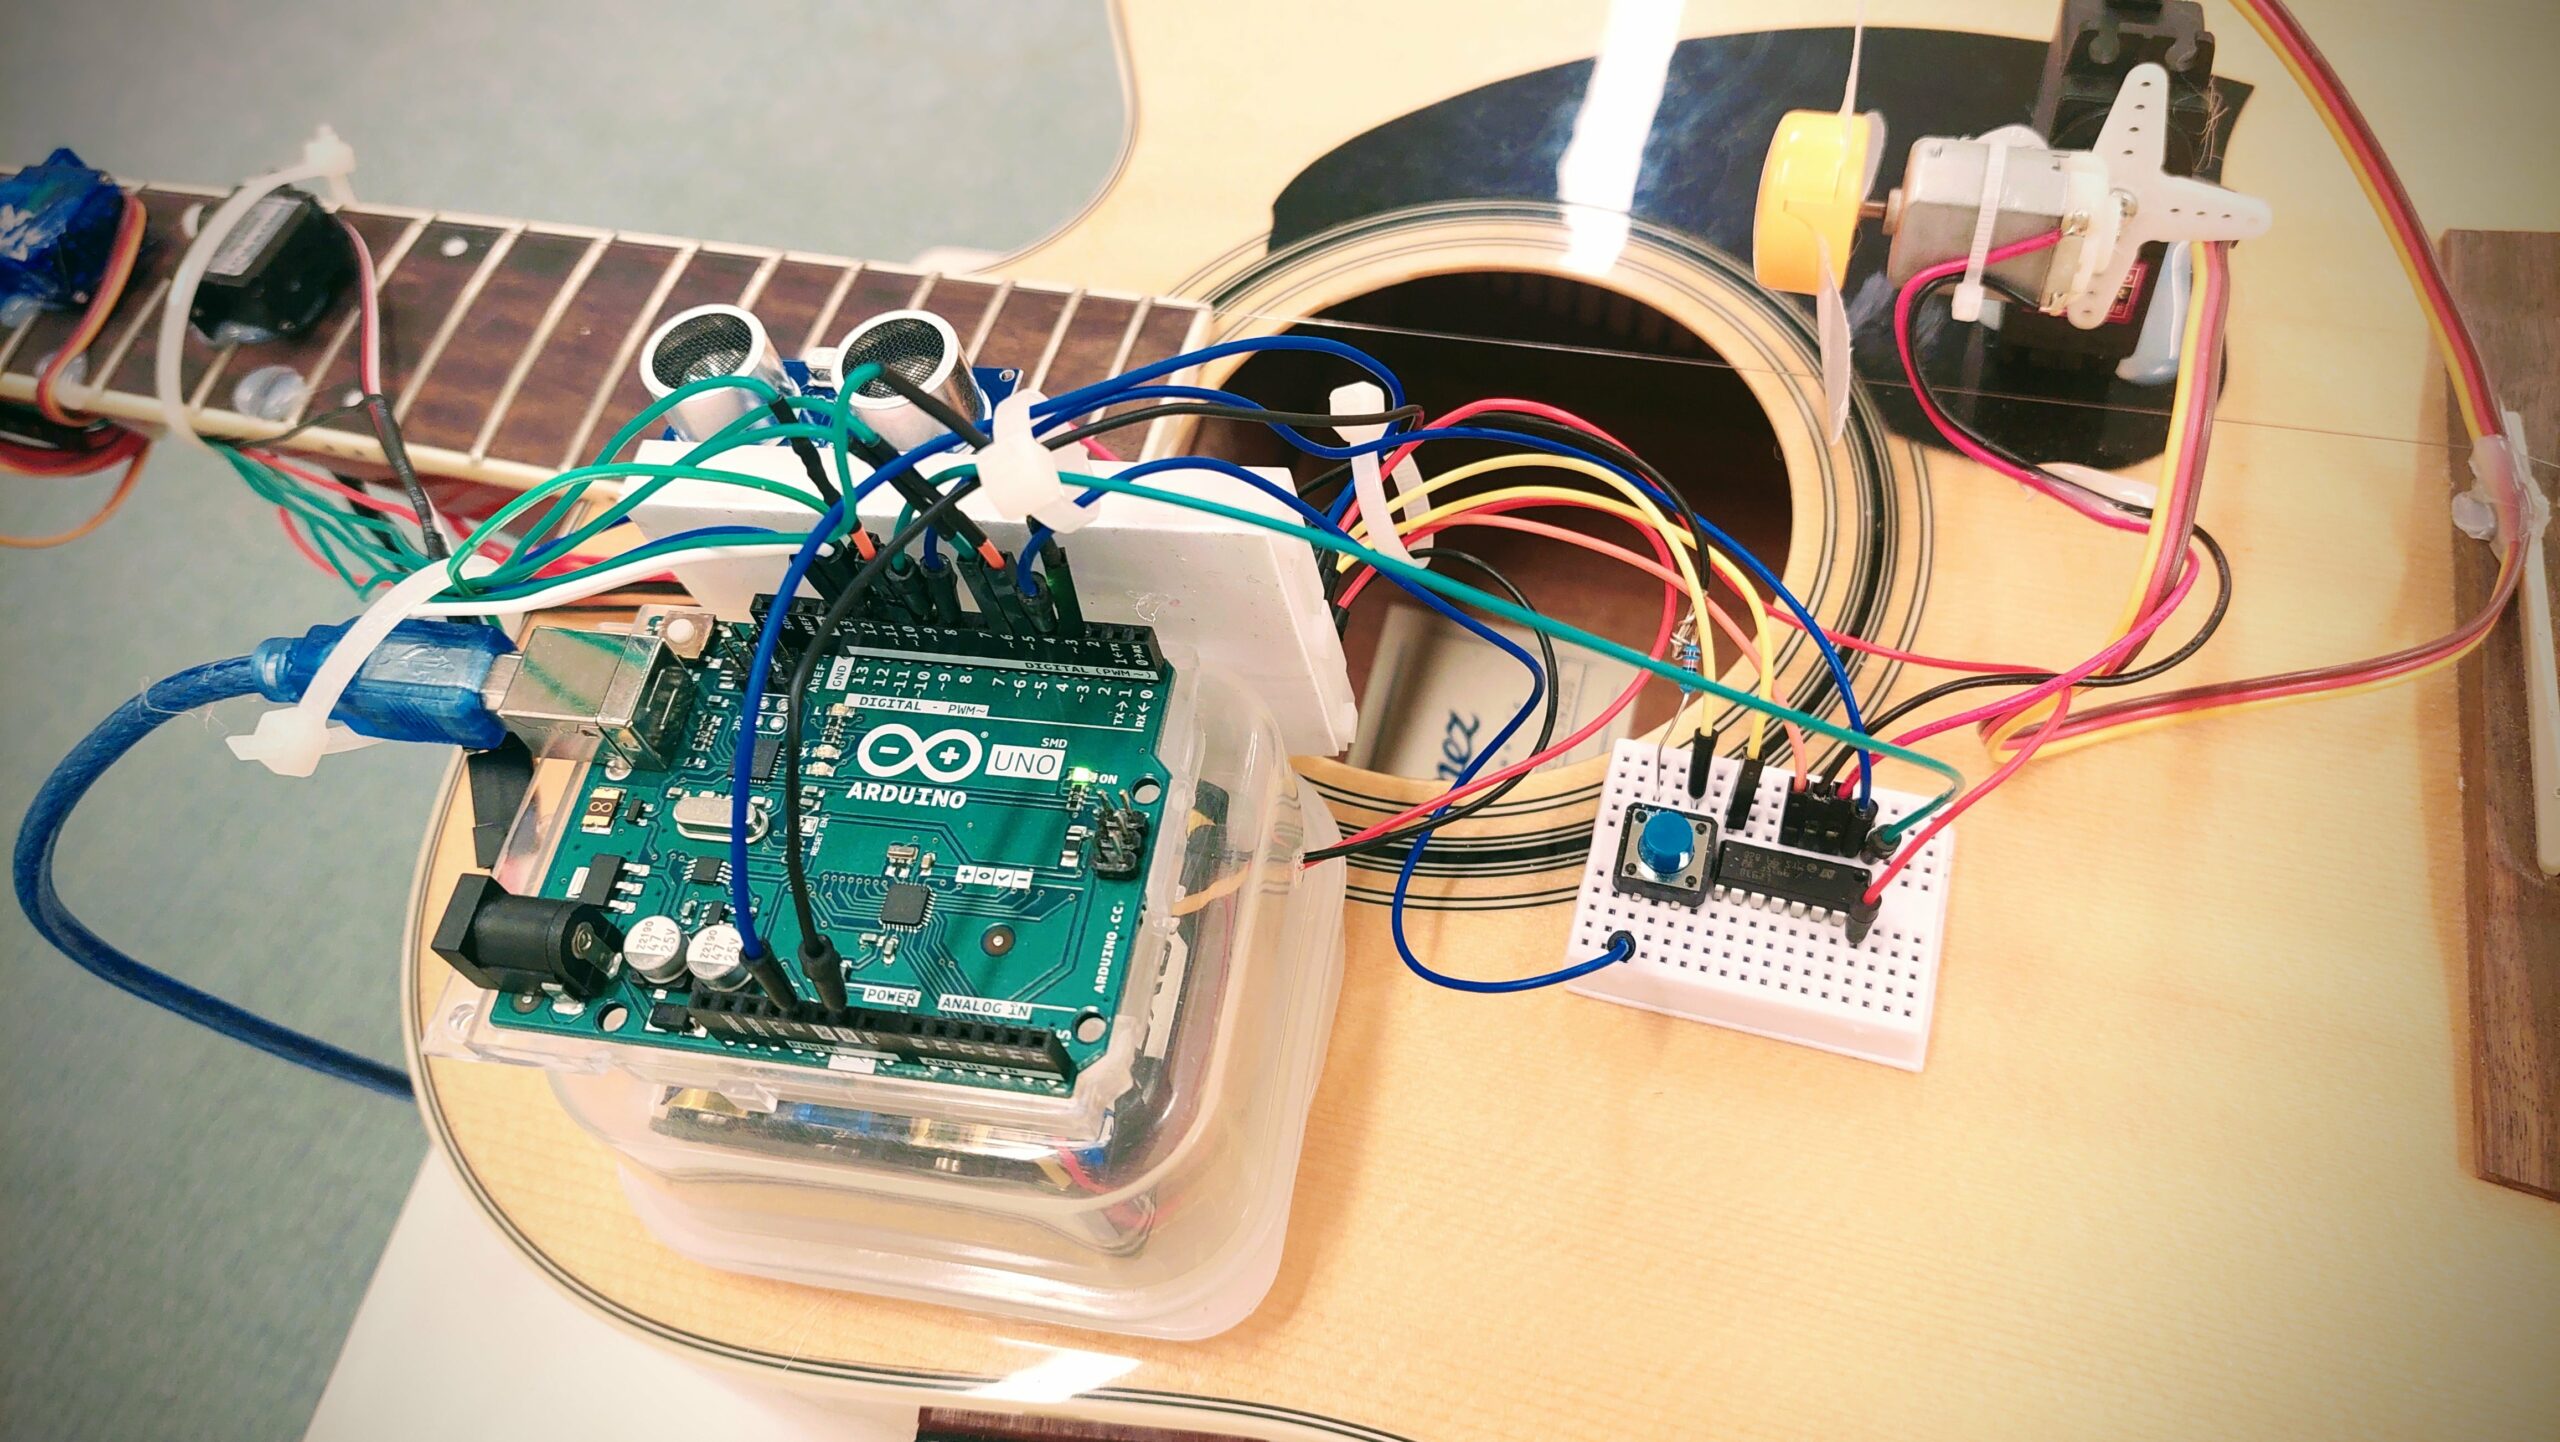
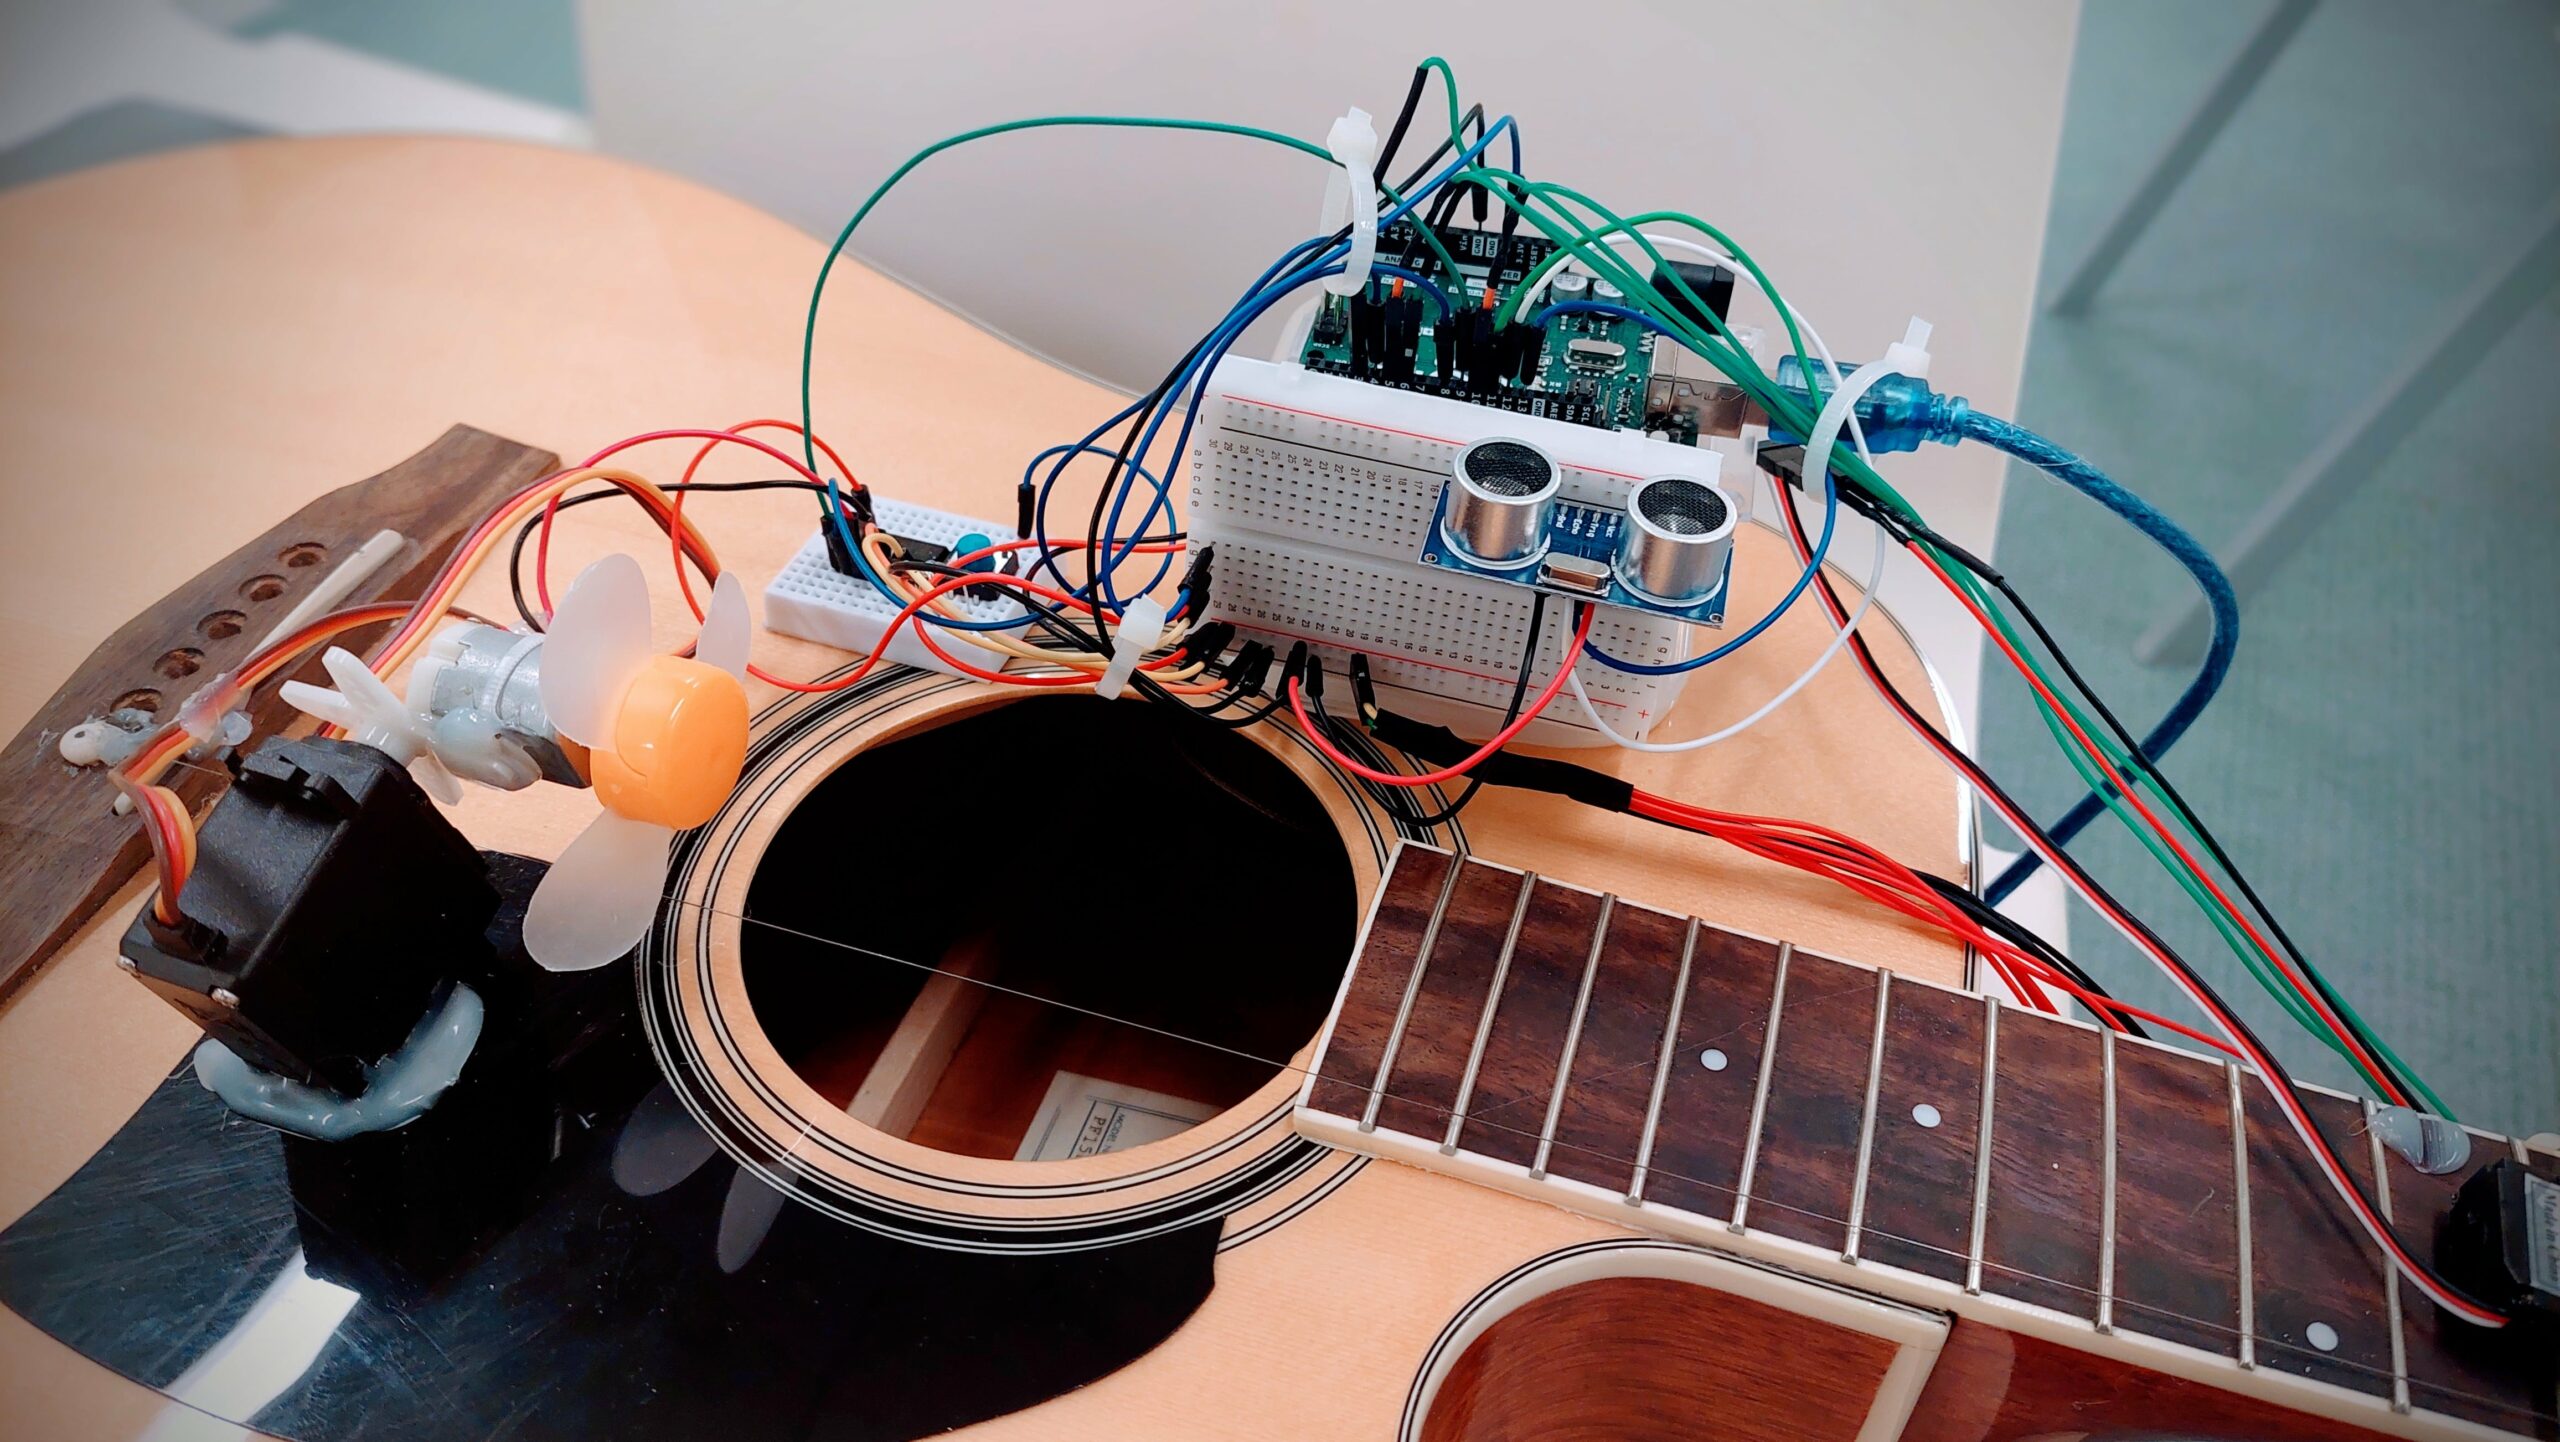
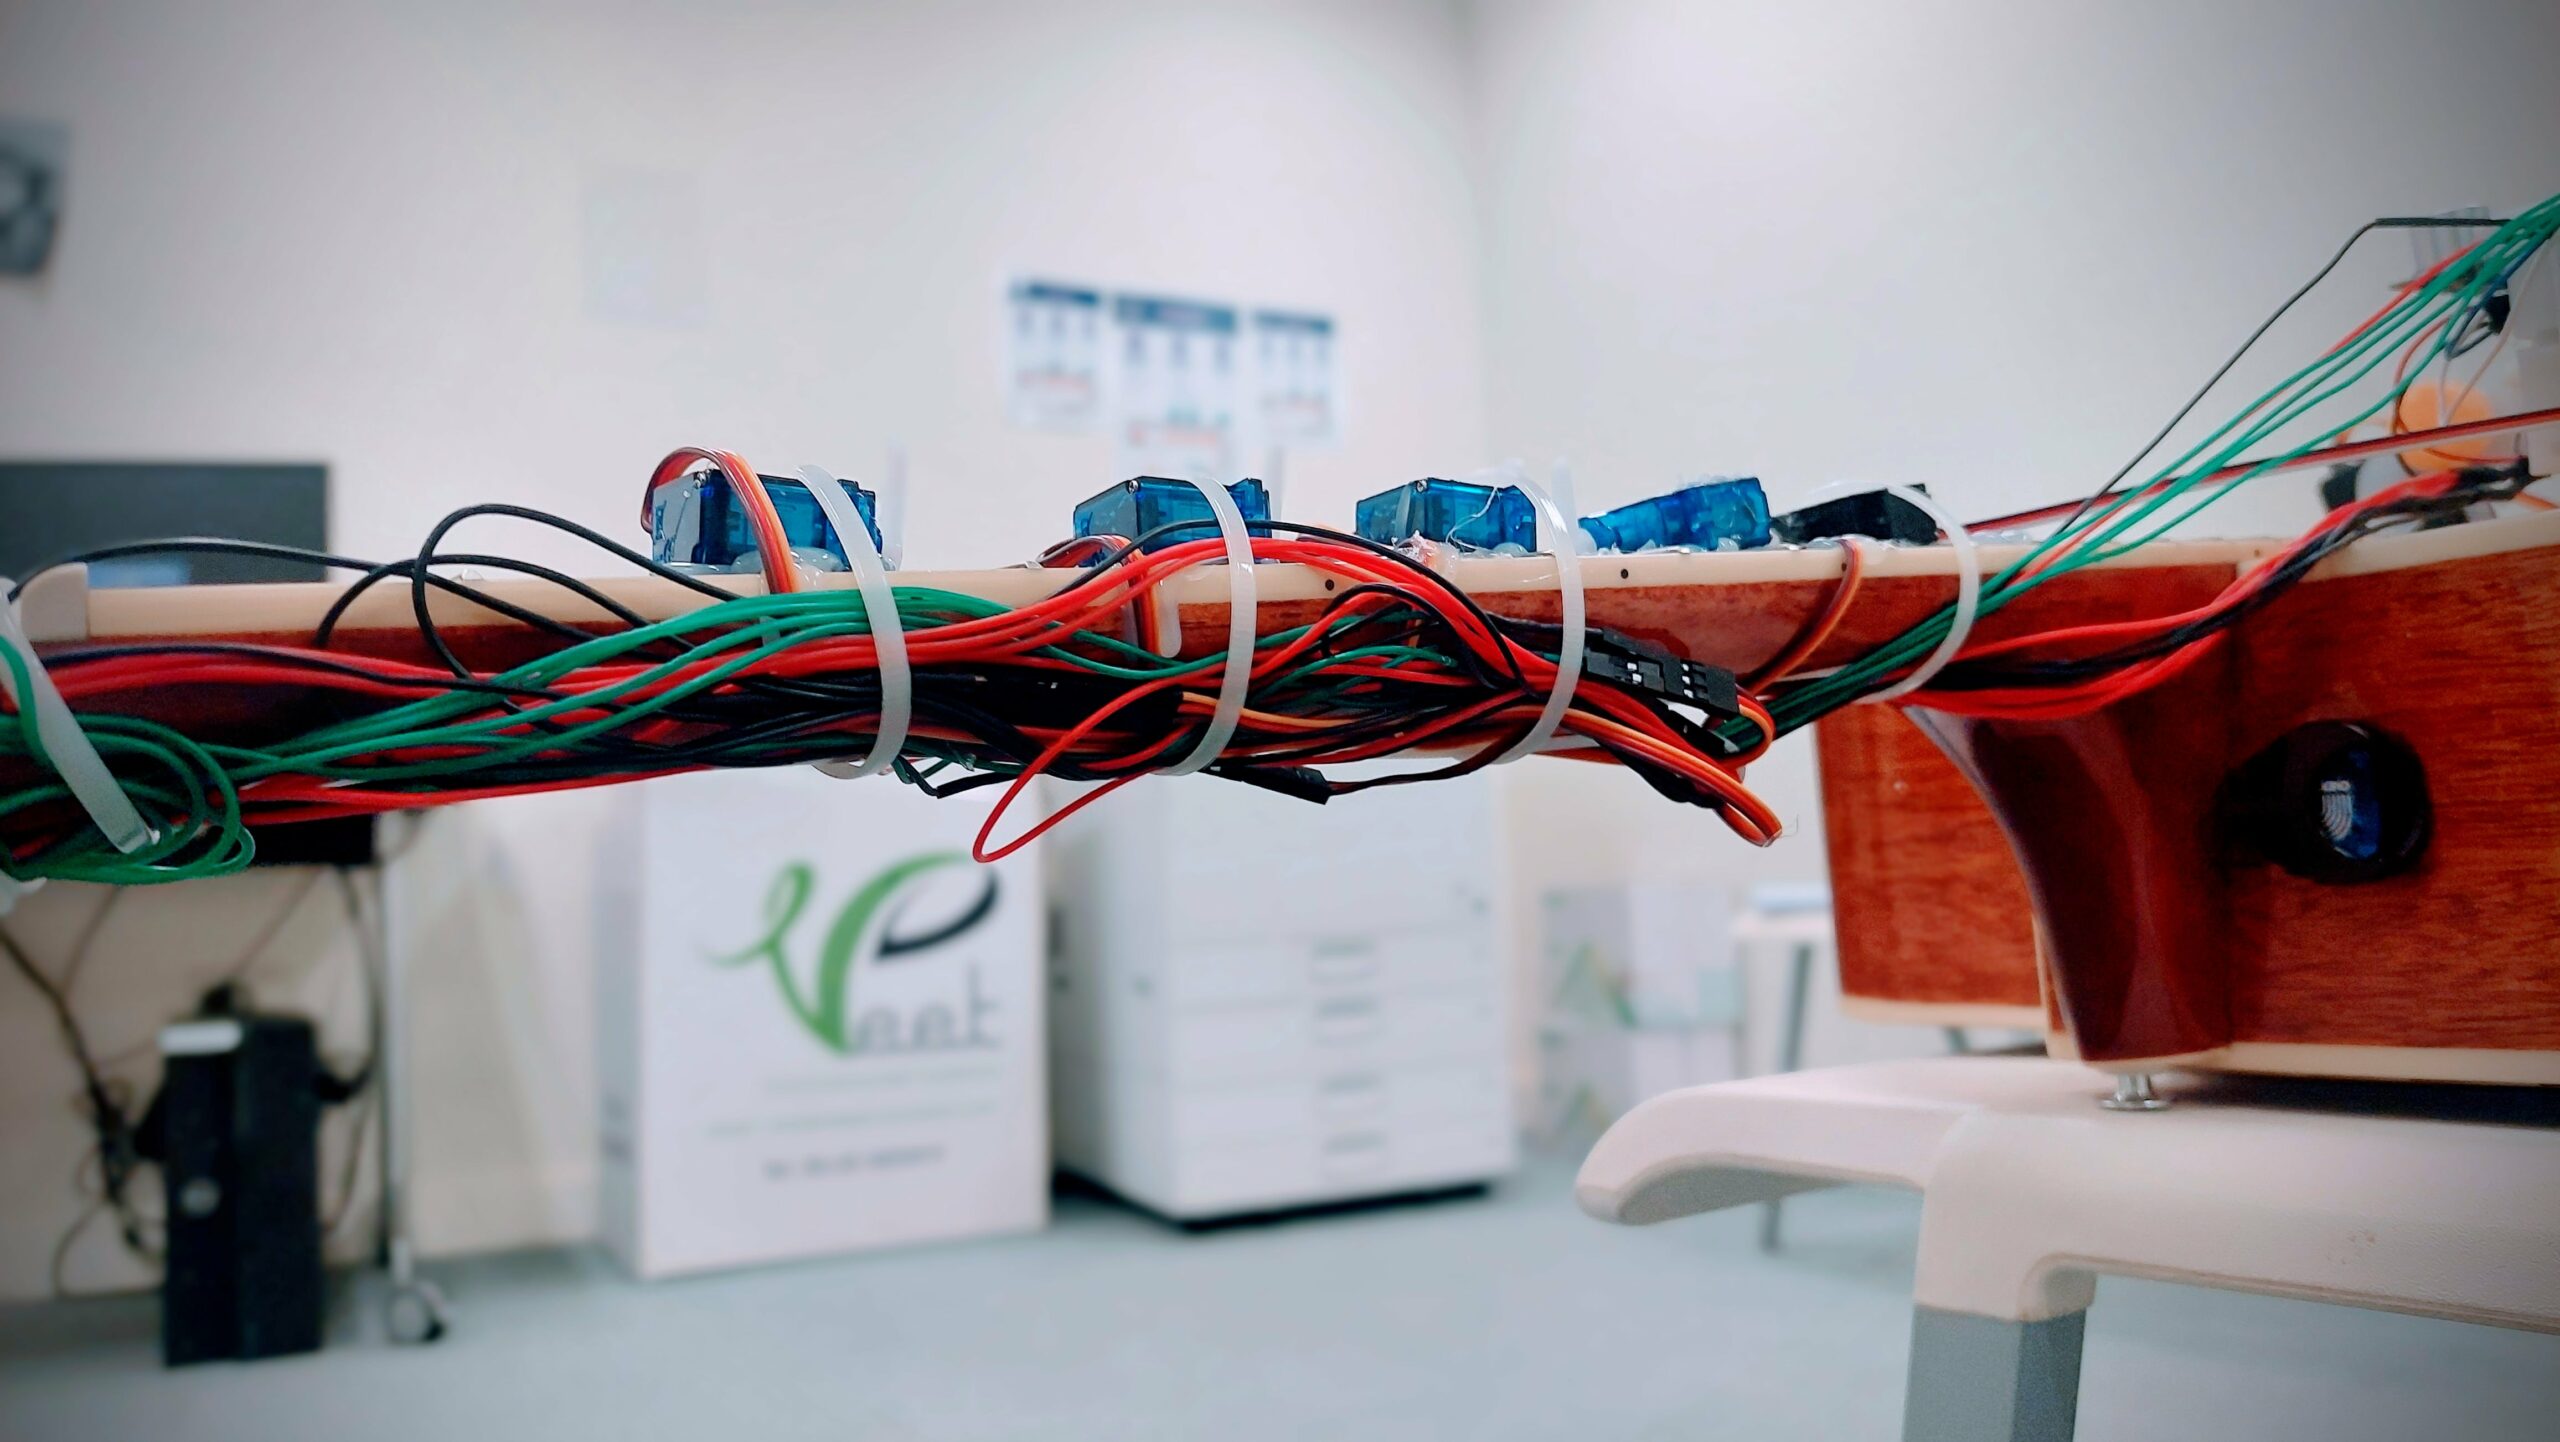
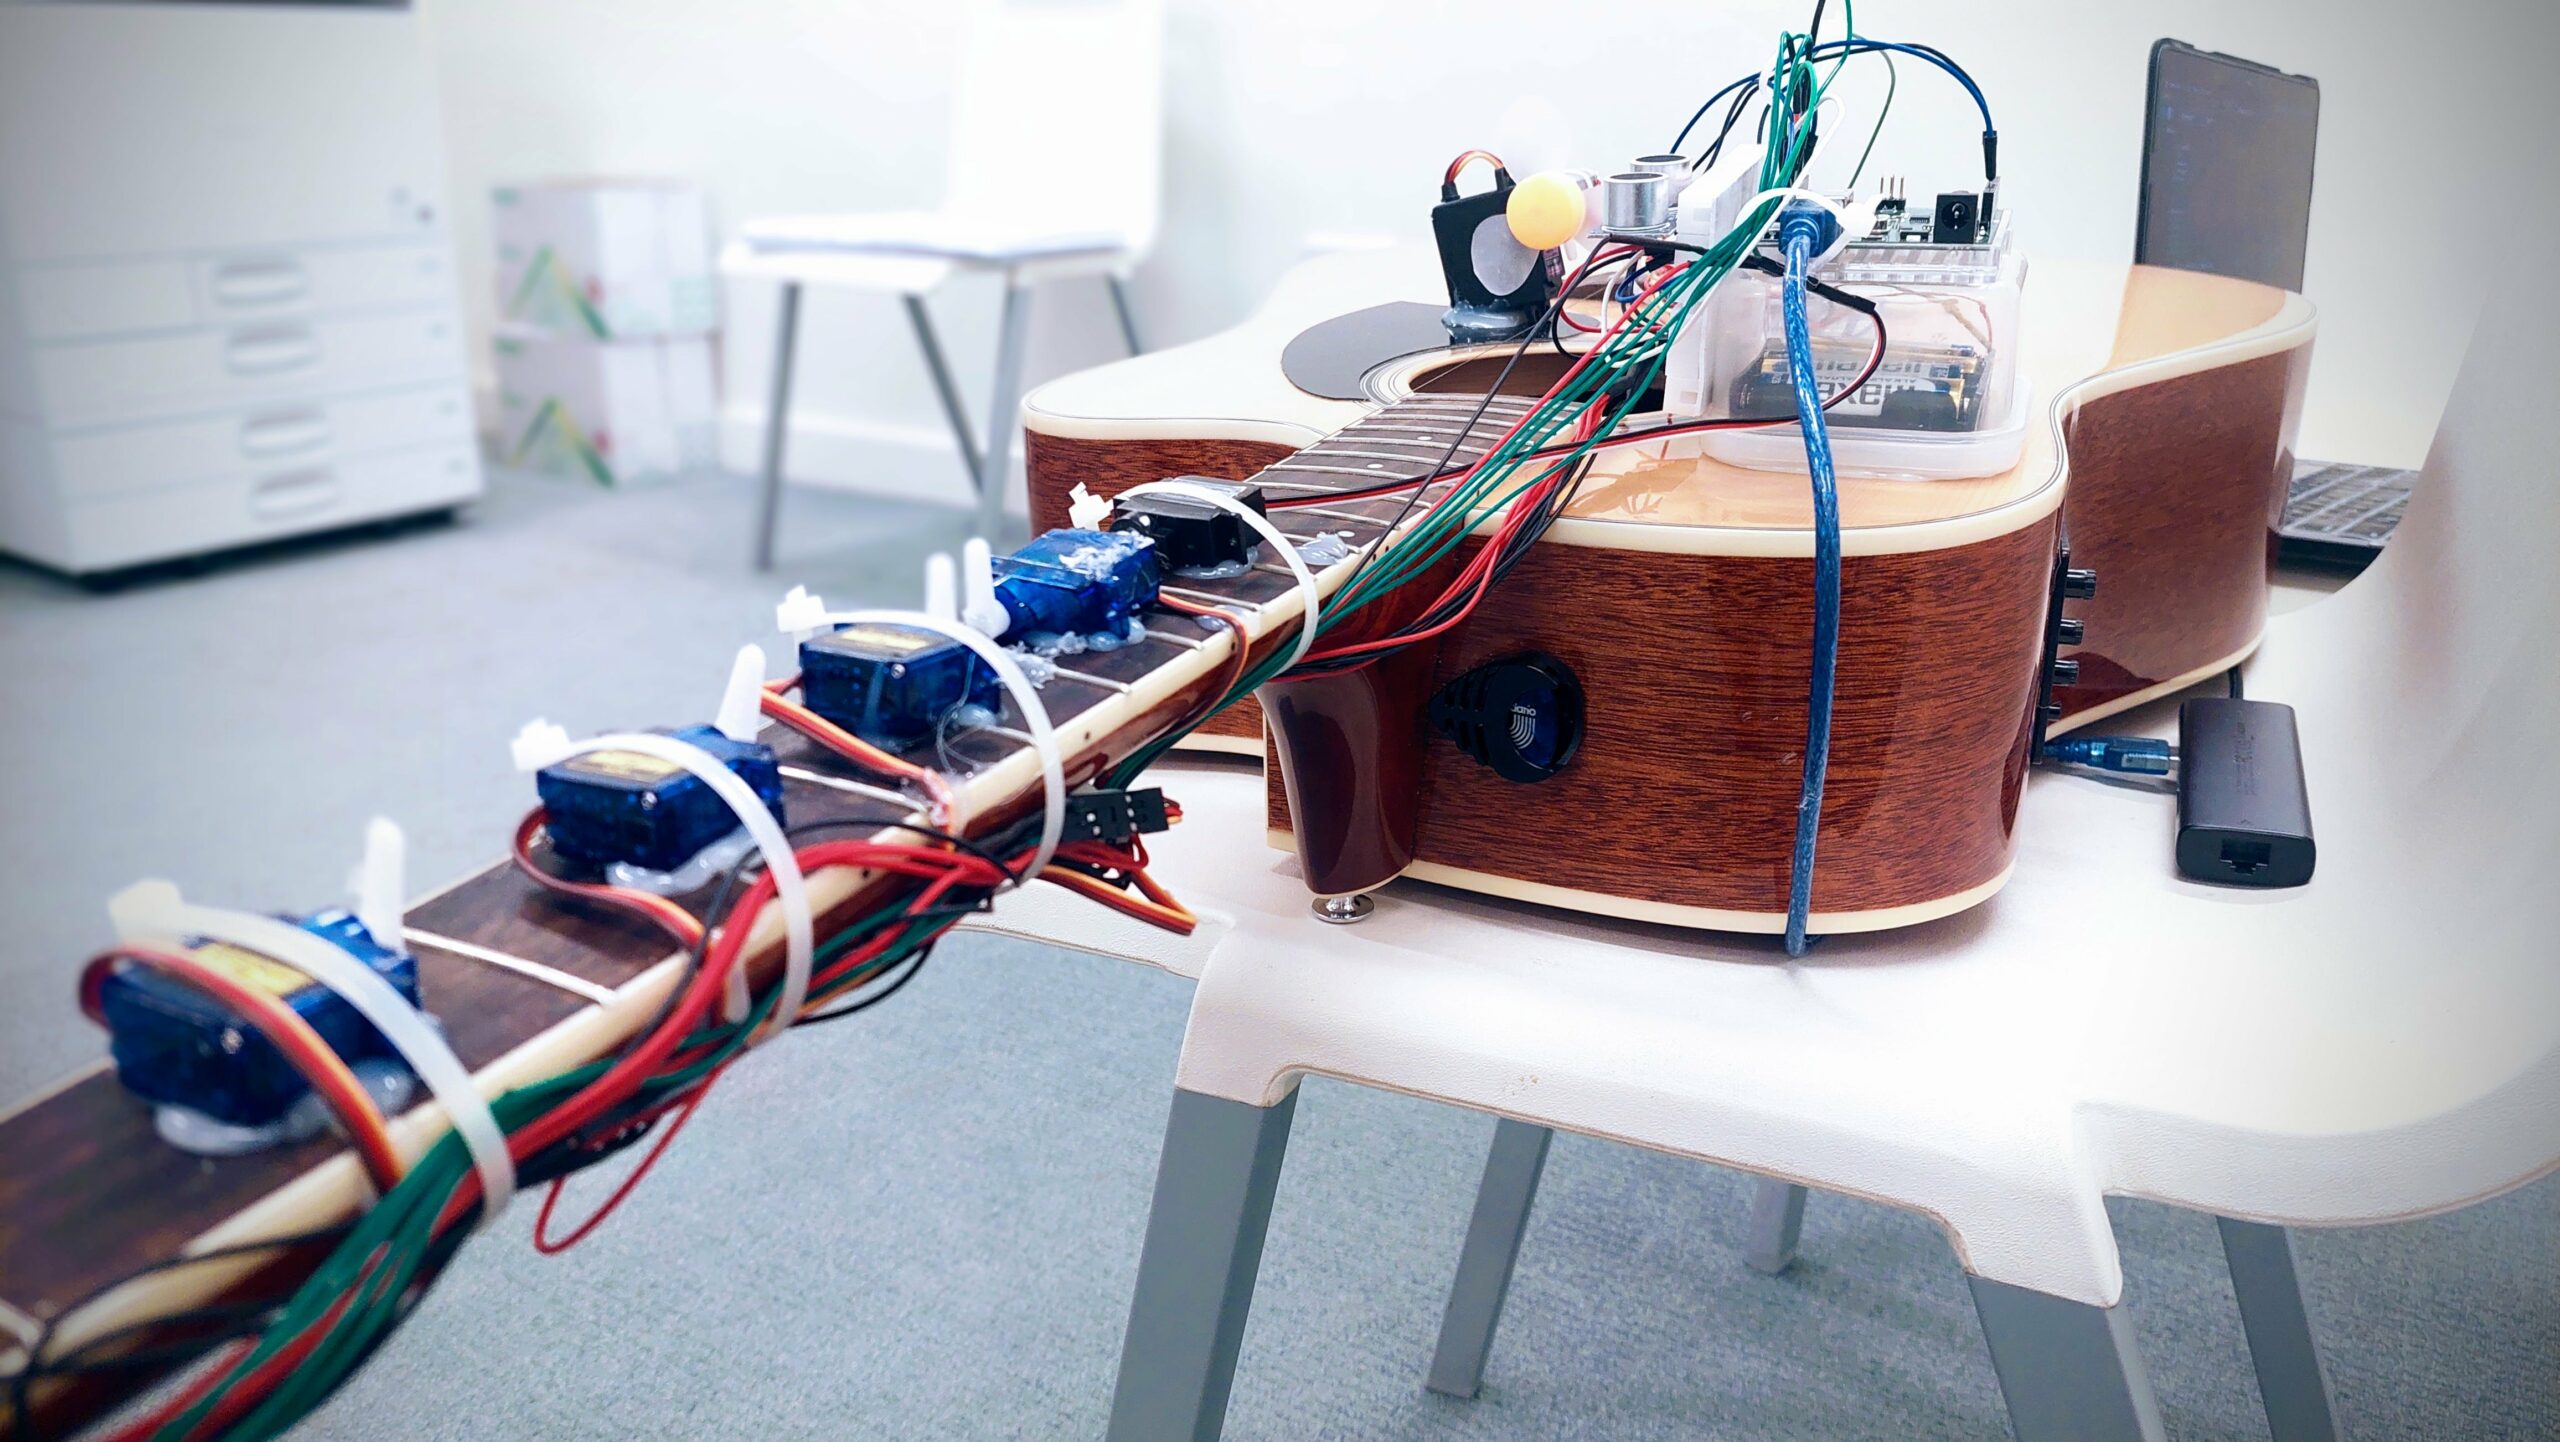
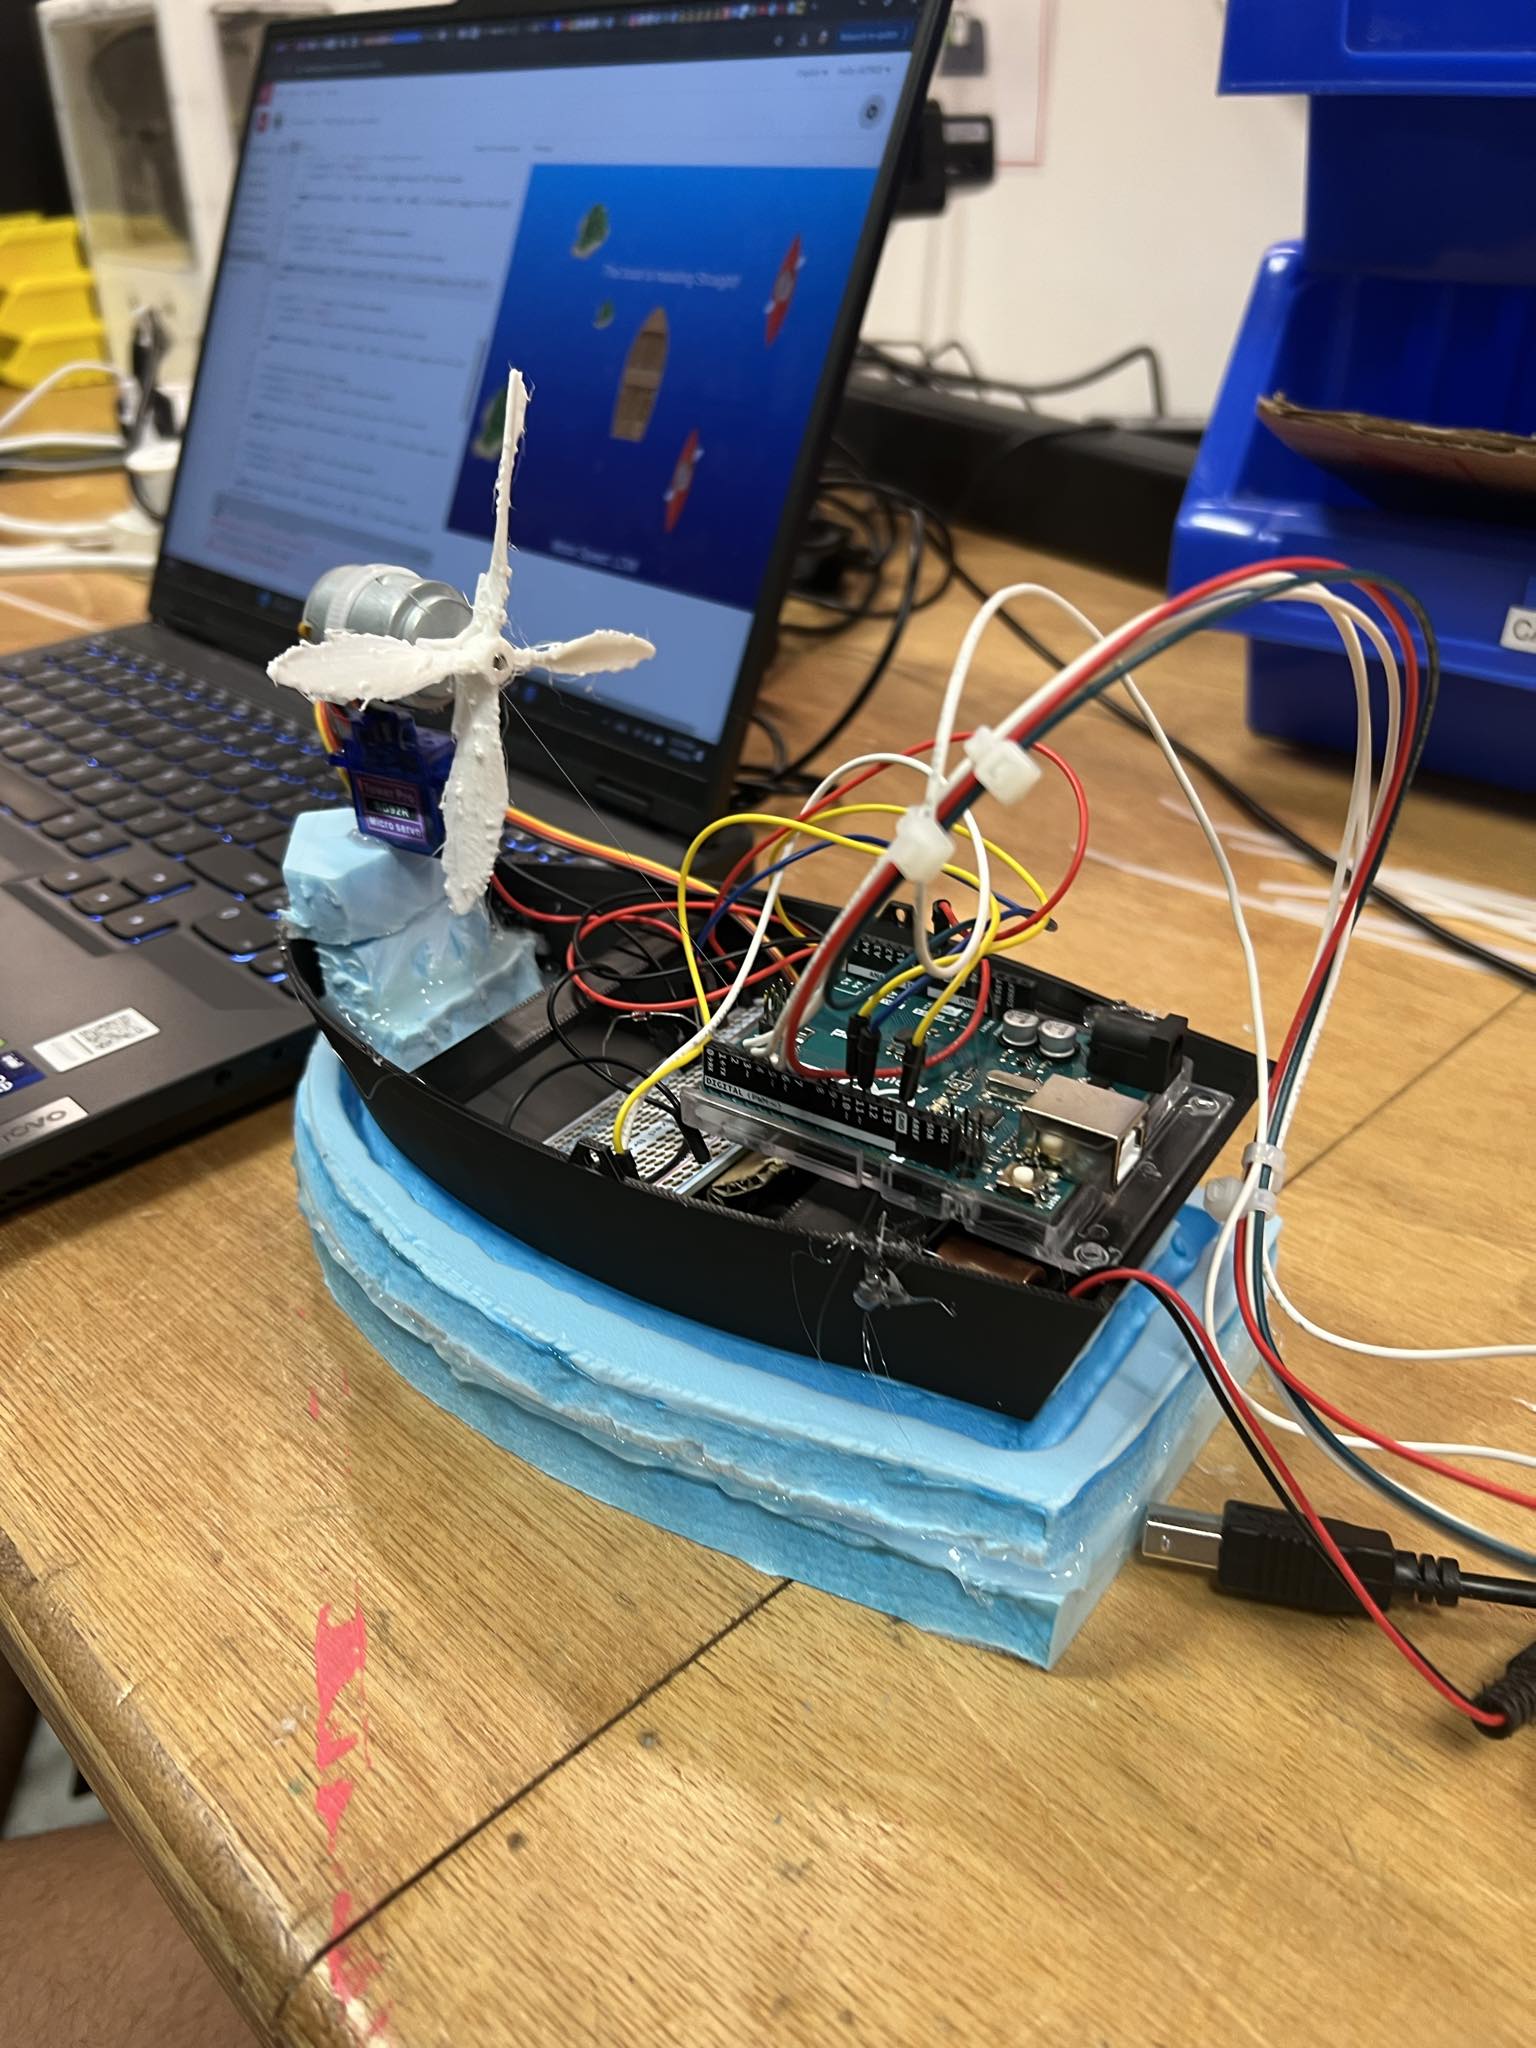
I also added some styrofoam padding on the bottom for added support and easier floating.

Here are some pictures from the production process:

And finally, here is the final video Presentation of it working:

Conclusion:

Overall this project was very fun challenging and I really think I learned a lot during the making.

Even though this is the end of the road for this class, this is only the beginning for me in exploring this area and I’m really excited of what happens next!

Darko

Final Project User Texting – Darko Skulikj

The project is well on its way, and I have some updates for all of you!

First of all, let’s start with the good things, and that is that the boat structure has been successfully 3d printed and is waterproof. Yaay. The arduino as well as all the batteries and breadboard fit comfortably on the structure so the sizing was correct (for the most part).

There is a few things I need to tackle which I realized during the user testing. Firstly, the fan that I have is not strong enough to move the boat, I will need to find, or make a bigger and better one. The boats construction also needs some styrofoam on the bottom since the boat is too heavy to float, as seen in the video below.

Over the next two days I want to solve the problem with the floating and the movement on the boat so I can leave the controls for the last day.

Hopefully everything works out fine!

Week 12 Reading Response: Designing for Disability

Designs, designs, designs. Throughout our whole life everything we see was designed and adapted for us (humans) to be used in the most practical and (sometimes) efficient way. The thing is that, all of these things more often than note don’t take into account people with disabilities.

One of the problems for that, as mentioned in the reading, is that people with disabilities cannot be exactly grouped the same as an “average human”. What I mean by that is the design process for items used by people with disabilities needs to be more tailored individually, because these people, even though they might be diagnosed with the same type of disability, very often have different ways of experiencing the world and “fighting” through the disability.

On the bright side, recently, I have seen more applications and Programs/ Games which seamlessly incorporate designs which take these people into account. One example is the game Fortnite. Fortnite has a special menu in the Video Settings where you can change the colors based on the Persons Type and Level of daltonism. This changes all the colors on the screen and allows for the player to have a normal playing experience. Another feature this game has is the Sound circle, which is a circle which appears around the character displaying where sounds come from, so this takes people with hearing disabilities into account.

It has also been a pleasure to be a witness of an IM Project last semester from one of my friends. He made a small machine which would let users hear a word and then learn the Braille alphabet. I thought this was a very nice design, with small pads that mimic the little dots from the Alphabet.

I feel like in the future we need to contribute to the community even more by adding more designs which would further improve the life of people with disabilities. The change starts from US!


Final Project Proposal – Darko

Inspiration and Concept

Ever since I’ve come to Abu Dhabi, my passion for jet-skiing and boats has been growing and growing inside me. At the same time, I wanted to do something unique, something that nobody has ever done before. That is why for this final project I decided to make a boat. 

I want the boat to be controlled by the users hand, and with gestures like: if you want to go left, you slide your arm to the left, if you want to go right, you slide your arm to the right. Same thing goes for the speed. If you want to go faster, you put your hand closer to the sensor (kind of like a pedal).

Implementation

The implementation phase can be very easily explained. For the gestures of the user, I would like to use this sensor that is available in our booking website:


I have also found a 3d model for the boat and matched the size so that It can fit the Arduino, the Breadboard and the Batteries. The plan is to attach a fan to a DC Motor, and attach the DC Motor to a Servo, which would be used to set the directions. As the user moves his hands, the servo will adjust the angle accordingly and the dc motor will adjust the power too. The communication will be done through a wireless receiver which would be provided by PI.

I plan to use p5.js only as a “dashboard” highlighting the way the boat is headed (straight, right, left) and also the speed. It would be interesting if I could animate the boat so that it shows some fun animation If we are speeding up or turning too sharply.

Week 12 Production Assignment – Pi / Darko

These are IM Week 12 Assignments by Pi and Darko

Production 1

Make something that uses only one sensor on Arduino and makes the ellipse in p5 move on the horizontal axis, in the middle of the screen, and nothing on arduino is controlled by p5

let rVal = 0;
let alpha = 255;
let left = 0; // True (1) if mouse is being clicked on left side of screen
let right = 0; // True (1) if mouse is being clicked on right side of screen
let xPos = 0; // Position of the ellipse

function setup() {
  createCanvas(640, 480);
  textSize(18);
  noStroke();
}

function draw() {
  // one value from Arduino controls the background's red color
  background(255, 255, 255);

  // Update the position of the ellipse based on the alpha value
  // Mapping alpha to the width of the canvas
  xPos = map(alpha, 0, 1023, 0, width);

  // Draw an ellipse that moves horizontally across the canvas
  fill(255, 0, 255, 255); // Same mapping as the text transparency
  ellipse(xPos, height / 2, 50, 50); // Position ellipse at center height with a diameter of 50

  if (!serialActive) {
    text("Press Space Bar to select Serial Port", 20, 30);
  } else {
    text("Connected", 20, 30);

    // Print the current values
    text('rVal = ' + str(rVal), 20, 50);
    text('alpha = ' + str(alpha), 20, 70);
  }

}

function keyPressed() {
  if (key == " ") {
    // important to have in order to start the serial connection!!
    setUpSerial();
  }
}

function readSerial(data) {
  if (data != null) {
    let fromArduino = split(trim(data), ",");
    if (fromArduino.length == 2) {
      rVal = int(fromArduino[0]);
      alpha = int(fromArduino[1]);
    }
   
    let sendToArduino = left + "," + right + "\n";
    writeSerial(sendToArduino);
  }
}


Production 2

Make something that controls the LED brightness from p5

let rVal = 0;
let alpha = 255;
let left = 0; // True (1) if mouse is being clicked on left side of screen
let right = 0; // True (1) if mouse is being clicked on right side of screen
let xPos = 0; // Position of the ellipse
let ledState = false; // To toggle LEDs


function setup() {
  createCanvas(640, 480);
  textSize(18);
  noStroke();
}

function draw() {
  // one value from Arduino controls the background's red color
  background(255, 255, 255);

  // Update the position of the ellipse based on the alpha value
  // Mapping alpha to the width of the canvas
  xPos = map(alpha, 0, 1023, 0, width);


  if (!serialActive) {
    text("Press Space Bar to select Serial Port", 20, 30);
  } else {
    text("Connected", 20, 30);

    // Print the current values
    text('rVal = ' + str(rVal), 20, 50);
    text('alpha = ' + str(alpha), 20, 70);
  }
 
 
  text("Then, press A to flash the police lights.",20, 100)
  //Edit the code below
  // Toggle LED state every frame if space is held down
  if (keyIsDown(65)) { // 32 is the ASCII code for space
    ledState = !ledState;
    if (ledState) {
      left = 1;
      right = 0;
    } else {
      left = 0;
      right = 1;
    }
  }
  // Edit the code above

}

function keyPressed() {
  if (key == " ") {
    // important to have in order to start the serial connection!!
    setUpSerial();
  }
}

function keyReleased(){
  if (key == "a") {
   left = 0;
      right = 0;


  }
}

function readSerial(data) {
  if (data != null) {
    let fromArduino = split(trim(data), ",");
    if (fromArduino.length == 2) {
      rVal = int(fromArduino[0]);
      alpha = int(fromArduino[1]);
    }
   
    let sendToArduino = left + "," + right + "\n";
    writeSerial(sendToArduino);
  }
}


Gravity Wind

Take the gravity wind example (https://editor.p5js.org/aaronsherwood/sketches/I7iQrNCul) and make it so every time the ball bounces one led lights up and then turns off, and you can control the wind from one analog sensor

let velocity;
let gravity;
let position;
let acceleration;
let wind;
let drag = 0.99;
let mass = 50;
let rVal = 0;
let alpha = 255;
let left = 0; // True (1) if mouse is being clicked on left side of screen
let right = 0; // True (1) if mouse is being clicked on right side of screen
let serialSetup = false;
// Declare a variable to store the time at which to trigger the action
let triggerTime = 0;

function setup() {
  createCanvas(640, 360);
  noFill();
  position = createVector(width / 2, 0);
  velocity = createVector(0, 0);
  acceleration = createVector(0, 0);
  gravity = createVector(0, 0.5 * mass);
  wind = createVector(0, 0);
  // Set the trigger time to be 5 seconds after setup runs
  triggerTime = millis() + 5000;
  textSize(20);
}

function draw() {
  // Check if the current time has passed the trigger time
  if (millis() >= triggerTime && !serialSetup) {
    serialSetup = true;
  }
  push();
  fill(0);
  if (!serialSetup) {
    text("Simulation starts in 5 seconds. Press a to set up serial.", 20, 50);
  }
  pop();

  if (serialSetup) {
    background(255);
    let windtext = "";
    if (alpha < 300) {
      wind.x = -1;
      windtext = "Wind : Right";
    } else if (alpha > 800) {
      wind.x = 1;
      windtext = "Wind : Left";
    } else {
      wind.x = 0;
      windtext = "No wind.";
    }

    push();
    fill(0);

    text(windtext, 20, 50);
    pop();

    applyForce(wind);
    applyForce(gravity);
    velocity.add(acceleration);
    velocity.mult(drag);
    position.add(velocity);
    acceleration.mult(0);
    ellipse(position.x, position.y, mass, mass);
    if (position.y > height - mass / 2) {
      velocity.y *= -0.9; // A little dampening when hitting the bottom
      position.y = height - mass / 2;
      console.log(
        "Bounce! Position Y: " + position.y + ", Velocity Y: " + velocity.y
      );
      left = 1;
    } else {
      left = 0;
    }
  }
}

function applyForce(force) {
  // Newton's 2nd law: F = M * A
  // or A = F / M
  let f = p5.Vector.div(force, mass);
  acceleration.add(f);
}

function keyPressed() {
  if (keyCode == LEFT_ARROW) {
    wind.x = -1;
  }
  if (keyCode == RIGHT_ARROW) {
    wind.x = 1;
  }
  if (key == " ") {
    mass = random(15, 80);
    position.y = -mass;
    velocity.mult(0);
  }
  if (key == "a") {
    // important to have in order to start the serial connection!!
    setUpSerial();
  }
}

// This function will be called by the web-serial library
// with each new *line* of data. The serial library reads
// the data until the newline and then gives it to us through
// this callback function
function readSerial(data) {
  ////////////////////////////////////
  //READ FROM ARDUINO HERE
  ////////////////////////////////////

  if (data != null) {
    // make sure there is actually a message
    // split the message
    let fromArduino = split(trim(data), ",");
    // if the right length, then proceed
    if (fromArduino.length == 2) {
      // only store values here
      // do everything with those values in the main draw loop

      // We take the string we get from Arduino and explicitly
      // convert it to a number by using int()
      // e.g. "103" becomes 103
      rVal = int(fromArduino[0]);
      alpha = int(fromArduino[1]);
    }

    //////////////////////////////////
    //SEND TO ARDUINO HERE (handshake)
    //////////////////////////////////
    let sendToArduino = left + "," + right + "\n";
    writeSerial(sendToArduino);
  }
}


Final Project Proposal: Become a sailor of one of the most fun small boats in the world!

For my Final Project I have thought about the Idea of creating a small boat which we would be able to control with our hands.

Okay okay I agree that is very very plain but stay with me while I explain exactly what my plan is and how I will combine the Arduino with p5.js.

My idea is to 3d print a boat bed which would accommodate the Arduino and some batteries which would be used to power a DC Motor which would have a fan on it. I want to attach the DC Motor to a Servo motor just so I am able to change directions easier.

For controls I want to use a specific Ultra-Sonic sensor which we have available in the Connect2 booking system. This will determine if the boat will go to the left or right, faster or slower.

Finally, by connecting the Arduino to p5js. I’m planning to display the speed, and direction of the boat –  kind of like a dashboard in a car.

Week 11 Reading Response: Of course I want JARVIS from Iron Man in my life, but I also love NATURE!

This weeks Reading response was very interesting for me. We always say that we can’t wait to see what the future holds and that we want flying cars and simplified life but what we don’t realize is that the future is NOW. The world is shifting in a tremendous pace, I mean look at AI, ChatGPT and other AI platforms have changed our views about Information on the Internet completely in the last 2-3 Years!

The real question is, how far do we need to go? How much is too much? We have all seen those Terminator movies, Judgement day and AI and Robots taking over, but I think that those technologies are very missenterpreted in the movies. As a firm Nature Lover and at the same time a religious person, I believe that those type of thoughts or the direction of which the world is heading to is a little bit too much. Why you would ask? There is always a limit of what we can do before it comes bad / or unhealthy. What makes us connected to earth is nature and our complete sense of it. From sandy beaches to incredible jungles, snowy mountains and wonderful lakes, Earth offers us whatever we would possibly want. That is what makes us human. Now why am I saying all this, well because as the years go we are moving further and further away from mother nature. Yes I understand (and I support) human centered design that will make our lives easier but what we keep forgetting is nature. So why don’t we center our research more on nature instead of us? Why does everything have to revolve around us?

On the flip side though, we can use AI and other Technologies to make the world a better place. Like imaging having Jarvis as an assistant in your everyday life.

This can help us make life easier and access to other people and information would be much much faster but I do not support this as a reason not to become closer to nature or people. Like why do we have to replace going to the Maldives with watching the Maldives on a VR screen. Or for example seeing your family in real life and having a talk over a coffee instead of just texting on Social Media.

“Overengineered Guitar” by Pi Ko and Darko Skulikj

Introduction

This is the “Overengineered Guitar” by Pi Ko and Darko Skulikj.

We massacred an acoustic guitar with a single string into an automated musical device that can be played akin to a theremin.

Concept – A Cringy Skit

Darko does not know how to play the Pirates of the Caribbean theme song on guitar, so he decided to turn to Arduino for help.

Demonstration and Media

The video demo of the instrument is shown below.

The sound sucks 😡. Moral of the story : Pi should play the guitar instead of the machine 🫵😠🎸.

Concept

In principle, the “Overengineered Guitar” is a one-stringed setup acoustic guitar for playing by using an array of sensors and servo motors. It has a push button digital sensor and an analog ultrasonic sensor. The main idea is to control the musical notes by hand over the ultrasonic sensor. Then a propeller does the mechanical plucking, controlled through a push button.

This provides the user the opportunity to play the predefined sequence from “He’s a Pirate” from Pirates of the Caribbean over and over again.

Components

  • Arduino Uno: Serves as the main controlling box for all the sensors and actuators used.
  • Servo Motors (5x): Five servo motors are being attached all across the fretboard, pressing their respective frets according to the desired note.
  • Ultrasonic Sensor: Used to toggle the press on the fretboard by the motors.
  • Digital pushbutton: It is pressed down to start up the propeller, which plucks the string.
  • Propeller motor and DC Motor: It gives the mechanical pluck on the guitar string.
  • L293D motor driver IC: Takes care of the high current requirement for the propeller.
  • External Power Supply: This ensures that the system power is being properly distributed among the various components without having to necessarily overpower the Arduino.

(Arduino, ultrasonic sensor, switch and L293D IC)

(Propellor on DC Motor)

The motors are attached to the arduino as below.

Arduino Pin Motor/Music Note ID Open Servo Angle Press Servo Angle
11 5 180 0
10 4 0 180
6 3 180 0
5 2 180 0
3 1 180 0
N/A 0 (open string) N/A (no servo) N/A (no servo)

Challenges

Our main challenge involved managing power to ensure that each component the required current. Also, the wiring was a challenge since there were a lot of wires.

(Wire management 😎)

Task Allocation

Darko took care of the wiring and code for the ultrasonic sensor and the switch using non-blocking code. The rest is filled by Pi.

Code

The code is below. It has debouncing to guarantee reliable operation of the switch.

#include <Servo.h>

// Define a struct to hold servo data
struct ServoData {
  int pin;
  int openAngle;
  int pressAngle;
  Servo servo;
};

// Create an array of servos for each note
ServoData servos[] = {
  {3, 180, 0}, // Note 1
  {5, 180, 0}, // Note 2
  {6, 180, 0}, // Note 3
  {10, 0, 180}, // Note 4
  {11, 180, 0} // Note 5
};
const int numServos = sizeof(servos) / sizeof(ServoData);

// Note durations in milliseconds
int noteDurations[] = {500, 500, 2000, 500, 2000, 500, 1000, 500, 500, 1000};
int noteSequence[] = {0, 1, 2, 3, 4, 5, 3, 2, 1, 2};
const int numNotes = sizeof(noteSequence) / sizeof(int);

unsigned long previousMillis = 0;  // Stores last update time
int currentNoteIndex = 0;          // Index of the current note being played

// Push Button and Propeller control
const int buttonPin = 4; // Pushbutton pin
const int ledPin = 13; // LED pin (for debugging)
int enA = 9; // Enable pin for motor
int in1 = 8; // Motor control pin
int buttonState = 0; // Current button state
// Define the pins for the ultrasonic sensor
const int trigPin = 13;
const int echoPin = 12;

// Define variables for the duration and the distance
long duration;
int distance;


void setup() {
  // Setup for servos
  for (int i = 0; i < numServos; i++) {
    servos[i].servo.attach(servos[i].pin);
    servos[i].servo.write(servos[i].openAngle);
  }

 // Define pin modes for ultrasonic
  pinMode(trigPin, OUTPUT); // Sets the trigPin as an Output
  pinMode(echoPin, INPUT); // Sets the echoPin as an Input
  // Setup for button and propeller
  pinMode(ledPin, OUTPUT);
  pinMode(buttonPin, INPUT);
  pinMode(enA, OUTPUT);
  pinMode(in1, OUTPUT);
  analogWrite(enA, 255); // Set propeller speed
  digitalWrite(in1, LOW); // Initially disable propeller
}

void loop() {
  unsigned long currentMillis = millis();
  // Darko - Switch
  // Improved button reading with debouncing
  int readButton = digitalRead(buttonPin);
  if (readButton != buttonState) {
    delay(50); // Debounce delay
    readButton = digitalRead(buttonPin);
    if (readButton == HIGH) {
      digitalWrite(ledPin, HIGH);
      digitalWrite(in1, HIGH); // Enable propeller
    } else {
      digitalWrite(ledPin, LOW);
      digitalWrite(in1, LOW); // Disable propeller
    }
    buttonState = readButton;
  }

  // Darko - Ultrasonic
  // Clear the trigPin condition
  digitalWrite(trigPin, LOW);
  delayMicroseconds(2);
  // Sets the trigPin HIGH (ACTIVE) for 10 microseconds
  digitalWrite(trigPin, HIGH);
  delayMicroseconds(10);
  digitalWrite(trigPin, LOW);
 
  // Reads the echoPin, returns the sound wave travel time in microseconds
  duration = pulseIn(echoPin, HIGH);
 
  // Calculating the distance
  distance = duration * 0.034 / 2; // Speed of sound wave divided by 2 (go and back)
 

  if(distance<=12){

  // Handling servo movements based on timing
  if (currentMillis - previousMillis >= noteDurations[currentNoteIndex]) {
    // Move to the next note
    if (noteSequence[currentNoteIndex] != 0) {
      // Release the previous servo, if any
      int prevNote = (currentNoteIndex == 0) ? -1 : noteSequence[currentNoteIndex - 1];
      if (prevNote != -1 && prevNote != 0) {
        servos[prevNote - 1].servo.write(servos[prevNote - 1].openAngle);
      }
      // Press the current servo
      int currentNote = noteSequence[currentNoteIndex];
      if (currentNote != 0) {
        servos[currentNote - 1].servo.write(servos[currentNote - 1].pressAngle);
      }
    } else {
      // Release all servos for open string
      for (int i = 0; i < numServos; i++) {
        servos[i].servo.write(servos[i].openAngle);
      }
    }

    previousMillis = currentMillis; // Update the last actuated time
    currentNoteIndex++;
    if (currentNoteIndex >= numNotes) {
      currentNoteIndex = 0; // Restart the sequence
    }
  }
  }
}


Beep Beep, Stuck in Traffic!

For this weeks assignment, I chose a very corny heading (sorry for that) but at the same time I combined some of the reading work we have previously done and implemented into the assignment.

My Inspiration came from the car industry, which is something I mentioned in one of my previous reading assignments. Since we are working with lights I thought that it would be a good idea to mimic some of the headlights that I’ve seen on never cars.

The way this lights work are:

  • When the driver turns to the left, the corresponding light turns on
  • When the driver turns to the right, the corresponding light turns on
  • The lights dim (in a way that if the turn is sharper, the light would be brighter)

To mimic this I used a potentiometer as well as two lights(logically :). For a fun element, I also added a buzzer and a button that activates that buzzer like a car horn would.

Here is the code I used:

int potentiometer = A0;
const int led0 = 5;
const int led1 = 6;
const int buttonPin = 7;
int buttonRead = 0;
const int buzzerPin = 10;

void setup() {
  Serial.begin(9600);
  pinMode(led0, OUTPUT);
  pinMode(led1, OUTPUT);
  pinMode(buttonPin, INPUT);
  pinMode(buzzerPin, OUTPUT);
}

void loop() {
  buttonRead = digitalRead(buttonPin);
  Serial.println(buttonRead);
  int potentiometerValue = analogRead(potentiometer);
  int pwmValue1 = map(potentiometerValue, 0, 512, 255, 0); // Map potentiometer value for LED0
  int pwmValue2 = map(potentiometerValue, 513, 1023, 0, 255); // Map potentiometer value for LED1

  // Check if the button is pressed (buttonRead is HIGH)
  if (buttonRead == HIGH) {
    // Turn on the buzzer
    analogWrite(buzzerPin, HIGH);
  } else {
    // Turn off the buzzer
    analogWrite(buzzerPin, LOW);
  }

  if (potentiometerValue >= 0 && potentiometerValue <= 512) {
    analogWrite(led0, pwmValue1); // Dim LED0
    analogWrite(led1, 0); // Turn off LED1
  } else {
    analogWrite(led0, 0); // Turn off LED0
    analogWrite(led1, pwmValue2); // Dim LED1
  } 
}

Basically what the code does is it takes the potentiometer values, and maps them to the lights correspondigly. At the same time, the button turns the buzzer on and off.

Video demonstration:


Week 10 Reading Response: From Physical computing to Shut up and Listen!

This weeks readings were very interesting, not only because they served as a great inspiration for my final project but at the same time made me think more deeply about my designs and projects.

Starting of from the Physical Computing reading, I really resonated with the sentence that says that everything is already done and we can not just imagine or make something new. Those type of moments happen very often, where you think that whatever you want to invent has already been made and there is no point in copying it but we can always add a personal twist. Let’s look at some examples:

  • Pi’s midterm game: Has a game ever been played on an Instrument: Yes. Has a game ever been made with p5.js: A ton of them. Was Pi’s midterm projects something unique and fascinating: TOTALLY! By adding some personal elements and experiences Pi actually made a great game which he controlled by a guitar which is a huge part of his personality.
  • Interactive dolls and pets are mentioned, and I couldn’t stop thinking about the project from Thecla Schiphorst called Soft(n). More info bellow:https://www.sfu.ca/~tschipho/softn/index.html. The thing about this projects is so unique and it only comes from a simple concept: You hug one pillow, and another pillow gets that information and gives the feeling of being hugged to a different user.

As we can see, creativity has no limits and we can all mix match and invent something interesting as well as add a personal element to it.

As for the second reading, we are once again getting back to simple and most important PROPER Design. As the reading says, if an artist needs to talk for hours and hours explaining and introducing the users on how to use or interact with his exhibition, then he has not done a good job. A very well designed exhibition should be obvious to the users  but at the same time add a level of discoverability so that the user can feel more “in-touch” or resonate with it. That is why we as artists or creators have an obligation to really think about how our users or viewers will interact with our creations and really make the process as smooth and fun as possible.