Midterm Project: Immune Defenders!

Introduction and Concept

The idea for this project came as a sort of natural follow-up to my projects in this class so far. I have tried to include elements of bioinspiration in almost every assignment I have done for this class so far (barring the Data Visualization of Week 4), so I already knew I wanted to do something within that theme.

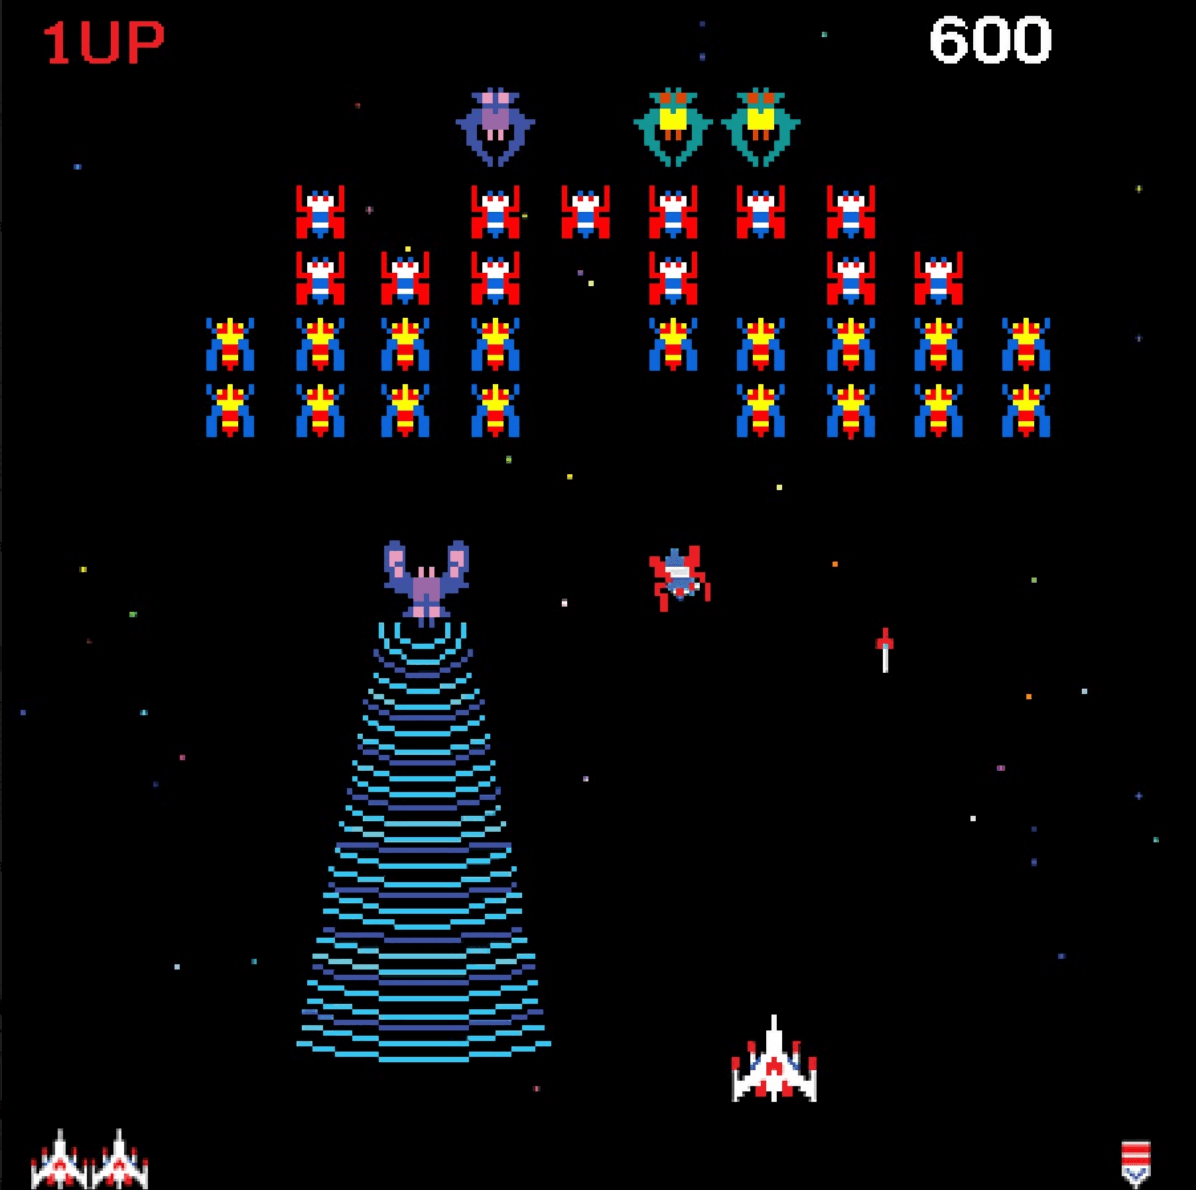
My inspiration for this game came almost directly from the retro arcade game Galaga by Namco (see image), and the many space shooters it inspired.

Namco’s Galaga

So, my goal was to now somehow combine a space shooter with the immune system. I also wanted it to be relatively accurate to the human immune system, so there was that added challenge.

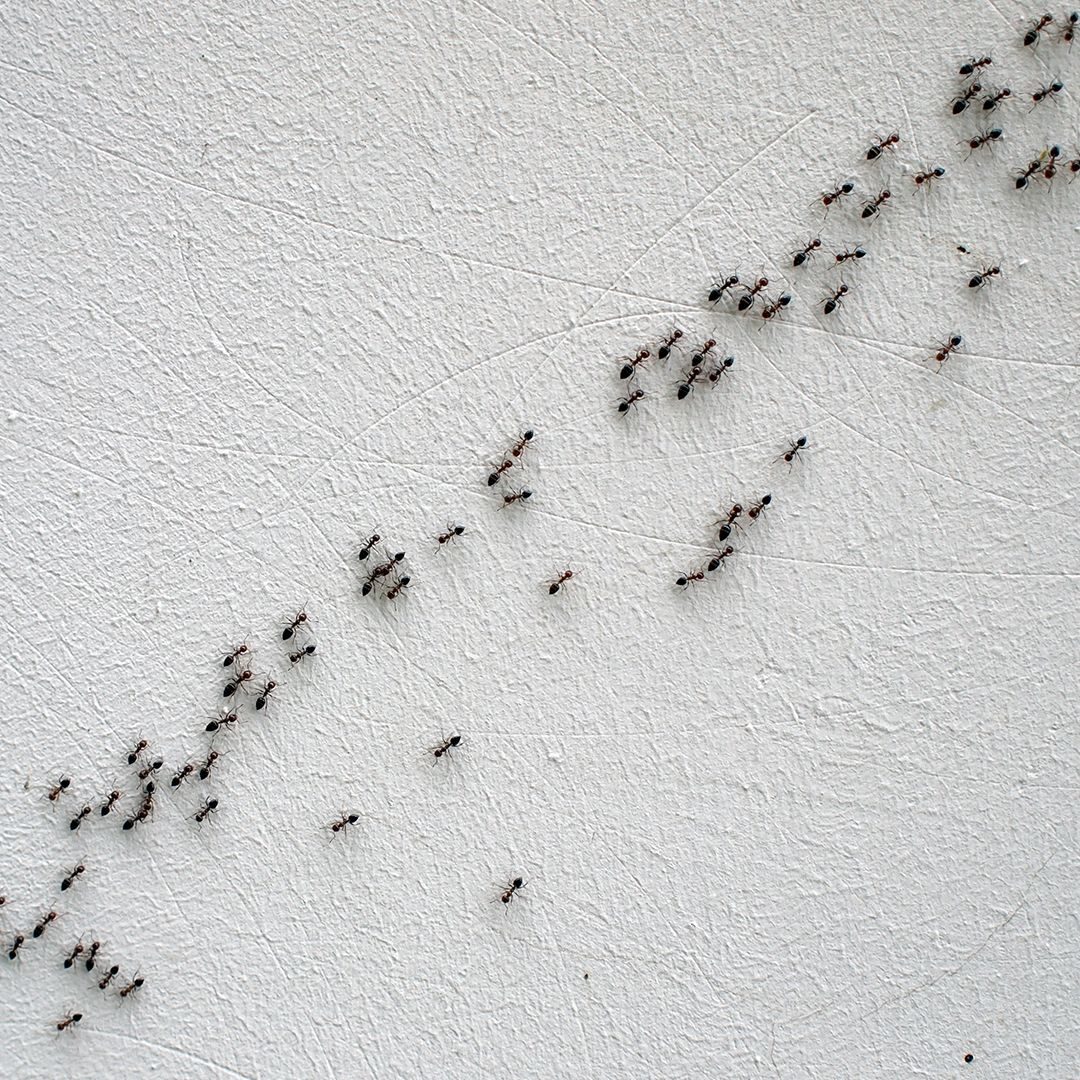
So, the end result is a game where you control an effector B-cell (or plasma cell), to shoot antibodies at and neutralize bacteria, just like your own immune system does millions of times each day, even when you’re healthy.

Code and Design

With a whopping 783 lines of code (including class definitions), this is easily the largest project I have ever coded. Here are some chunks that I am particularly proud of:

if (keyCode == 32) {
  shot.play();
  if (int((millis() - lastboosttime) / 1000) > boosttime) {
    numBullets = 1;
  }
  for (let i = 1; i <= numBullets; i++) {
    bulletx =
      lives[0].x +
      lives[0].r * 0.25 * (-2 * pow(-1, i) * i + pow(-1, i) - 1);
    bullety = lives[0].y;
    bulletr = height / 100;
    bulletspeed = height / 20;
    var bullet = new Bullet(
      bulletx,
      bullety,
      bulletr,
      bulletspeed,
      bulletsprite
    );
    bullets.push(bullet);
  }
}

So, the above code is used to shoot the bullets that are a core component of the game. But the code is written mainly to handle the challenge of summoning multiple bullets together during the Vitamin C powerup (more on that later). I could have just called it a day and made three separate “new bullets” with the correct x-positions, but I wanted a way to make it uniform for no matter how many bullets could be added by the powerup. This tool from Wolfram Alpha was essential for this, as it calculated a mathematical formula (the part which has quite a few terms involving multiplication of -1 raised to the bullet number). So, whether I add 3, 5, or 19 bullets, theoretically, I should get a consistent result.

//bullet display,, movement and collision
for (let i = 0; i < bullets.length; i++) {
  bullets[i].display();
  bullets[i].move();
  //Delete bullet and bacterium, and add score when killing bacteria
  for (let j = 0; j < bacteria.length; j++) {
    if (bullets.length > i) {
      //length condition added as parameter changes before draw() function is next called
      if (bullets[i].collide(bacteria[j])) {
        bullets.splice(i, 1);
        bacteria.splice(j, 1);
        score++;
      }
    }
  }
  //Delete when bullets fly off-screen
  if (bullets.length > i) {
    //length condition added as parameter changes before draw() function is next called
    if (bullets[i].wallCollide()) {
      bullets.splice(i, 1);
    }
  }
}

The above part of the code deals with the collision logic for the bacteria, and is another part I’m proud of. Using splice() instead of pop() ensures that the correct bacterium is deleted, even when they move out of order because of their different speeds.

Other Code Features

Other features of the code that are important for the functioning of the game, but are not particularly remarkable are the event handlers for clicking and key presses. While clicking to change stage, I had to ensure that the user wouldn’t accidentally click out of the game into the game over screen, but that was easy enough with some conditionals. Key event listeners involve the shooting using the keyboard, movement visa left/right or A/D keys, and using powerups via the Z, X, C keys. Each had their respective actions coded within the event handler itself.

There is also a timer that tracks the time from each iteration of the game starting anew (even in the same sketch run), as well as a counter to track score. The timer is used to both indicate the length of time survived by the player, as well as to control the powerup cooldowns.

Classes

There are a total of 7 classes: Bacteria (display, movement and collision of bacteria), Immune (immune cell display), Bullet (display, movement and collision of bullet), Boost, Net, Bomb (display and update of the cooldown of the powerups), and Button (hover/click behavior of end-screen buttons). I realize now that I could have probably included the three powerup classes under one, but I had initially planned to have their respective functions as class methods. I could probably still have done that by inheritance, but I wasn’t aware of how to make parent classes in p5 or JS, and I did not have sufficient time to learn.

Gameplay

As described earlier, the game is basically a Galaga clone. All you primarily do is shoot down or dodge waves of bacteria (enemy spaceships). To make the gameplay more interesting however, I included three powerups.

The first powerup (try pressing the Z key), allows you to shoot out 3 antibodies per shot instead of just one. That turns out to be particularly useful when the bacteria tend to be just off the exact center mark of the white blood cell.

The second powerup (X key) allows you to slow down the bacteria, giving you more time to shoot or dodge them, whichever you prefer. This powerup was based on the ability of some neutrophils (one of the types of white blood cells that act as a first-line defender) to produce traps that literally stick the bacteria in place so that they can be neutralized and then consumed by other immune cells.

The third and final powerup (C key) almost feels like cheating as it completely nukes everything on the screen and gives you the rewards for it. Initially, I wanted to balance it by reducing the score you get back, but I realized that would confuse players (after all, the bacteria are being killed). So, instead I balanced it with a high score cost, which does kind of match real life. Such an attack that kills multiple colonies of bacteria in one go often results in the immune cells attacking the body’s own healthy cells as well, engaging in inflammatory reactions with massive collateral damage, often causing even more damage than the disease on its own.

The best part about these powerups according to me is that they’re all based at least loosely in real biological concepts, and are not just make-believe gameplay conveniences.

Graphics

Graphics were mostly obtained from royalty-free clipart on the web, which I then recolored to increase contrast/make them look more interesting. The title card’s image was generated using DALLE-3 on Bing Copilot. Any editing required was easily done in Microsoft Paint 3D.

All of the graphics elements involved in this project.

Sound and Music

Pixabay has always been a lifesaver for me when it comes to obtaining high-quality royalty-free/Creative Commons-licensed music and sound effects without any pesky registration or annoying PLUS subscriptions (this is not an ad). I already had somewhat of a general idea of the feel of music I was going for, so I just searched up a few different categories and stuck to the music that immediately hit it off with me. I trimmed a few of the sound clips using Audacity and also put them through FileConvert’s compression tool to reduce the burden on p5.js, which does tend to struggle with loading heavy images/sounds. My only regret is not leaving enough time to include SFX for the powerups.

Pixabay User Interface

Challenges, Improvements and Future Considerations

Bug-fixing was probably the most challenging aspect. Because I had worked on the project over several days, I found that there were often things I was forgetting that led to weird interactions and things not going as expected. Asking my roommate to play-test the game definitely did help.

There are many things that I wanted to include that had to be left out in the interest of time. I had planned to include other pathogens, including viruses that didn’t damage your health but instead temporarily blocked your ability to shoot, and even a parasite final boss that would not attack you directly but instead open up more wounds for hordes of bacteria and viruses to enter the blood vessel and overwhelm the player.

Additionally, as mentioned earlier, I would have preferred to have more sound effects, for not just the powerup, but also when the player was hit by a bacterium and lost a life. However, overall, I am happy with the final result, and I can say that it closely matched my initial expectations.

Midterm Demo

Fullscreen Link: https://editor.p5js.org/amiteashp/full/Uvgv-fIWb

Link to project on P5 editor: https://editor.p5js.org/amiteashp/sketches/Uvgv-fIWb


Week 5 Reading Response: Computer Vision

I am not a programmer or a videographer, so I’ll mostly speak about the first topic, Computer Vision in Interactive Art.

I was really impressed by Krueger’s Videoplace. It seemed to be a highly interactive Computer Vision piece. I found it especially interesting that this project is actually quite old, older even than the computer mouse. This surprised me as I thought that computer vision, at least the kind that could track poses accurately, was relatively new. It’s pretty amazing that the piece was working even in 2006.

Also, the part about computer vision and interactive art based on it being a response to increasing surveillance really stood out to me. Art has often been a response to various kinds of troubles or challenges faced by society, and is often a means of coping with societal trauma. Therefore, it is no surprise that the increased surveillance following 9/11 and the War on Terror, especially machine-based surveillance, triggered an outpouring of interactive artpieces based on computer vision. Lozano-Hemmer’s Standards and Double Standards is probably the best example of this, as to me, it represents that surveillance makes people more distant from each other (represented by the “absent crowd”) while enforcing a sense of oppression and authority (represented by the belts).

Rokeby’s Sorting Daemon was another particularly interesting project, especially after I visited his website to understand how the composites were made. On the left side of the composite are the faces, sorted from dark skin to fair, left to right. The right side meanwhile captures details of their clothes, sorted into mosaics by similar color. I found it to be a rather fitting representation of the profiling of people, which is often racial and unfairly targets racial minorities and immigrants who appear more similar to the stereotypical “terrorist” or “criminal”. It is also a visual representation of the dehumanization of people into datapoints that are monitored by the state.

Overall, this was a very interesting reading about the history of Computer Vision-based art. While I regret not being able to understand the technical aspects better, I would say this was quite a well-written article, which simplified many complex concepts of this old, yet cutting-edge, field.

Week 5 Assignment: Midterm Progress Report

Organ Defenders (WIP)

Concept

For this project, I was inspired mostly by Namco’s Galaga (image attached) and other games in the shoot ’em up genre. In the game, there are waves of enemies that you have to shoot down to score points. Being shot by the enemy or colliding into them makes you lose a life. Finally, there are some enemies that have special attacks that don’t kill you outright but make it harder for you to survive the wave.

A game of Galaga. The player controls a spaceship that is trying to dodge attacks from enemy spaceships. The boss spaceship has a tractor beam that spreads out in front of itself towards the player.

Galaga

As the Biology major of this class, I thought of combining the gameplay of Galaga with a concept based on our body’s immune system in order to make something new. Thus, Organ Defenders (would appreciate suggestions on the name) was born.

Design

This can be divided into three aspects, the game design, the code structure, and the visual design.

Game Design: I mostly went with the tried and true format of Galaga. The player has four lives and can control a white blood cell in the x-axis at the bottom of the screen. The player will be able to shoot bullets of enzymes at the enemies to bring them down and score points.

Waves of bacteria and viruses keep generating at the top and moving downwards (I might change this to right-to-left later). I may give some of the bacteria the ability to shoot toxins later, but for now, colliding with a bacterium makes the player lose a life. Viruses won’t directly kill the player but will disable the gun control, thereby not being able to earn any points.

As mentioned before, score is earned based off of how many bacteria/viruses have been killed. If I have the time, I might create a hard mode, where the higher the number of bacteria/viruses that are allowed to leave the bottom of the screen, the higher the number of new bacteria that are generated at the top. This will attempt to simulate infection.

Additionally, I plan to include three different kinds of timed powerups that can also help the player in challenging situations. Again, the hard mode might include some kind of cost to use the powerups more than once, to prevent spamming. The powerups I am currently planning for will be Antibody Rush (freezes the bacteria/viruses in place), Cytokine Boost (the player will be able to shoot more projectiles per shot), and Complement Bomb (basically nukes everything on the screen).

Code Structure: I plan to have 4 classes: the white blood cell, bacteria, virus, and the bullet. Here’s an example of how the classes will look, using my Bacteria class.

class Bacteria {
  constructor(
    initX,
    initY,
    radius,
    speed
  ) {
    this.x = initX;
    this.y = initY;
    this.r = radius
    this.moveY = speed;
  }
  
  display(){
    fill("green")
    ellipse(this.x, this.y, 2 * this.r);
  }
  
  move(){
    this.y += this.moveY
  }
  
  collide(other){
    return dist(this.x, this.y, other.x, other.y) <= this.r + other.r
  }
  
  wallCollide(){
    return (this.y > height)
  }
}

Visual Design: While it is a bit early to finalize the visual design before most of the gameplay is ready, I can still talk about it briefly. I plan to use Creative Commons-licensed sprites for the white blood cell, bacteria, and viruses. I might use spritesheets to show some animation, but I am not sure whether that will add to the game’s visual aspect as things might be going too fast anyway for a player to enjoy animations. At the most, I might include animations for when the white blood cell shoots a projectile.

Frightening Aspects / Challenges

There are quite a few aspects that seem daunting now:

  • Actually creating a desirable core gameplay loop, something that will encourage the player to keep playing
  • The powerups seem like a hassle to implement, especially the way I’m planning to implement them. Also, it will be challenging to show the timer of how much time is left before the next use of the projectile.
  • Timing of the animations will also need to be fine-tuned to avoid distracting the player and detracting from the game experience.
  • I also need to find a way to have the bacteria not clump together, which would unfairly make the player lose more lives. I tried for a bit to use while loops to keep regenerating random positions until there was a non-colliding one, but it didn’t seem to work properly.

Risk Prevention

  • I’ll have to work on extensive playtesting to resolve bugs. I also aim to have my roommates/friends playtest it to fine-tune the UI/UX.
  • Implementing the powerups will require me to learn some new skills.
  • I should have a core gameplay loop ready, along with visuals and SFX before I attempt to include the powerups, so that in the worst-case scenario, I still have a ready project.
  • Regarding the bacteria clumping together, I need to either find a way to unclump them or give the player i-frames (invincibility frames) upon losing a life. I might include the i-frames anyway, but will need to find a way to indicate that to the player (in fact, my prototype currently has half a second of i-frames, clearly not enough).
  • I should also make my code more responsive and check for any in-built functions I use that may respond unexpectedly on other systems.

Midterm Prototype

Finally, here’s the prototype. So far, only the player movements, the bacteria collisions, and the game over/game restart logic have been put in place.

Week 4 Assignment: Personal Electronics Market in India

I had initially wanted to work with generative text to create poems in my native language (Bengali), which would have translations in English. Midway through this project however, I realized how challenging it was as the rules of grammar in English and Bengali are quite different, and I couldn’t just make one-to-one sentences, even simple ones.

Then I decided to go through the Kaggle website to search for suitable datasets. The dataset on the Device market in India over last 15 years (https://www.kaggle.com/datasets/michau96/device-market-in-india-over-last-15-years) was a trending dataset, so I decided to use that. Since the dataset was on a monthly basis, I first used Excel to take averages across each year, converting the dataset to an annual one.

When it came to making the plot itself, I first tried getting the basic stacked histogram right. This was done using rectMode(CORNERS) as it allows to specify the opposite corners of the rectangle. The x position for each bar was specified using the Year column and the y position and height using the percentage value of each column normalized to the desired height of the plot.

    rectMode(CORNERS); //to allow stacking of the bars
    //bar for mobile
    fill(this.mobileColor);
    rect(
      (this.dataYear - 2007) * w,
      y,
      w * (this.dataYear - 2007 + 1),
      y - (h / 100 * this.mobile)
    );
    //bar for desktop
    fill(this.desktopColor);
    rect(
      (this.dataYear - 2007) * w,
      y - (h/100 * this.mobile),
      w * (this.dataYear - 2007 + 1),
      y - (h / 100 * this.mobile) - (h / 100 * this.desktop)
    );
    //bar for tablet
    fill(this.tabletColor);
    rect(
      (this.dataYear - 2007) * w,
      y - (h / 100 * this.mobile) - (h/100 * this.desktop),
      w * (this.dataYear - 2007 + 1),
      y - h
    );

After that, I decided to work on the graph legend. The legend class takes one of the bars and makes the legend based off of that (this works since every bar is identical when it comes to the number of groups and the color associated with each group).

Finally, I wanted to add a level of interactivity in the form of a popup that comes up when you hover over a bar, similar to the statistics website Statista (statista.com). I tried using the mouseOver() event listener, but that didn’t work with the bar object for some reason, so I decided to go with the hard route of checking mouseX and mouseY against the bar’s dimensions.

The final result is below:


I would have loved to make this more generalized and capable of visualizing any dataset loaded by a user (kind of like ggplot in R). In that case, the program would need to work for any number of columns. But until I figure out how to make function arguments optional, this is kind of impossible.

Week 4 Reading Response: The Psychopathology of Everyday Things

This was a really interesting reading on the principles of good design. A lot of considerations mentioned by Don Norman seem obvious from the user standpoint but are often forgotten by product designers. Norman goes in depth regarding the principles he sees as crucial for designing good products, especially products with increasing functional complexity.

This reading is archaic. After all, the latest technologies mentioned here include new types of landline telephones. But everything mentioned here is relevant in the Web age. Even now, we still see complicated products in the market that need you to search for an instruction manual on Google. And UI/UX is a very important consideration on websites and applications. Yet many websites fail at one or more of Norman’s principles of good design: providing good conceptual models, making things visible, mapping, or feedback. A common example is the fact that a lot of websites that are mapped well on desktops completely lose all sense of mapping on mobile, even when (and sometimes especially when) using the mobile version of the website. An example from the application side of things might be Slack, whose problems range from the fact that separate channels usually do not display notifications if not actively logged into them (at least in my experience), the interface that seems hostile to new users with its multiple menus of options (some of which don’t visibly change anything), and notification “quiet hours” being turned on by default. Many of these problems have slowly been fixed by updates, yet Discord, or even WhatsApp, feels like a better alternative to Slack as a group messaging service. Which is not to say that the other two apps don’t have their own UX problems either.

To close off, the final line about the paradox of technology struck a chord with me. “Added complexity and difficulty cannot be avoided when functions are added, but with clever design, they can be minimized.” This, after all, is the very principle of UX design.

Week 3 Assignment: The Ant Life

For this assignment, I had initially planned to create Agar Plate V2, but quickly found out that there would be very few ways to add more features and convert it to follow the guidelines of OOP without overhauling some major parts, so I decided to start from scratch. The bouncing balls example we did in class inspired me to do a project on generative art using ants.

Four Tips to Keep Ants out This Spring · ExtermPRO

Fig.: A column of ants, hard at work carrying food back to their colony

The patterns formed by scout ants searching for food and then leading worker ants to the food using pheromones always fascinated me. I wanted to replicate something along those lines in a generative art project. Because this was generative art, most of it had to involve randomness in initial positions, direction, and motions. I first got to work to converting the bouncing balls to ants. For this, I also converted my simple speedX and speedY parameters to be calculated from polar coordinates instead. The hope was that using angles instead of plain coordinate directions would allow better control over the behavior when reflecting off surfaces. I also finally figured out how to set up the collision between two objects in p5.js, which I implemented as below:

collide(other) {
  var d = dist(this.x, this.y, other.x, other.y);
  if (d < this.rad + other.rad) {
  return true; 
  } else {
  return false;
  }
}
for (var j = 0; j < ants.length; j++) {
  if (i != j && ants[i].collide(ants[j]) && !(ants[i].collide(colony))) {
    ants[i].speedDir += PI/2;
    ants[j].speedDir += PI/2;
  }
}

I was initially having the ants go in opposite directions when they met, but decided that having them bounce off 90 degrees instead better matched the behavior of real ants, who often exchange information about the presence or lack of food along their already searched path and move off in different directions instead.

This is the final result:

Finally, I decided to add a bit of randomness to the motion to avoid having them go in exact straight lines and be a closer match to ant-like motion.

Overall, there are many more things that I wanted to include in this project, but figuring out direction and the p5.js rotate() function took the bulk of my time. I had initially planned to have user interactivity in the form of sugar cubes they could drop, which would cause all the ants nearby to rush towards it. But, I had already tired of the math required just to figure out which direction the ants would be oriented in when they bounced off the walls, and I wasn’t too eager for further math. If I have more time in the future, I would love to revisit this project and improve upon it.

Week 3 Reading Response: The Art of Interactive Design

In this chapter, Chris Crawford sets about to define the murky concept of ‘interactivity’. As Crawford rightly mentions, interactivity has become the buzzword of the Web age, prompting much corporate marketing based on the notion of interactivity, even when it doesn’t make sense. Thus, it is important to set a clear definition of interactivity and what constitutes as interactive.

I feel Crawford’s “Listening, Thinking, Speaking” definition is definitely a good place to start, but while trying to exclude things that are definitely not interactive, it may exclude things that are conventionally seen as interactive. After all, so-called smart lamps, for example, do not “think” much (I am talking about the most basic ones, such as the ones that respond to clapping), yet they could be classified as interactive. The argument can be made that there is some level of signal processing to differentiate a clap from background noise, and I won’t claim to be an expert on the matter, but I believe that it is still simpler than the thinking that Crawford calls for. This definition also excludes things like “interactive fiction”, because no thinking goes on in deciding between pre-coded paths in an interactive novel, and the reader doesn’t have free reign over the responses they can communicate to the characters of the story.

In this regard, I found that looking through the lens of degrees of interactivity makes more sense. Thus, things like refrigerator doors are low on the interactivity scale. Smart lamps, as well as many beginner Interactive Art projects, could be classified as medium interactive. Medium-high interactivity might include video games. And the highest tiers of interactivity are relegated to AI LLM chatbots and actual people. Thus, interactivity is a spectrum, and much to Crawford’s dislike, is inherently subjective.

Week 2 Reading Response: Casey Reas

I found Casey Reas’ talk on Chance Operations highly interesting. As a biologist, the part I myself found most interesting was Reas’ Tissue work, which was based on neuroscientist Valentino Baitenberg’s Vehicles: Experiments in Synthetic Psychology and On the Texture of Brains, books that have become hallmarks in conceiving emergent behaviors from even simple sense-response loops in cybernetics, like a vehicle moving towards the nearest light source. I found it interesting how the different ways of wiring the sensory and motor “neurons” had an impact mainly on the vehicles’ behavior on approaching the light source and beyond. I also loved how he was able to create pretty good-looking artwork just from tracing the random paths of these vehicles, though I realize that he probably had to run it several times more than the number of prints in order to get the most aesthetically consistent results.

Another part that I found interesting was Rosalind Kraus’ scathing review of modernist grid art, a review that Reas unexpectedly cherished. I skimmed over Kraus’ original article (which is 15 pages long) and found that a lot of the seemingly negative aspects of grid art were less coincidental and more deliberate. This is especially true for the complaint about grids being temporally removed from all art preceding it. As Reas mentions in his talk, a lot of modern, postwar art was born from the feelings of despair against both modern science and historical traditions, both of which had combined into the vitriol that fuelled the World Wars. Thus, it only makes sense that art produced in this period similarly reject the traditions that art was built on, becoming abstract to the highest degree in the form of grids.

Week 2 Assignment: Agar Plate

I got the idea for this assignment while working with bacterial cultures in the lab. The random generation of shapes we did in class kind of reminded me of how bacterial colonies form on agar plates. So, I started by just getting the color of the agar and the bacterial colonies right, similar to the image below.

Colonies of E. coli growing on agar plate. Colonies appear as off-white dots on the yellowish agar Fig.: E. coli growing on an agar plate

This is when I also started with experimenting with the randomGaussian() function instead of the regular random() function. This allowed the generation of random positions that were more concentrated towards a central position, basically forming what would be a “3D bell curve”, which usually represents biological growth better than true randomness. And adding translucency to the background gave the effect of some colonies gradually “dying” as new ones “grew”.

However, this alone didn’t look good enough. Off-white colonies on a yellowish background could only look somewhat interesting. That’s when I came across photos of microbial art and also remembered work I did in a class with bacteria that were engineered to be bioluminescent using a Green Fluorescent Protein (GFP) from jellyfish.

Microbial Art depicting a beach scene made with fluorescent bacteria2 plates growing E. coli bacteria. Colonies in plate on left express GFP in an LB/Ampicillin/Arabinose medium. Colonies growing in regular LB/Ampicillin medium do not express GFPFig.: (a) Microbial Art from the lab of Prof. Roger Tsien (discoverer of GFP)
(b) Plates with GFP-expressing bacteria under black light grown by me

I wanted to incorporate this in the assignment without losing out on the essence of the original appearance of the colonies. Fortunately, this was easy enough with just an if statement that changed the color variables, and a button that toggled the “UV blacklight” between on/off states.

Next, I wanted to add a bit of interactivity to the project, to allow a user to actually create some microbial art instead of having the colonies just randomly generate in a circle in the centre of the viewport. I decided to create discs that were meant to simulate carbohydrate-impregnated paper discs that can be added to agar plates. These special paper discs gradually diffuse the energy source into the agar, instead of the agar already having an energy source in it. In microbiology, this allows for experiments on how different microbes respond to different energy sources. In this project, it allowed me to easily localize the generation of colonies around multiple user-defined points.

I created a class for the discs, which would allow me to quickly generate them when a mouseClicked() event is triggered, while allowing its properties to be used as a basis for the randomGaussian() functions to generate the colonies. This was my first foray into OOP in JavaScript, and the differences from Python took me by surprise.

The next part was arguably the hardest. I wanted to give the user an option to freeze the plate in time and view their resulting artwork. In the lab, we perform a process called fixation that uses formaldehyde or glutaraldehyde to prevent further growth or death of cells, preserving them for as long as we need them, so it would be cool to give that option to the user too. However, including this feature in a way that did not interfere with the UV toggle was challenging. The easiest way to go about doing this is to use the noLoop() function which interrupts the draw() loop. But in that case, the user was stuck with their last UV setting, whether on or off, as that was also part of the draw loop. Instead, I settled on a compromise, using a multidimensional array to capture colony position and size information for every colony of every disk for the last 2 generations. This data was used to recreate the last 2 generations in the “fixed plate”. While this drastically cut down on the number of visible colonies, I was happy with this compromise as it still allowed to toggle between UV on/off states after the plate was fixed.

if (!fixed) {
    background(plateColor);
    // create arrays to store colony position and size information
    prevColonies = colonies;
    colonies = [];
    for (
      let d = 0, colonyX, colonyY, colonyR, colonySpecs;
      d < discs.length;
      d++
    ) {
      // discs
      fill(discColor);
      discs[d].display();
      // create sub-array to store specific info for each disc
      colonies.push([]);
      // bacterial colonies
      for (let i = 0; i < numColonies; i++) {
        // Gaussian random to ensure aggregation towards discs
        colonyX = randomGaussian(discs[d].x, spread);
        colonyY = randomGaussian(discs[d].y, spread);
        colonyR = random(2, 15);
        colonySpecs = { x: colonyX, y: colonyY, r: colonyR }; // dictionary containing colony info
        colonies[d].push(colonySpecs);
        stroke(colonyBorder);
        strokeWeight(3);
        fill(colonyColor);
        ellipse(colonyX, colonyY, colonyR);
      }
}

The finishing touches were just adding another button to clear the plate (basically a reset button that resets everything to setup state), tweaking the colors, adding conditions for when the discs could be placed (with warnings for when they couldn’t), and setting up simple counters that would very slowly increase the number of generated colonies and how spread out they were from the disc.

The final result can be seen below. Remember that you cannot interact with the plate when it is being irradiated with UV (that’s a skin cancer risk waiting to happen) or when it’s fixed (well, the bacteria are dead already).

Overall, I am very happy with this assignment. It feels like I found a creative way to present laboratory processes that I work with on a regular basis as a Biology major. If there were any changes I would like to make to it in the future, it would probably be in converting the bacteria to objects as well for easier manipulation. I would also like to include a feature to choose the agar and species growing on it, which can allow experimentation with various interesting colors, such as those produced by some bacteria on blood agar, or by various purple, blue, and other colored bacteria or fungi.

Week 1 Assignment: Self-Portrait

While I had some experience with Processing through Intro to CS, I was new to JavaScript and especially p5, so this assignment took longer than I expected. My goal was to make the portrait as detailed and true to life as possible with just basic shapes on p5.js, while at the same time not drowning in code. My final result is a compromise between these two parameters.

For my portrait, I first took a few pictures of myself as a reference. I began by basing the basic proportions of the shapes based on the proportions of different parts of my face.

I knew that a simple ellipse would not be enough to represent my face, so I decided to combine a rectangle with multiple arcs to get the “rounded square” shape of my face. A few more arcs (yes, this is a recurring theme throughout this assignment) were used to round out the jaw and the chin and then I was done with the first part.

I then decided to work on the neck and the shirt, as that would be easy to get out of the way. They just required a rectangle and a quadrilateral respectively, and I used more arcs to round out the shoulders and collar to avoid a blocky look.

Next, I worked on the eyes which, which was probably the most time-consuming step. Inspired by examples on the Intro to IM website, I decided to challenge myself by making some Bezier curves. This tutorial was very helpful in understanding how they work. Yet, it was time-consuming to make a decent shape out of them, especially as they are not as intuitive as they would be on graphics editing software such as Adobe Illustrator (and according to me, they’re not very intuitive even there). I settled for combining an arc for the upper portion of the eye, and a Bezier curve for the lower portion, which I feel gives the desired result. While learning to use Bezier curves took more time than I would have wanted, it was valuable for other steps in this assignment and in future ones.

function drawDayEyes(){
  //cornea
  strokeWeight(2);
  stroke(hairColor);
  fill(corneaColor);
  //right
  arc(4.13*width/10, 4.28*height/10, 0.8*width/10,
0.55*height/10, PI+0.1, -0.1, OPEN);
  bezier(3.73*width/10,4.23*height/10,4*width/10,
4.5*height/10, 4.25*width/10, 4.45*height/10,
4.5*width/10, 4.23*height/10);
  //left
  arc(5.87*width/10, 4.28*height/10, 0.8*width/10,
0.55*height/10, PI+0.1, -0.1, OPEN);
  bezier(5.47*width/10, 4.23*height/10, 5.77*width/10,
4.45*height/10, 6.07*width/10, 4.5*height/10, 
6.27*width/10, 4.23*height/10);
  //irises
  noStroke();
  fill(irisColor);
  ellipse(4.13*width/10, 4.2*height/10, 0.34*width/10);
  ellipse(5.87*width/10, 4.2*height/10, 0.34*width/10);
  //pupils
  fill("black");
  ellipse(4.13*width/10, 4.2*height/10, 0.18*width/10);
  ellipse(5.87*width/10, 4.2*height/10, 0.18*width/10);
}

After the eyes came the obvious next step, my glasses. The basic frame was not too hard to make, but required a bit of trial and error to get a decent-looking shape. Within the glasses, I decided to include the optical lensing that occurs due to the high negative power of my lens, which makes it appear as if my face is shrunken inward when viewed face-to-face. This also helped me correct for making my eyes inadvertently small as I had forgotten that the reference also had the optical lensing effect.

Next were the lips and the nose. I was afraid of using Bezier curves for a shape as complex as lips but decided that I didn’t need them anyway. I simulated the shape of the lips using arcs and triangles, which seemed suitable enough. The nose too was similarly done, with the nostrils being made of simple ellipses, the apex being made of a moderately thick arc, and the dorsum (the front part of the nose) being made of thinner arcs. I still used Bezier curves to get the iconic shifted curved look of the nasal alae (the “wings” of the nose around each nostril).

This is when I decided to add hair to my portrait. The head hair was just a bunch of triangles, ellipses, and arcs overlapping to get the hair’s fringes. The eyebrows were also arcs drawn using a thick stroke weight. I wanted to include eyelashes, but they were annoying to implement, so I skipped them.

Next were the ears, which were also daunting. I knew that this required a complex Bezier curve shape. I experimented with the beginShape() and bezierVertex() functions to get the complex shape needed for the ears. This too required a lot of trial and error to get the shapes and sizes right.

  //right ear
  beginShape();
  vertex(2.85*width/10, 3.8*height/10);
  bezierVertex(2.5*width/10, 3.6*height/10, 2.4*width/10, 4.025*height/10, 2.55*width/10, 4.55*height/10);
  bezierVertex(2.625*width/10, 4.65*height/10, 2.4*width/10, 5.05*height/10, 2.8*width/10, 5*height/10)
  endShape();
  //left ear
  beginShape();
  vertex(7.15*width/10, 3.8*height/10);
  bezierVertex(7.5*width/10, 3.6*height/10, 7.6*width/10, 4.025*height/10, 7.45*width/10, 4.55*height/10);
  bezierVertex(7.375*width/10, 4.65*height/10, 7.6*width/10, 5.05*height/10, 7.2*width/10, 5*height/10)
  endShape();

At the very end, I decided to include some rudimentary interactivity by making a lamp that could be clicked on to cycle between “wake” and “sleep”. If-else statements dictate which elements to draw or not, and I quickly made a pair of “closed eyes” which are essentially just a pair of arcs.

Here is what my final self-portrait looked like:

Overall, I am really happy with the result. It did take a long while and quite a bit of effort, but I feel it was worth it to help set a strong foundation in p5.js while also making a decent self-portrait.