
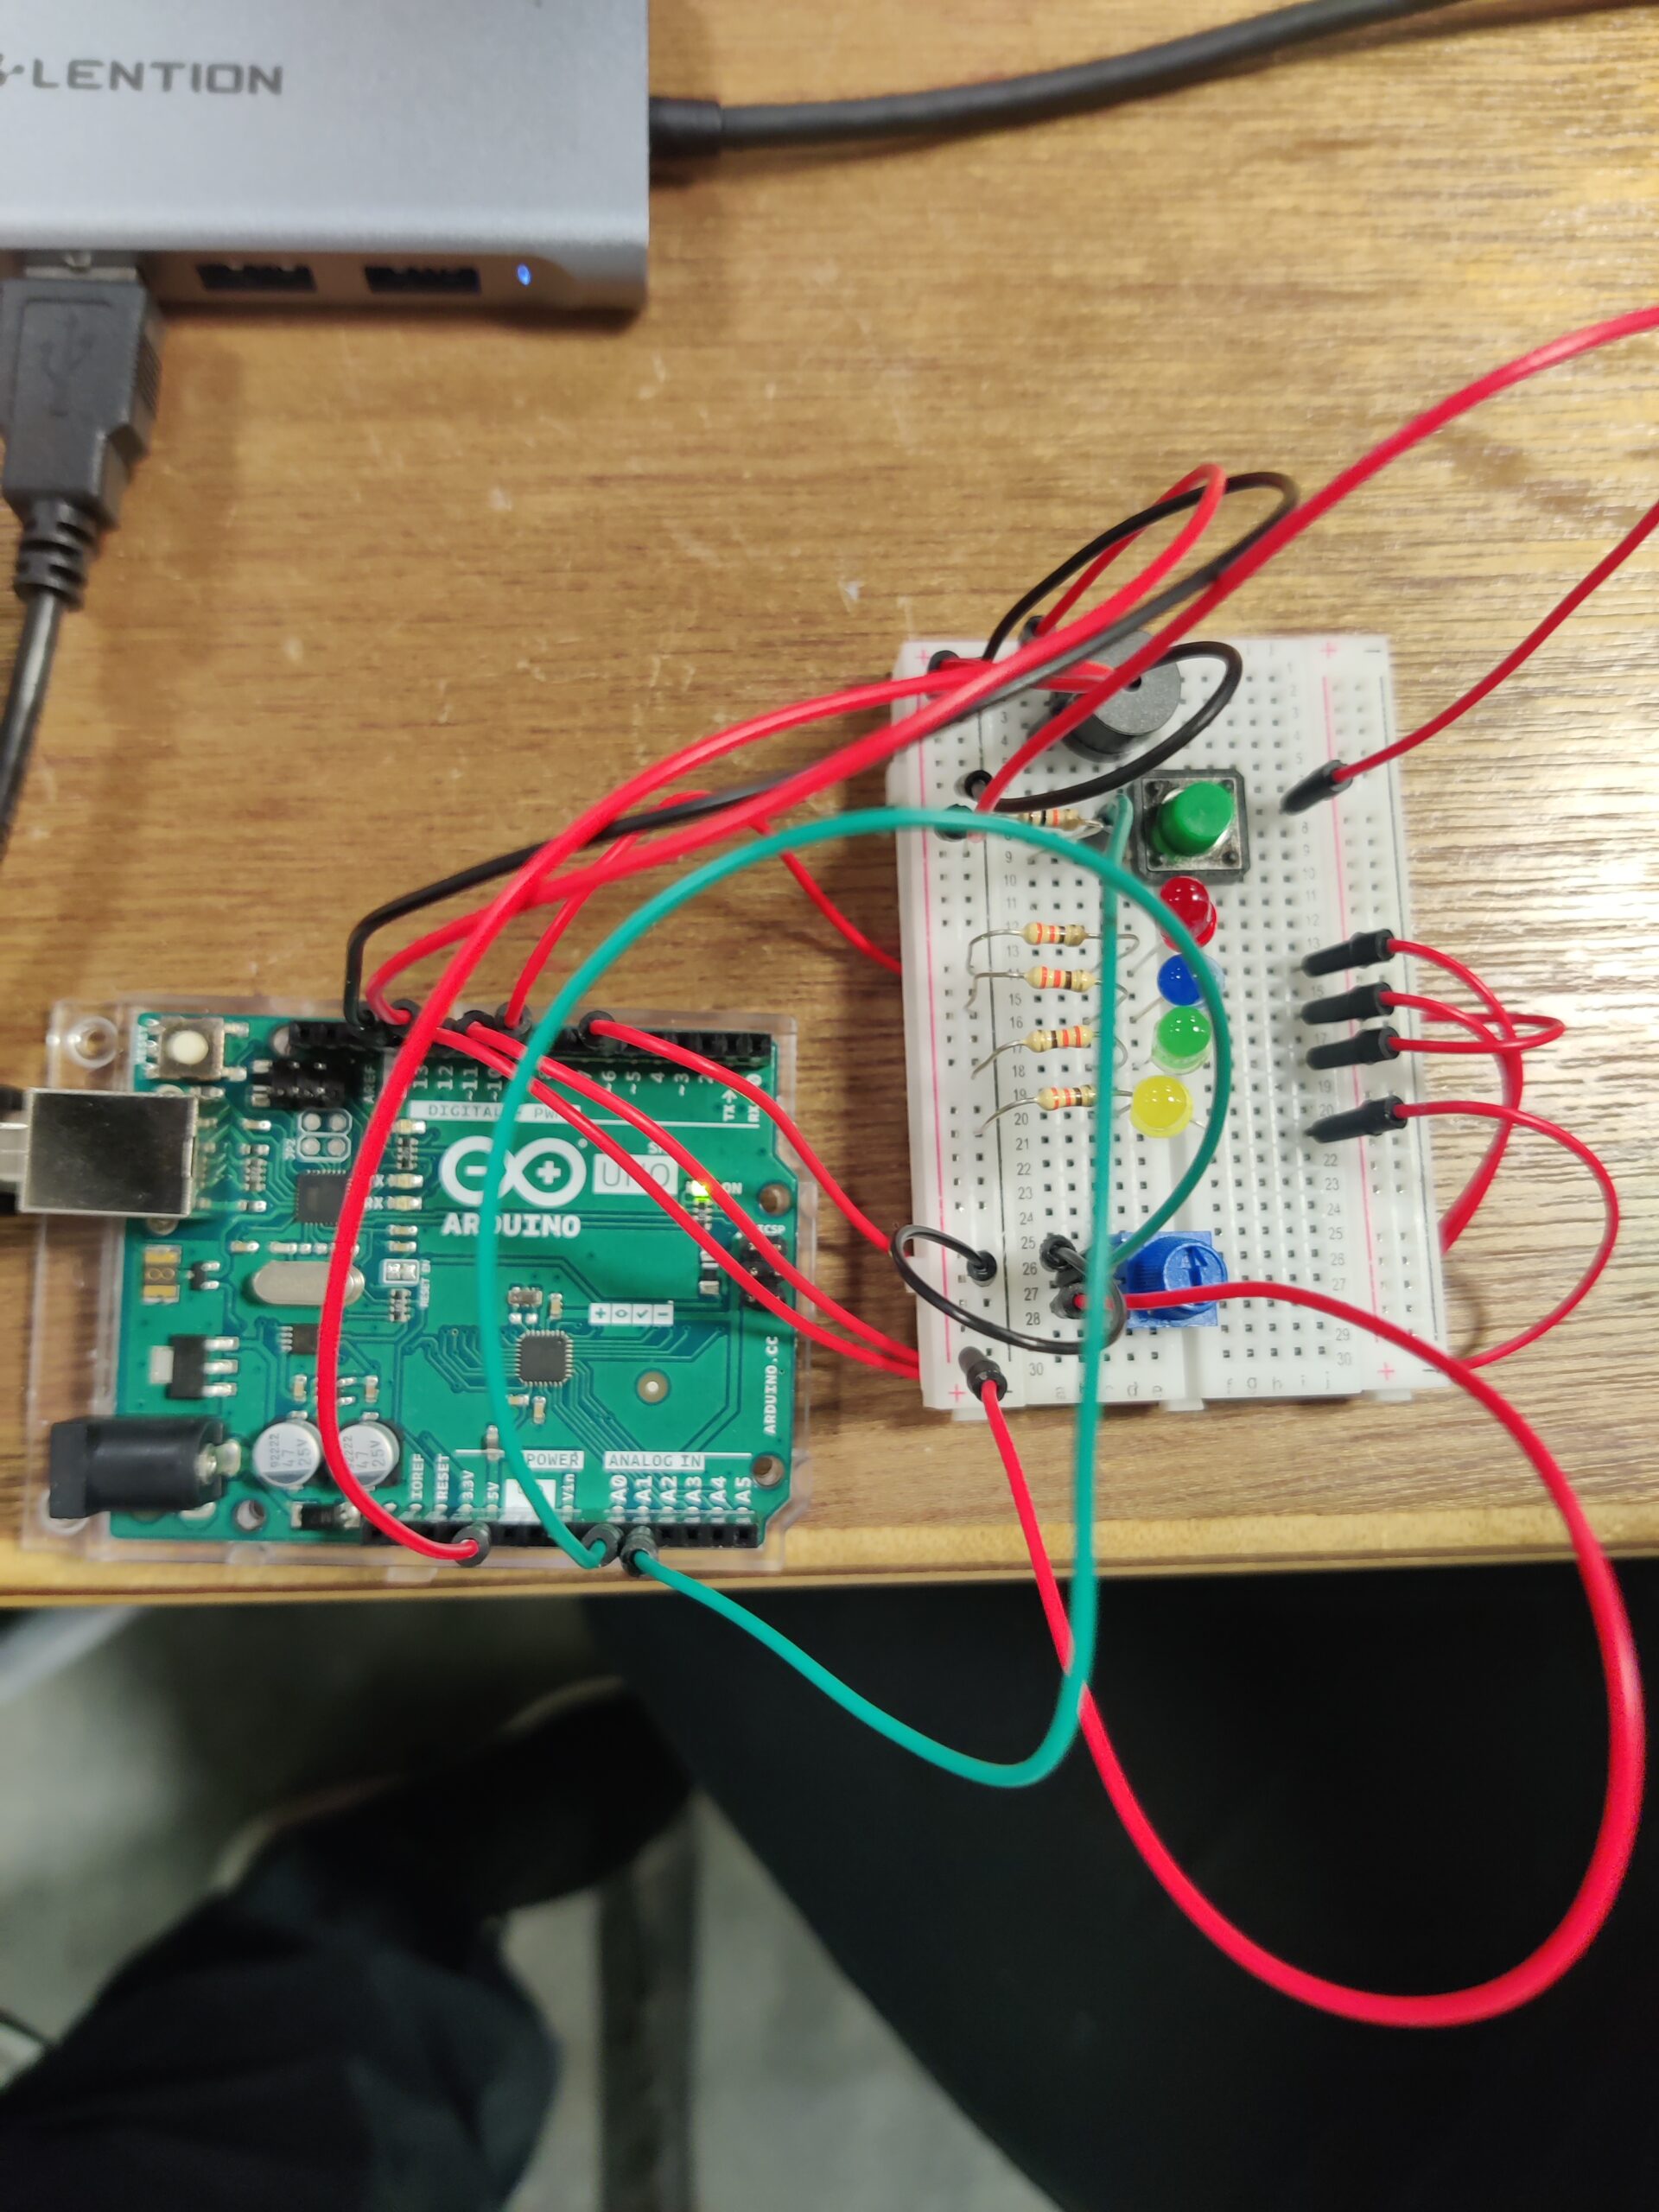
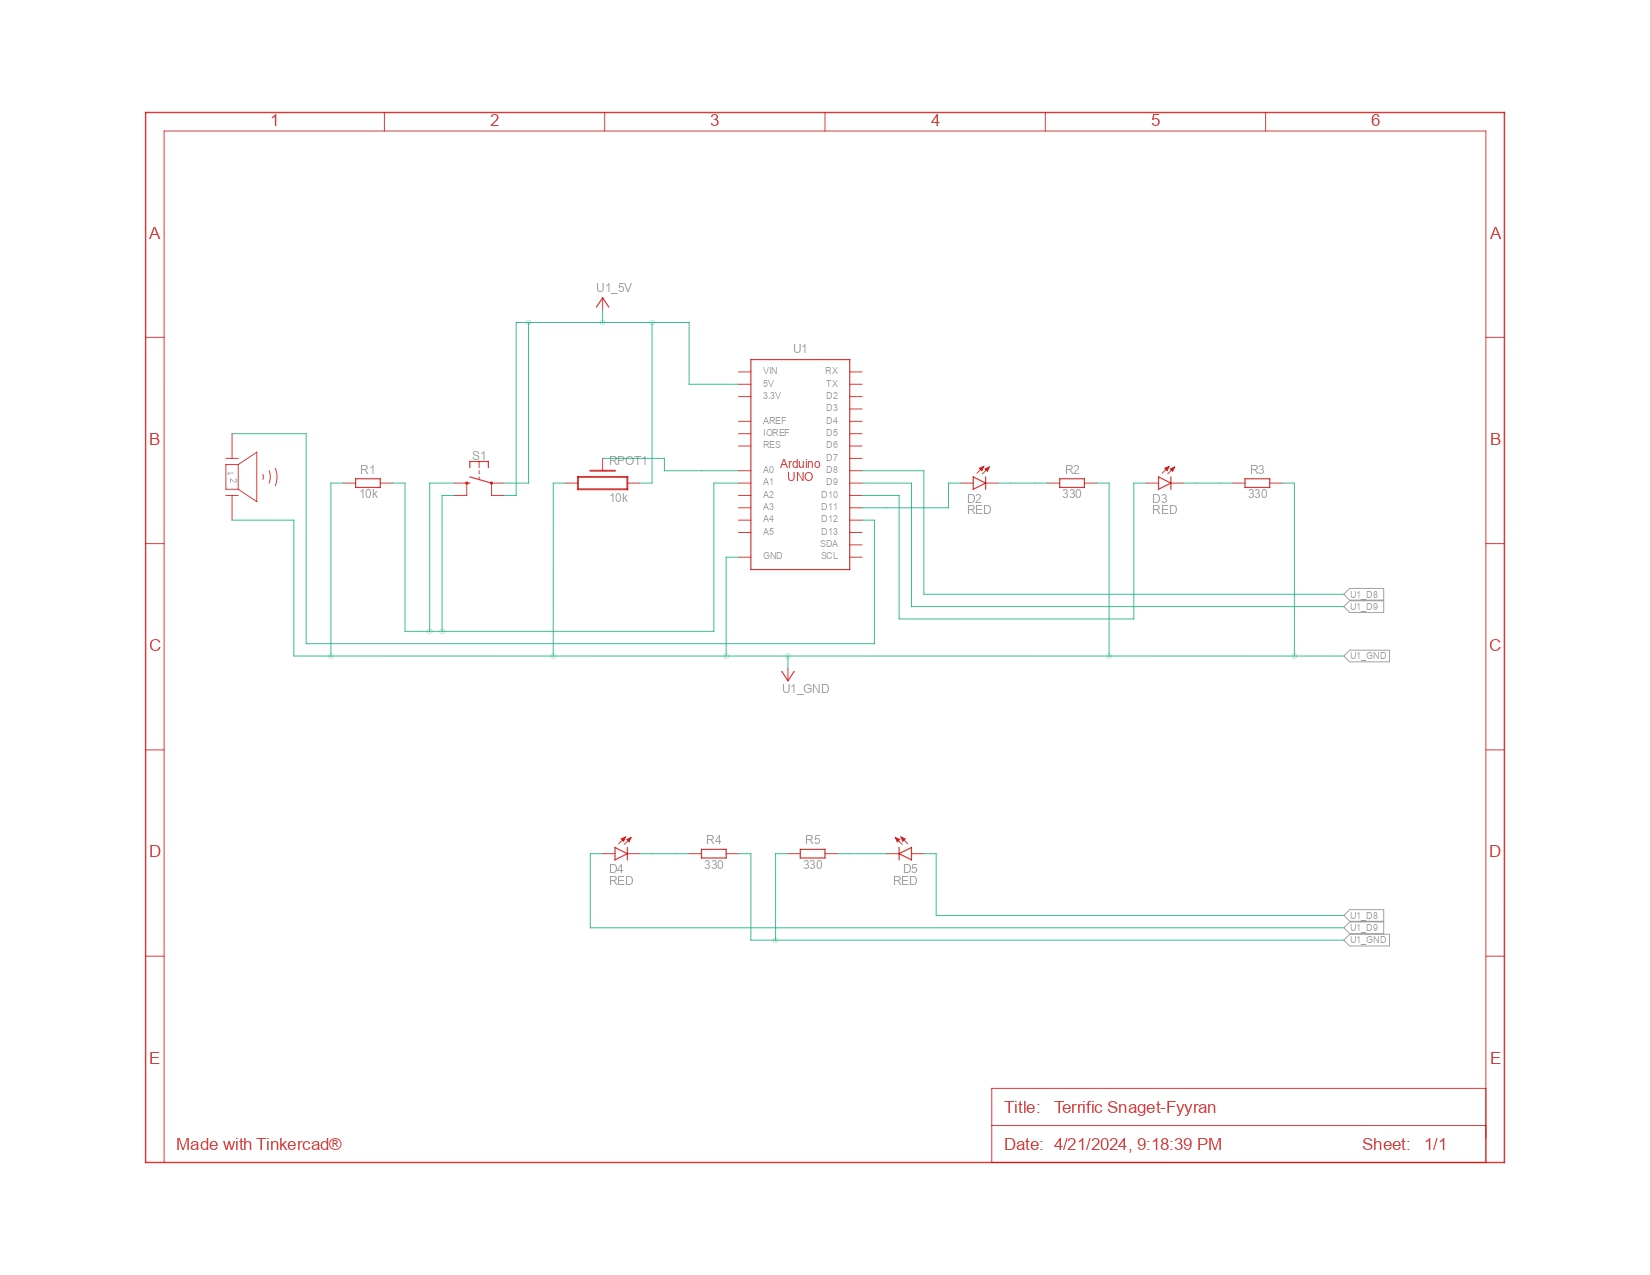
For this week’s assignment, we made a simple musical instrument using the Arduino. It is more similar to DJ equipment than a traditional musical instrument – slowing down the music or speeding it up, switching between different speed quickly to add dynamics to the music, and, of course, flashy lights, which will make or break the party. As part of the assignment, we used the button switch as the digital input and the potentiometer as the analog input. The Arduino plays a melody through a buzzer, and 4 LEDs light up in correspondence with the melody. By pressing the button, you can play the melody. The potentiometer allows you to control the length or duration of the melody.
Components Used
- Arduino Uno
- Breadboard
- Jumper wires
- Button
- Potentiometer
- LED (4 of different colors)
- Buzzer
- Resistors (330 ohms x 2)
#include "pitches.h"

#define BUZZER_PIN 12
#define ANALOG_PIN A0
#define RED_PIN 11
#define GREEN_PIN 10
#define BLUE_PIN 9
#define YELLOW_PIN 6
#define DIGITAL_PIN A1

int melody[] = {
  NOTE_B4, NOTE_B5, NOTE_FS5, NOTE_DS5,
  NOTE_B5, NOTE_FS5, NOTE_DS5, NOTE_C5,
  NOTE_C6, NOTE_G6, NOTE_E6, NOTE_C6, NOTE_G6, NOTE_E6,

  NOTE_B4, NOTE_B5, NOTE_FS5, NOTE_DS5, NOTE_B5,
  NOTE_FS5, NOTE_DS5, NOTE_DS5, NOTE_E5, NOTE_F5,
  NOTE_F5, NOTE_FS5, NOTE_G5, NOTE_G5, NOTE_GS5, NOTE_A5, NOTE_B5
};

int durations[] = {
  16, 16, 16, 16,
  32, 16, 8, 16,
  16, 16, 16, 32, 16, 8,

  16, 16, 16, 16, 32,
  16, 8, 32, 32, 32,
  32, 32, 32, 32, 32, 16, 8
};

bool isPlaying = false;

void setup() {
  pinMode(BUZZER_PIN, OUTPUT);
  pinMode(DIGITAL_PIN, INPUT_PULLUP);
  pinMode(RED_PIN, OUTPUT);
  pinMode(GREEN_PIN, OUTPUT);
  pinMode(BLUE_PIN, OUTPUT);
  pinMode(YELLOW_PIN, OUTPUT);
}


void playMelodyWithLEDs() {
  int size = sizeof(durations) / sizeof(int);

  for (int note = 0; note < size; note++) {
    if (!isPlaying) return;

    int duration = 1000 / durations[note];
    tone(BUZZER_PIN, melody[note], duration);

    int sensorValue = analogRead(ANALOG_PIN);
    float speed = map(sensorValue, 0, 1023, 1.3, 6.0);

    int pauseBetweenNotes = duration * speed;

    int ledPattern[] = { RED_PIN, GREEN_PIN, BLUE_PIN, YELLOW_PIN };
    int ledIndex = note % 4;
    digitalWrite(ledPattern[ledIndex], HIGH);
    delay(pauseBetweenNotes);
    digitalWrite(ledPattern[ledIndex], LOW);

    noTone(BUZZER_PIN);

    delay(50);
  }
}

void loop() {
  if (digitalRead(DIGITAL_PIN) == LOW) {
    isPlaying = false;
    digitalWrite(RED_PIN, LOW);
    digitalWrite(GREEN_PIN, LOW);
    digitalWrite(BLUE_PIN, LOW);
    digitalWrite(YELLOW_PIN, LOW);
  } else {
    isPlaying = true;
    playMelodyWithLEDs();
  }
  delay(200);
}
The map() function is a hidden gem in this code. It’s a versatile function that remaps a range of values from one scale to another. In our case, the potentiometer reading (analog input) ranges from 0 to 1023. We use map() to translate these values to a range of speeds between 1.3 and 6.0. This allows the potentiometer to control the tempo of the melody playback.
The loop() function continuously checks the button state. If the button is pressed (digitalRead(DIGITAL_PIN) == LOW), the isPlaying flag is set to false, effectively stopping the melody. Additionally, the LED lighting is turned off (digitalWrite(RED_PIN, LOW), etc.). When the button is not pressed (digitalRead(DIGITAL_PIN) == HIGH), the isPlaying flag is set to true, and the playMelodyWithLEDs() function runs.
As we were integrating the LEDs with the melody, we struggled a bit. Initially, the LED light-up function was different, and it had a separate delay() for the individual LED to match with the melody. It did not work as expected. We realized after playing a note if we move to the separate LED function and delay there, the melody becomes very slow due to using 2 separate delays. So, we removed the LED function and used the same delay() for both the notes and LEDs.