
Concept
I was experimenting with the Circles class that we created in class and thought of some way of generating abstract art by using Circles to draw random lines on the Canvas . I came up with a simple algorithm to generate art :
1.Create random points
2.Draw a circle with random radiuses around the points (restricted random radiuses)
3.Wherever the center of circle is in another, invert the color
4.Make options to change the frame rate
5.Move the circles randomly by making their speeds random
6.Make sliders to change color
7.At the end draw the paths taken to create something random but intriguing
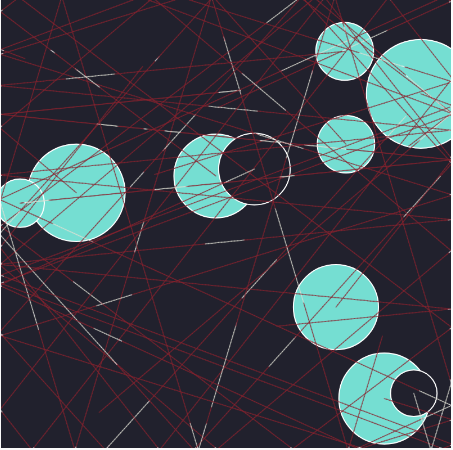
Each Circle on the canvas would have its own corresponding class ,Whenever a Circle would pass over another, it would change color . The user could also add circles by clicking on the canvas. Initially I had fixed the color to a black background and tried experimenting with different colors of circles and backgrounds . Then I thought – ” Why not create a slider to let the user choose what background color they want according to their preferences ?” This would solve the problem of selecting the best looking background and would add user interactivity as well .
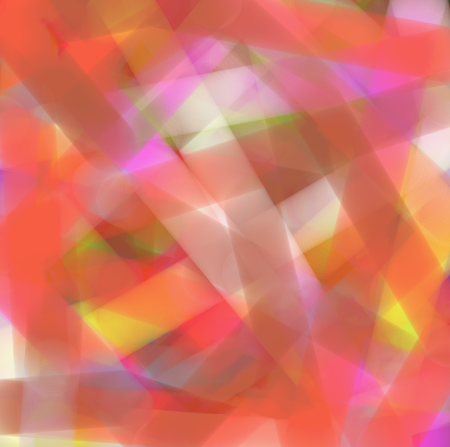
Then came the question of art . What kind of final product would I want ?I wanted the art generated to be random but intriguing . I decided to draw the paths traced by the circle . This was done using a graphics buffer . The entire canvas is emptied but only the buffer remains when the simulation ends . I experimented a bit with the color of the trails generated by the circles and decided to make this color relative to the background(just like the fill color of the circles) . I also tried different strokeWeights for the trails and different alpha values for color to make them more or less transparent . at the end I stuck to using strokeWeight as 1 and alpha value as 150 .
Sketches
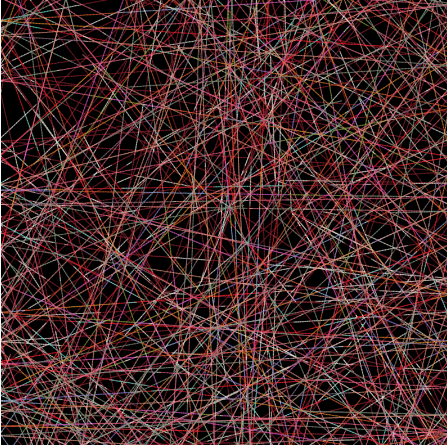
The following are some interesting sketches that I got by experimenting with color, and strokeWeights and Alpha values for the circle trails
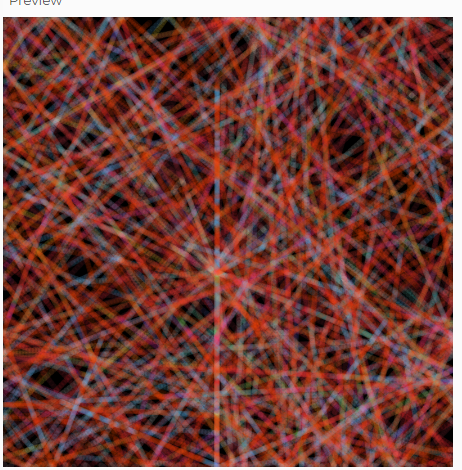
The kind of sketch that We can get from default setting is like follows:
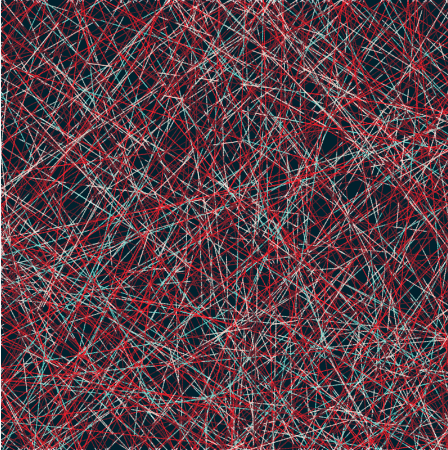
The background color can also be changed according to what the user wants :
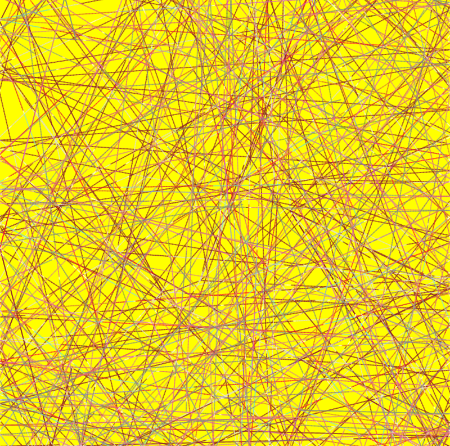
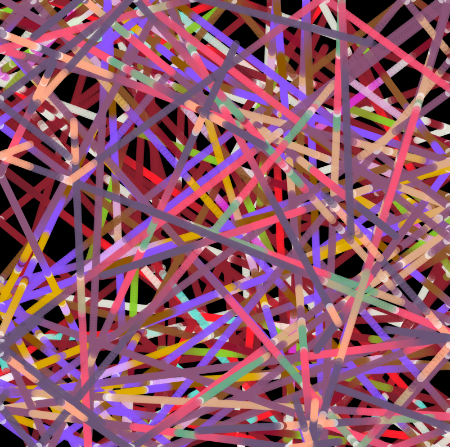
In short, there are a lot of variation that the user could decide on , the circles while drawing the lines are aesthetically pleasing too :
I had to make a decision of whether or not to display the trail lines when the circles are still there . At the end I decided to keep the trail lines . However, hiding them until the end requires changing just one if-else loop which I have indicated in the commented code .
Sketch
Below is the embedded sketch :
Try playing with the color values and clicking on the sketch to draw the circles before clicking on end simulation to get the web of lines . Ideally the sketch at the end looks best with a black background
Code that I am proud of
The Display() function of Circles Class is where the magic happens and this is the part of code that I am most proud of :
display() {
  stroke(255);
  strokeWeight(1);
  fill(150 - get(this.x,this.y)[0],255 - get(this.x,this.y)[1],255 -get(this.x,this.y)[2]); // inverting the color of fill from the color at the center of the circle
  circle(this.x,this.y,this.radius*2);
    // Draw a line segment from previous position to current position onto trails buffer

  trails.stroke(255 - get(this.x,this.y)[0],255 - get(this.x,this.y)[1],255 -get(this.x,this.y)[2] ,150);//writes to the trails buffer
   //alpha value is 150
    trails.strokeWeight(1);
    trails.line(this.prevX, this.prevY, this.x, this.y);


    // Store current position as previous position for next frame
    this.prevX = this.x;
    this.prevY = this.y;
}
The idea of using a graphics buffer called trails to make the trails was very useful . the fill() function in this class inverts the color of fill of the circle from the color of the background at the center of the circle . the trails.stroke and trails.strokeWeight command are at the essence of the final art piece (as illustrated in the picture gallery above) . Changing and experimenting with these values was a big part of this project .
Another part that I am proud of is creating the sliders for color and framerate and the end simulation button as it adds to the user interactivity of the sketch .
function setup() {
  createCanvas(400, 400);
  trails=createGraphics(400,400);
  backgroundColor = color(33, 33, 45); // Default background color

  //Sliders at the bottom of Canvas

  backgroundColorRedSlider = createSlider(0, 255, red(backgroundColor)); // Slider for the red component
  backgroundColorRedSlider.position(10, height + 30);
  backgroundColorRedSlider.style('width', '80px');
  let backgroundColorRedLabel = createDiv('Red');
  backgroundColorRedLabel.position(10, height + 10);
  backgroundColorRedLabel.style('color', '#FF5733'); // Custom color
  backgroundColorRedLabel.style('font-family', 'Arial, sans-serif'); // Custom font

  backgroundColorGreenSlider = createSlider(0, 255, green(backgroundColor)); // Slider for the green component
  backgroundColorGreenSlider.position(110, height + 30);
  backgroundColorGreenSlider.style('width', '80px');
  let backgroundColorGreenLabel = createDiv('Green');
  backgroundColorGreenLabel.position(110, height + 10);
  backgroundColorGreenLabel.style('color', '#156F25'); // Custom color
  backgroundColorGreenLabel.style('font-family', 'Arial, sans-serif'); // Custom font

  backgroundColorBlueSlider = createSlider(0, 255, blue(backgroundColor)); // Slider for the blue component
  backgroundColorBlueSlider.position(210, height + 30);
  backgroundColorBlueSlider.style('width', '80px');
  let backgroundColorBlueLabel = createDiv('Blue');
  backgroundColorBlueLabel.position(210, height + 10);
  backgroundColorBlueLabel.style('color', '#3366FF'); // Custom color
  backgroundColorBlueLabel.style('font-family', 'Arial, sans-serif'); // Custom font

  frameRateSlider = createSlider(10, 150, 70); // Min: 1, Max: 60, Starting value: 30
  frameRateSlider.position(10, height + 80);
  frameRateSlider.style('width', '80px');
  let frameRateLabel = createDiv('Frame Rate');
  frameRateLabel.position(10, height + 60);
  frameRateLabel.style('color', '#560F0F'); // Custom color
  frameRateLabel.style('font-family', 'Arial, sans-serif'); // Custom font

  frameRateSlider.position(10, height + 80);
  frameRateSlider.style('width', '80px');

  //End simulation button
  let endButton = createButton('End Simulation');
  endButton.position(10, height + 100);
  endButton.mousePressed(stopSimulation);
  endButton.style('font-family', 'Arial, sans-serif');
  endButton.style('background-color', '#FF5733');
  endButton.style('color', '#ffffff');
  endButton.style('border', 'none');
  endButton.style('padding', '5px 10px');
  endButton.style('border-radius', '5px');
  endButton.style('cursor', 'pointer');

  //Create all required Arrays
  speeds = generateSpeeds(num_of_circles);
  v = generateRandomPoints(num_of_circles); //10 points
  r = createRandomRadiuses(num_of_circles, 30, 20); //(length , max_radius ,min_radius)
  arr_circles = createArrayCircles(v, r); //Create array of Circle objects
}
Challenges and Further Ideas
One challenge was thinking about the various variables involved in this sketch and asking questions like- the number of default circles? The range of speed? The framerate? the Background color? How should the trail color relate to the background color? What should be the Stroke weights and alpha values for the trail color? Some of these do not have a right or wrong answer and much depends on user preferences . I factored in user input for some of these and determined the rest by experimenting with what looked good (even the variables determined by the user needed to have a default value that should look good to most people) .
While adding user interactivity solved some of these problems, there is scope for taking even more input from the user in the form of asking for alpha values or Stroke weights that would allow the user to use this as a tool for creating generative art .
I also had further ideas of changing the colors of the circles at the intersection (the part where they intersect) rather than changing colors based on the coordinates of the circles center . This would make the “drawing” part perhaps more visually appealing or could be made into an artwork of its own .
Overall Reflections
I am happy with the final result and with the variety of sketches that I got playing around with the transparency and color of the trails drawn by the circle. I learnt a lot about creating sliders and graphicBuffers . This project also taught me the power of OOP – one small change in the circles class affects the entire sketch in drastic ways . I was looking to implement something based on Perlin noise for the color of the circles if they are to change without any user input but eventually I just decided to stick to the slider mechanism . Replacing the user input with Perlin noise is something I look forward to experimenting with in future projects .