
For this project, I was especially interested in using a light sensitive resistor as well as the force sensor we briefly discussed during class on Wednesday. My initial thoughts about analog inputs was that they would be extremely useful in detecting changes in the environment around the device, and how they could be used to manipulate outputs once they reached a certain value, or decreased to a certain value. Specifically I thought about how this could be used in a context of a home, how things could be activated without having to flip a switch, but by less explicit actions that would make things much more convenient.
For this assignment, I decided to create an Intruder Detector that would detect changes in light in my model home’s doorway as well as a force sensor discreetly placed below the window of the home. I also decided to incorporate LEDs as well as a piezo buzzer to create different patterns and reactions depending on what was happening in the model home. I soldered the components (except for the buzzer and the force sensor) and taped them onto the house.
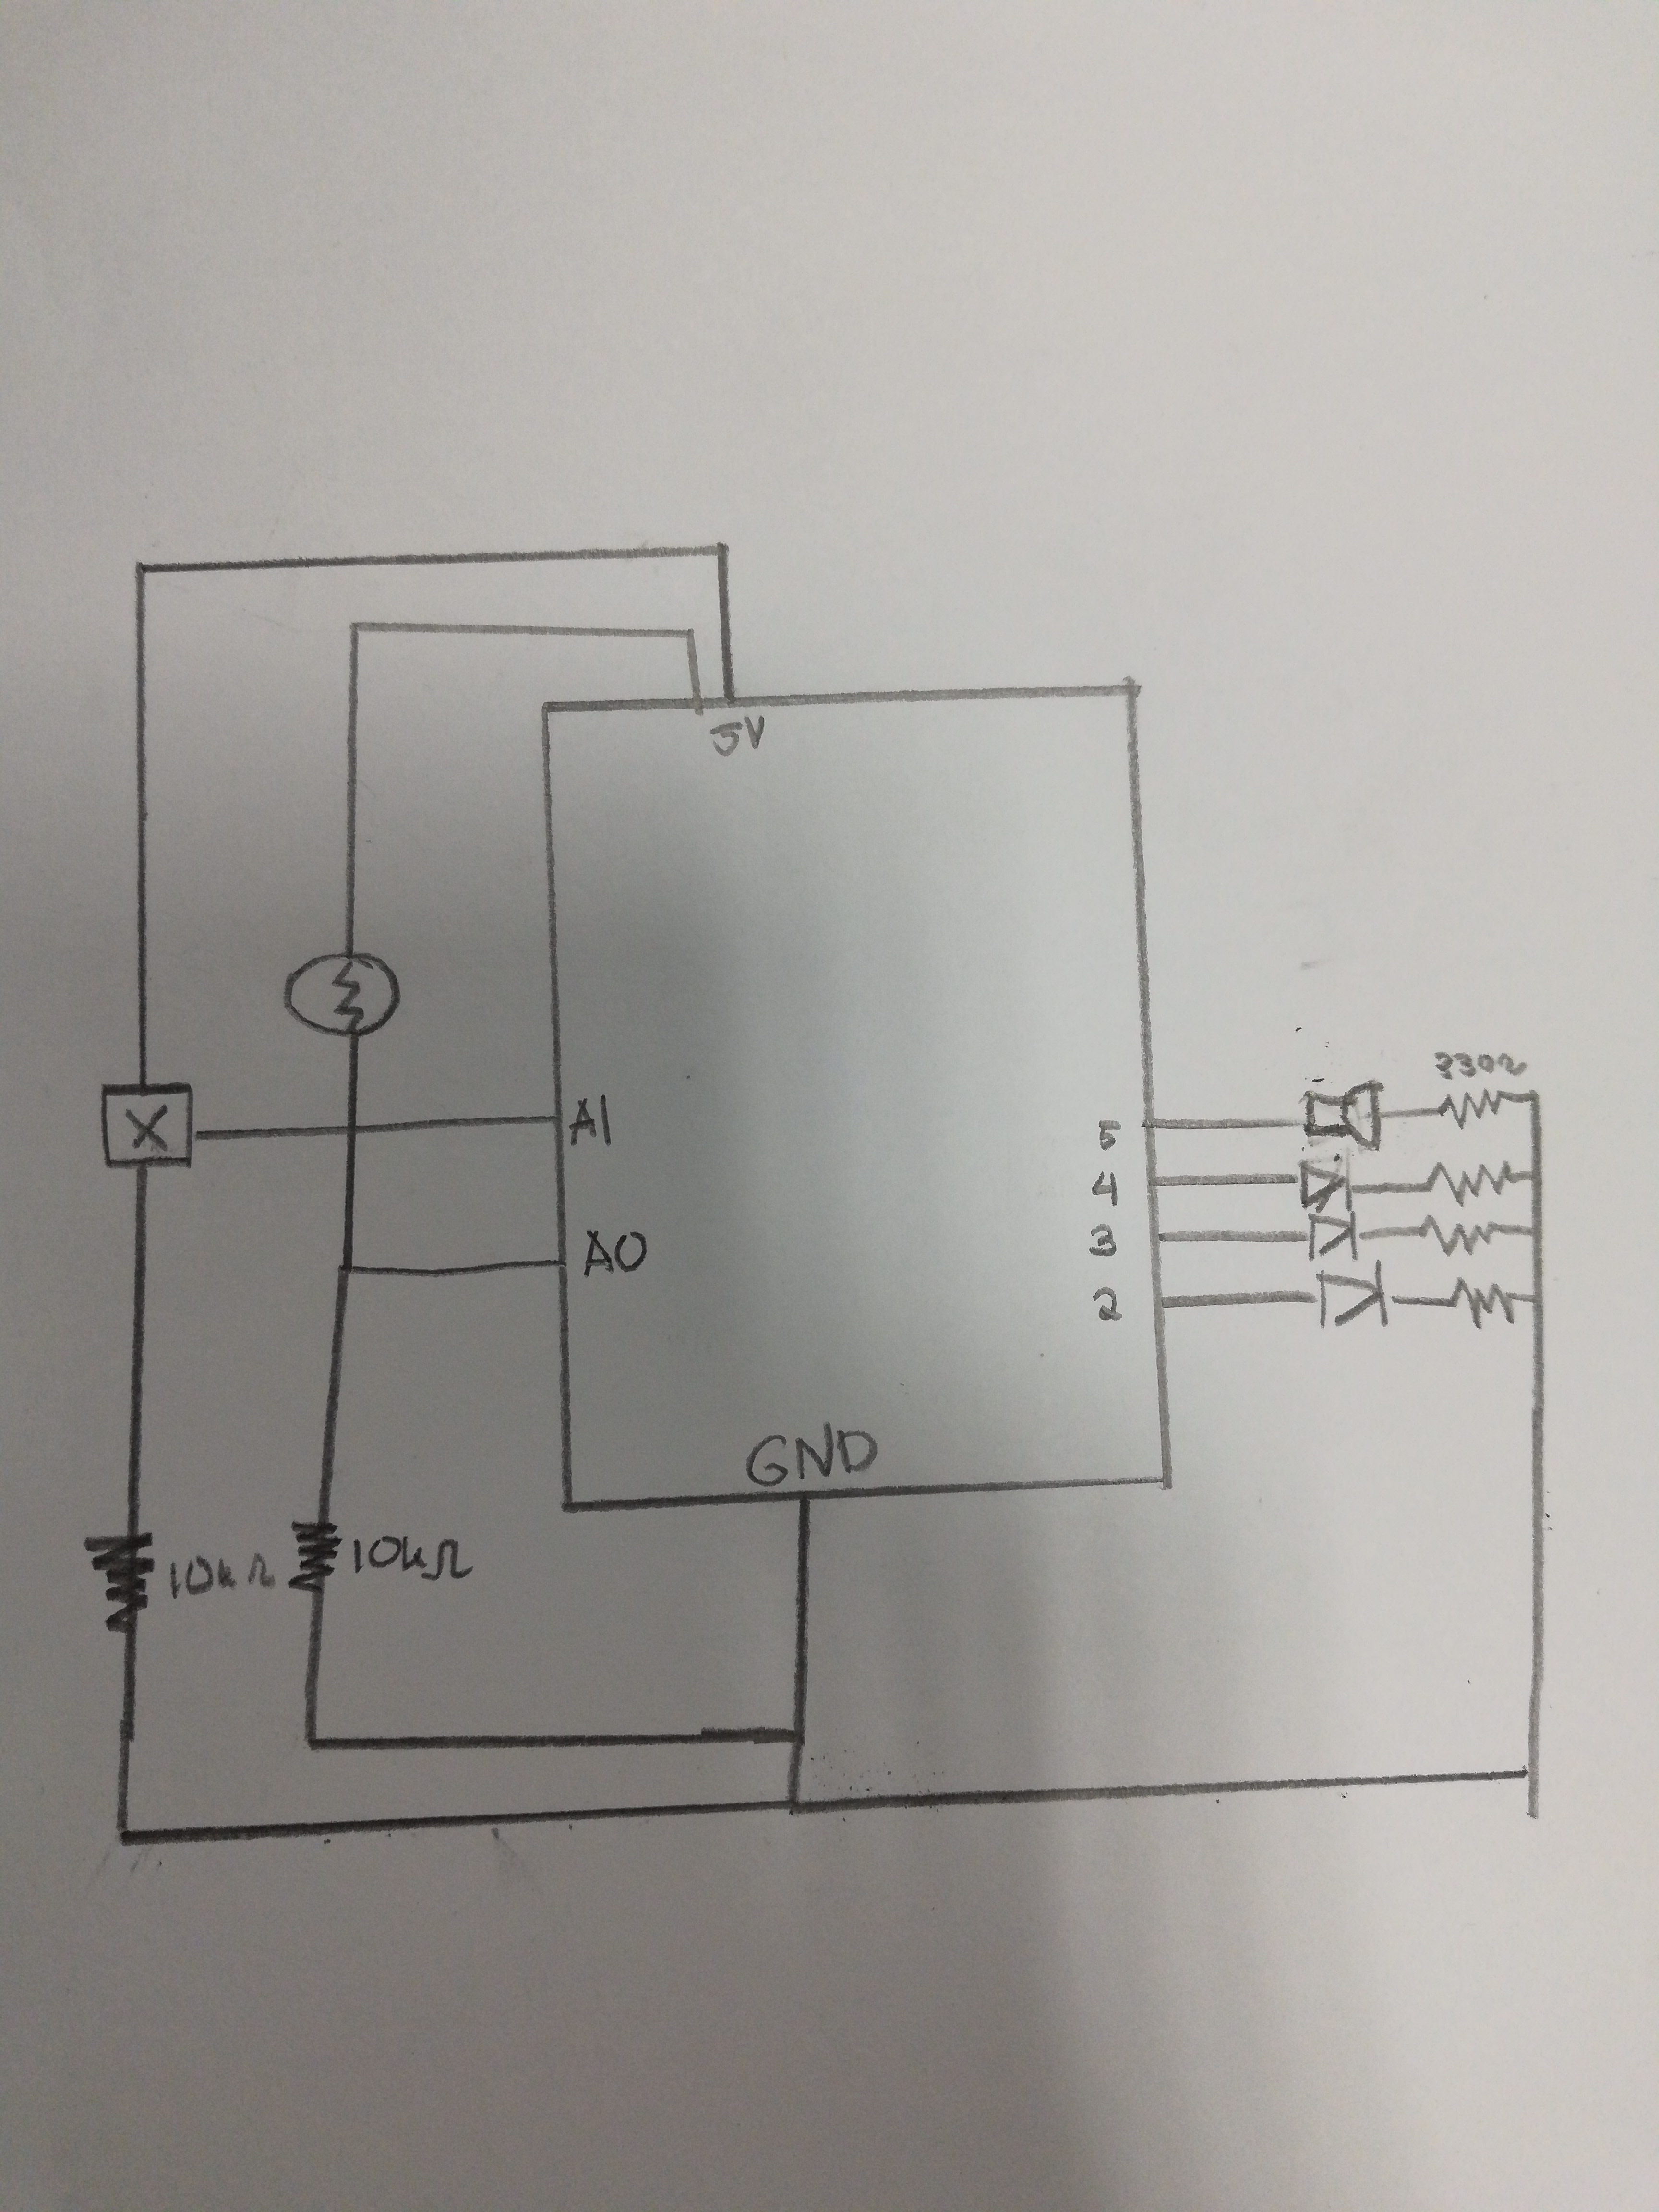
Below is a schematic of my model home and how it would be configured with the Arduino
By default, the room of the house is set on “tranquil” mode, and the blue LED is turned on while the piezo buzzer remains on silent and the two red LEDs remain off. If the value of the photoresistor decreases below 440, the alarm goes off and the red light on the floor flashes, indicating that a shadow has passed through the doorway. If the value of the force sensor goes over 60, the red light on the wall turns on. However, the buzzer does not go off until the value of the force is at 500, because the owner’s cat weighs a little less than 500, and any value above that would be a bigger object (a burglar!). If the force value is greater than 500 and the photoresistor is less that 440, this indicates that a gang of burglars has laid siege to the house through the two entrances! The buzzer emits a high pitch noise and the two lights flash rapidly.
const int blueLed = 2;
const int forceLed = 3;
const int lightLed = 4;
const int piezoPin = 5;
int forceVal = 0;
int lightVal = 0;
int forceLight = 0;
int lightLight = 0;

void setup() {
  // put your setup code here, to run once:
  Serial.begin(9600);
  pinMode(blueLed, OUTPUT);
  pinMode(forceLed, OUTPUT);
  pinMode(lightLed, OUTPUT);

}

void loop() {
  // put your main code here, to run repeatedly:
  forceVal = analogRead(A1);   // read the input pin
  lightVal = analogRead(A0);   // read the input pin
  if (lightVal < 440) {
    analogWrite(lightLed, lightVal);
    digitalWrite(blueLed, false);
    Serial.println(lightVal);
    tone(piezoPin, 1000, 500);

  }
  if (forceVal > 60) {
    digitalWrite(forceLed, true);
    digitalWrite(lightLed, false);
    digitalWrite(blueLed, false);
    if (forceVal > 500) {
      tone(piezoPin, 100);
      digitalWrite(forceLed, true);
      }
    else {
      noTone(piezoPin);
      digitalWrite(forceLed, true);

    }
  }

  if (forceVal > 500  && lightVal < 440) {
    analogWrite(lightLed, lightVal);
    digitalWrite(forceLed, true);
    tone(piezoPin, 5000, 500);
    delay(150);
    digitalWrite(lightLed, false);
    digitalWrite(forceLed, false);
    tone(piezoPin, 100, 500);
    delay(150);
    analogWrite(lightLed, lightVal);
    digitalWrite(forceLed, true);
    tone(piezoPin, 5000, 500);
    Serial.println(forceVal);

  }
  if (forceVal < 10 && lightVal > 440) {
    digitalWrite(blueLed, true);
    digitalWrite(lightLed, false);
    digitalWrite(forceLed, false);
  }
}